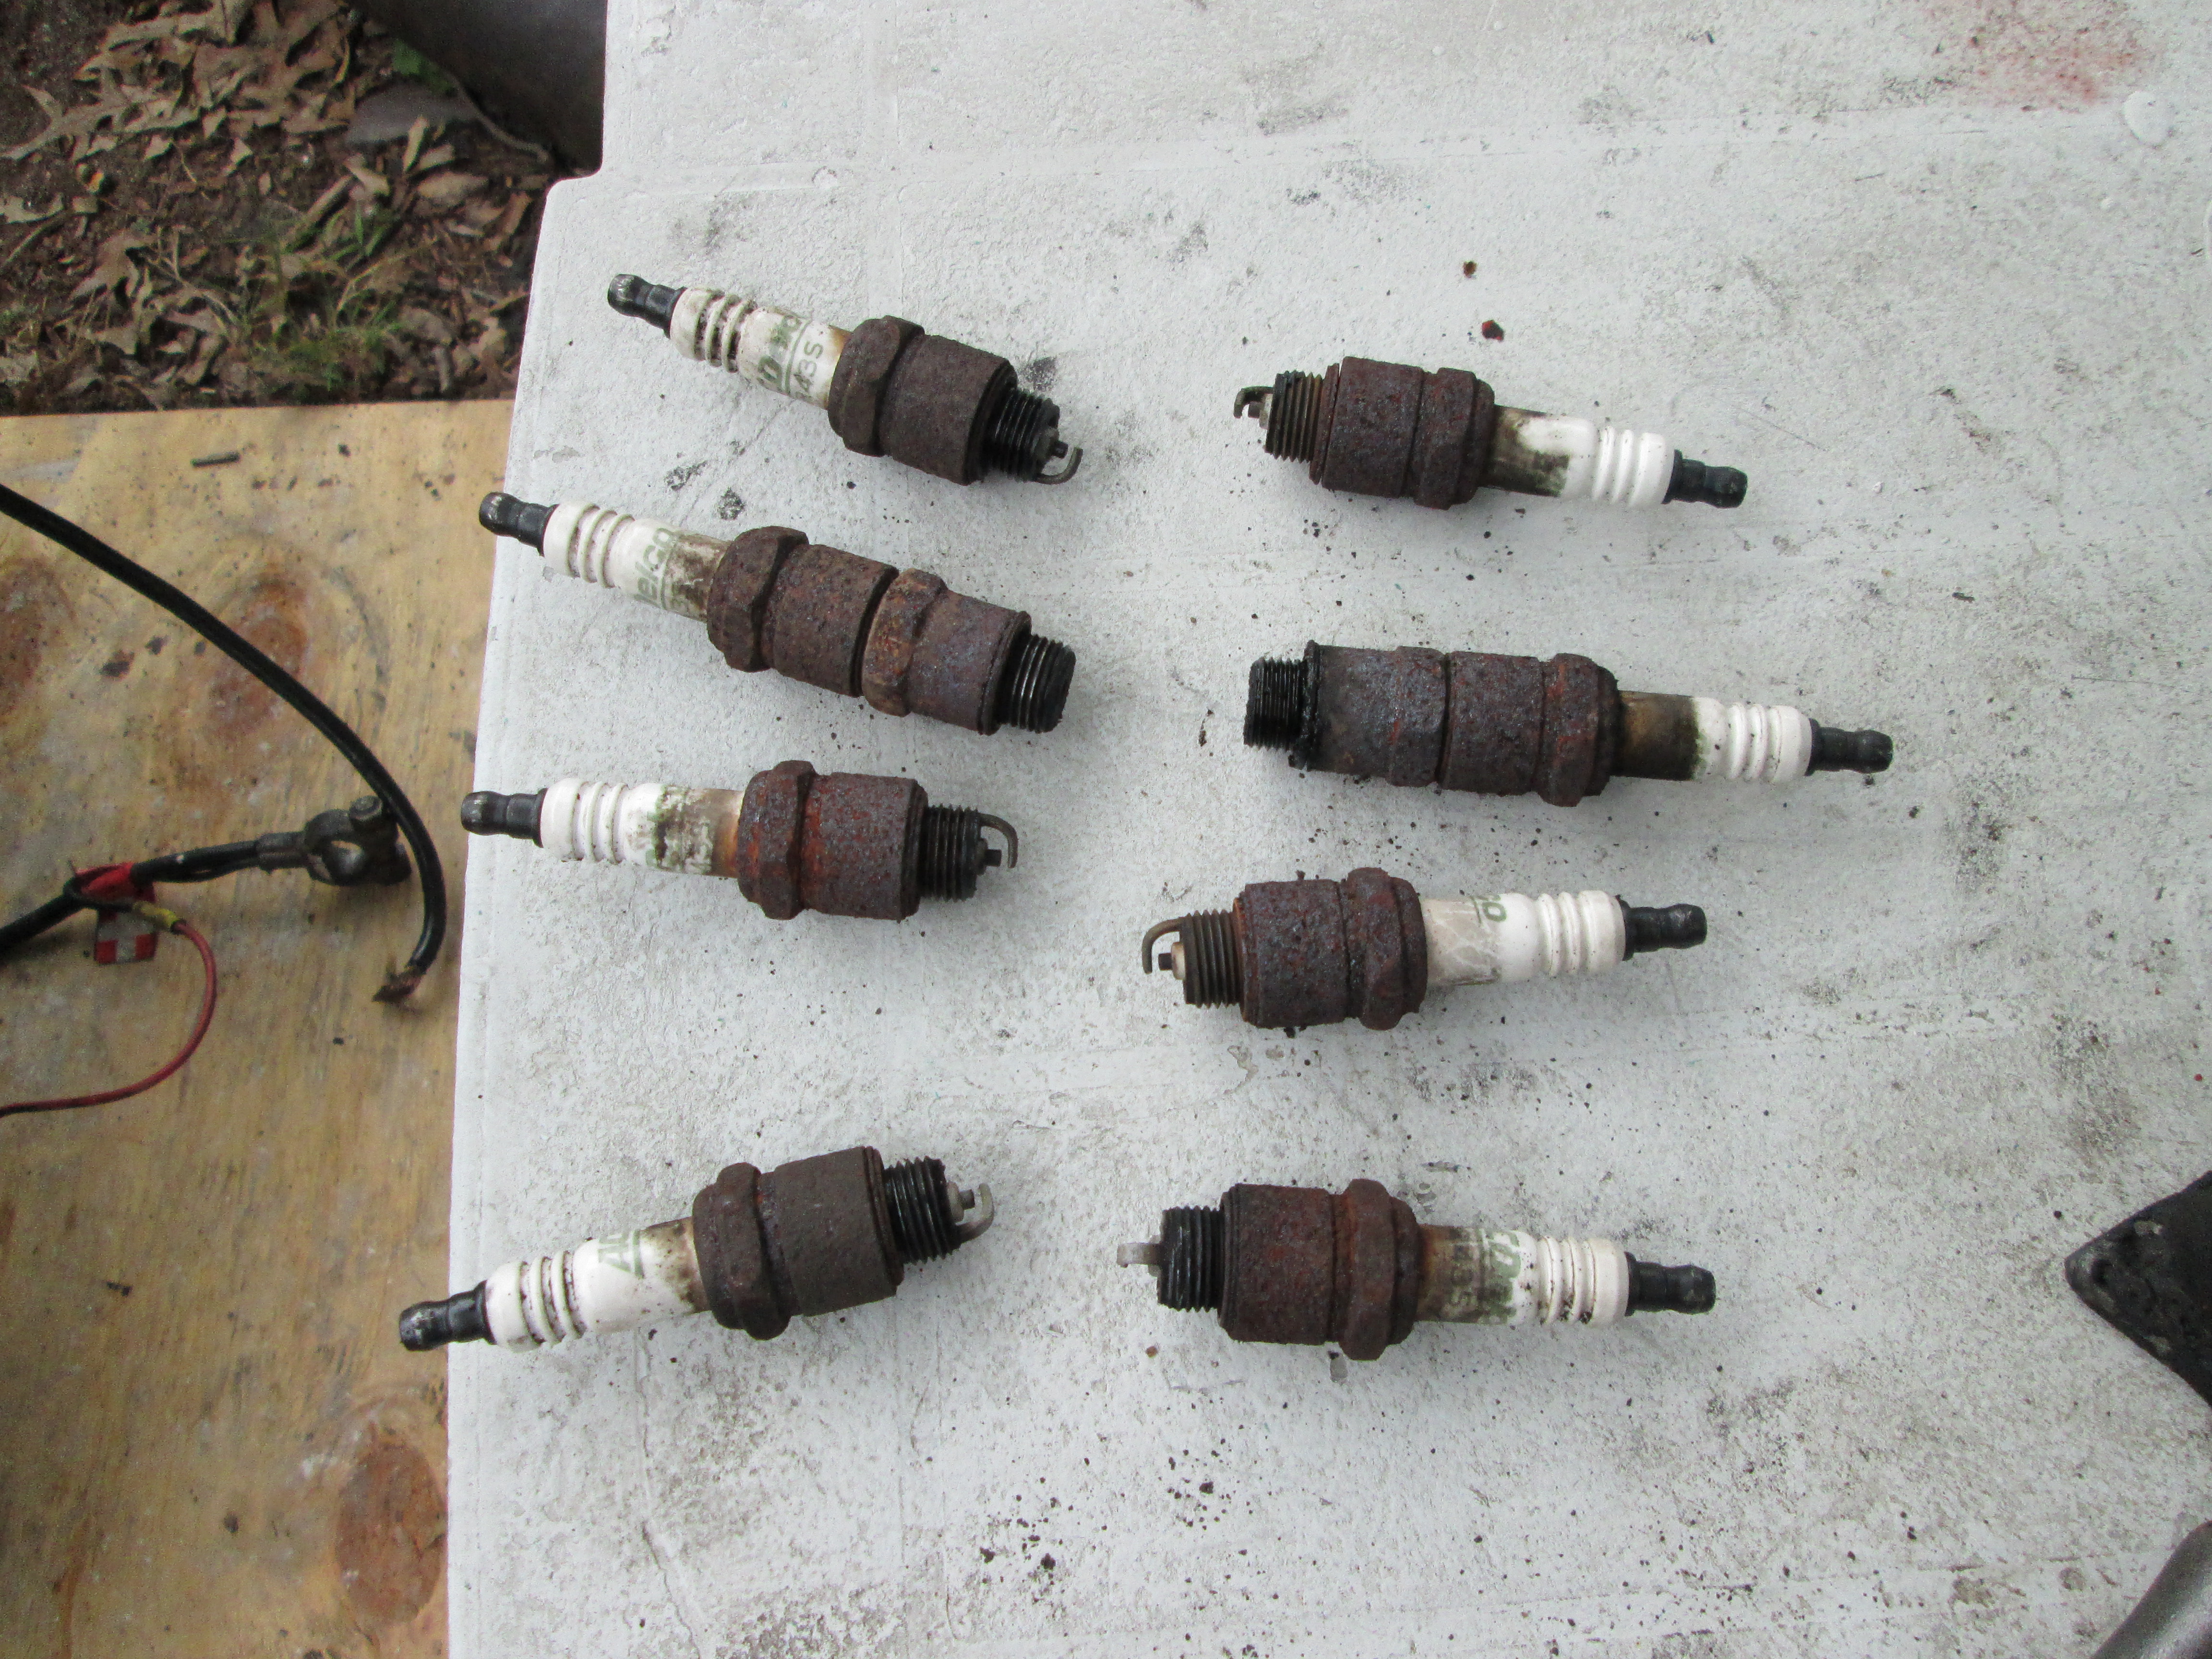
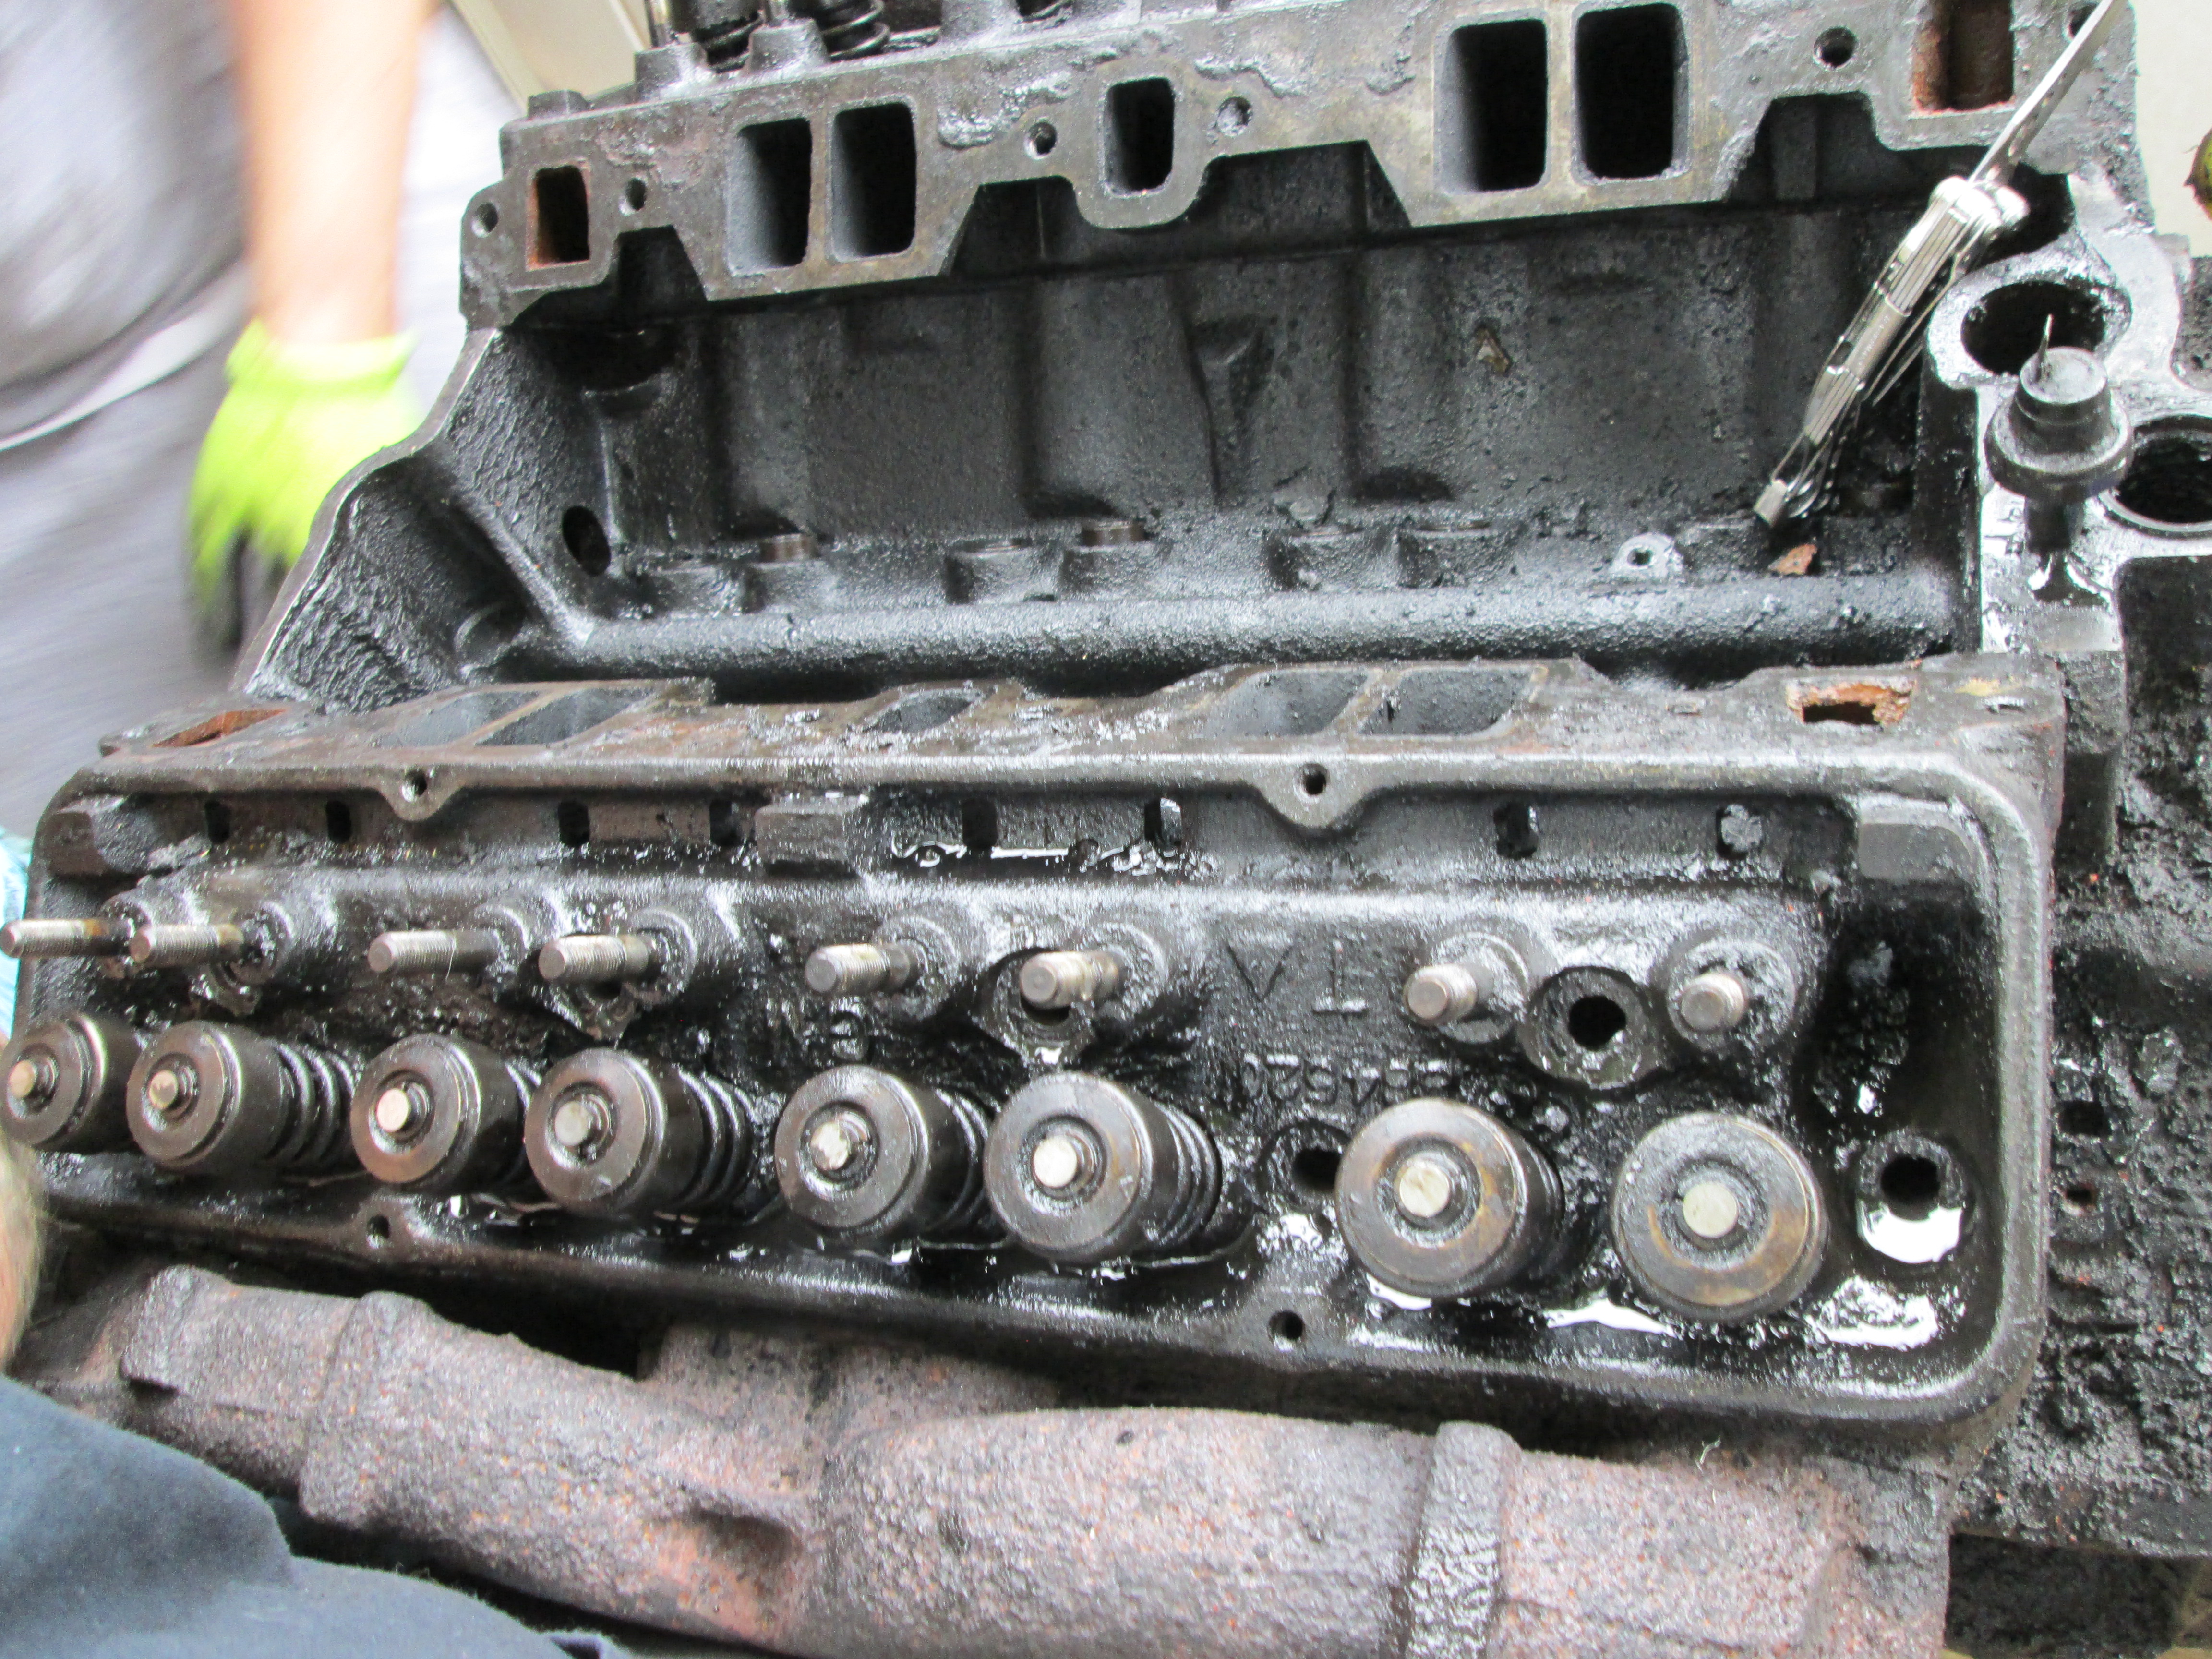
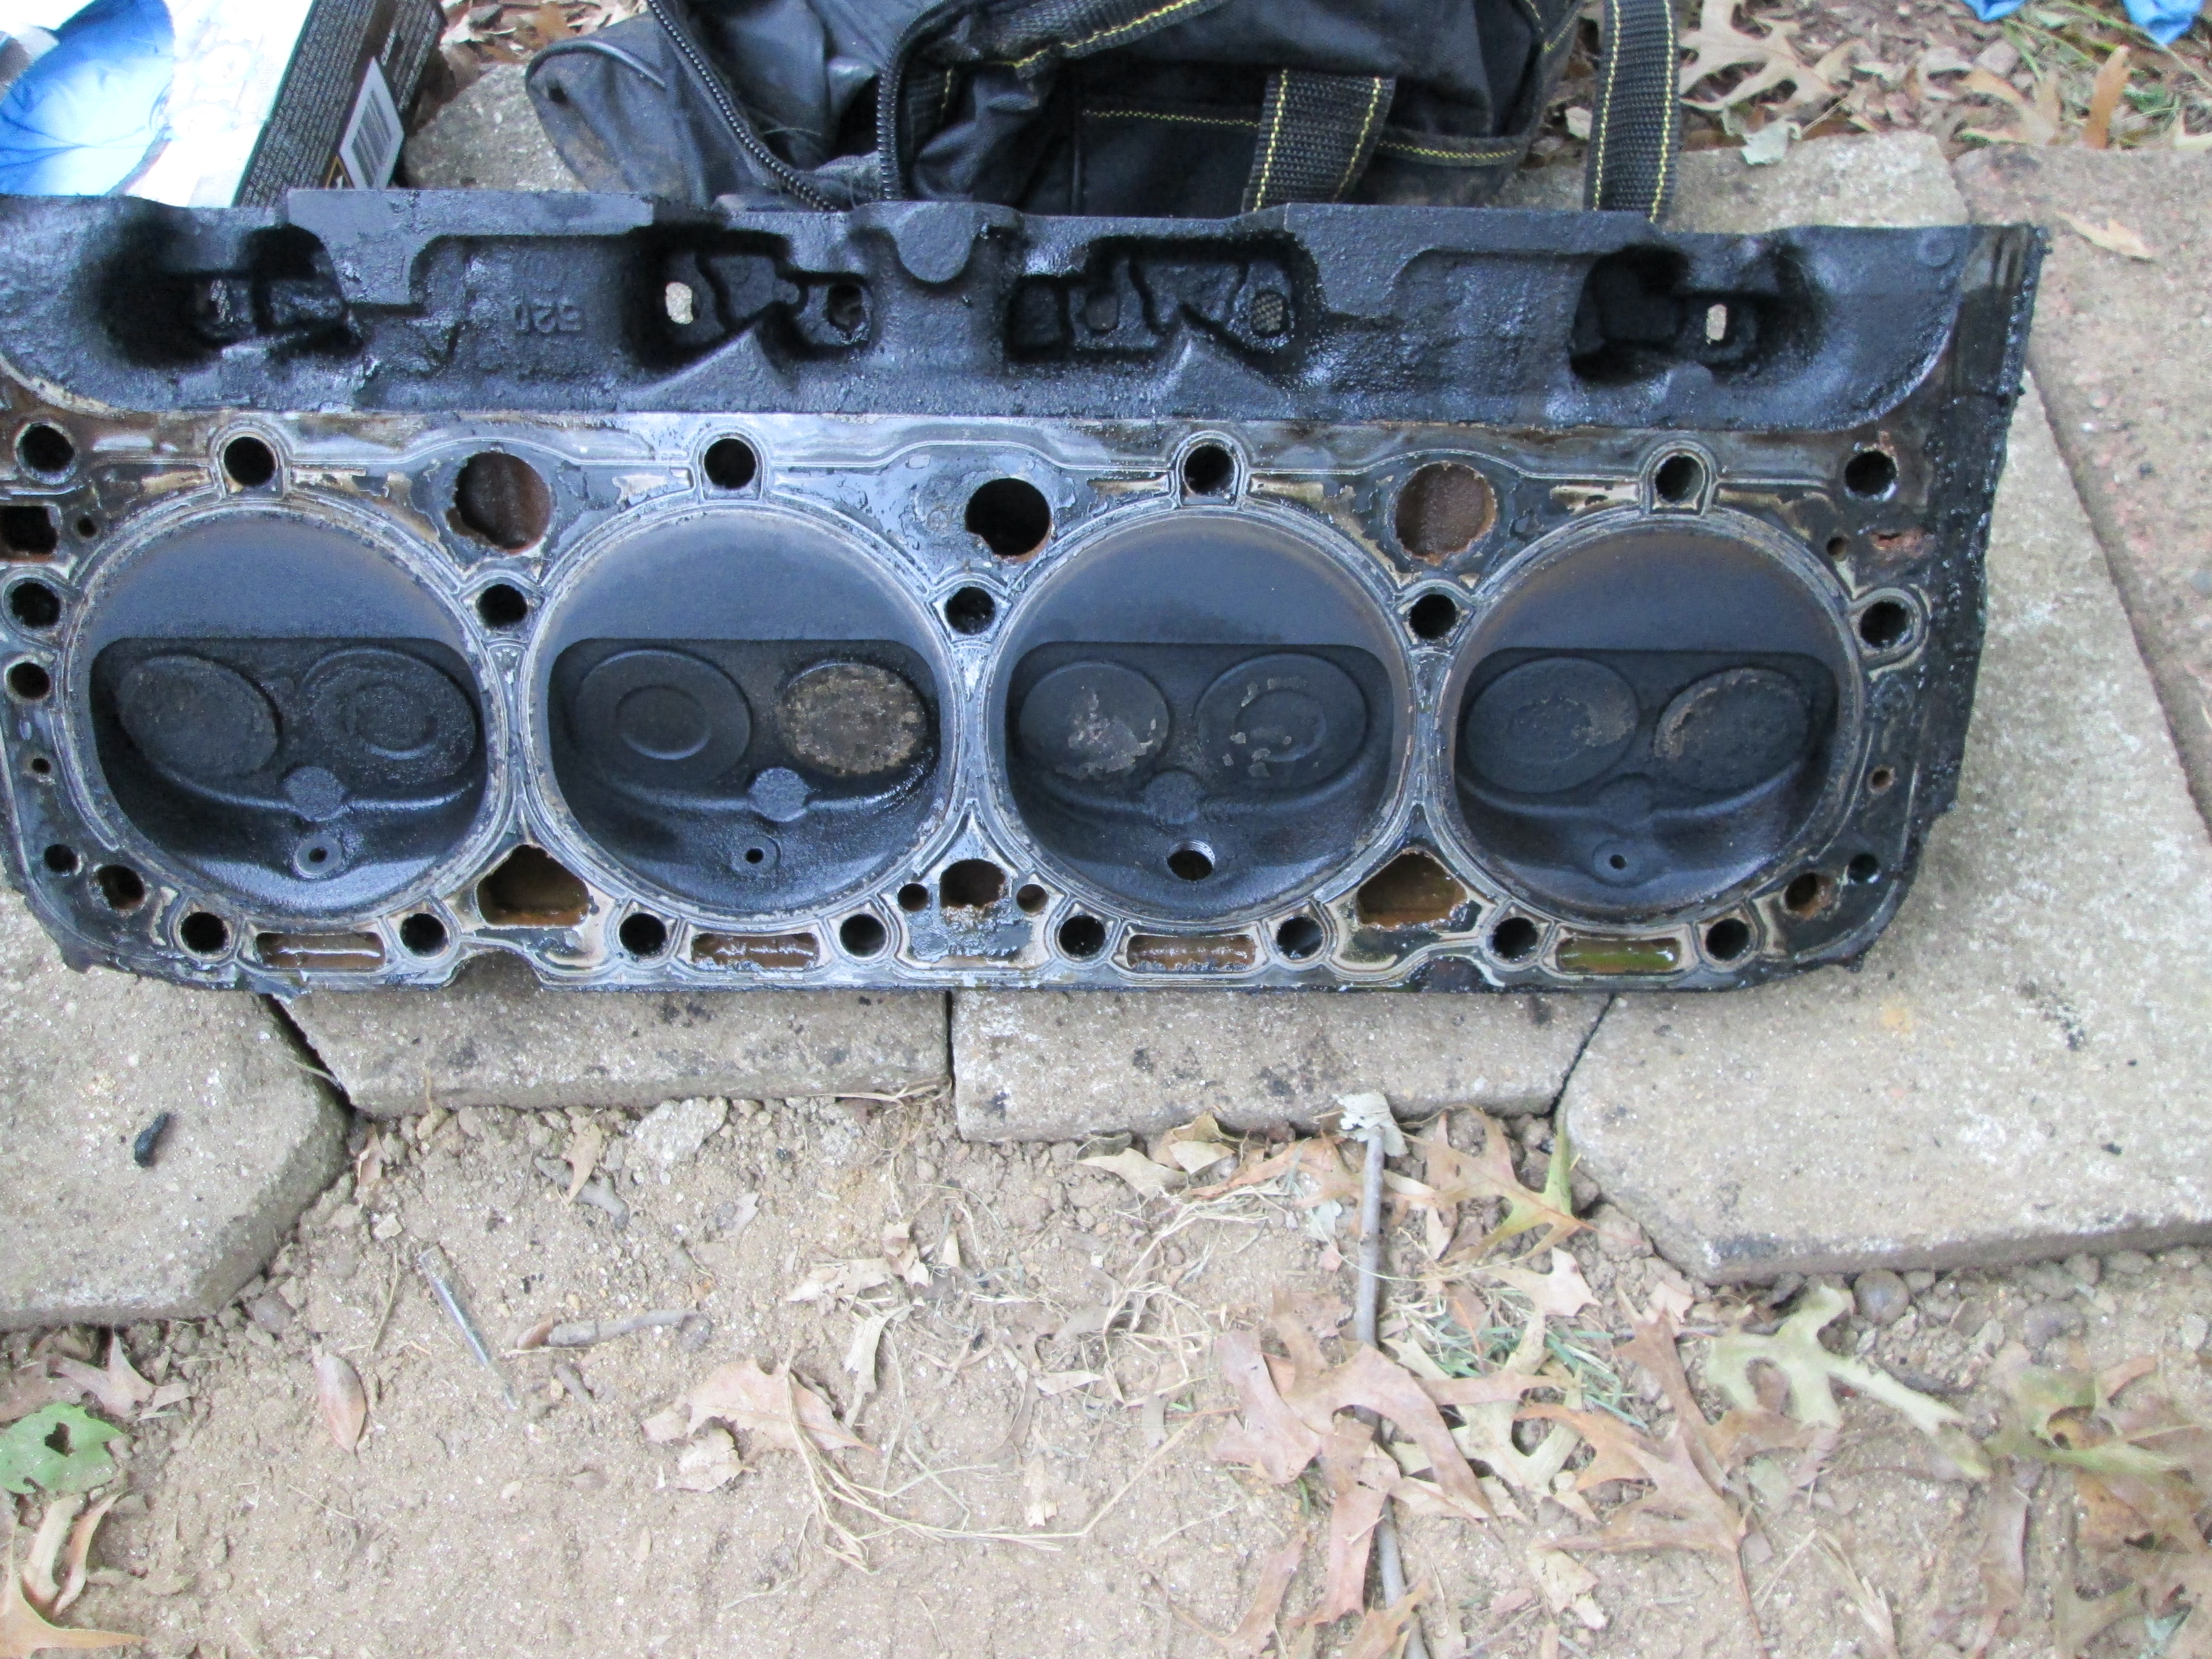
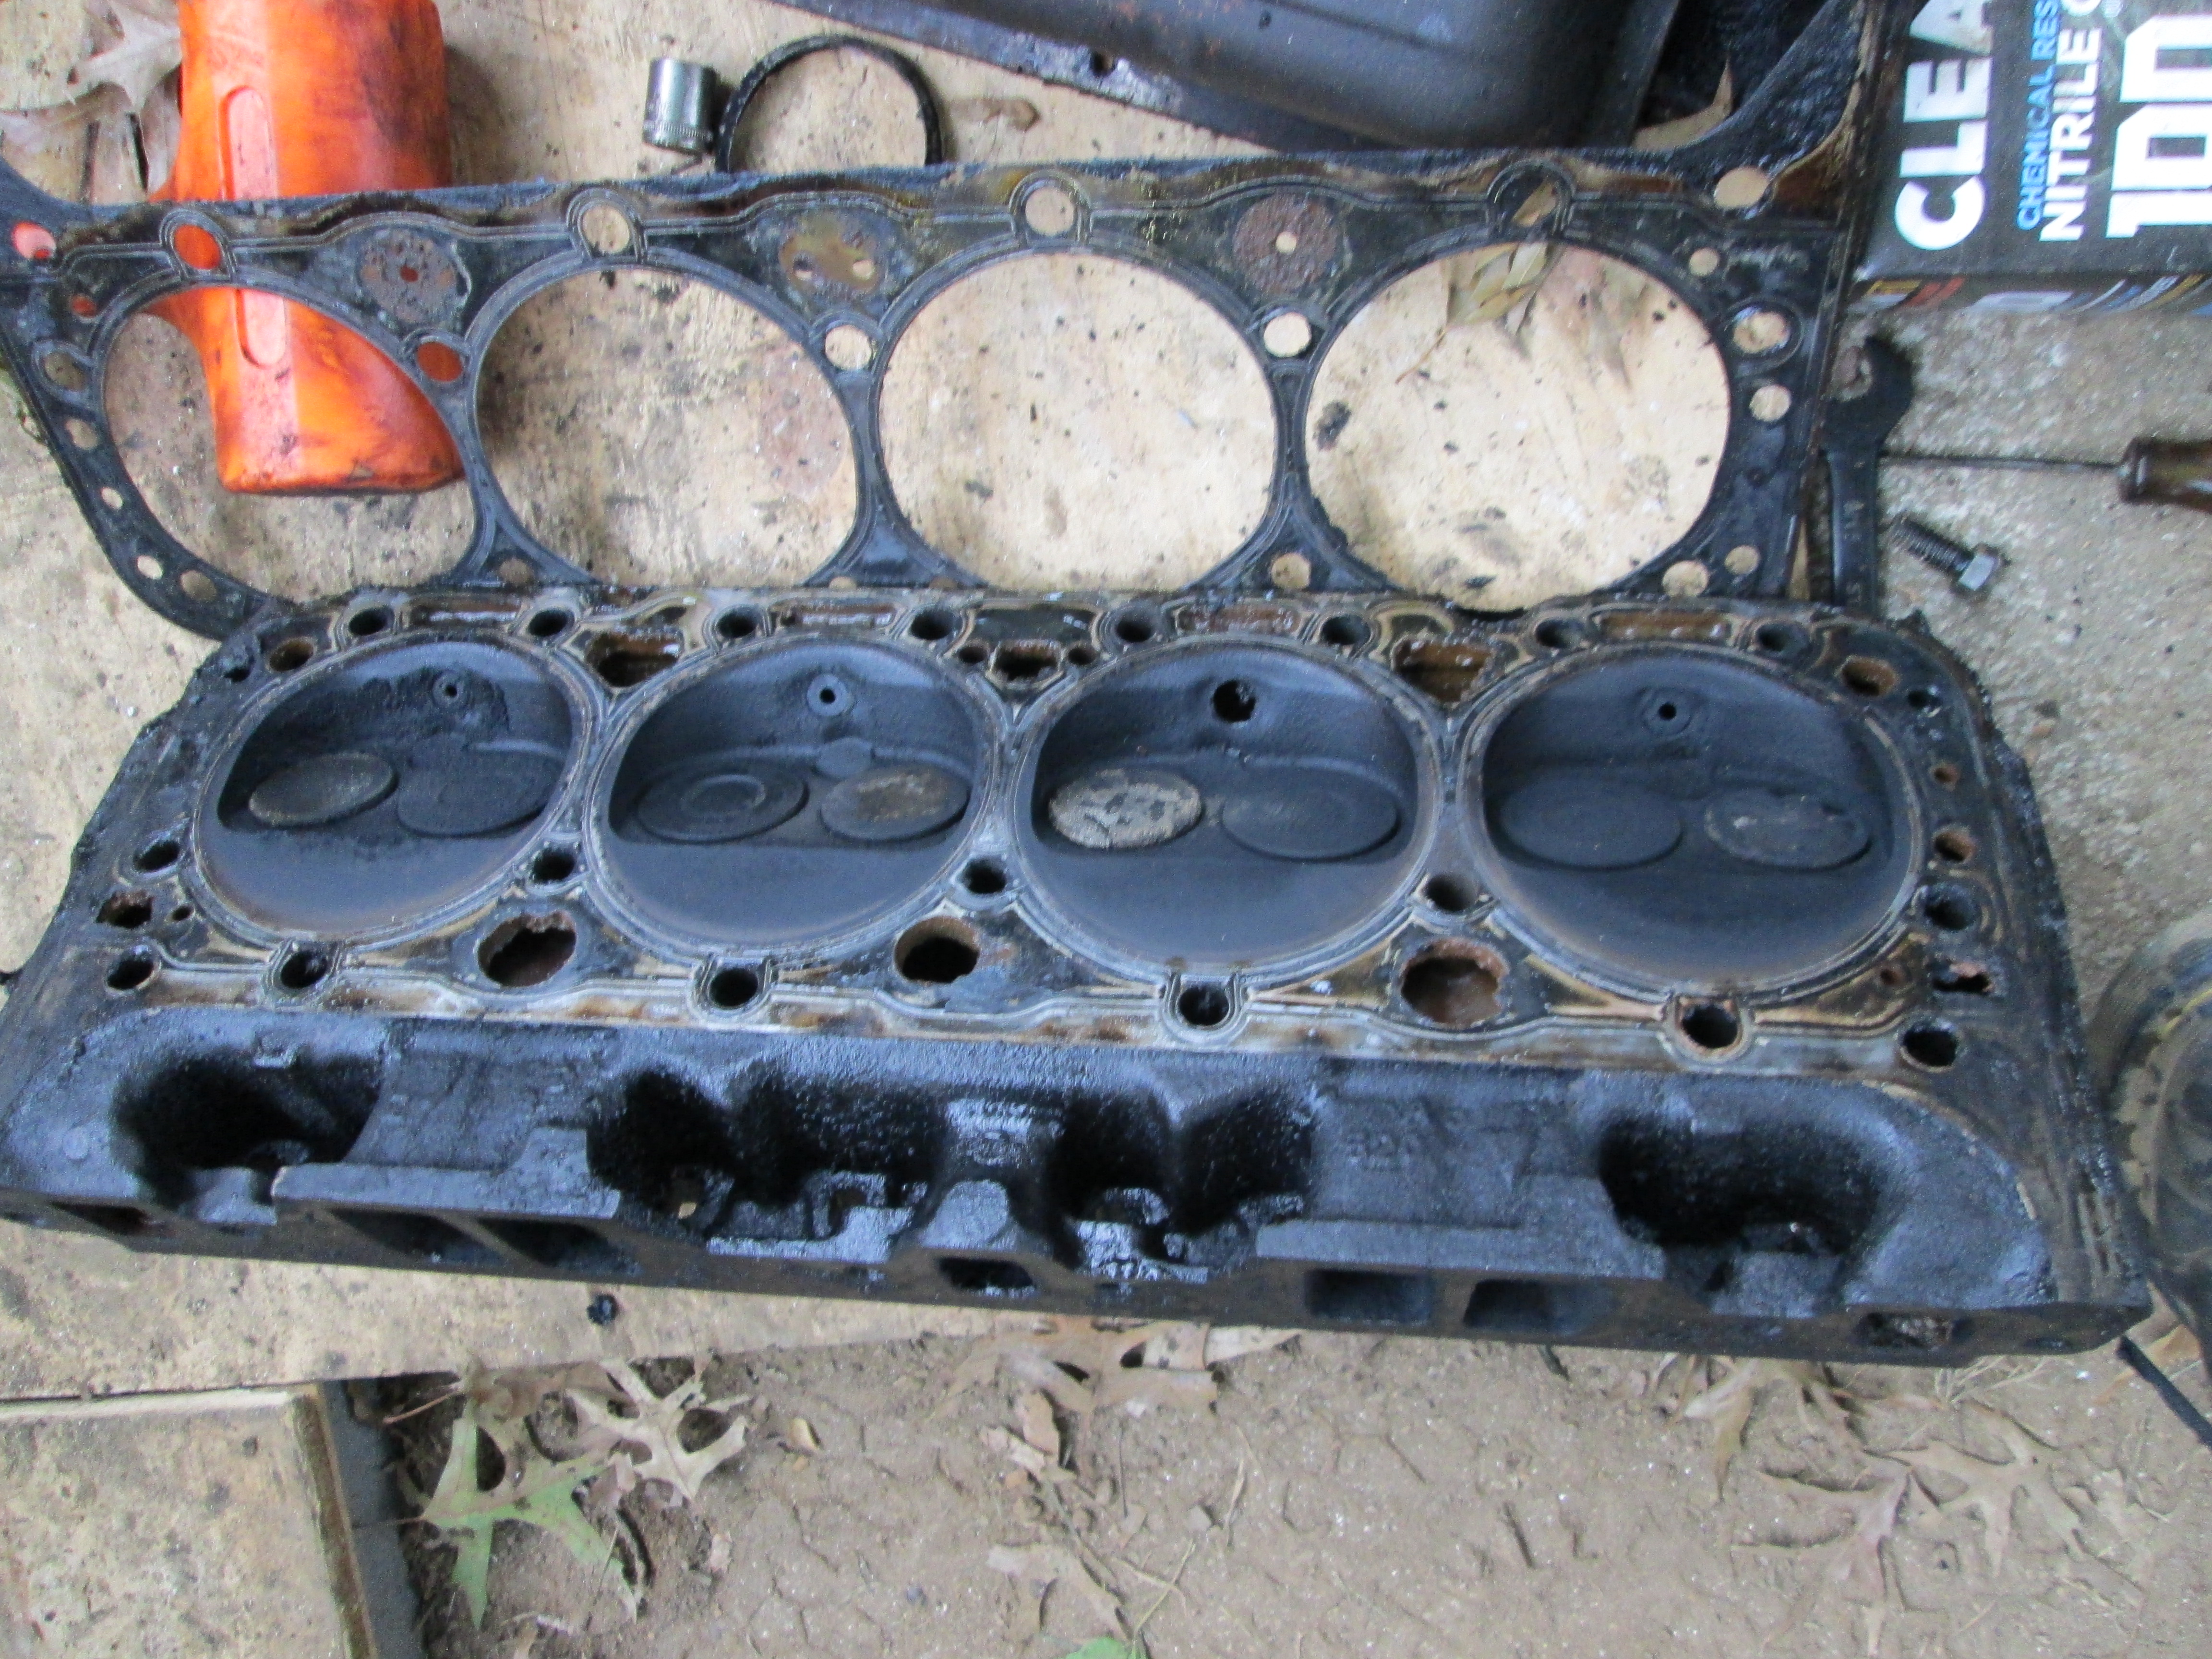
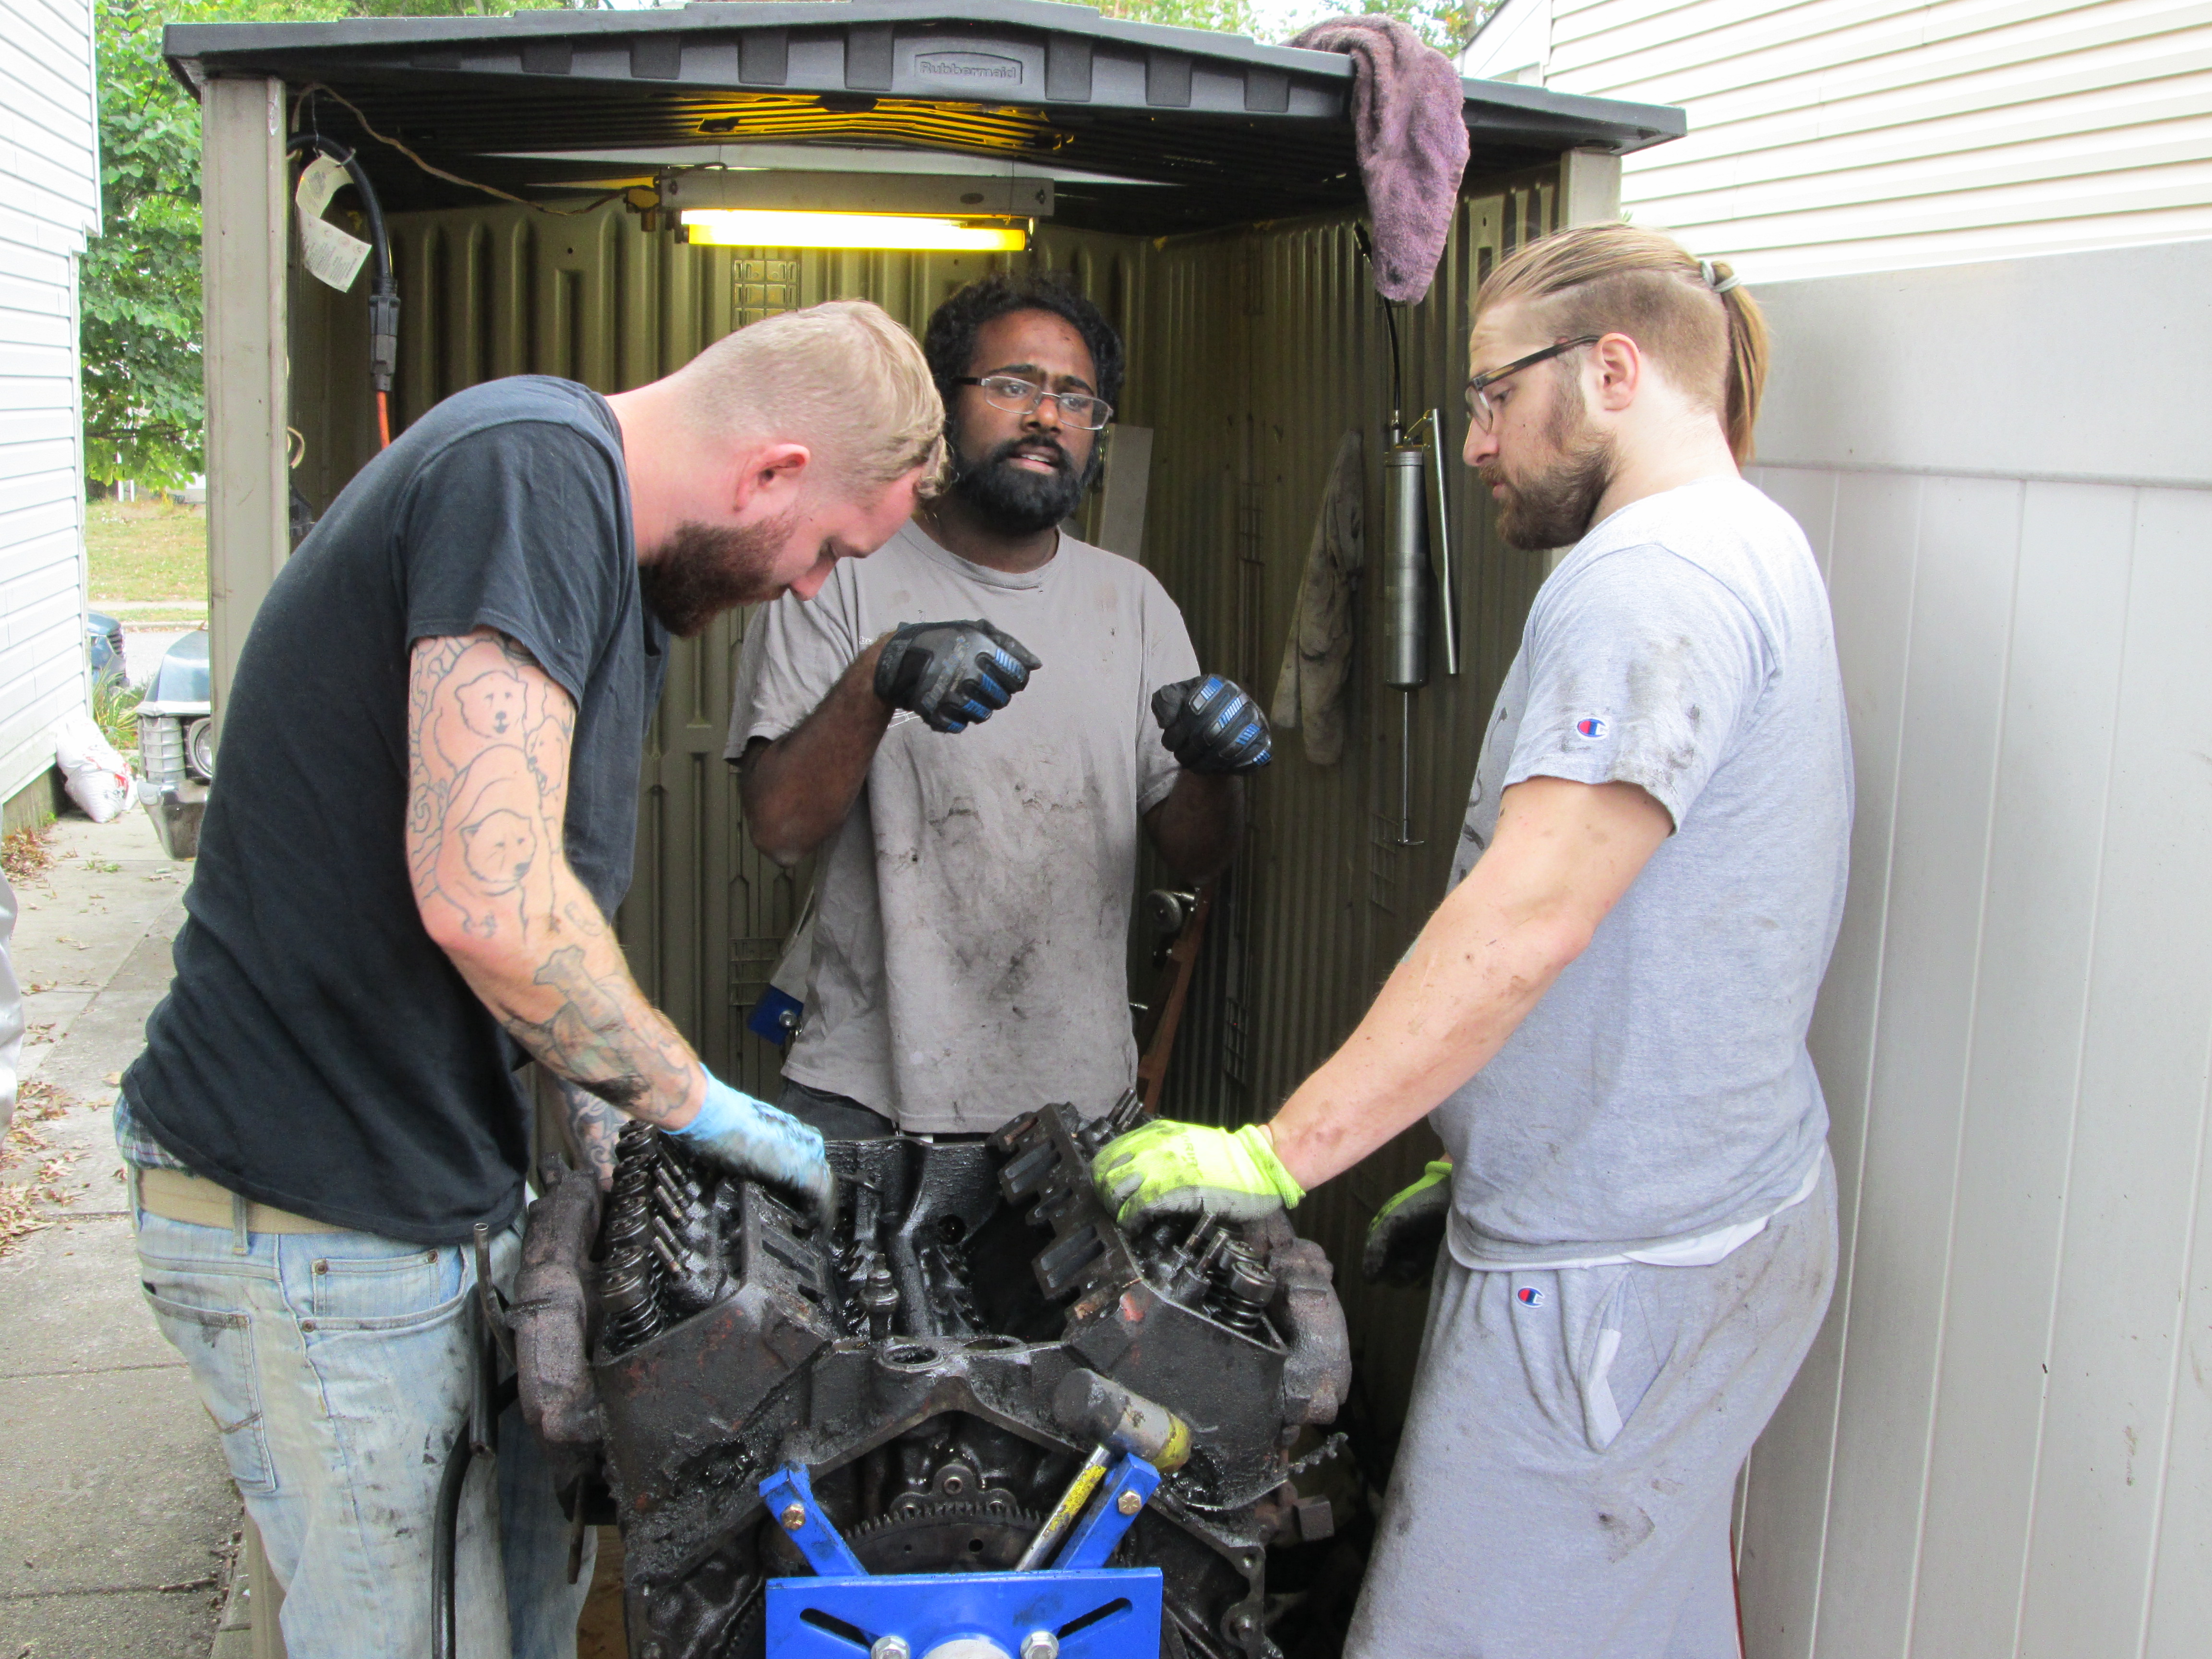
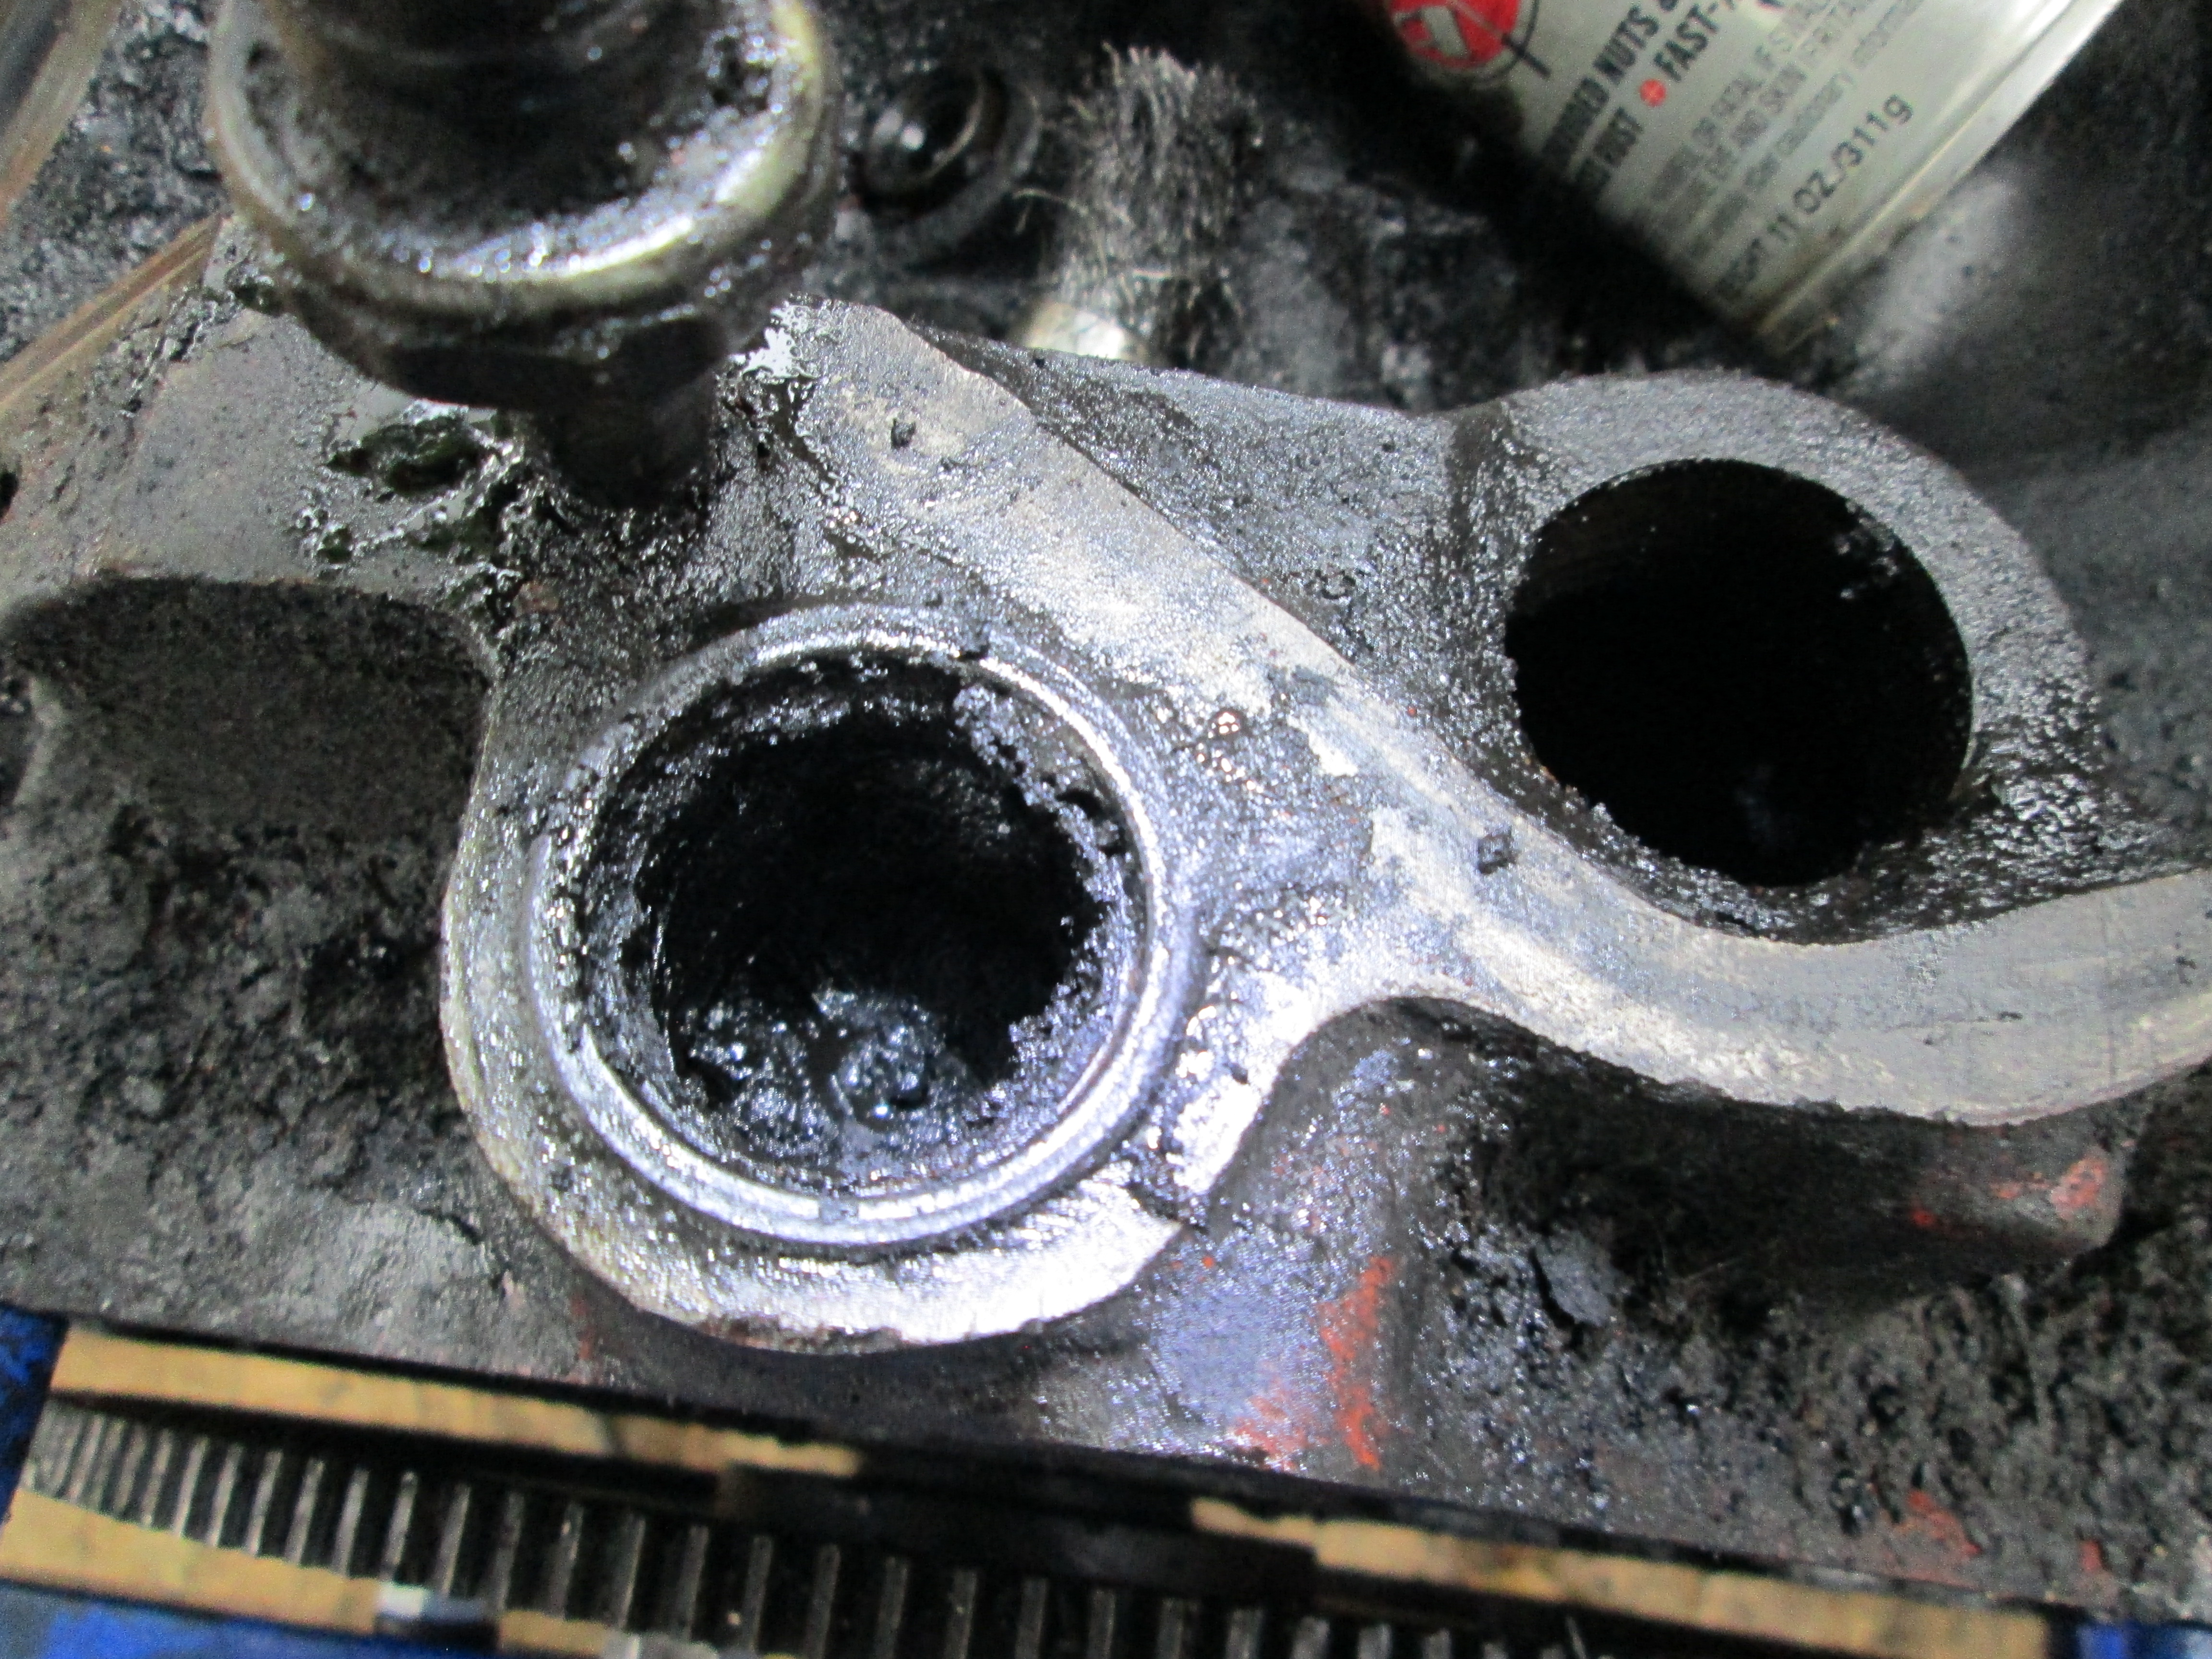
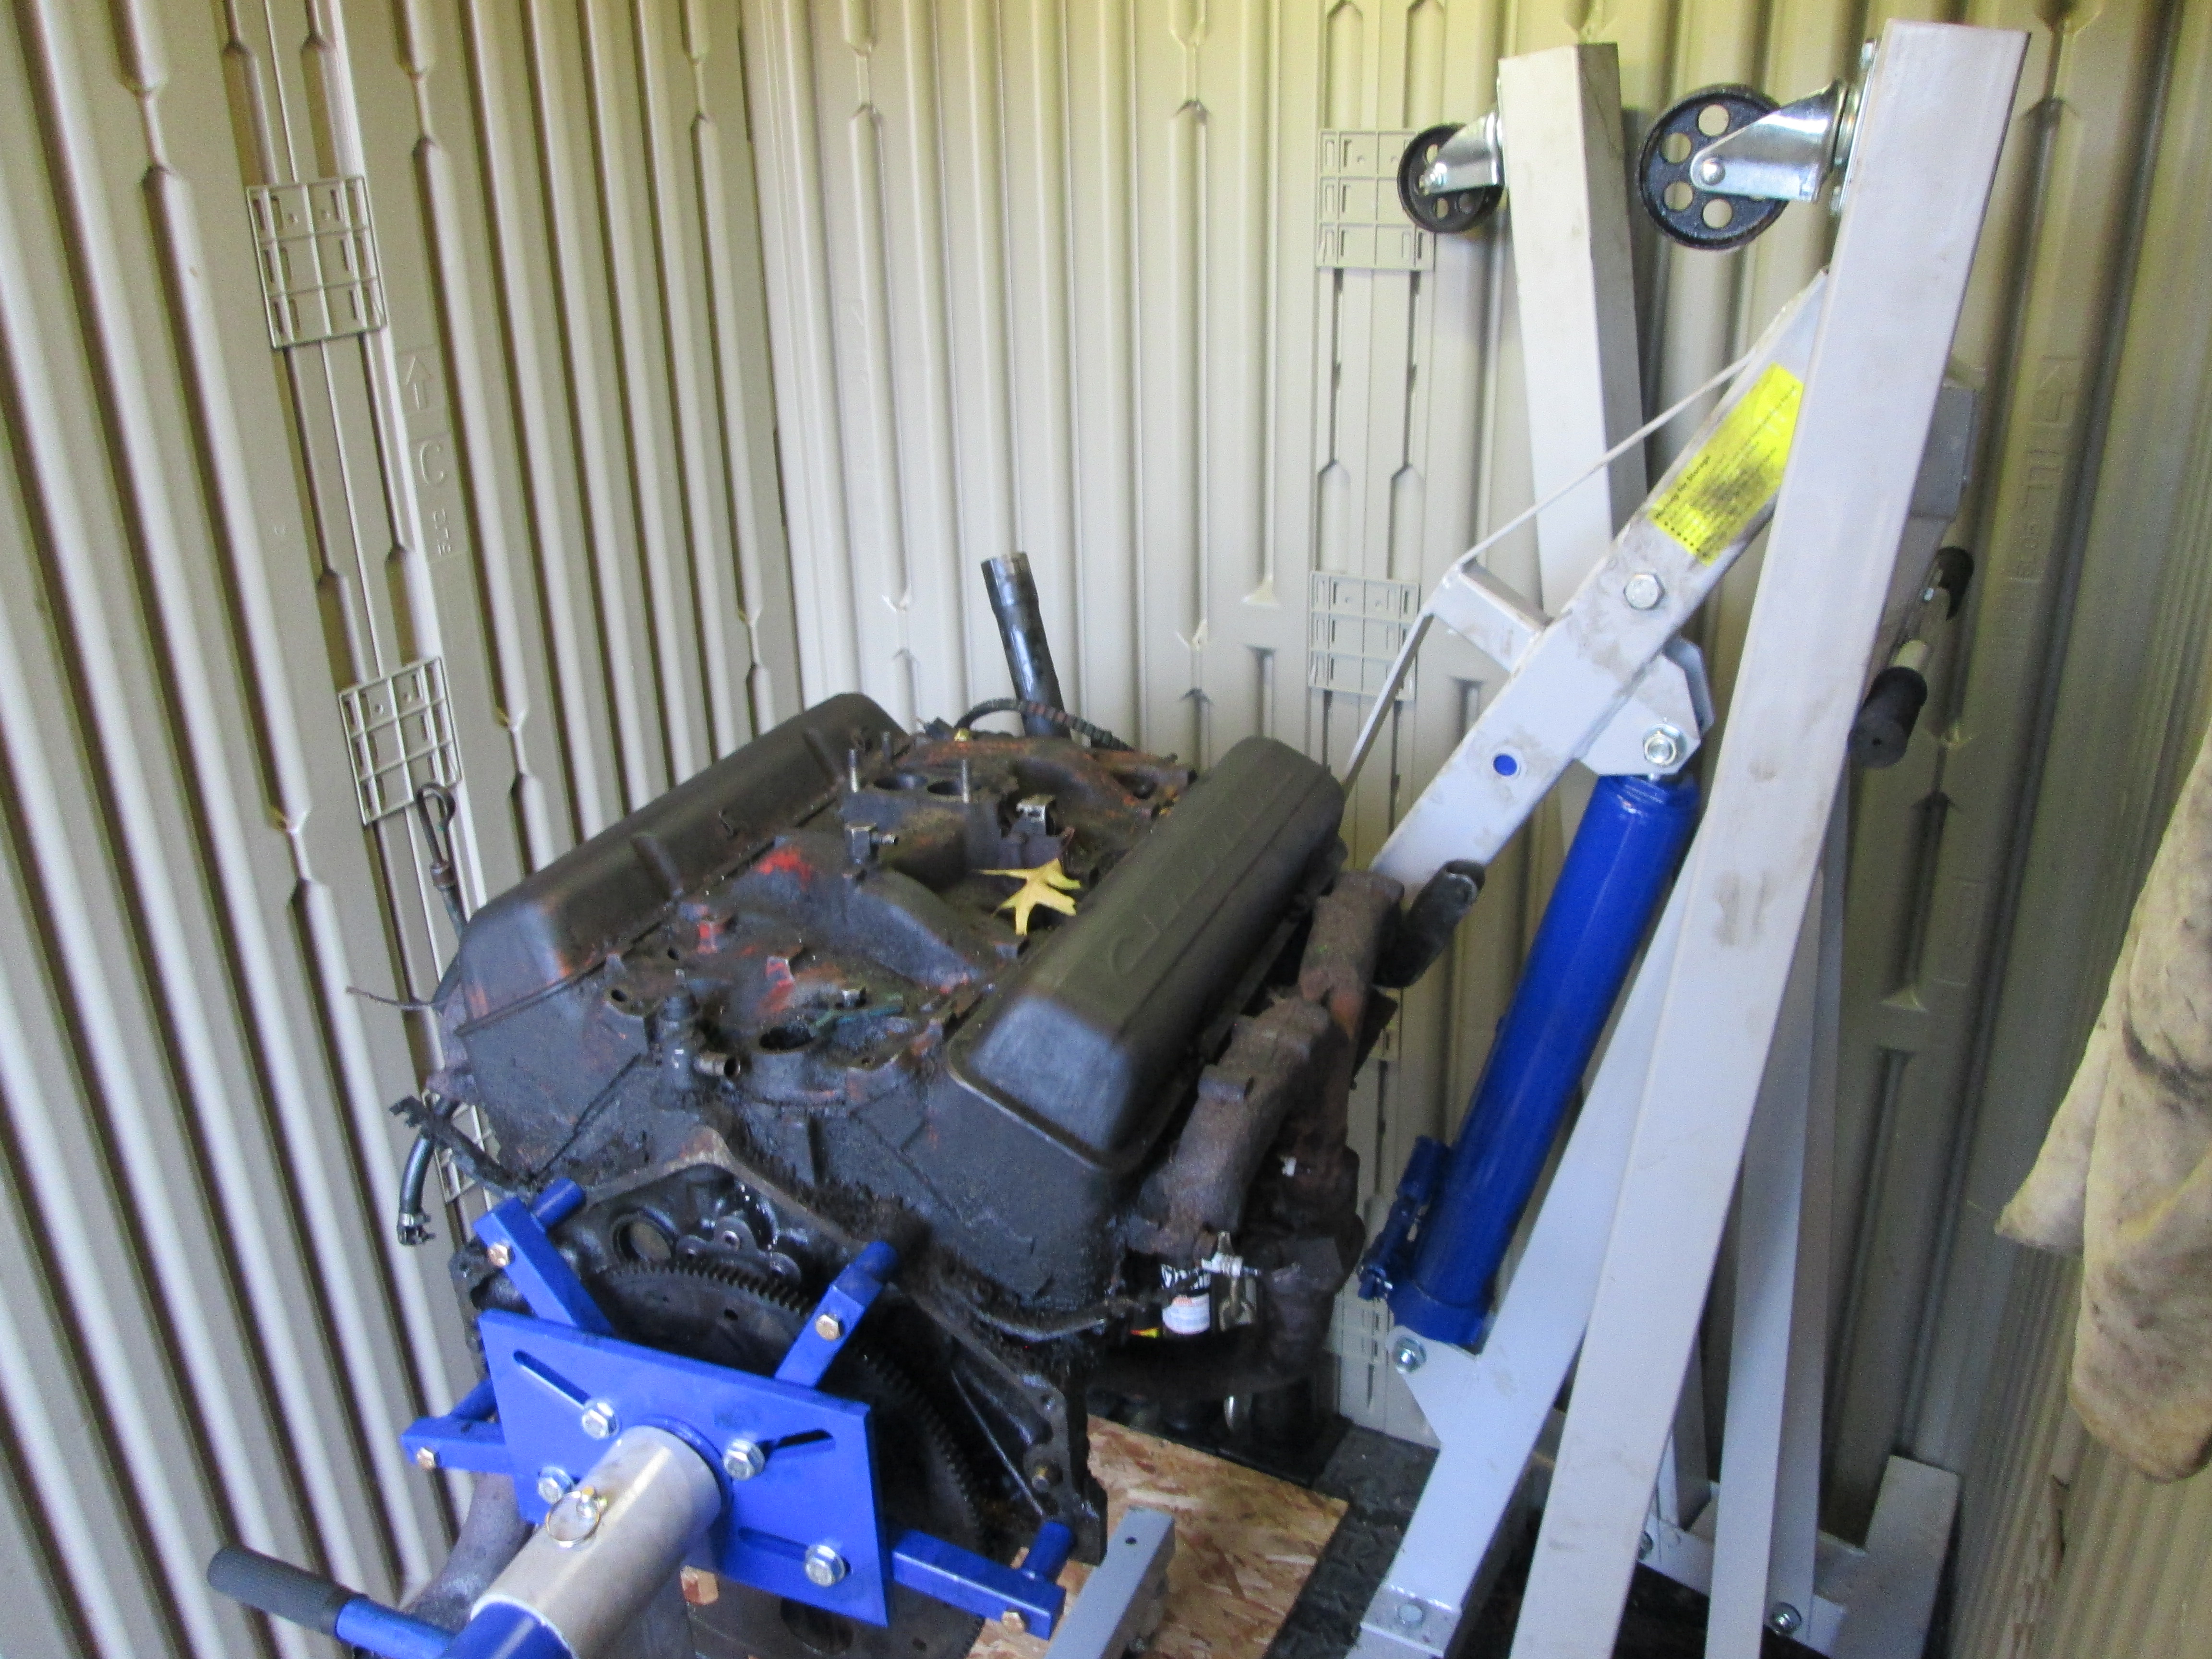
We took apart the 283 smallblock engine. Lot of oil buildup and gunk. Most parts came off with a 14mm socket or wrench. Once again used the wire brush and drill trick to clean the bolts before removing. Was pretty straight foward. marked all the bolts and parts just as a reference, we're going to replace most of it anyway. Valves weren't in great condition, however the cylinders look flawless, which is very good news. Wasn't expecting that, still going to take the block, pistons, and cam shaft over to a machine shop to get a professional opinion. Hoping it'll be in good shape and then I can start ordering new valves and stems, intake manafold, headers, and related parts. Always great working with Nick and Stephen, and our special guest Brandon. Stooges' Engineering keeps growing.
Next step is to power wash the crap out of the block.
September 28th and 29th
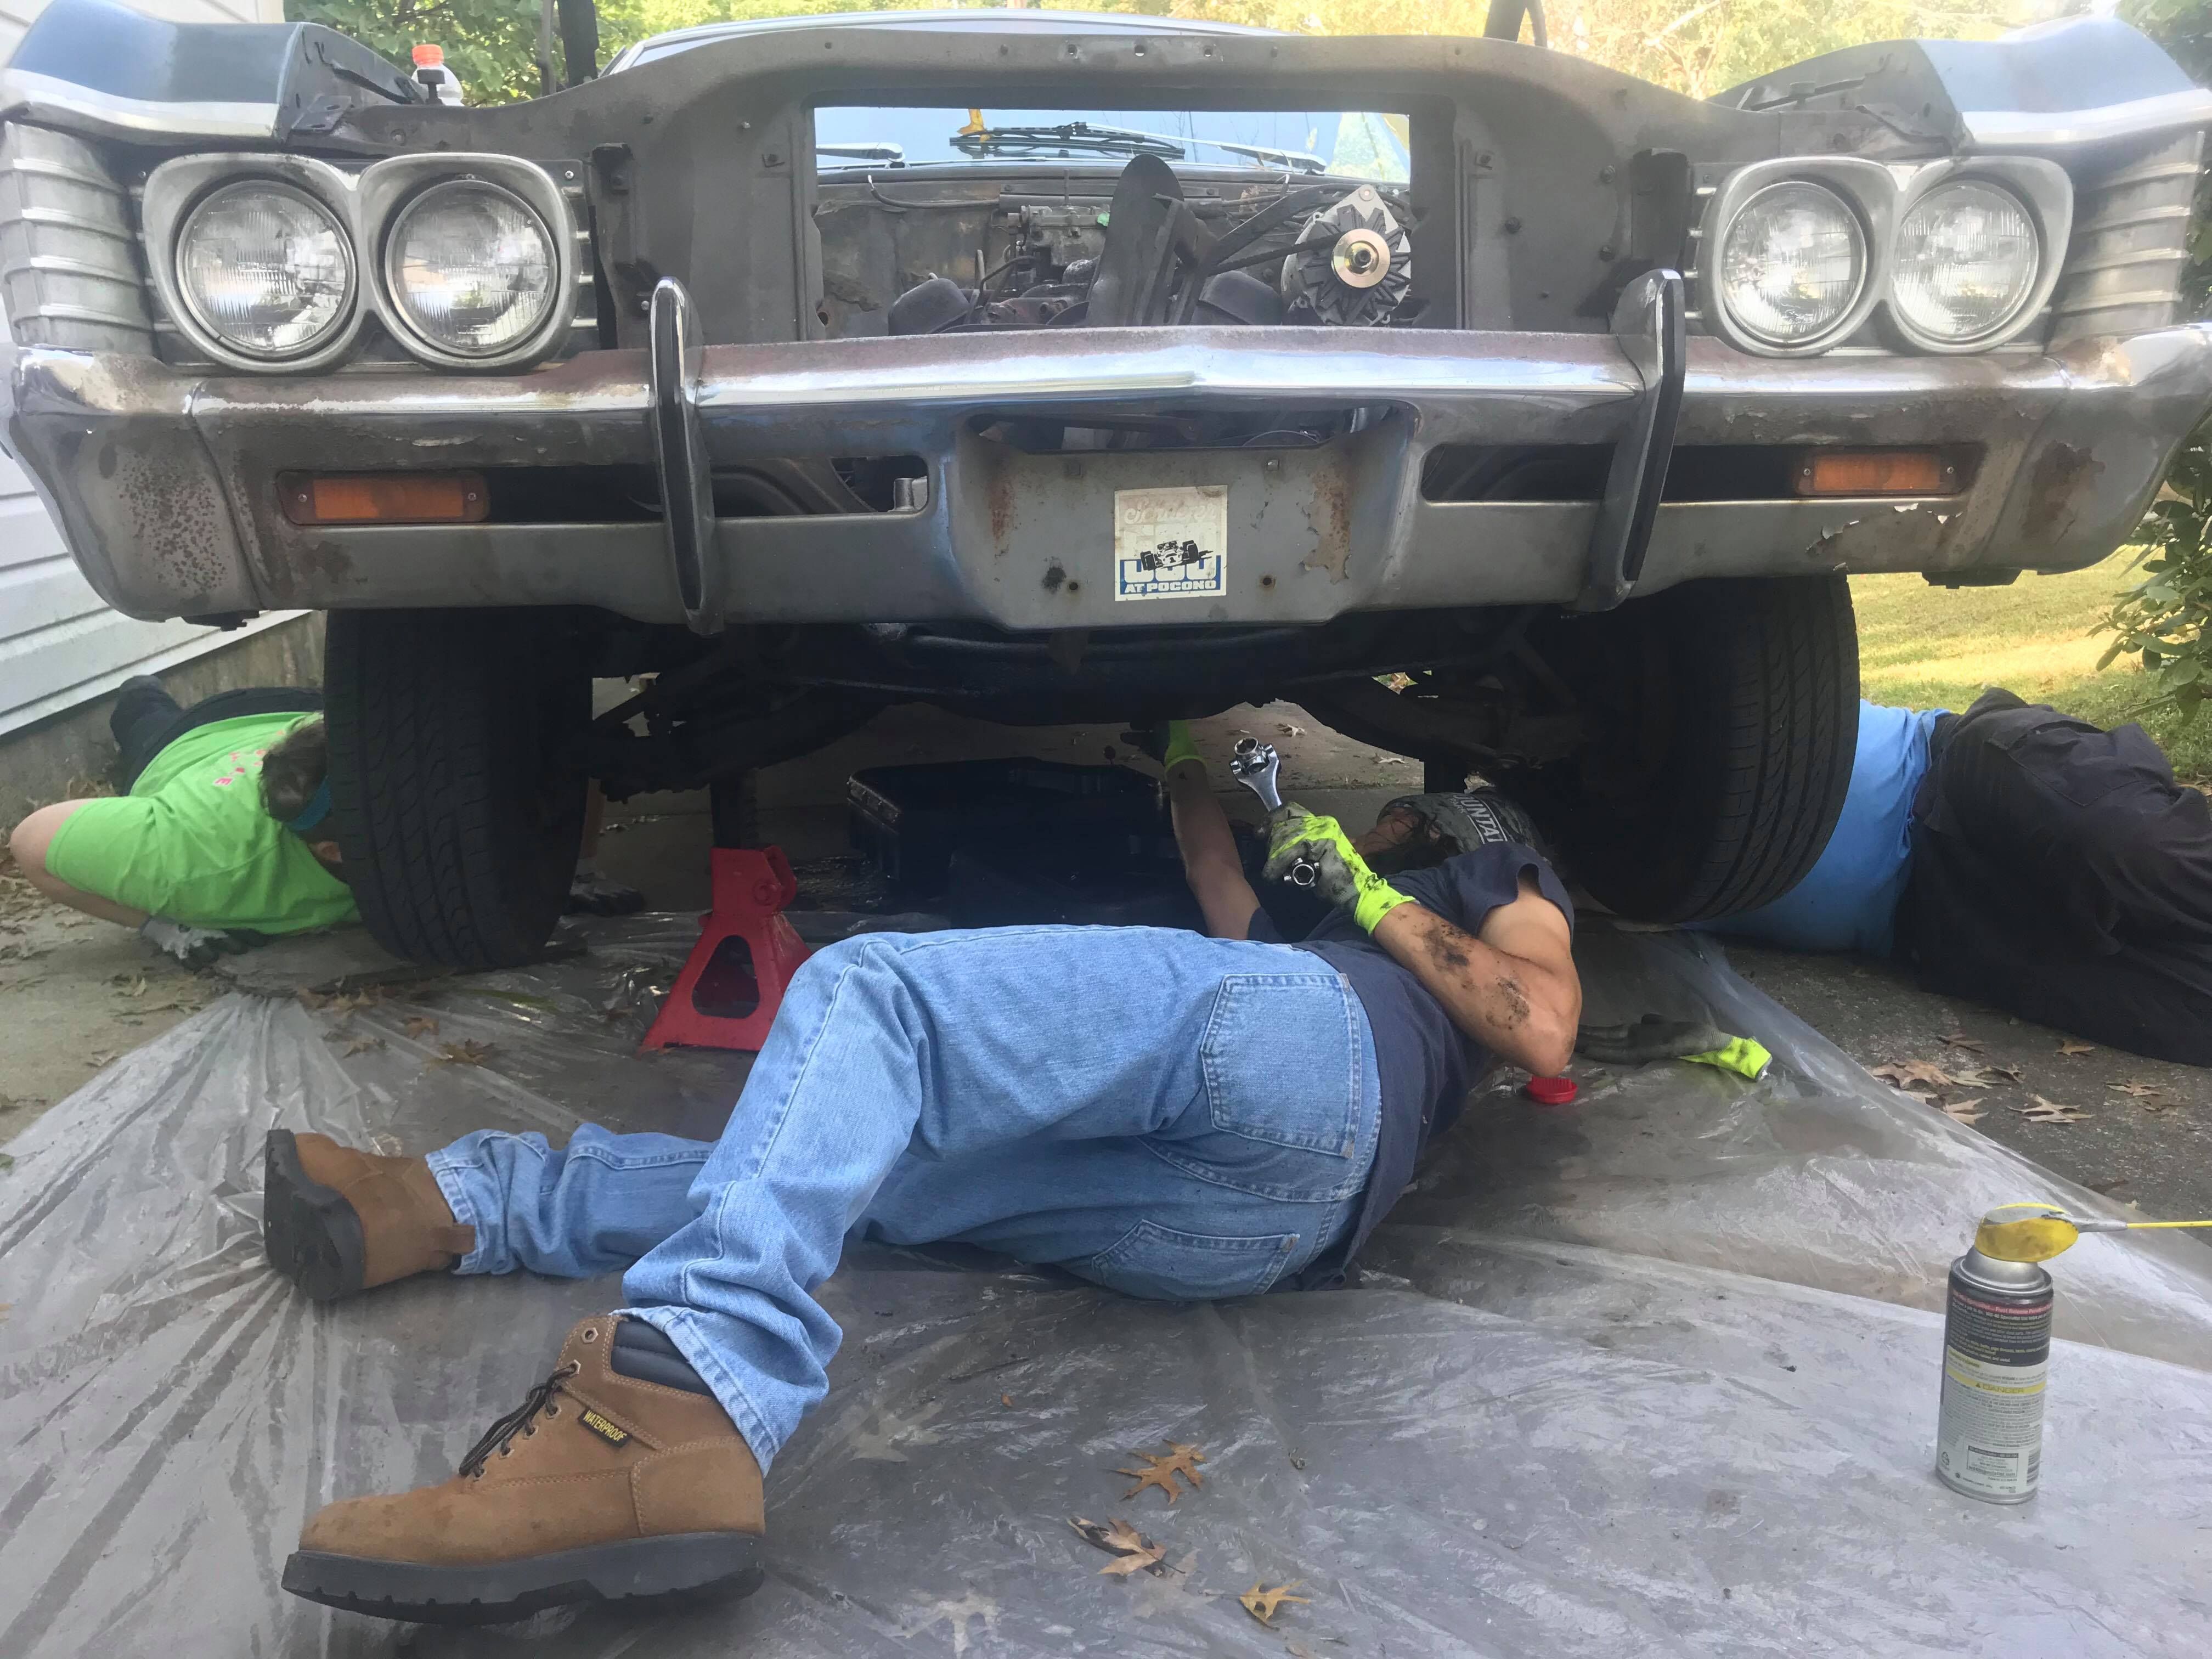
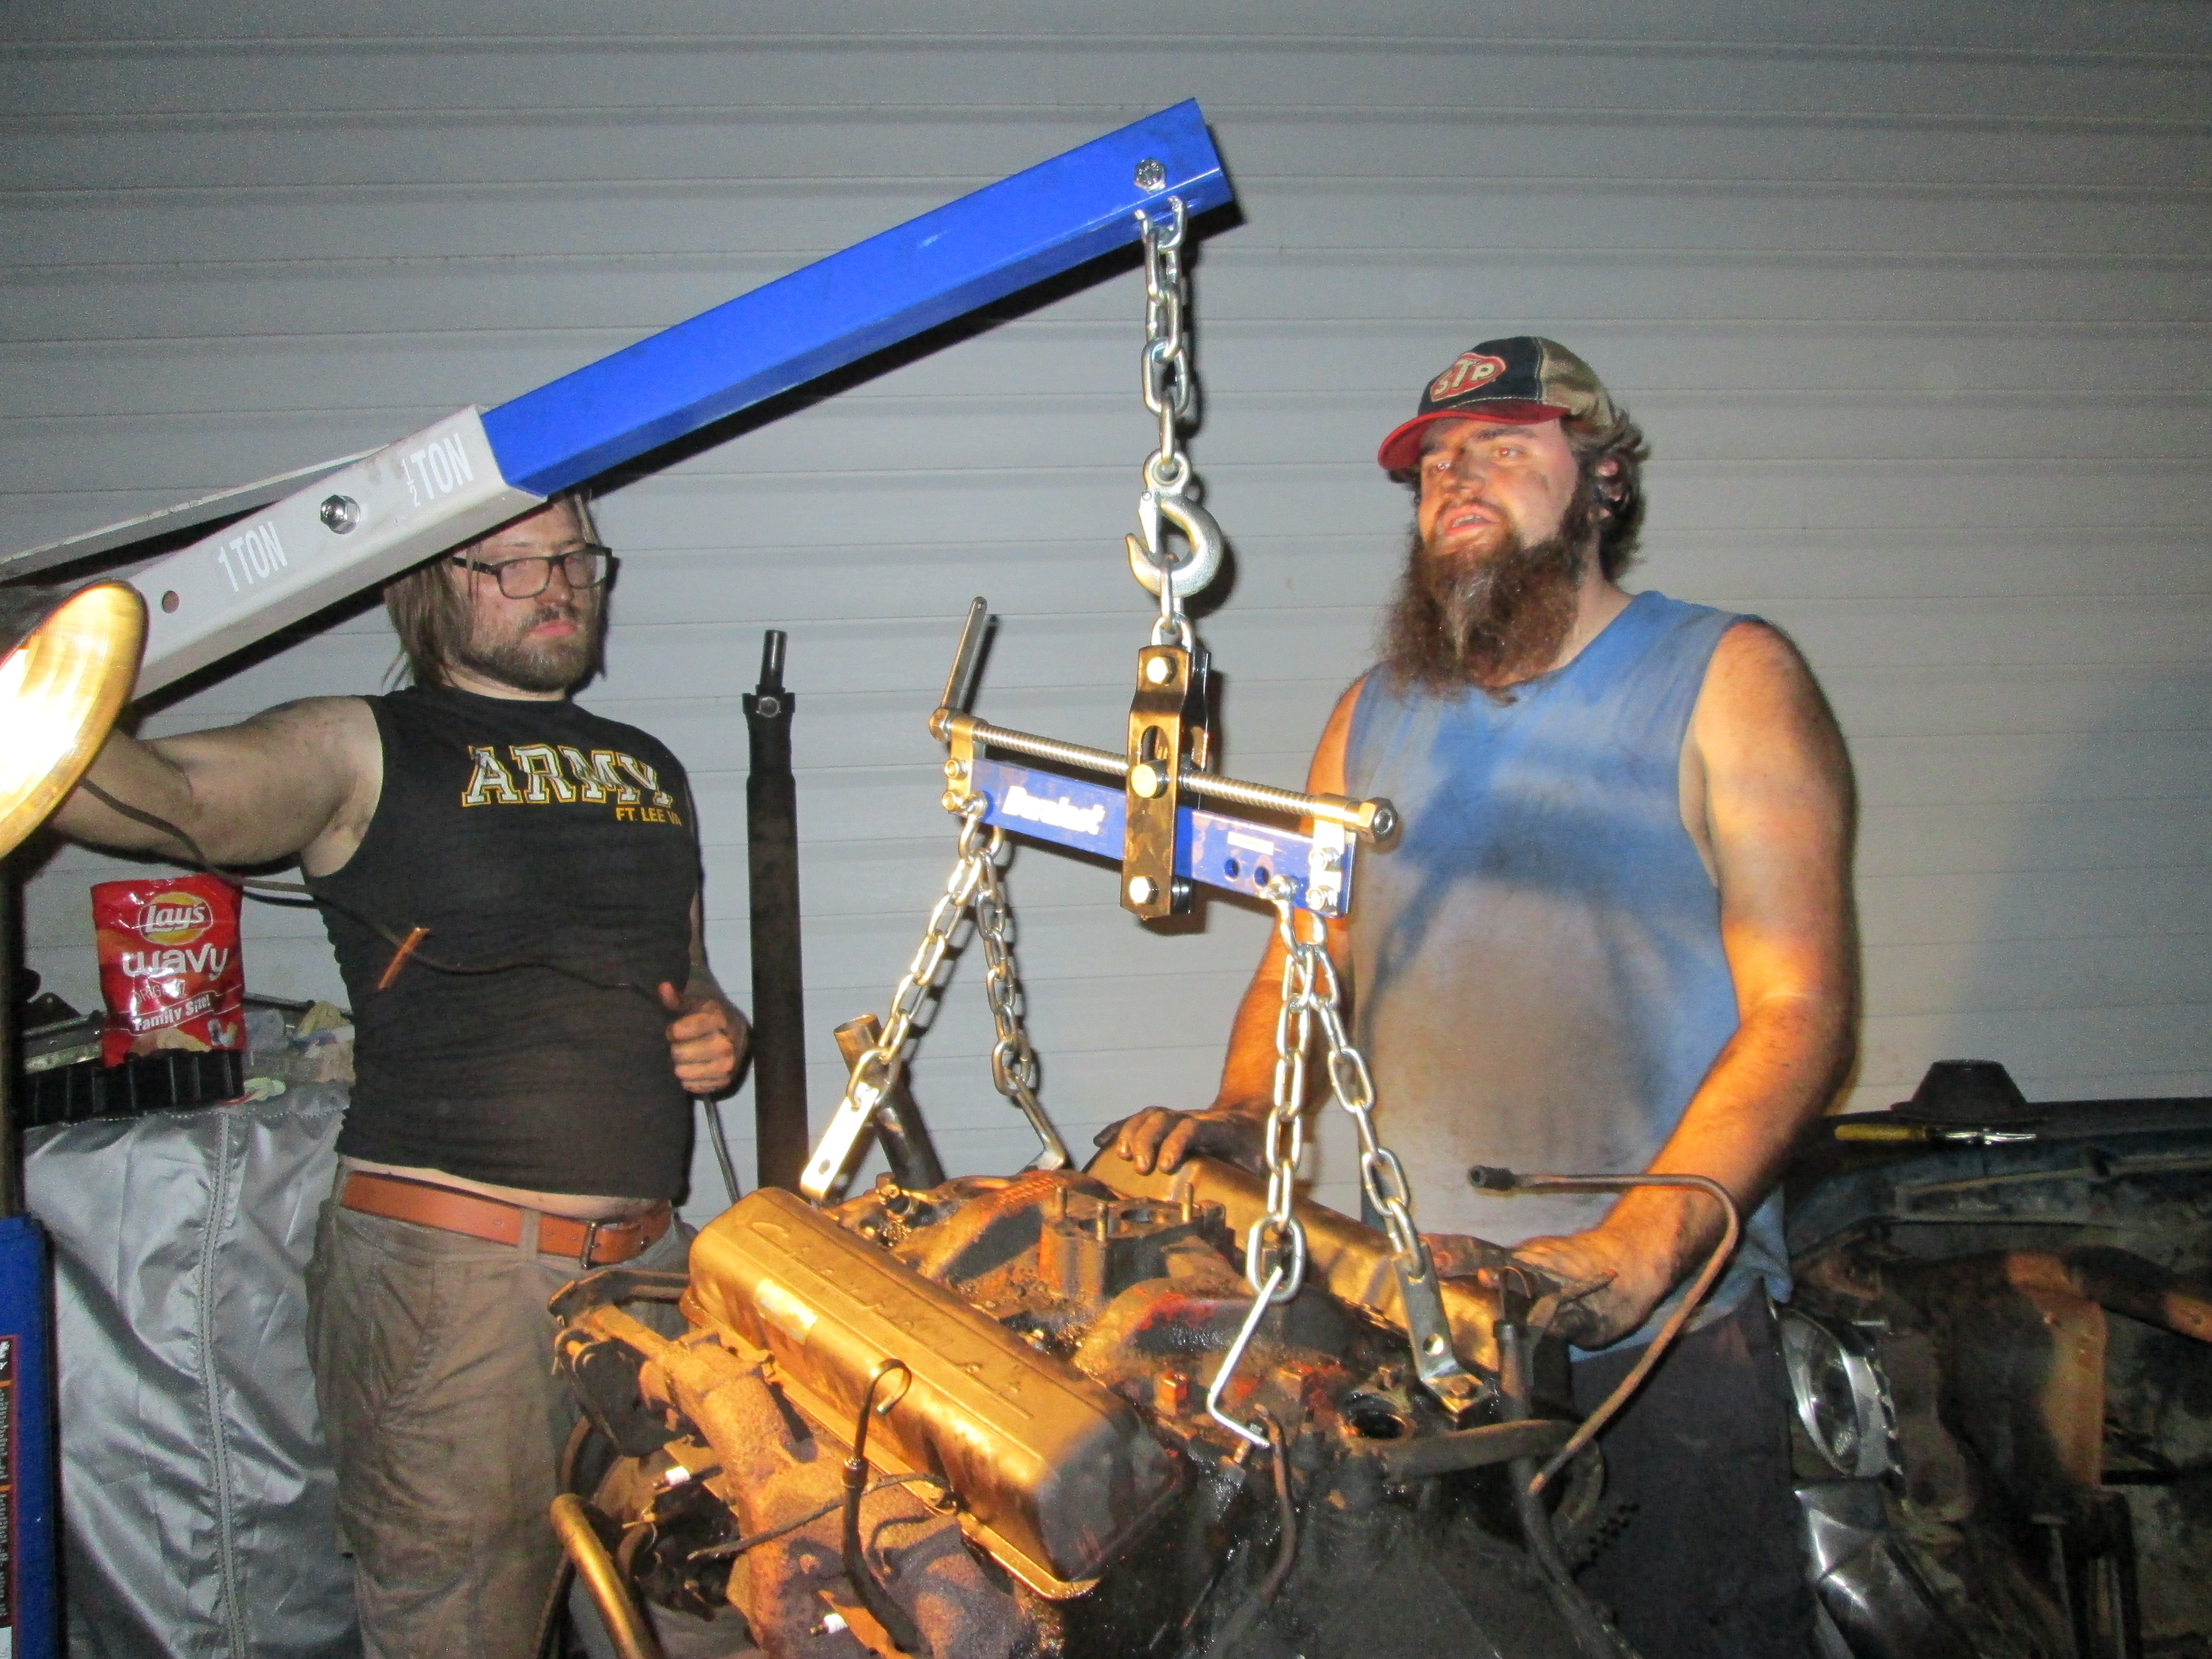
WE GOT THE ENGINE OUT!
Started at 10:30am Saturday morning and finally got it out and sitting on blocks 8pm Saturday night. Sunday at 3pm, we lifted it up again to separate the transmission from the engine, finished at 7pm Sunday evening. Details below:
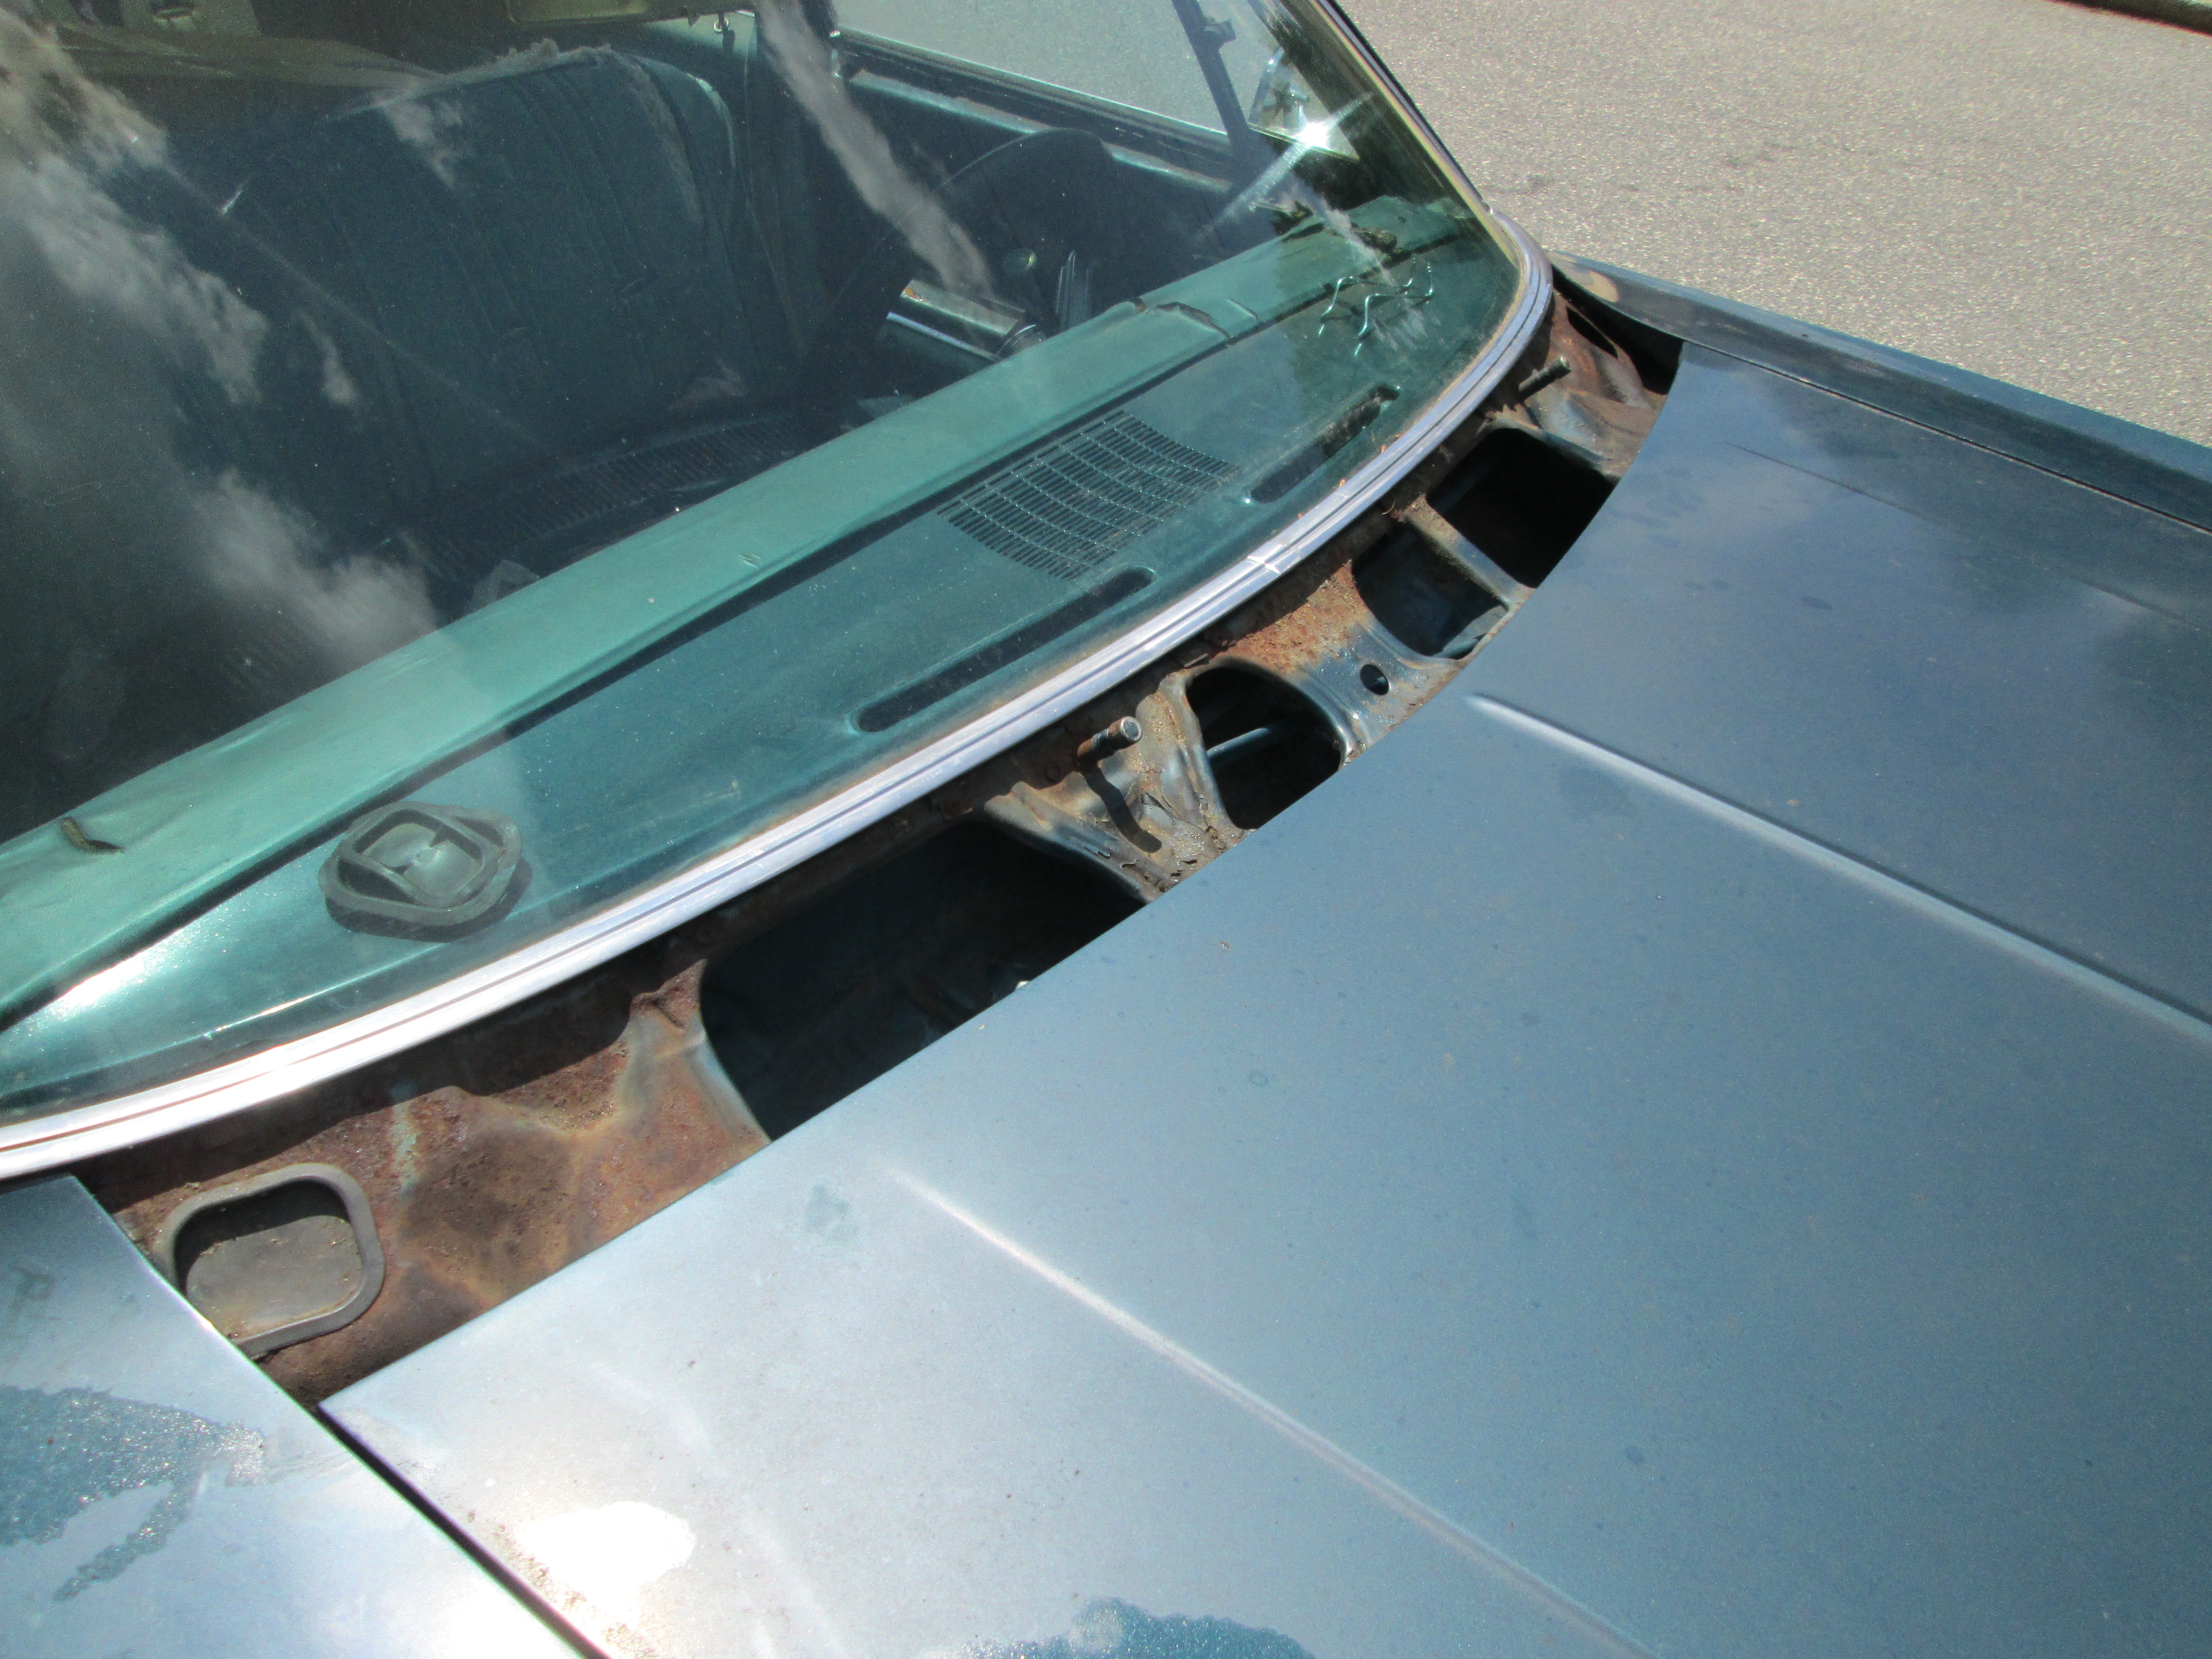
Saturday: removed engine hood (“bonnet” for you UK folks) and drained the fluid from the radiator. Was a good lime green color, so we don’t have a coolant issue. Was difficult at first as the drain plug was beyond usable, couldn’t get it opened. So we had to disconnect the lower hose from the radiator and most of the fluid gushed out into our pans. (“Most” is probably an overstatement as we were all covered in so much fluid at the end.)
I disconnected the spark plug wires and battery. Dana took care of the heating lines; the rubber hoses were so hard to get off the plugs.
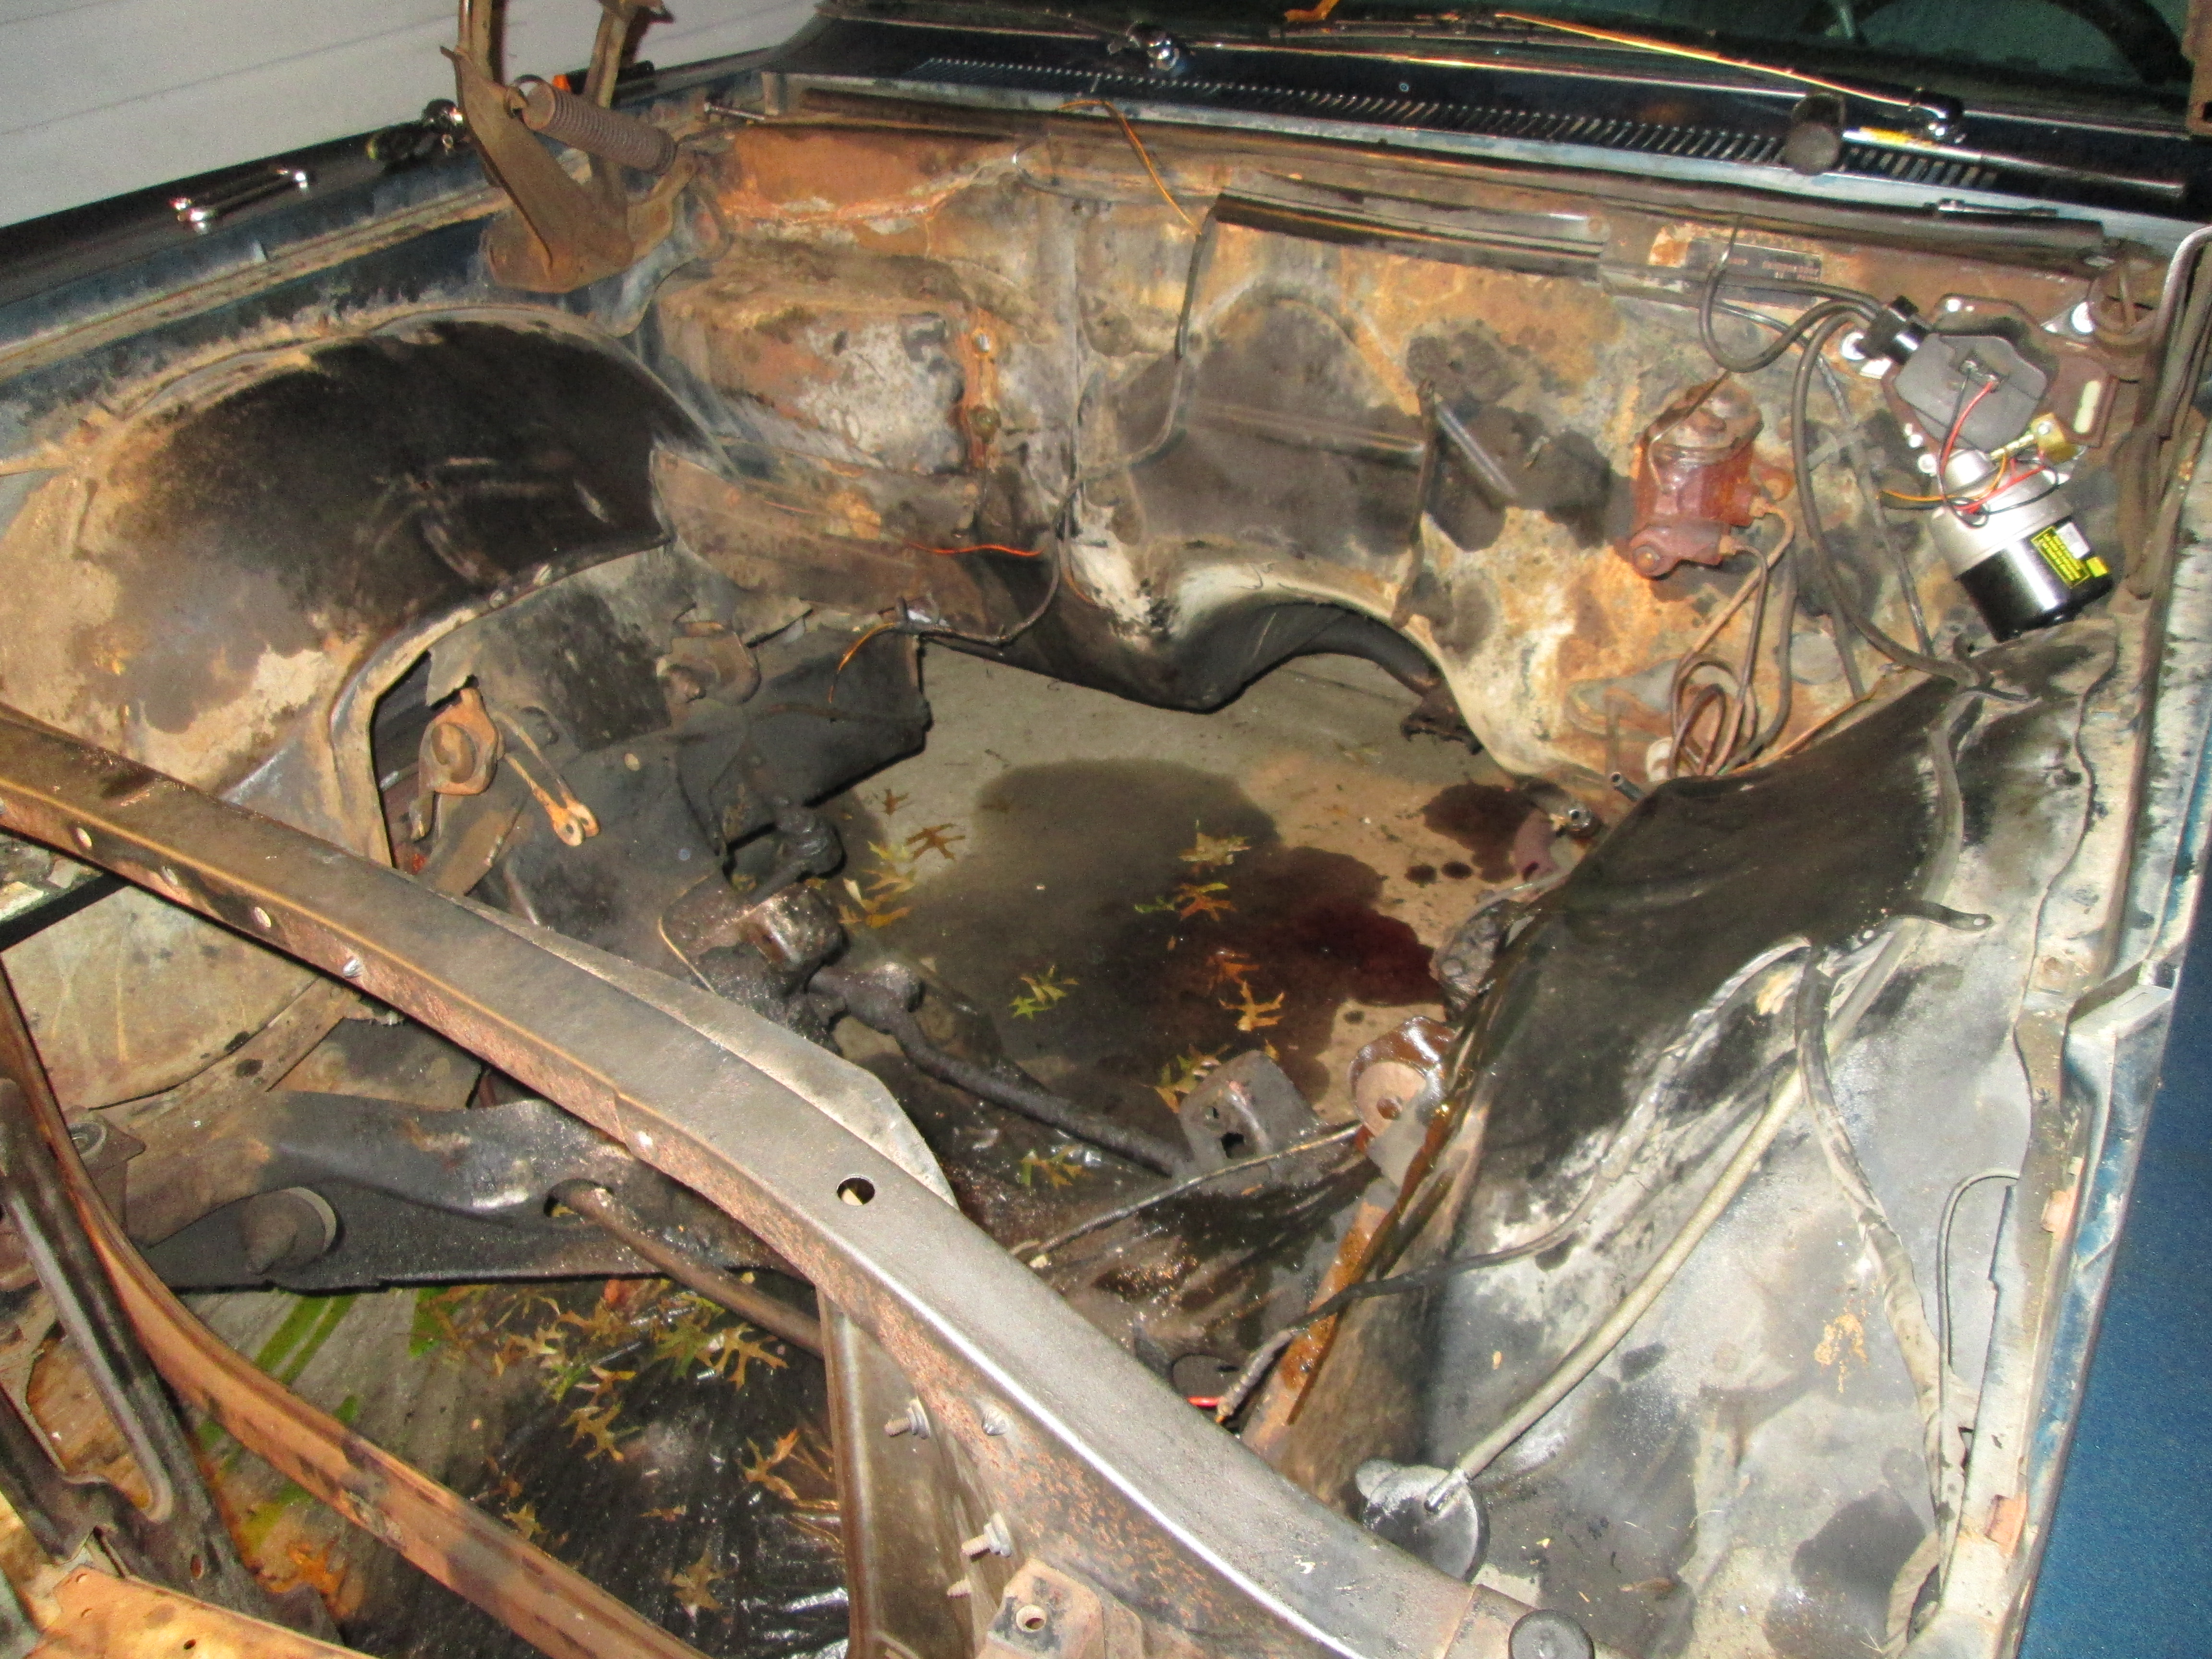
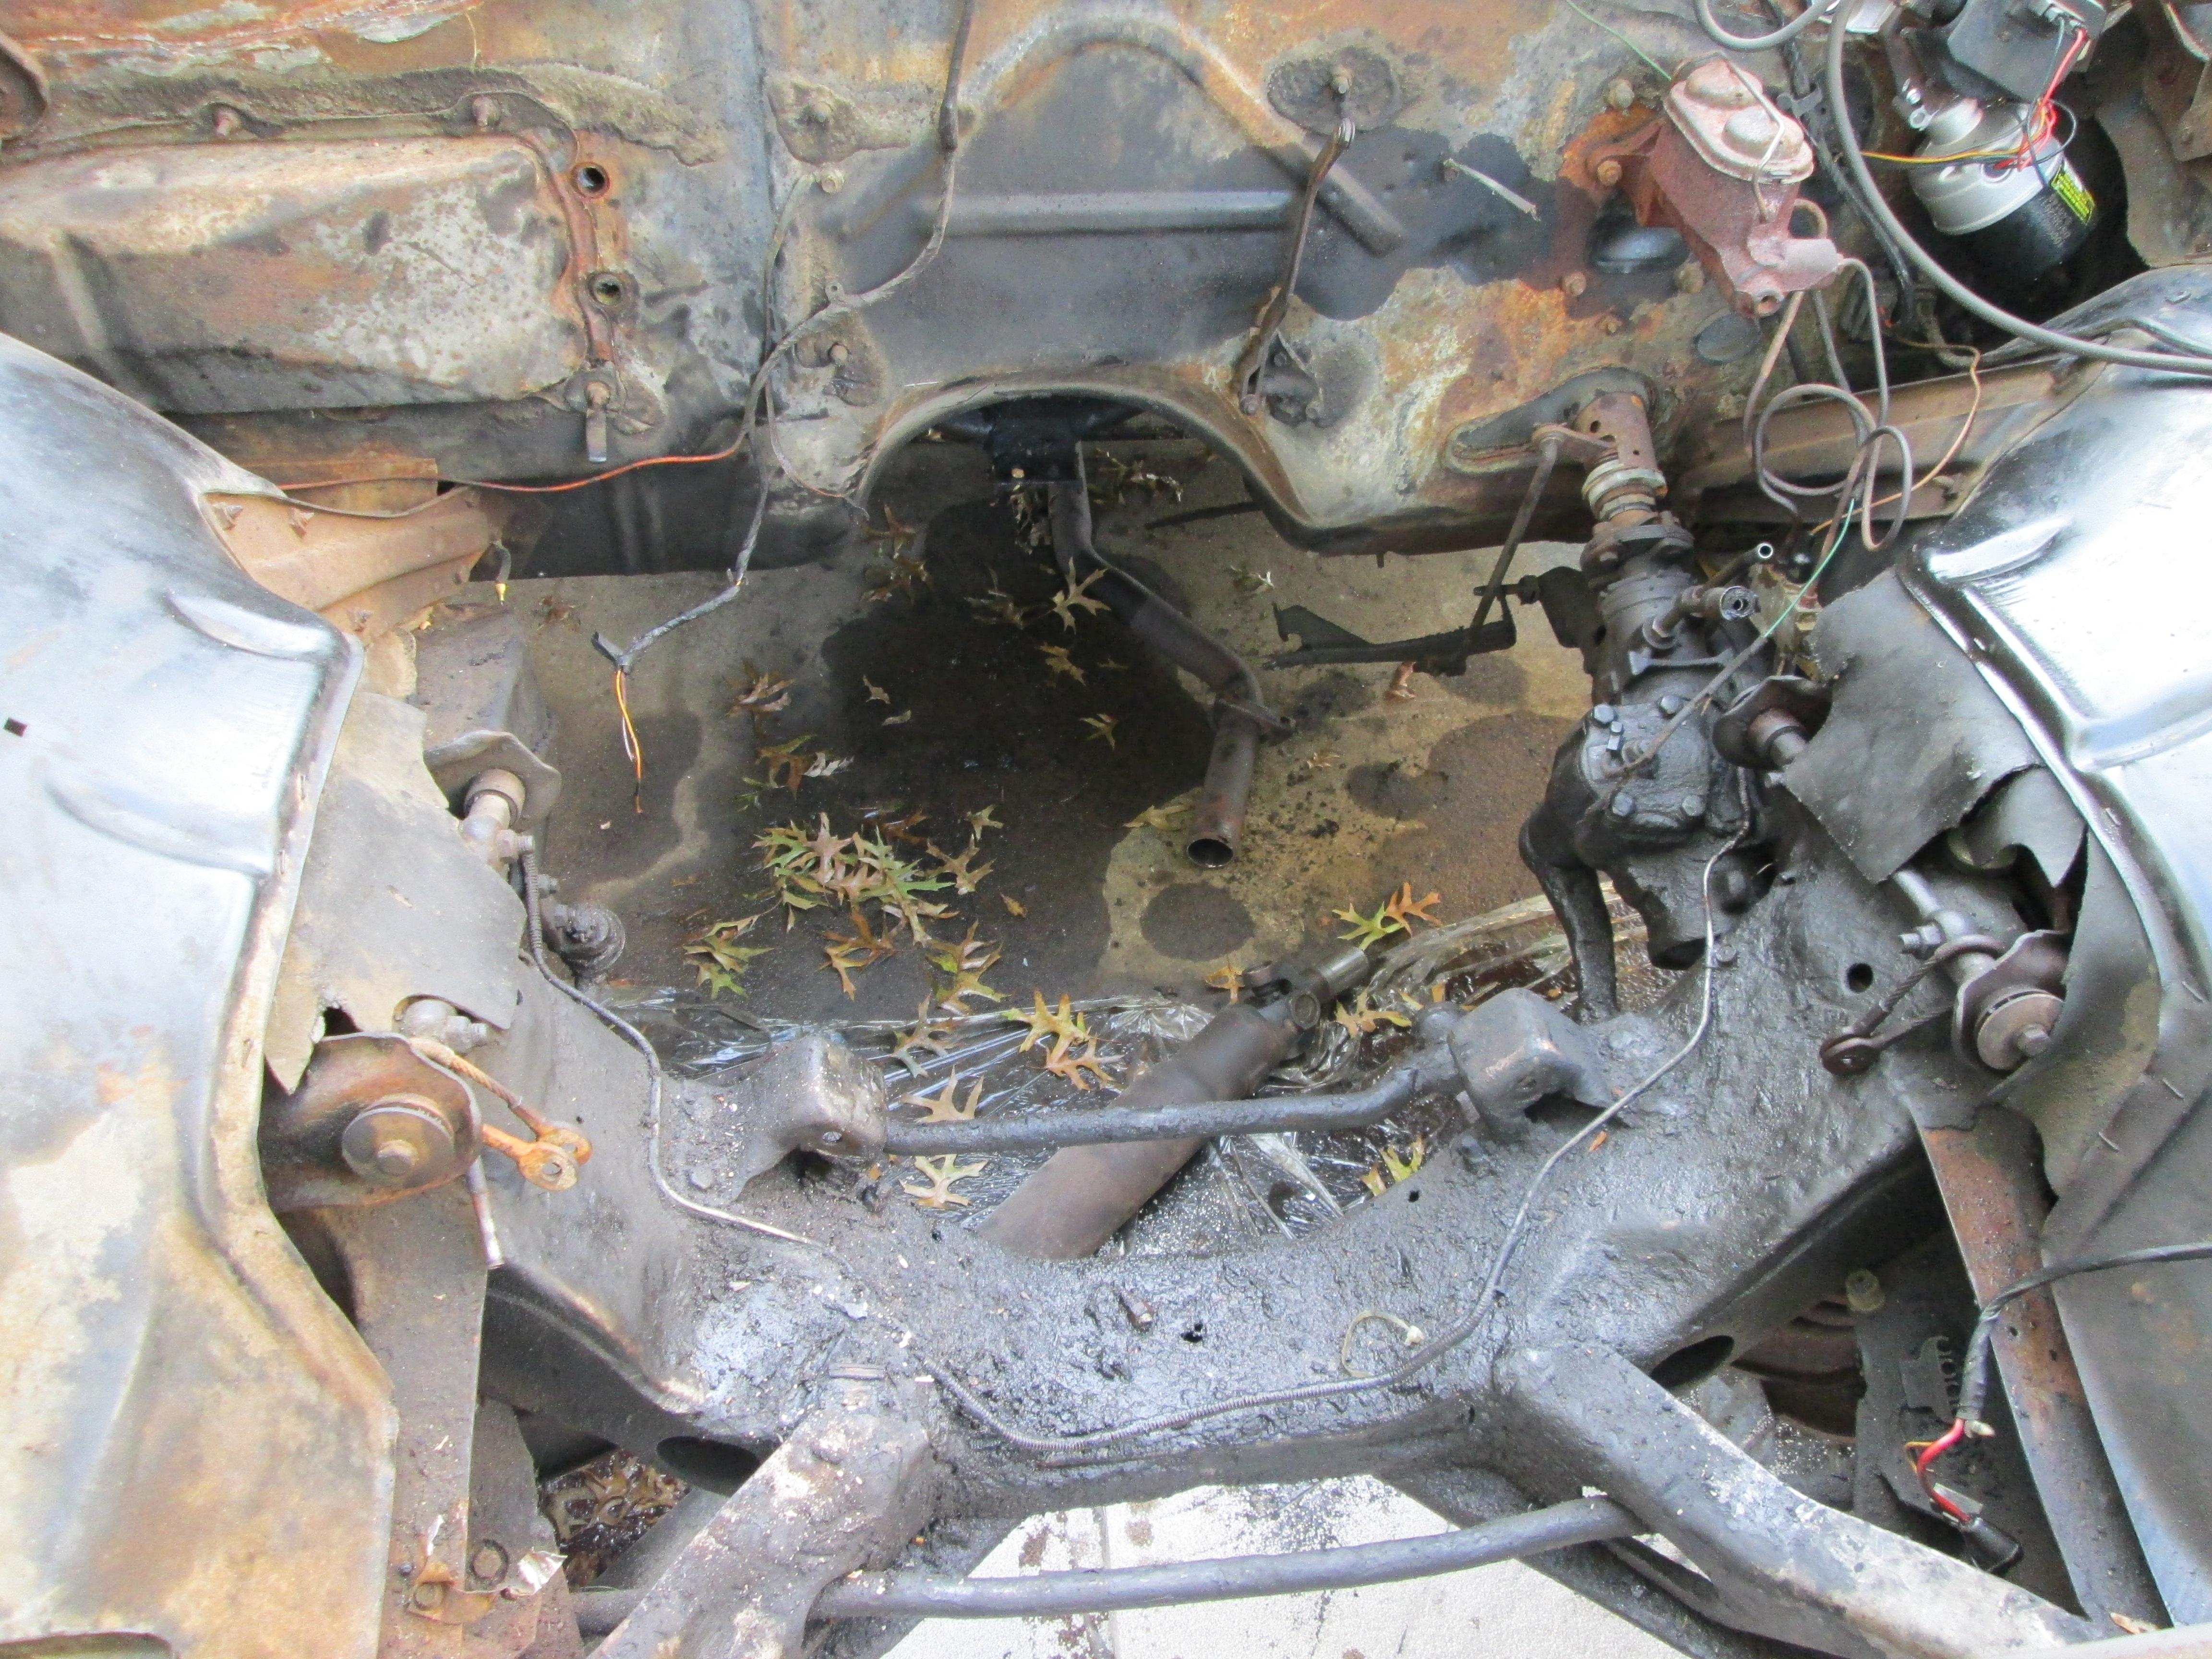
Dana and I focused on removing the radiator and some of the body work from the front to make it easier to get the engine out. More room is always better,
Lot of the bolts were rusted on and crusty, we found that cleaning them with a wire brunch on a cordless drill and then spraying WD-40 on the bolts resolved this issue. Had to cut the transmission coolant lines as they were just not loosening. Didn’t have a reservation against that as we’re replacing pretty much everything except the engine block and most of the internals of the transmission.
We then jacked the front end up for Anthony to start draining the oil and transmission fluid, that was probably the one task that went smoothly as it’s a simple procedure.
We then disconnected the fuel line from the fuel pump and Nick got some gas in his mouth, which he spit out immediately and rinsed out with a nearby Angry Orchard.
I hacksawed the exhaust line from the Y pipe leading from the headers to the muffler. Found out later that I should have cut from the headers, not after the Y pipe. Nick and I then worked on removing the transmission’s mounting bracket from the frame.
Next was the drive shaft. It’s a yoke with pins holding it together between the rear differential and the transmission shaft. This was a very frustrating task for Nick and Stephen, as there was so much rust and dirt built up from the many miles this car drove. Found that the wire brush drill trick worked. Dropped it from the differential and was then able to pull it from the transmission.
I took care of disconnecting the electrical groundings. Stephen syphoned out the power steering fluid from the reservoir and didn’t get a lot of fluid out. We all later found out the hard way that majority of the fluid was in the steering gearbox and hoses, as when we cut the lines (rubber hoses wouldn’t disconnect) the fluid sprayed everywhere. And then just as we thought it were done, Stephen was looking at the engine mounts when he told Anthony to turn the steering wheel and more fluid gushed from the severed hoses… all over Stephen.
We jacked up the rear to work on removing the exhaust line. Nick and Anthony removed all the brackets, some bolted and some welded, ultimately found that the exhaust ran up between the axel and the floor pan, so we would have to cut it. However, an angle grinder was no where to be found, and my hacksaw blade was done. We ended up leaving it there, once I get an angle grinder, I’ll make quick work of that.
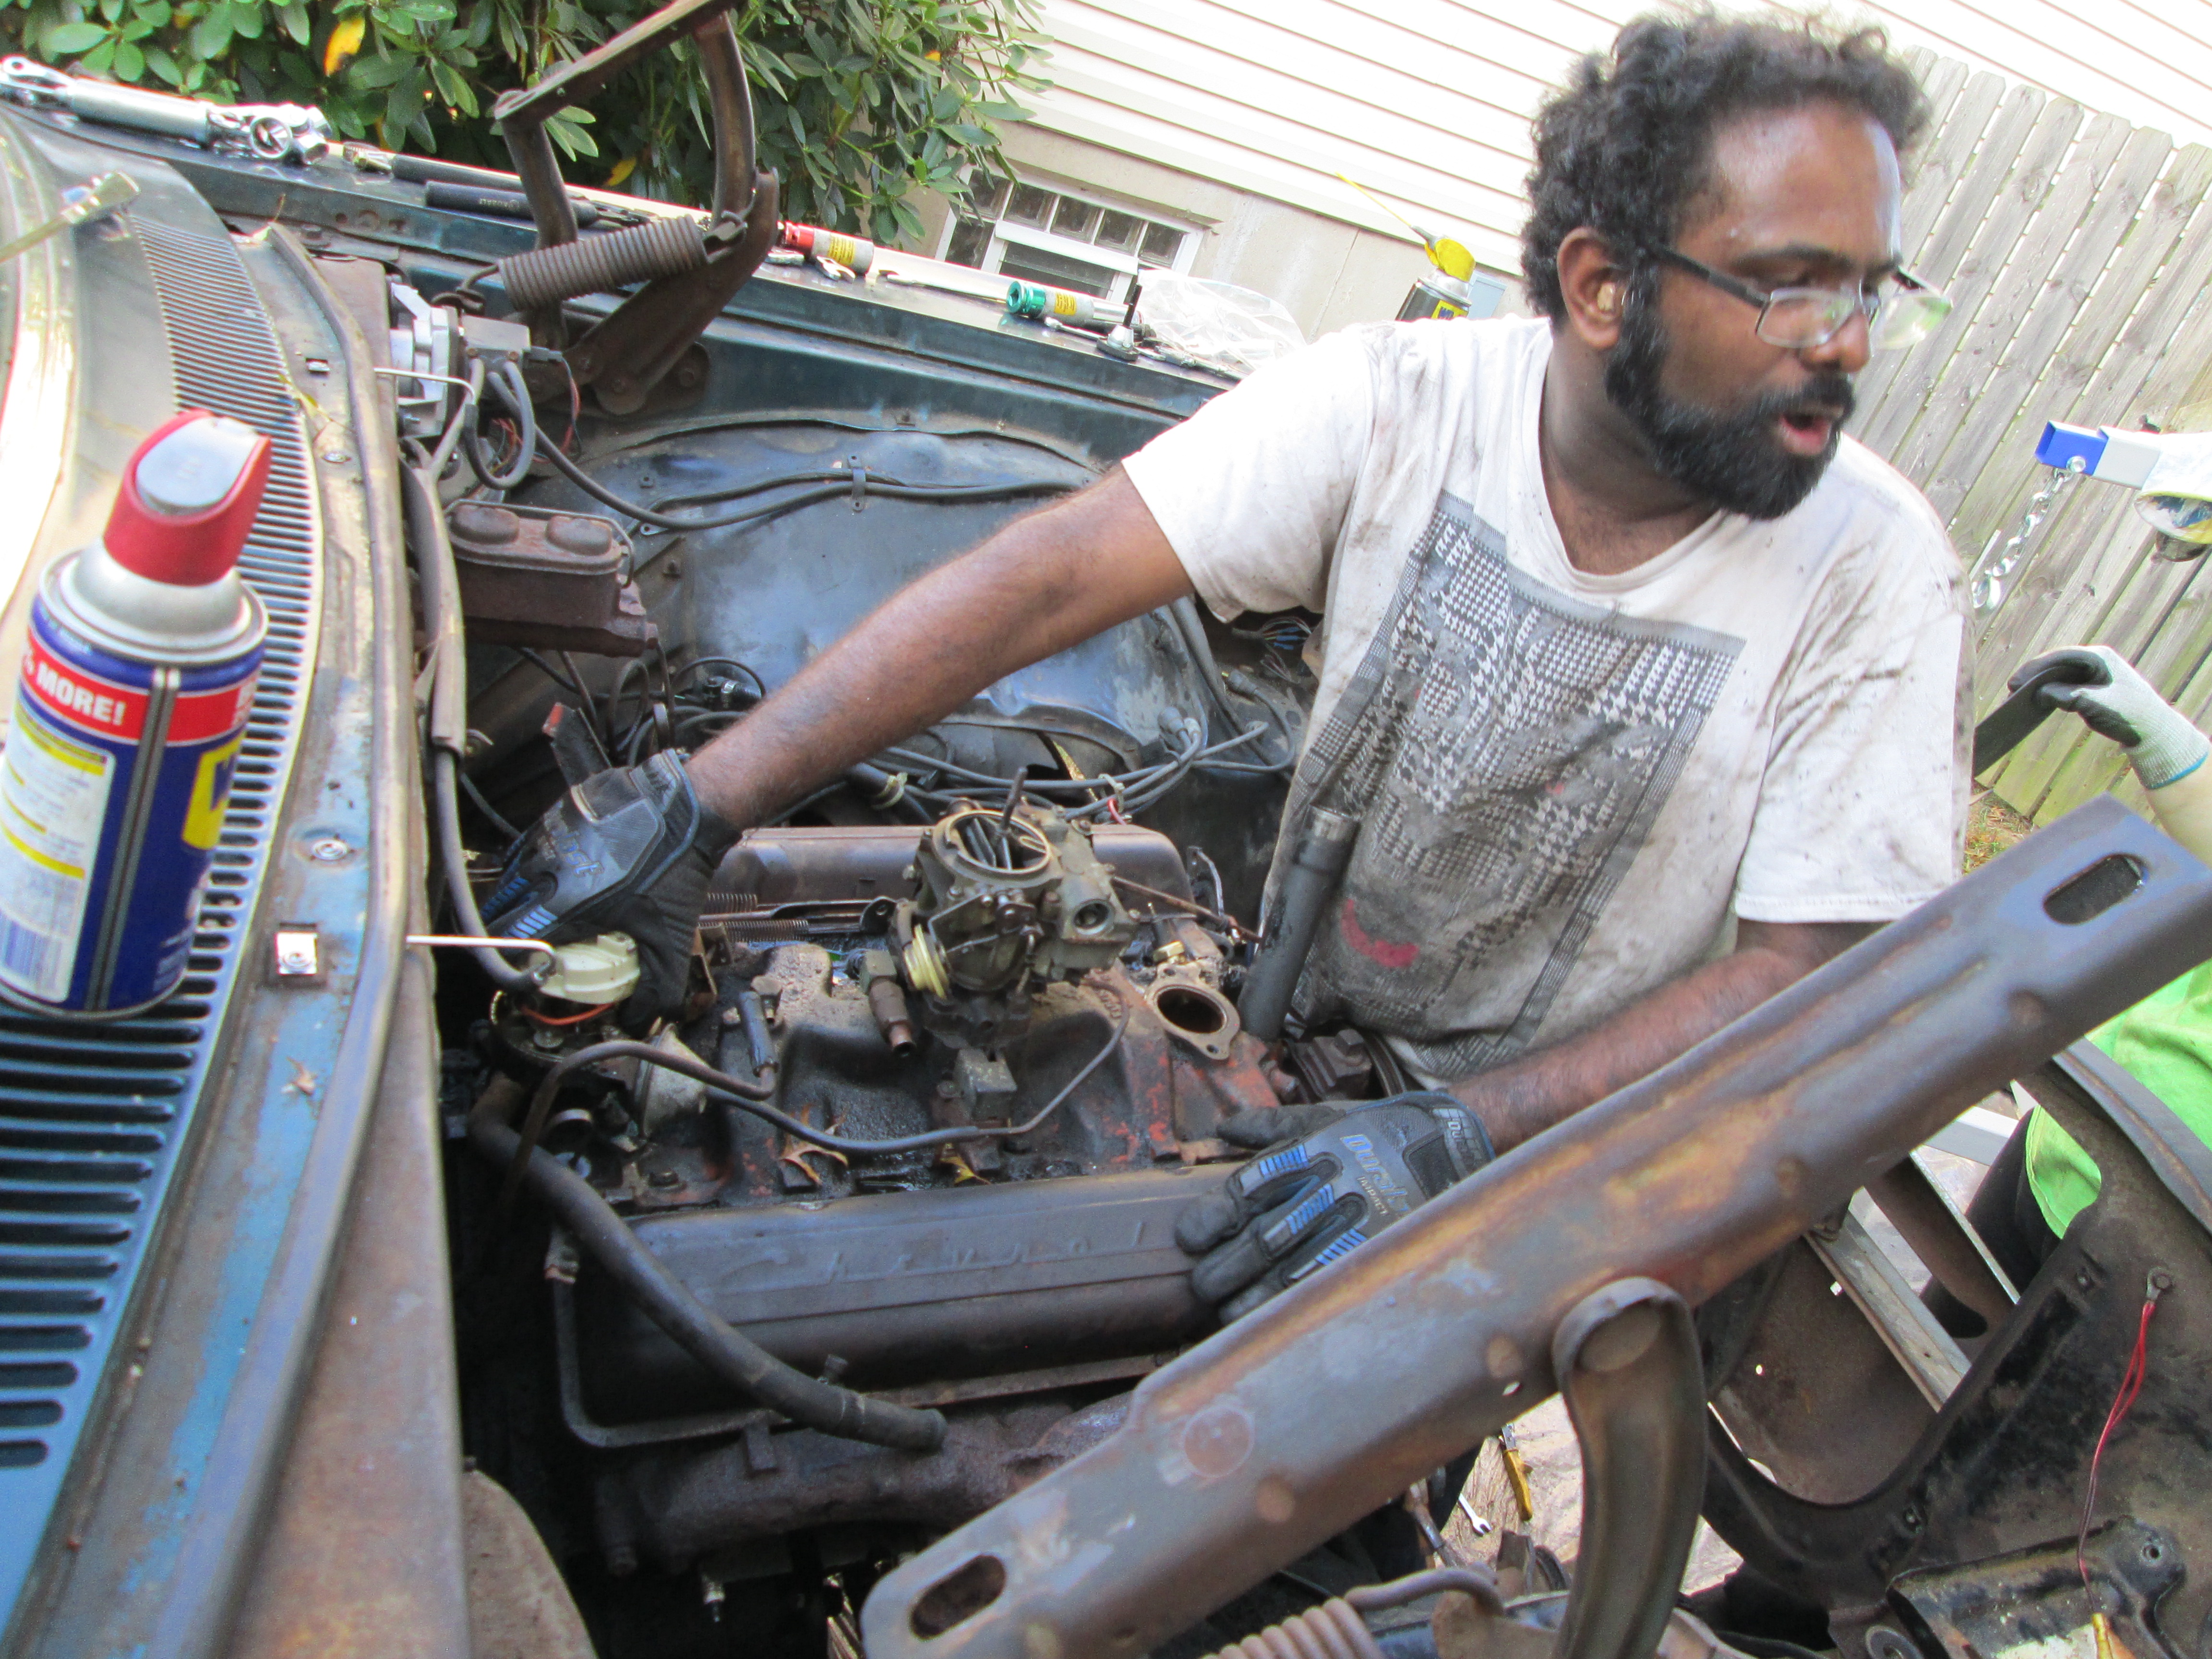
Stephen, Dana, and I began removing the Carburetor, ignition coil and spark plug distributer. Ignition coil came off with no problem. Carburetor was annoying as we had to climb into the engine bay to get a good angle with the socket wrench. Spark plug distributer was horrible as the bolt was positioned under the cap where only a wrench could get it out with 1/8th of a rotation at a time. Was very frustrating, but we got the bolt out, then I had to wrestle it out from the engine where it’s gear meets the cam shaft. We then disconnected the transmission control levers from the shifter stick on the steering wheel.
At this point, we were able to address the engine mounts. Anthony and I worked on the passenger side mount, wasn’t too difficult to remove. Anthony then went over to help Stephen with the driver side mount which was being blocked by the power steering pump and reservoir, which was proving difficult to remove. We managed to get the nut off of both mounts.
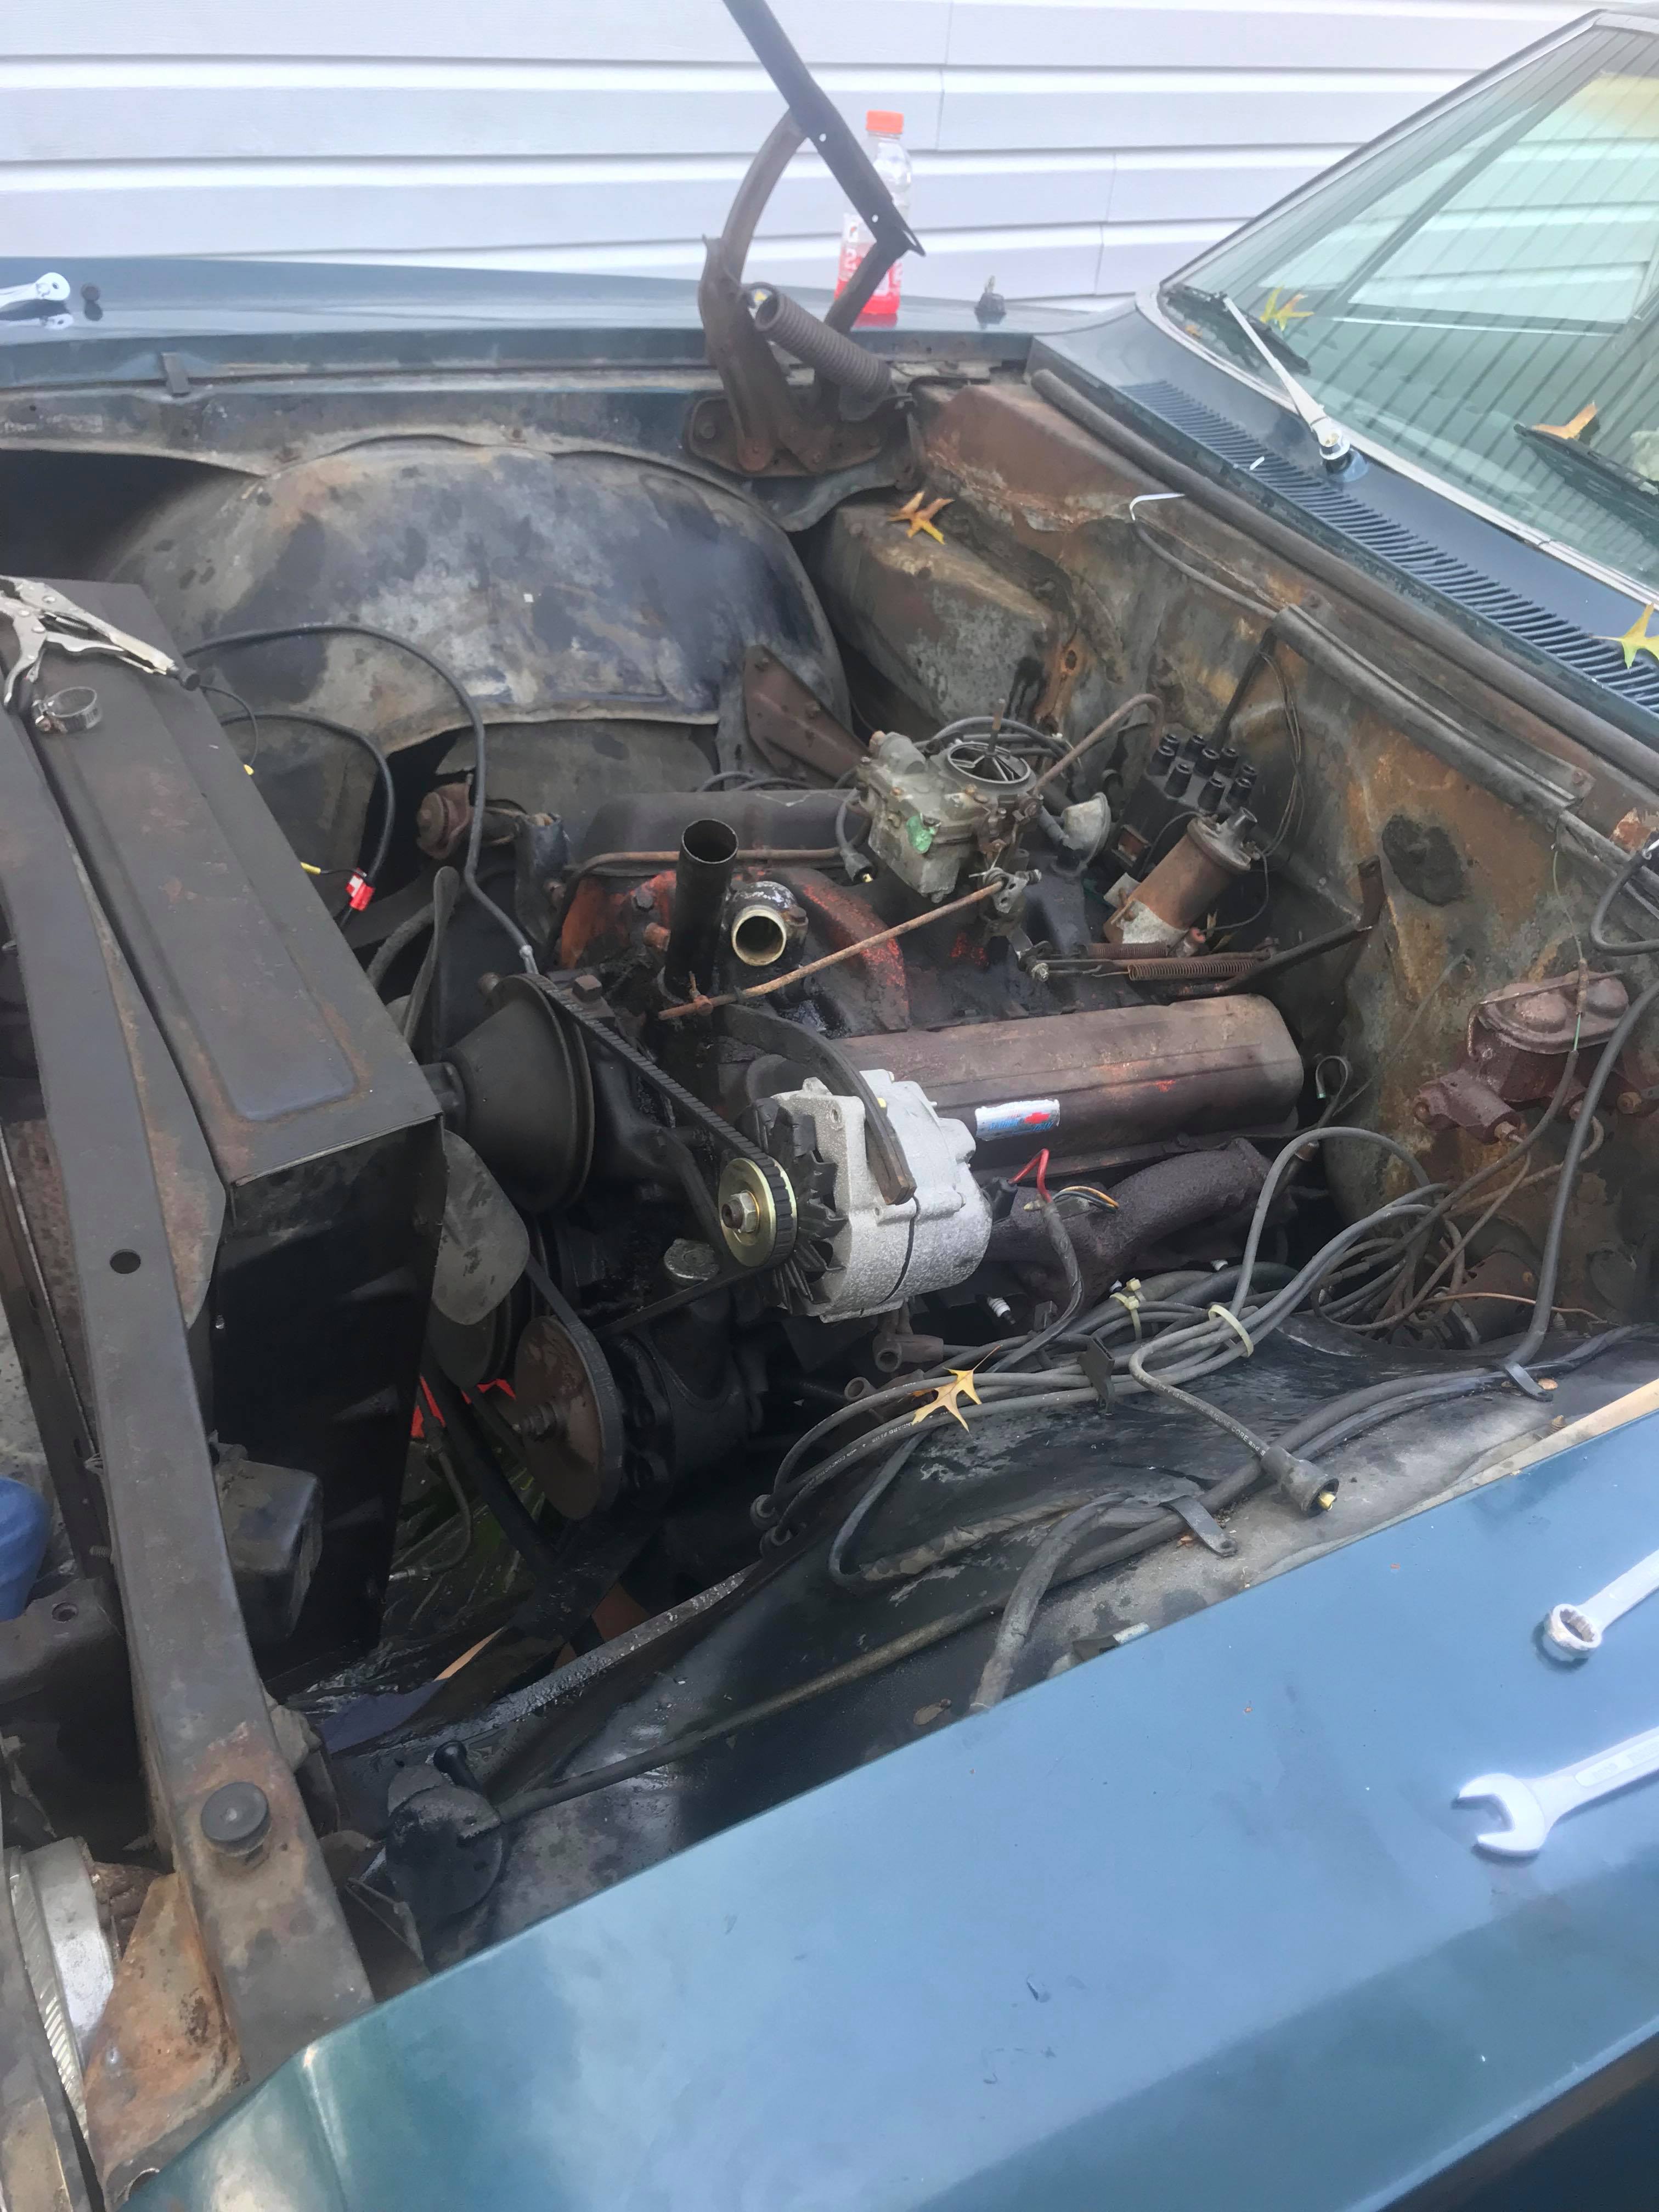
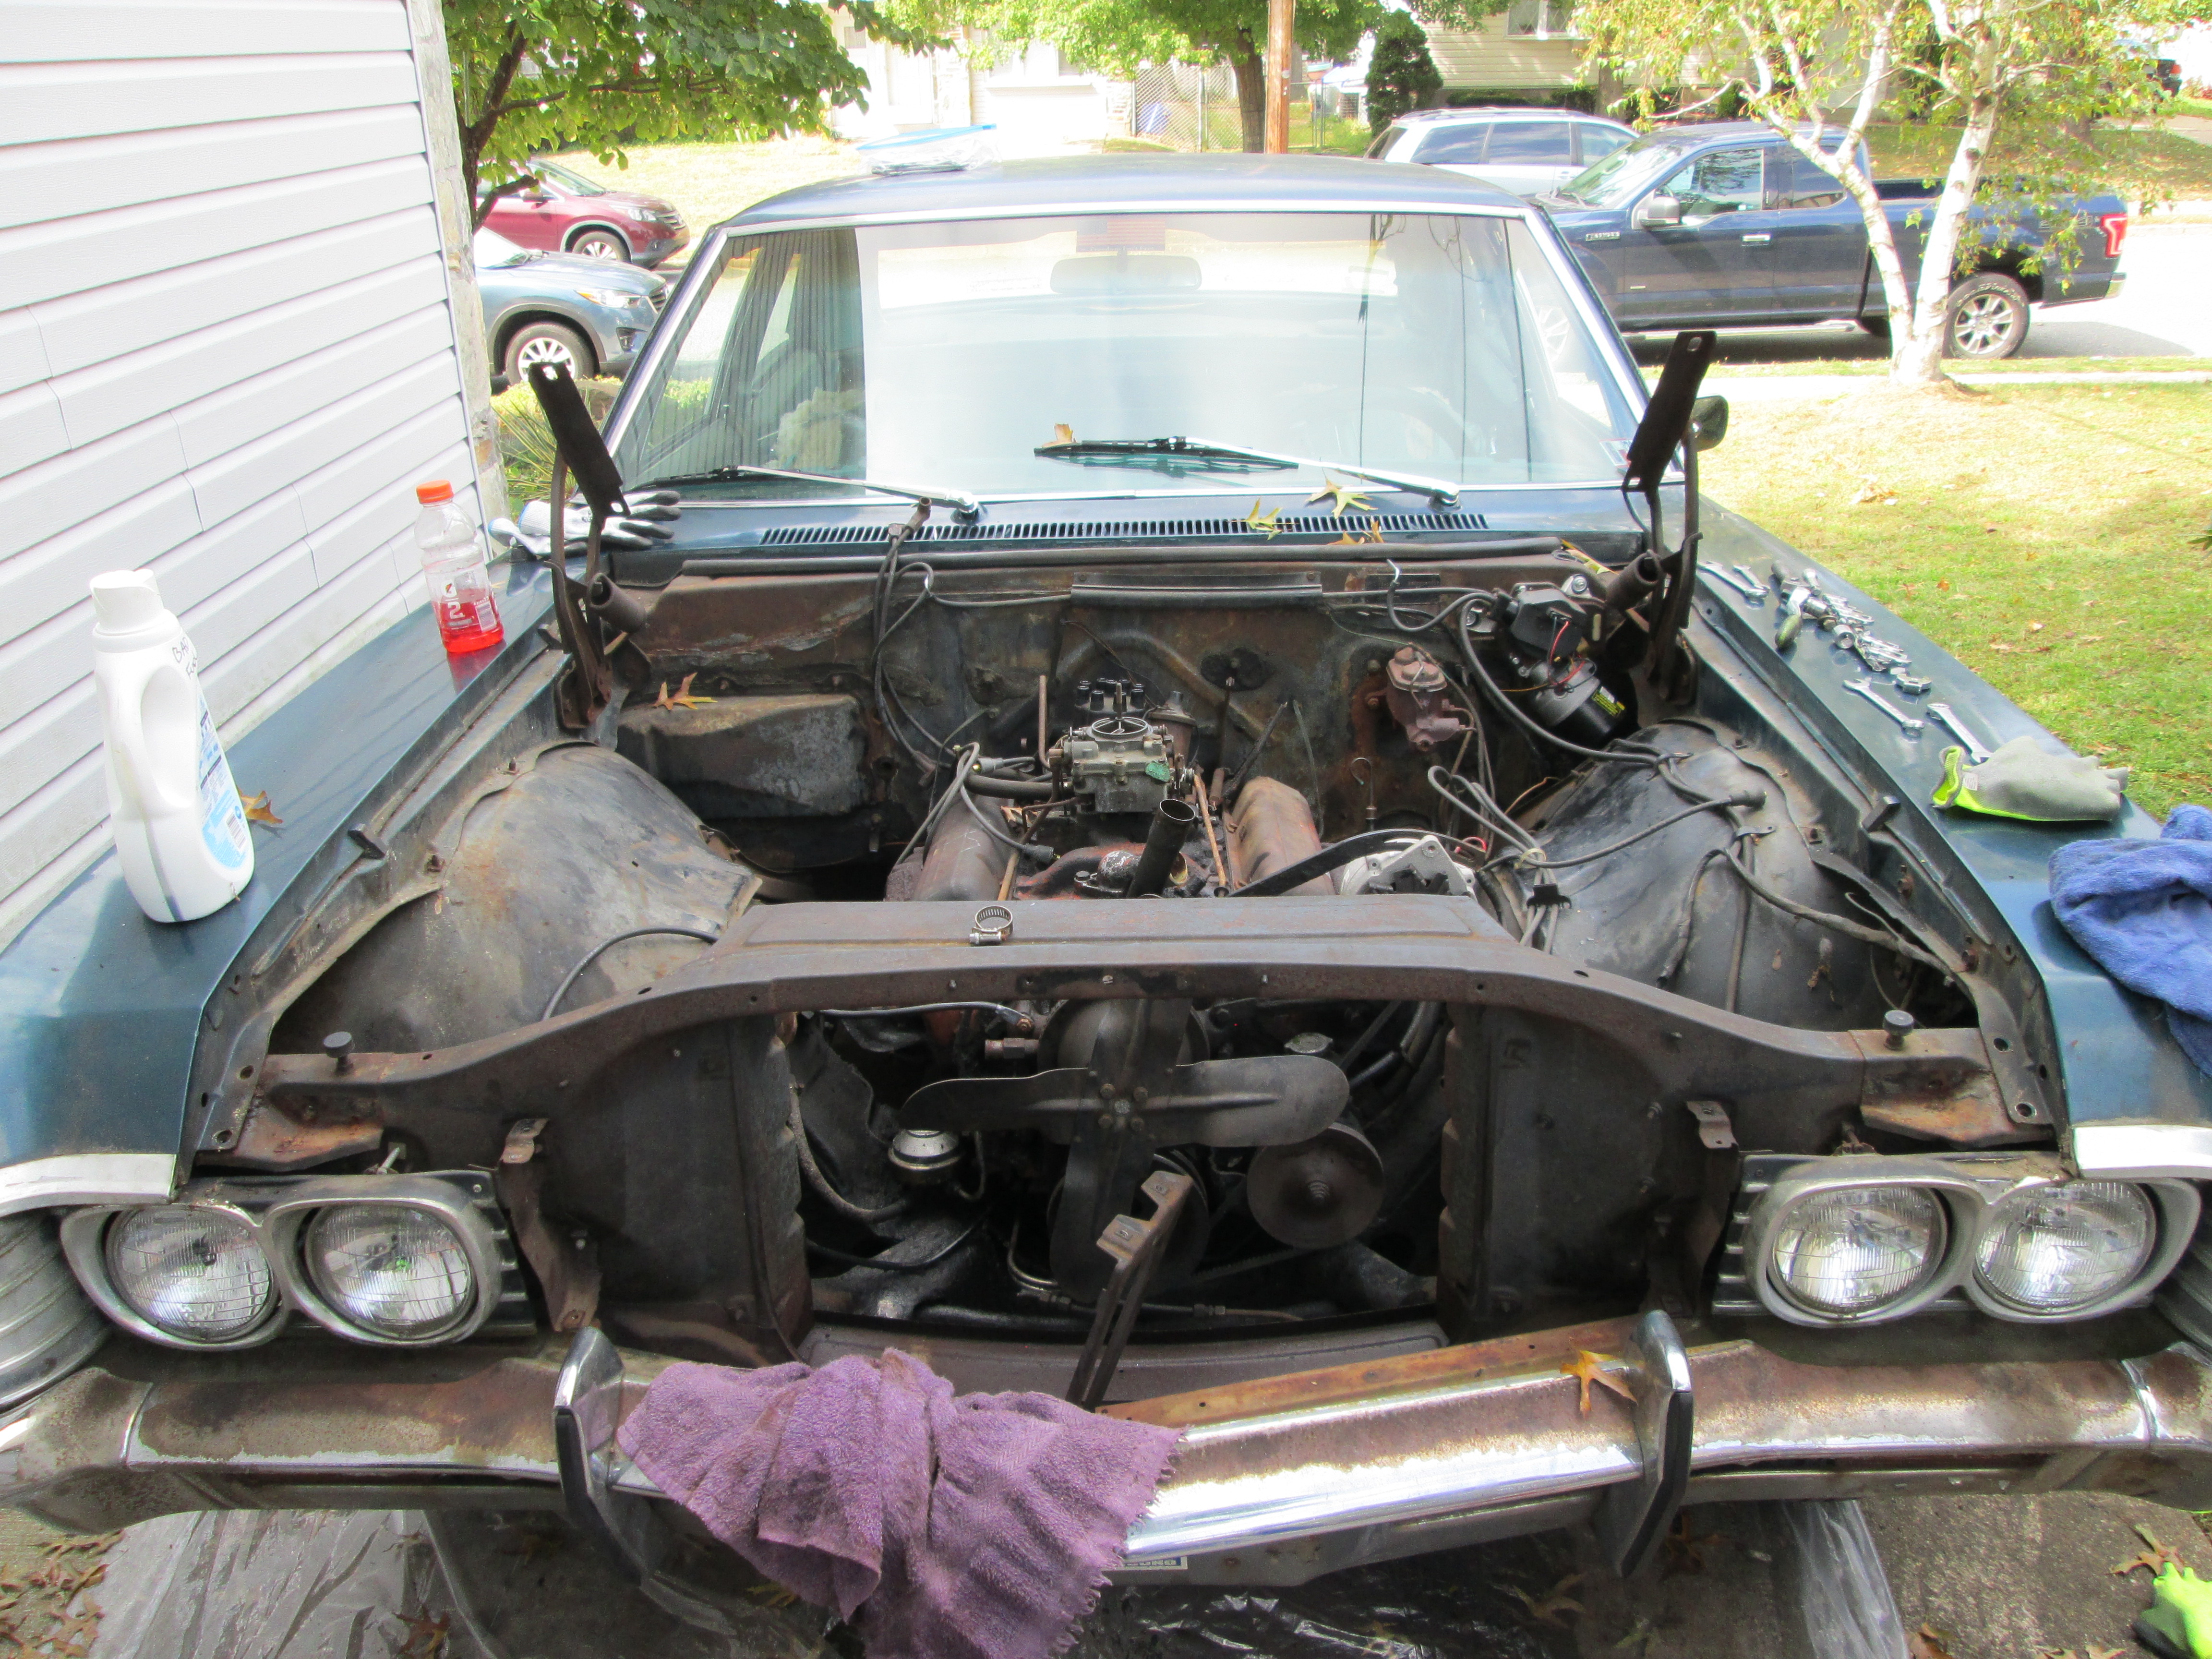
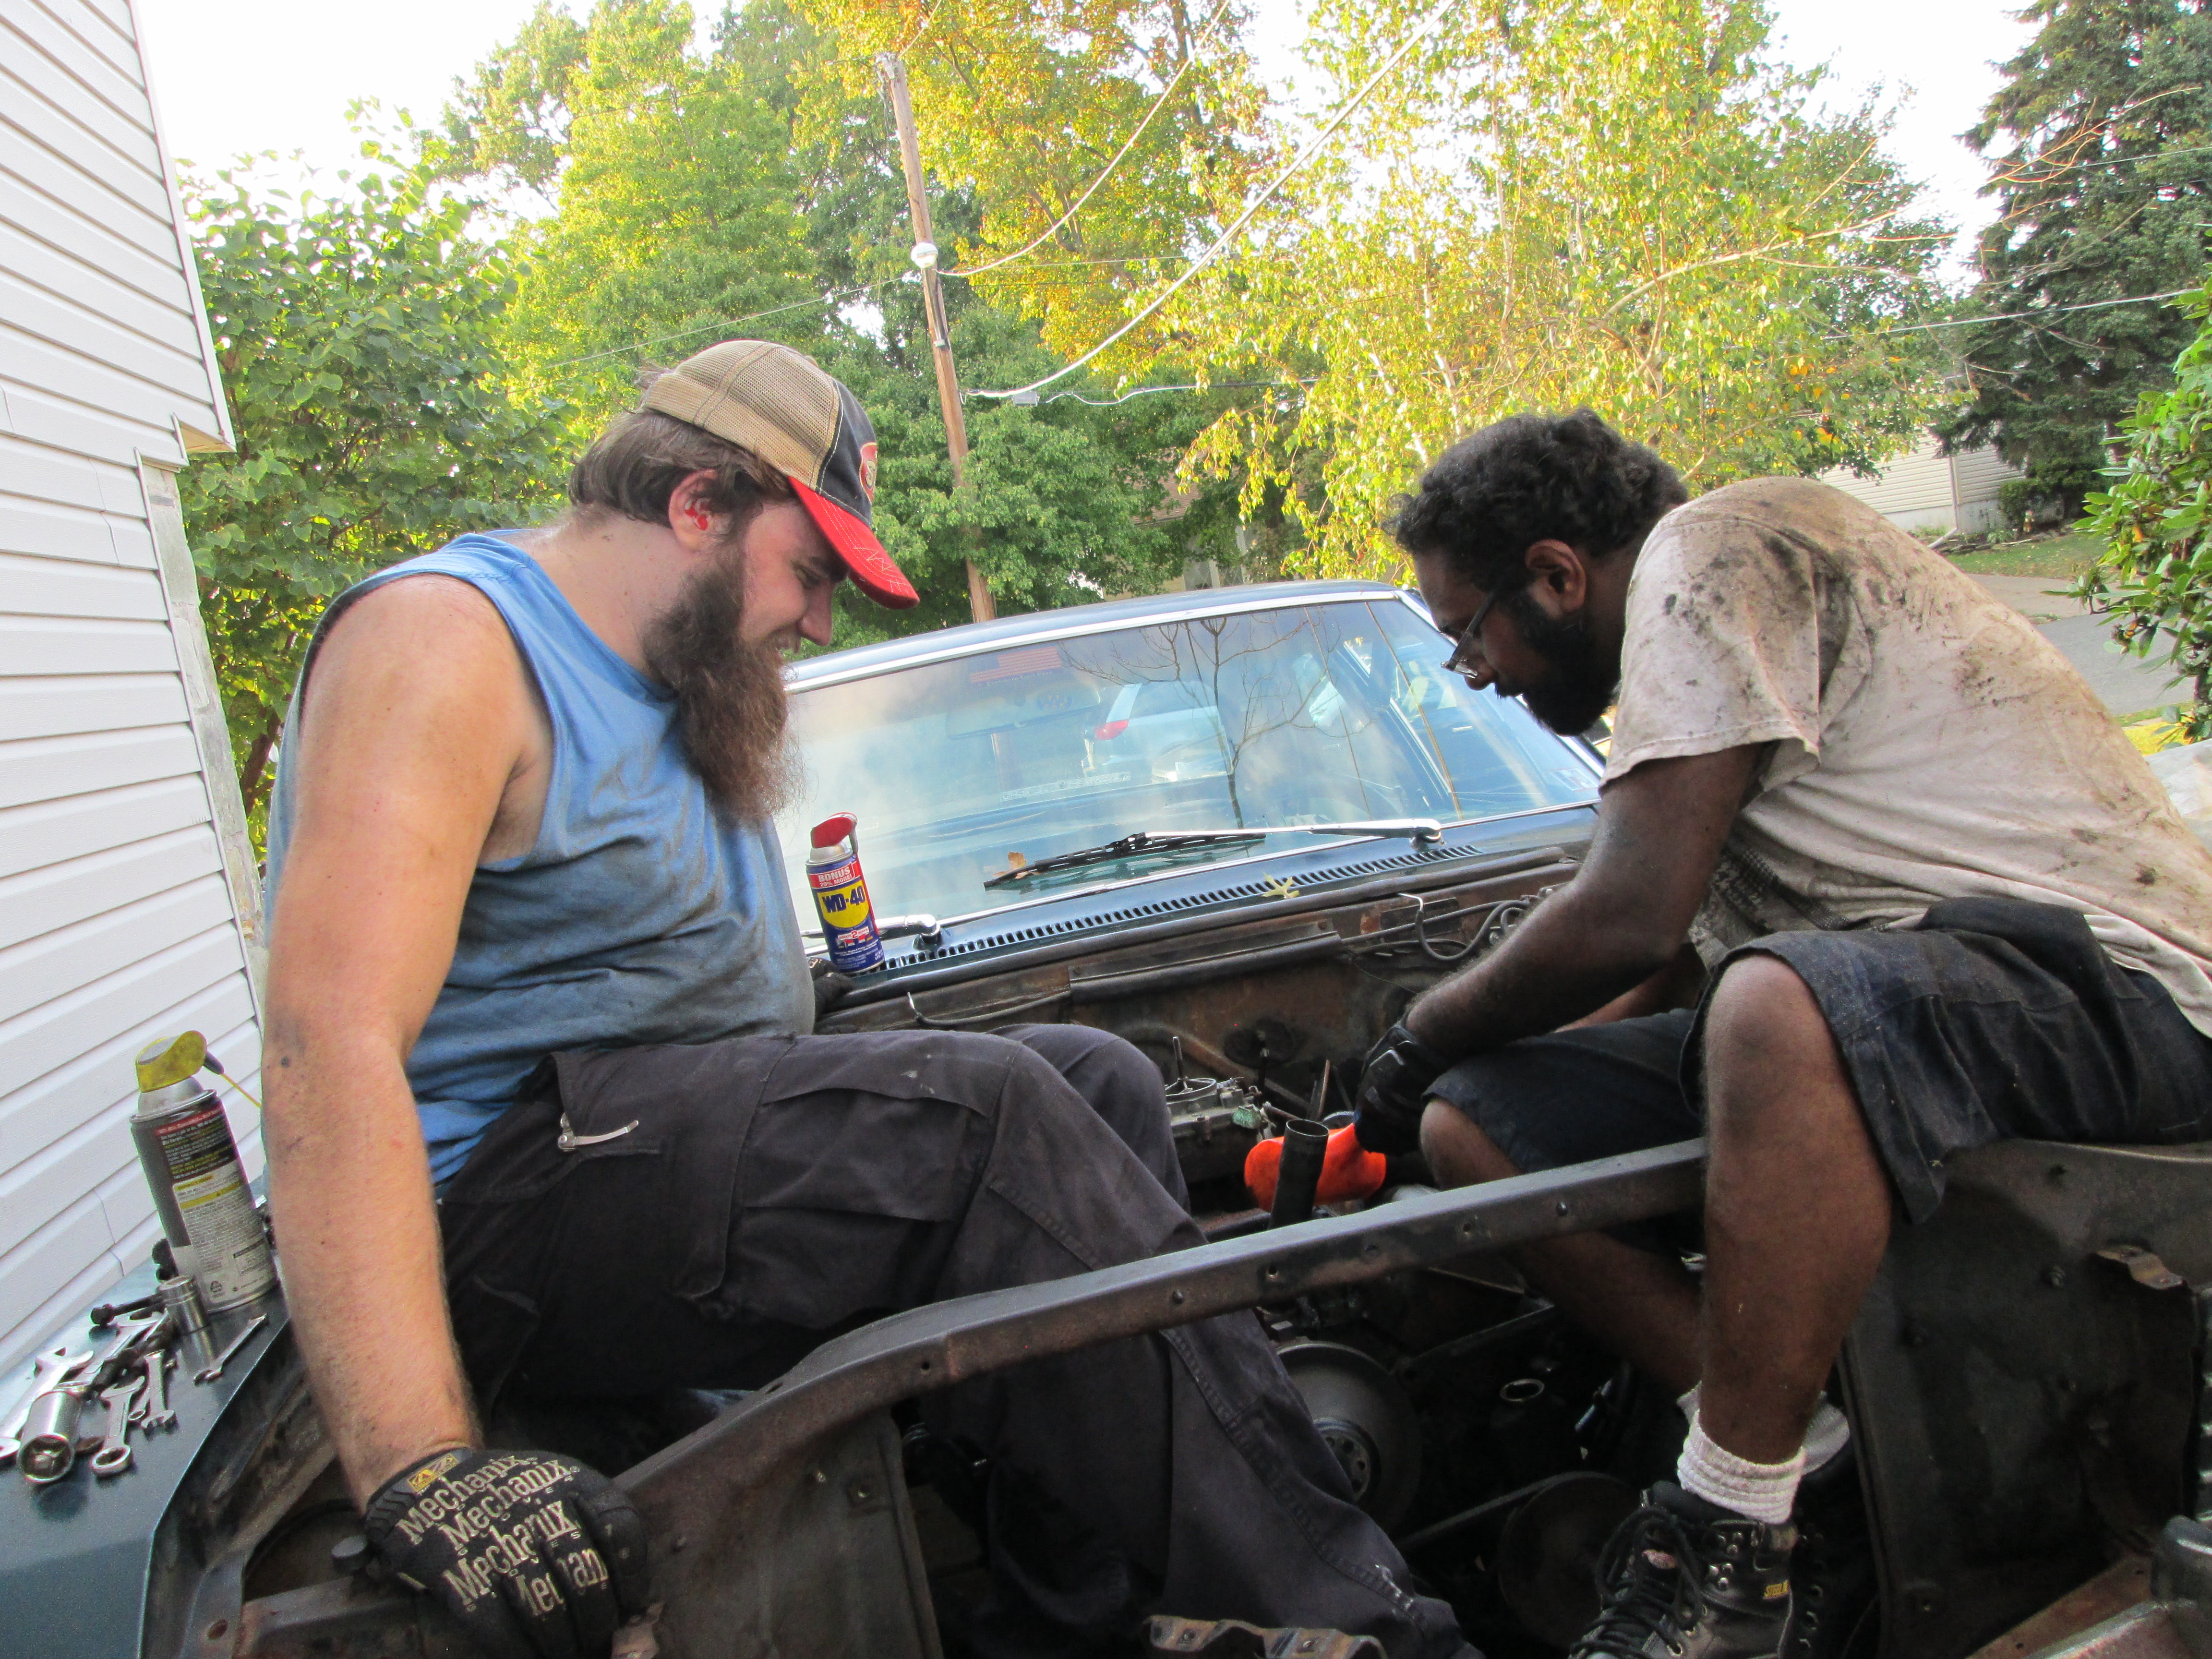
So now everything was disconnected from the engine and transmission. All that was left were the two factory engine mount bolts (as we removed the nuts) and two engine support cables that were added due to a recall from Chevrolet. We brought the engine crane over and bolted the chains to the outmost bolts on the intake manifold on the top of the engine. Now it was 7pm and we lost all daylight. Had to resort to a flood lamp and cell phone flash lights. We began to lift the engine to free the two bolts holding the engine to the frame. Stephen got the passenger side out relatively easily, but the driver side was extremely difficult. After trying different heights and angles, I was able to pull the bolt out, took about 15-20 minutes’ worth of attempts to get it out.
We got to lift the engine up and started tilting it so the transmission would come out from under the firewall. Dana was in charge of the crane height, Stephen and Anthony were pulling the crane slowly away from the car, and Nick and I were checking clearance. We had an issue with the exhaust pipe hanging up against the engine mount on the frame. Apparently I should have disconnected the Y pipe from the exhaust manifolds. We were able to bully it out though, as the nuts to remove the exhaust manifold were too damaged to remove easily. Once the exhaust Y pipe was free from the mounts on the frame, we were able to lift up and out. With the engine’s oil pan barely clearing the front body frame.
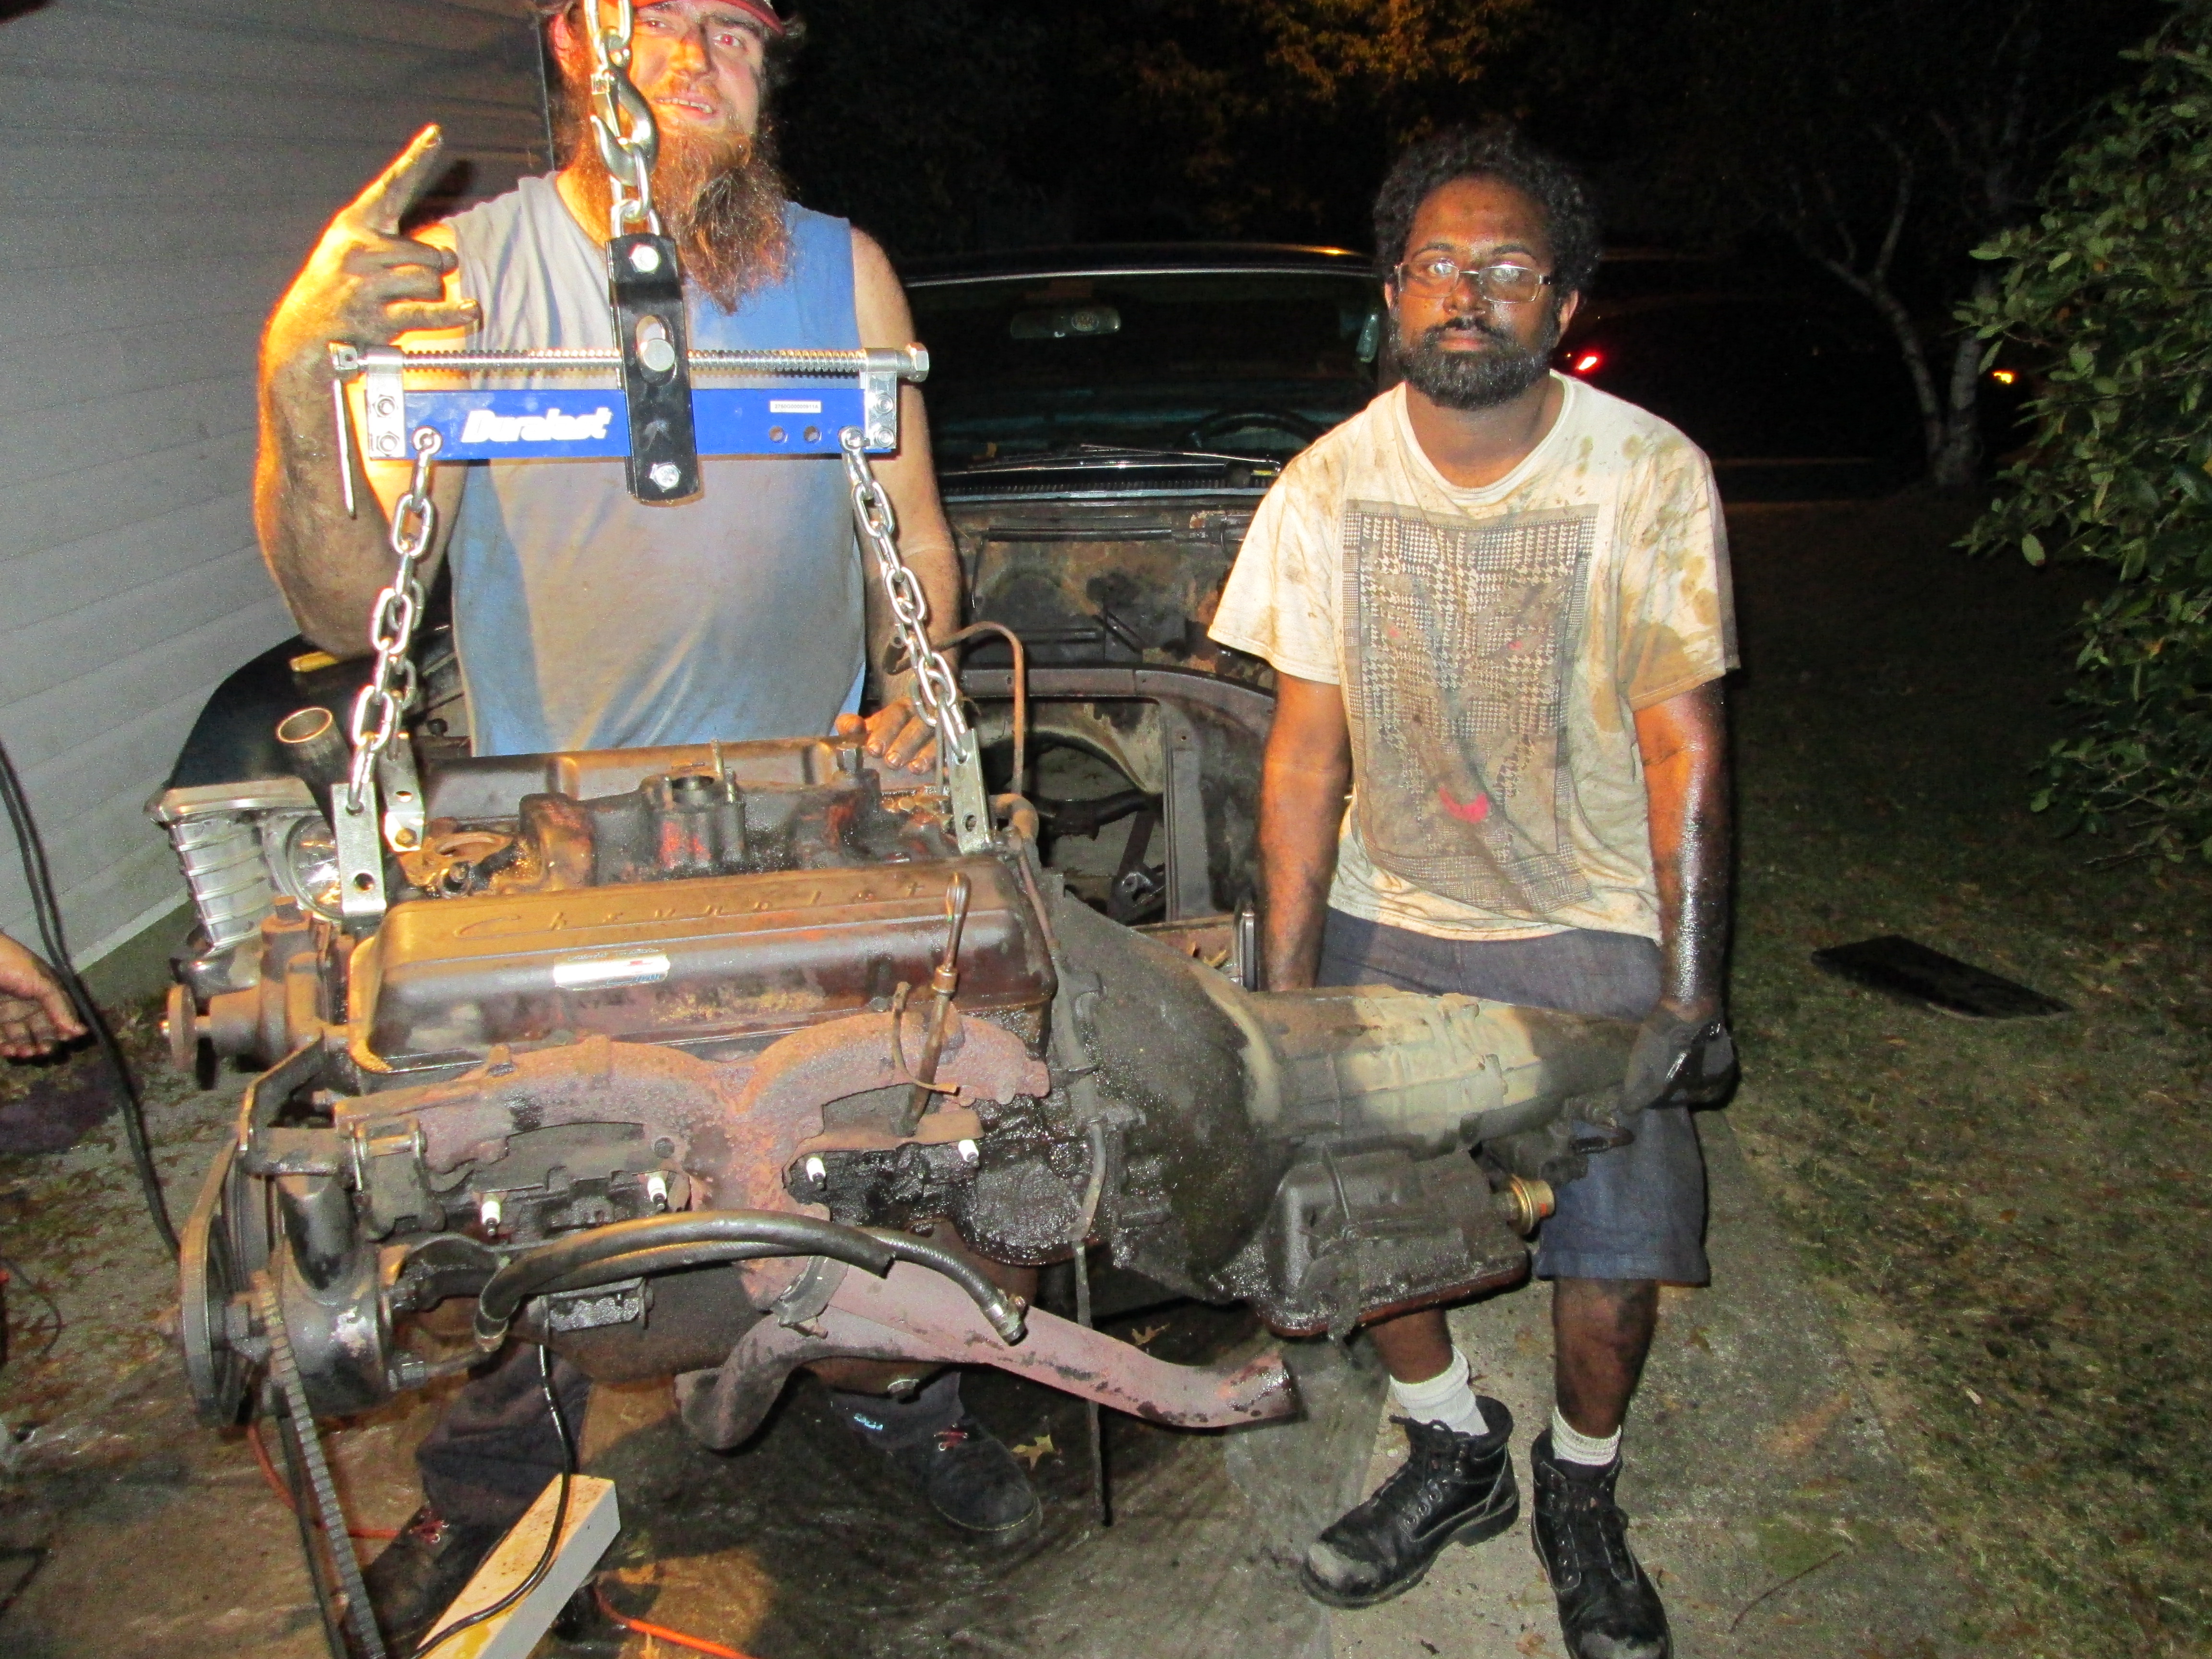
But we got it out, and then lowered it onto 2x4s for the night.
Sunday: Stephen and I met to separate the transmission from the engine with the help of my Dad, John. We jacked the engine up from last nights 2x4s and started removing the bolts holding the transmission case from the rear of the engine. Had to do our wire brush drill trick again. We started to get some separation but found that we still had to remove the starter, which wasn’t too difficult, but the bolts were very dirty. We got the case off though, which then caused a stream of transmission fluid to pour from the torque converter. Next we removed the torque converter from the fly wheel. After the last bolt was removed, I pulled the converter off, unaware of its weight, it slipped out and splashed transmission fluid all over my face.
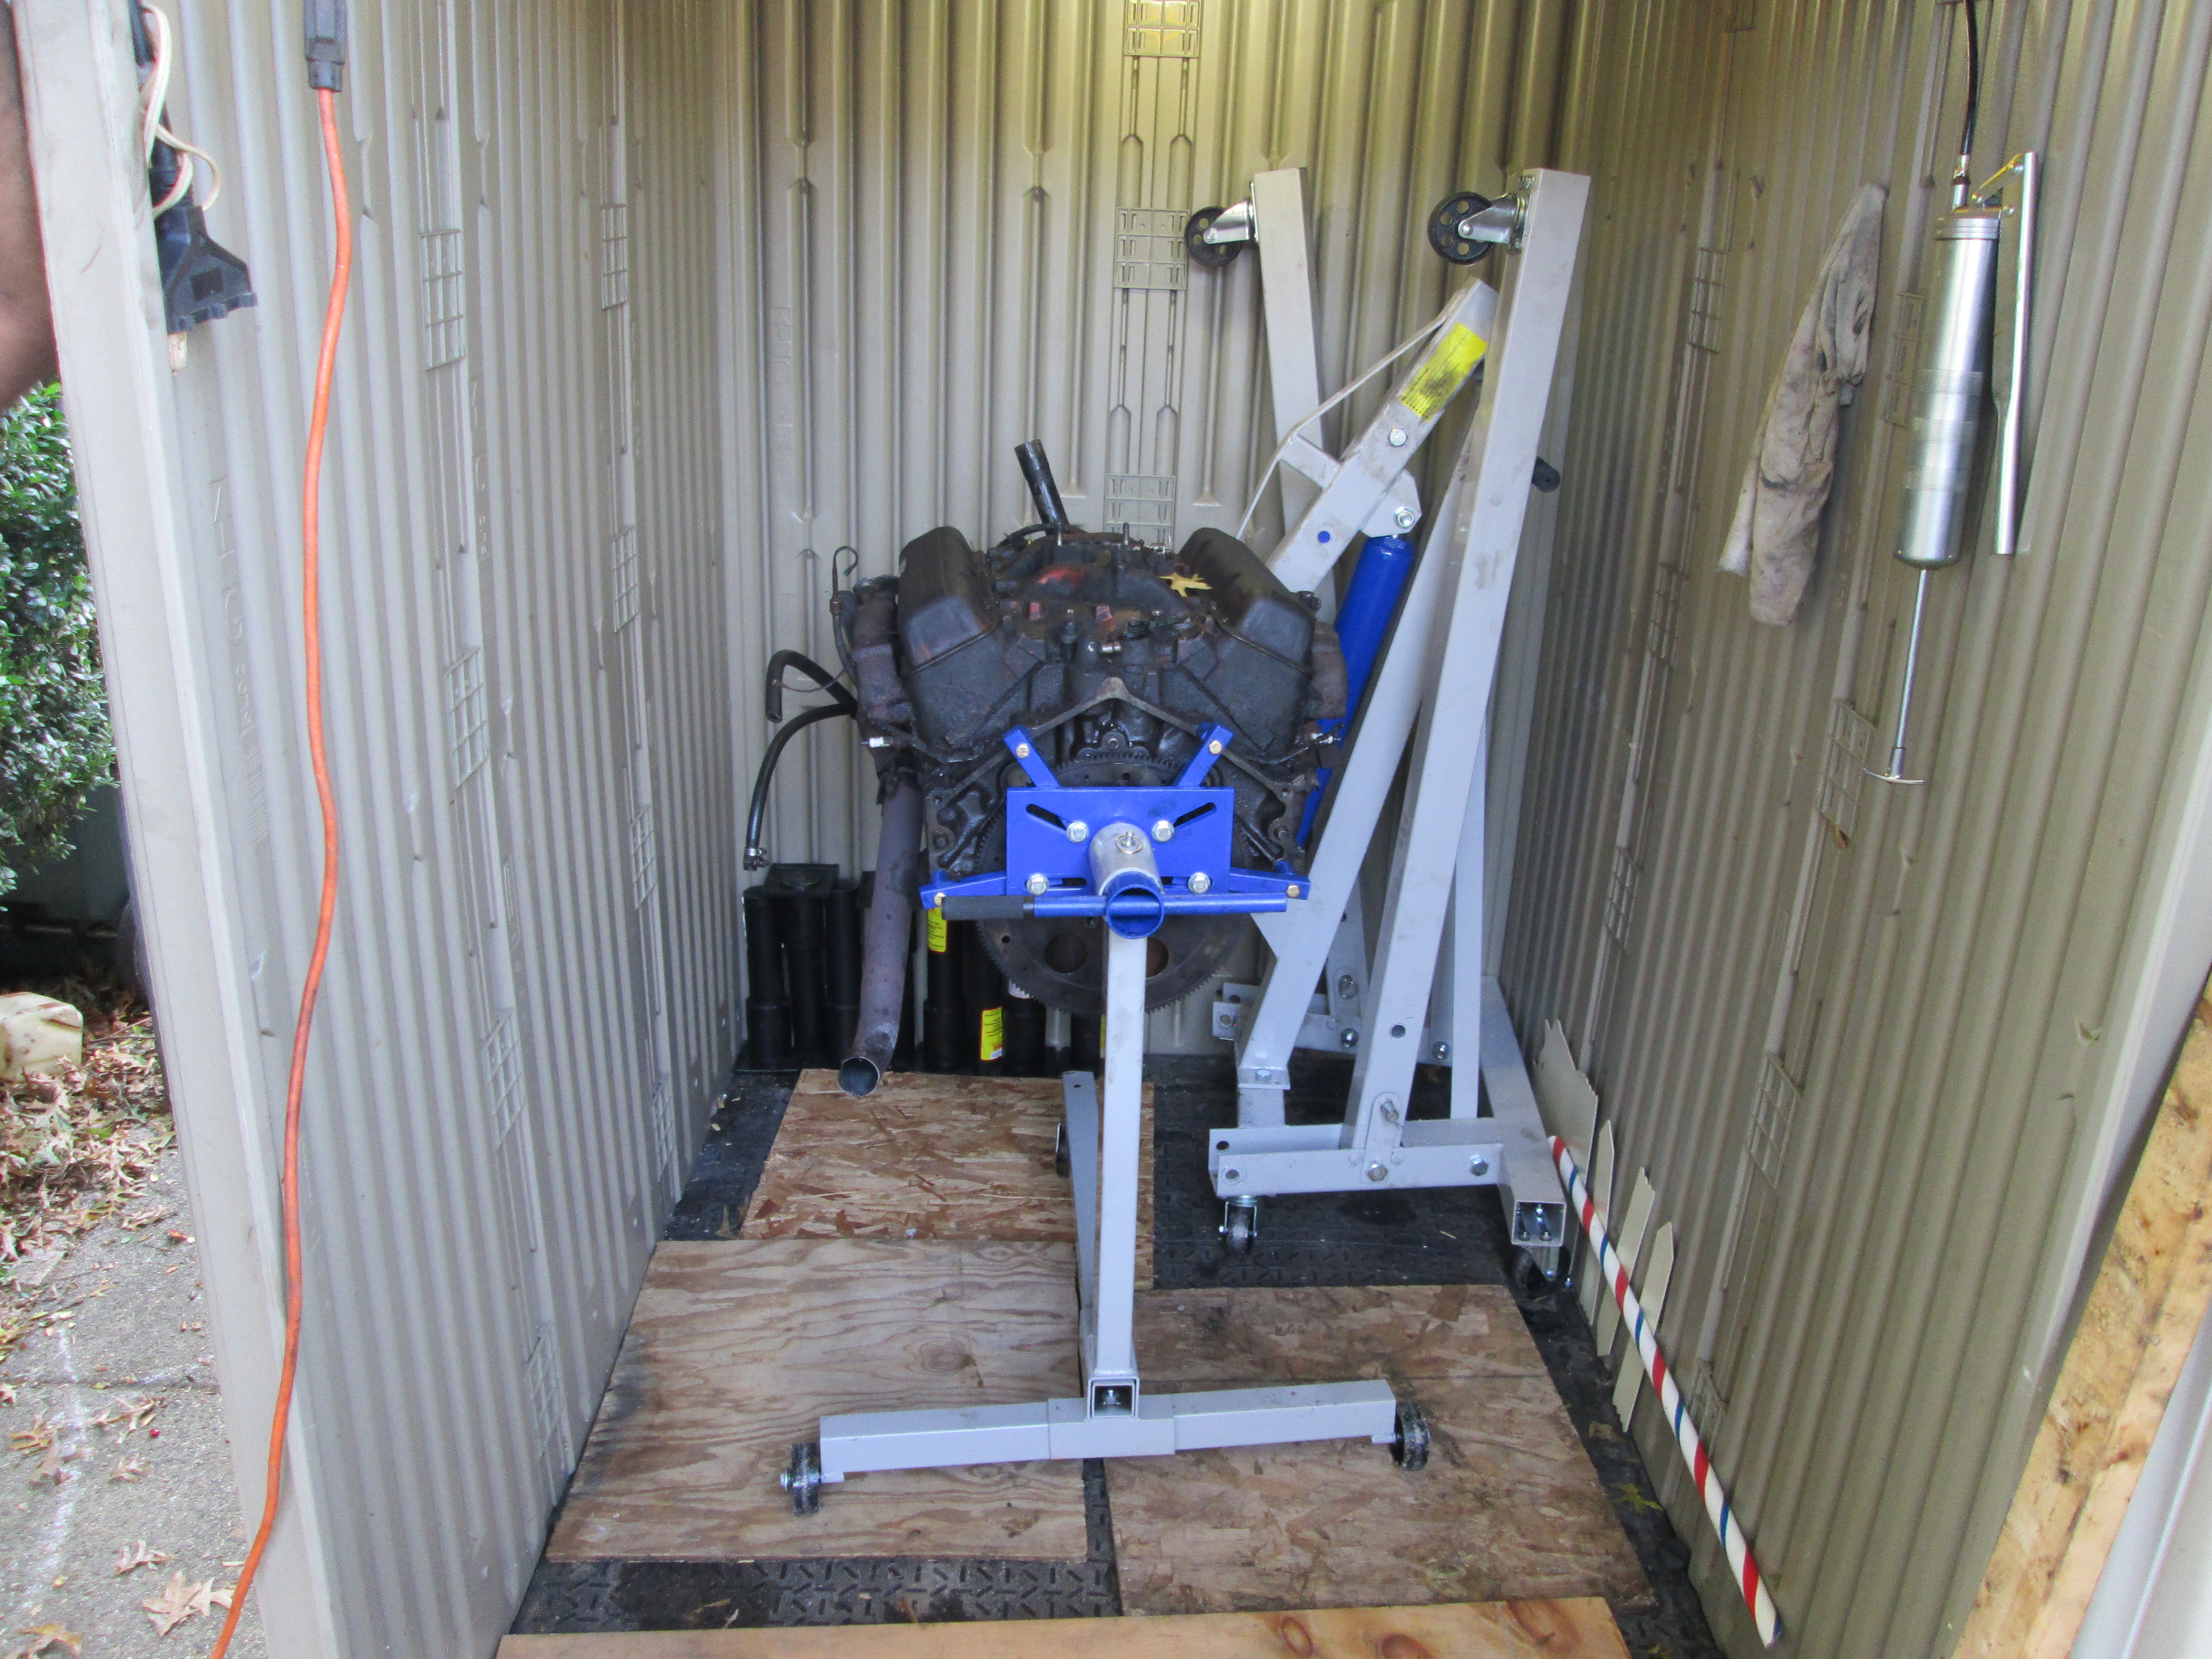
Once the transmission was removed, we mounted the engine to the engine stand and began the annoying process of moving the engine stand to the shed where it will be stored and worked on from here on out. Found out that the wheels on the engine stand are designed for smooth garage/shop floors, not rough concrete paths in our back walls. We broke a wheel off from the stand, but was able to replace it and then used makeshift pry bars to bully the stand over the cracks and uneven concrete paths. Then got it up onto plywood and moved it into the shed and called it a night.
Mind you, we did all this with wrenches, ratchets, plyers, and mallets. No Impact drills, no air tools, no angle grinders. All manual tools, aside from the wire brush drill. We had a 3 ton floor jack, 4 jack stands, and an DuraLast engine lift from autozone.
September 8th
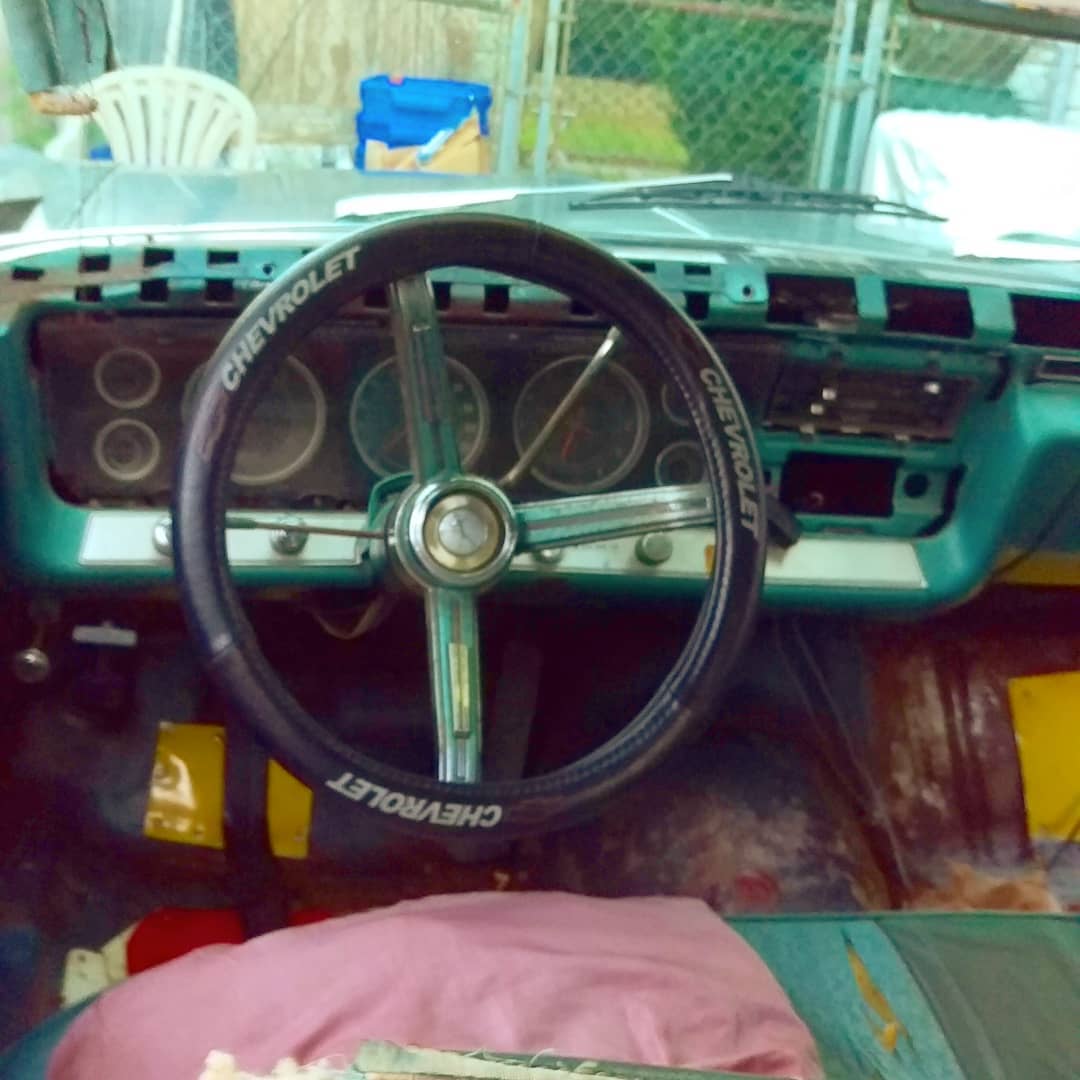
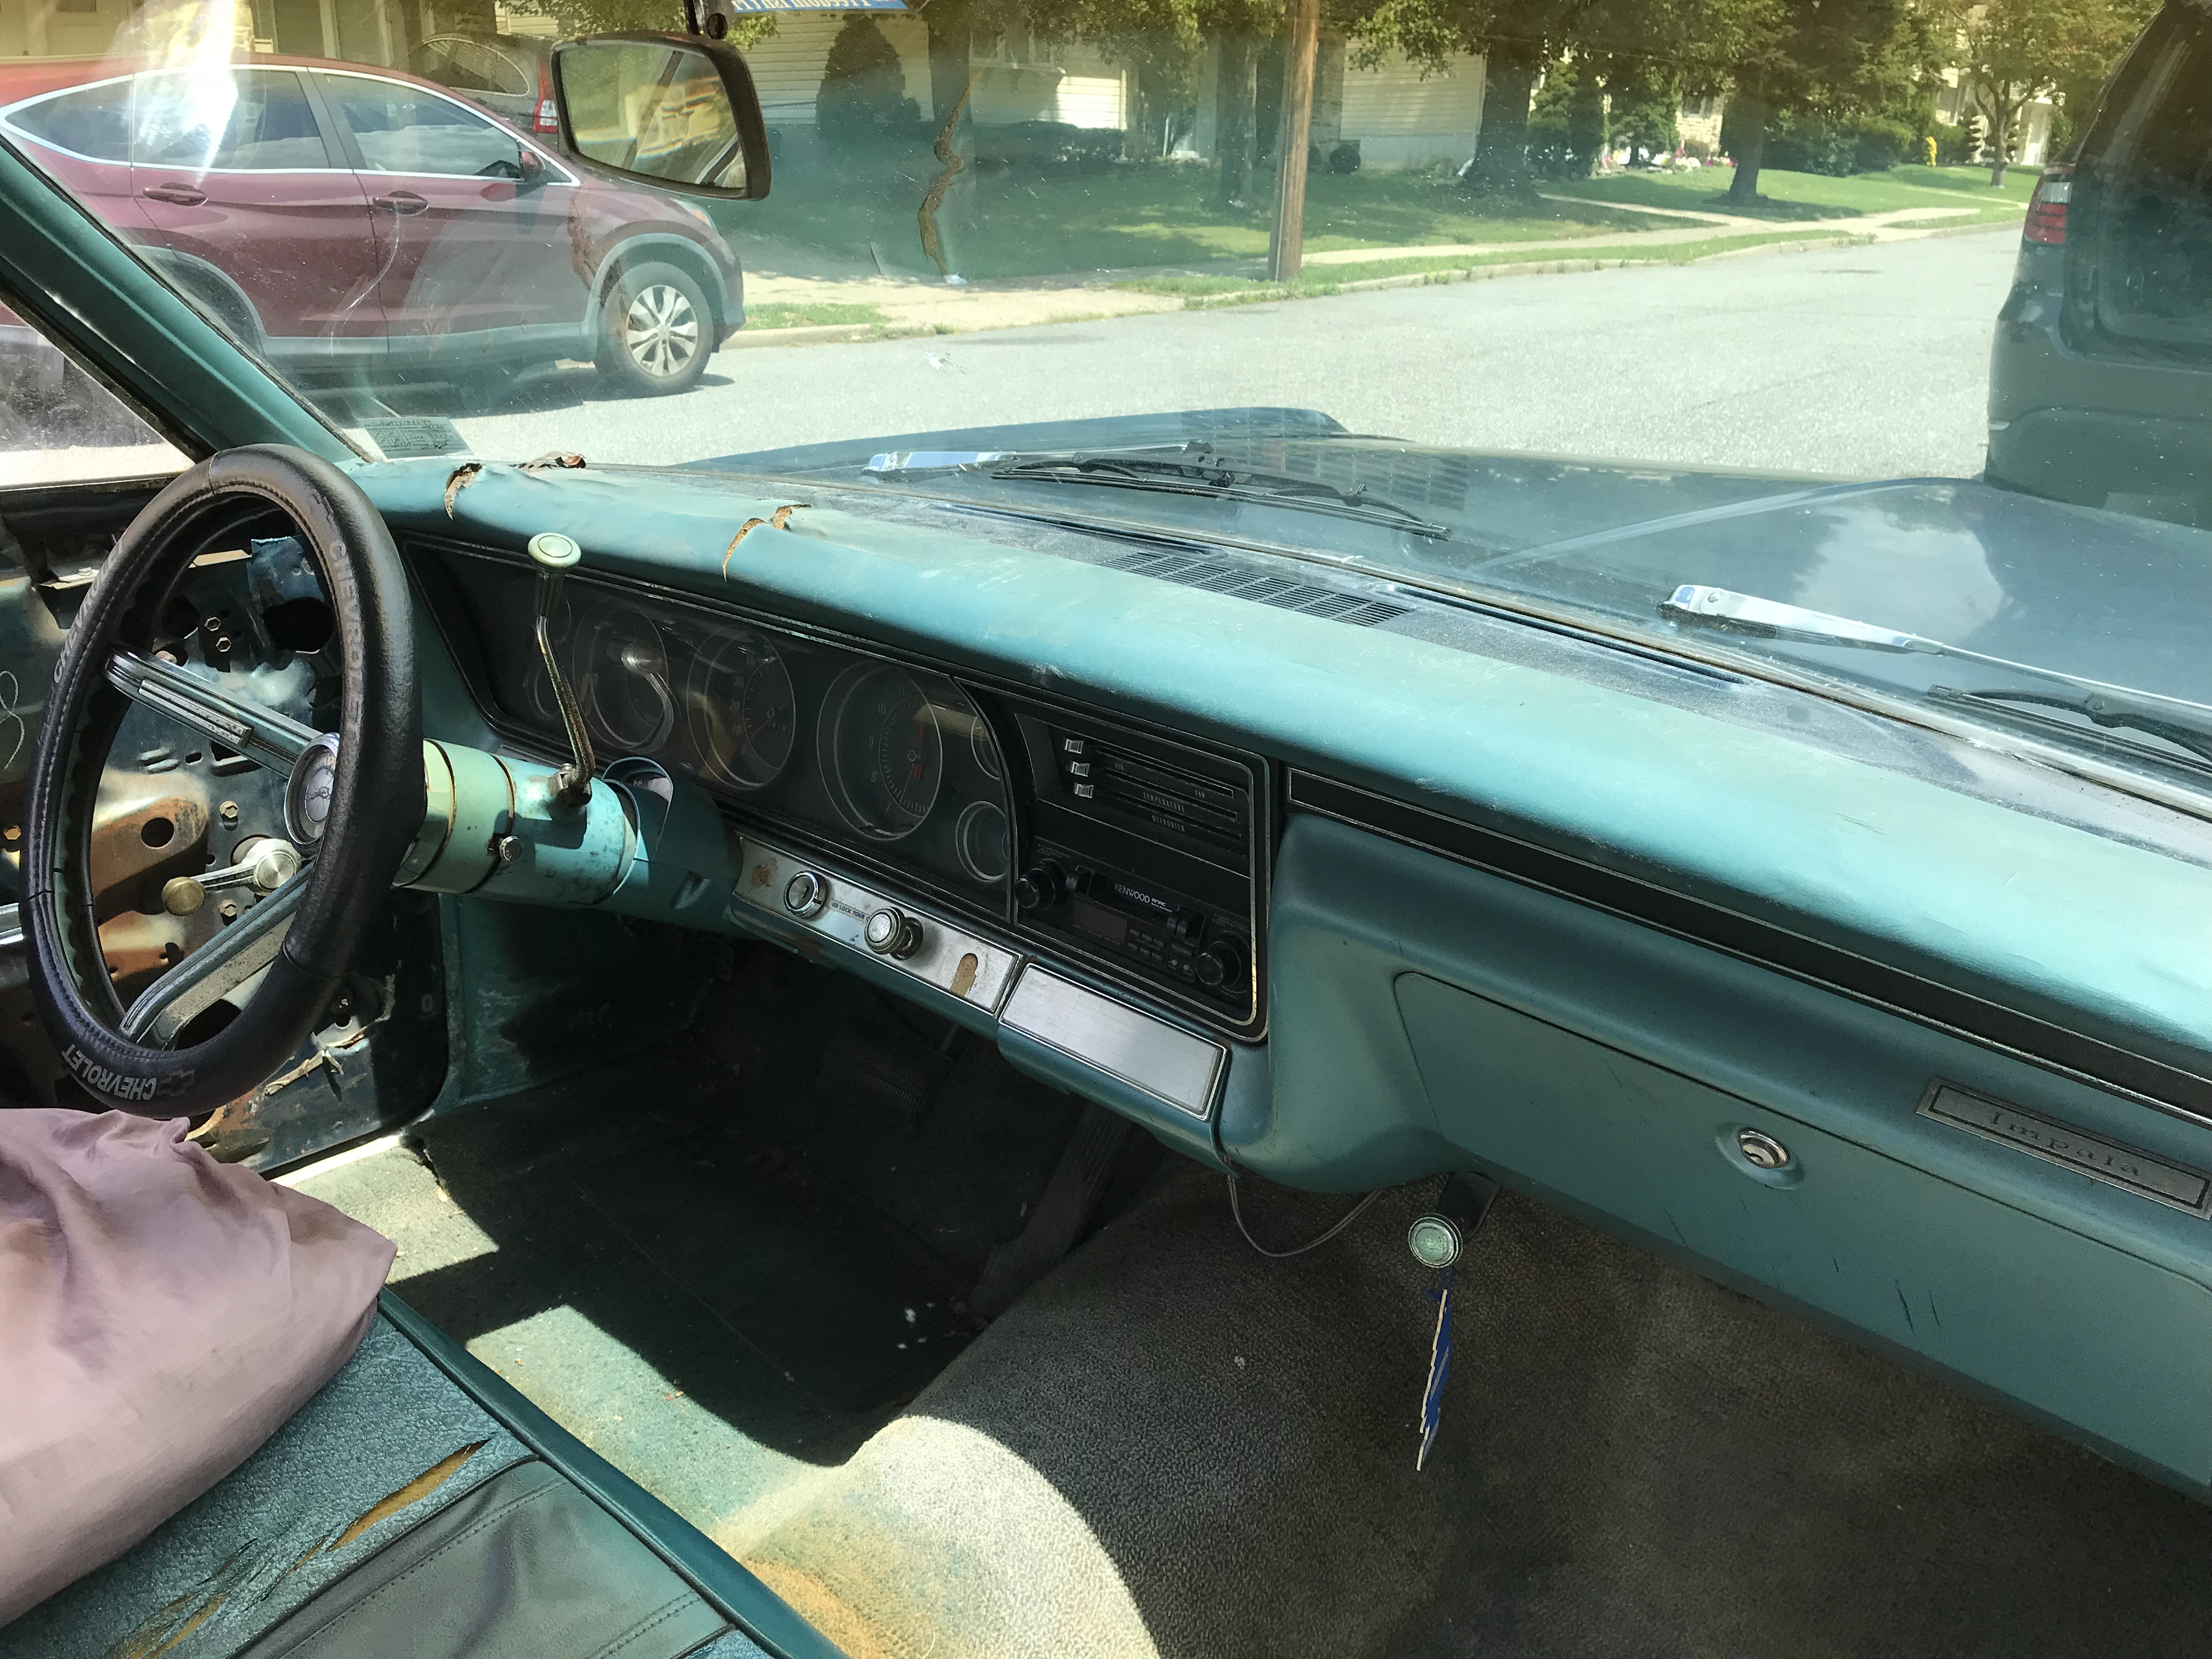
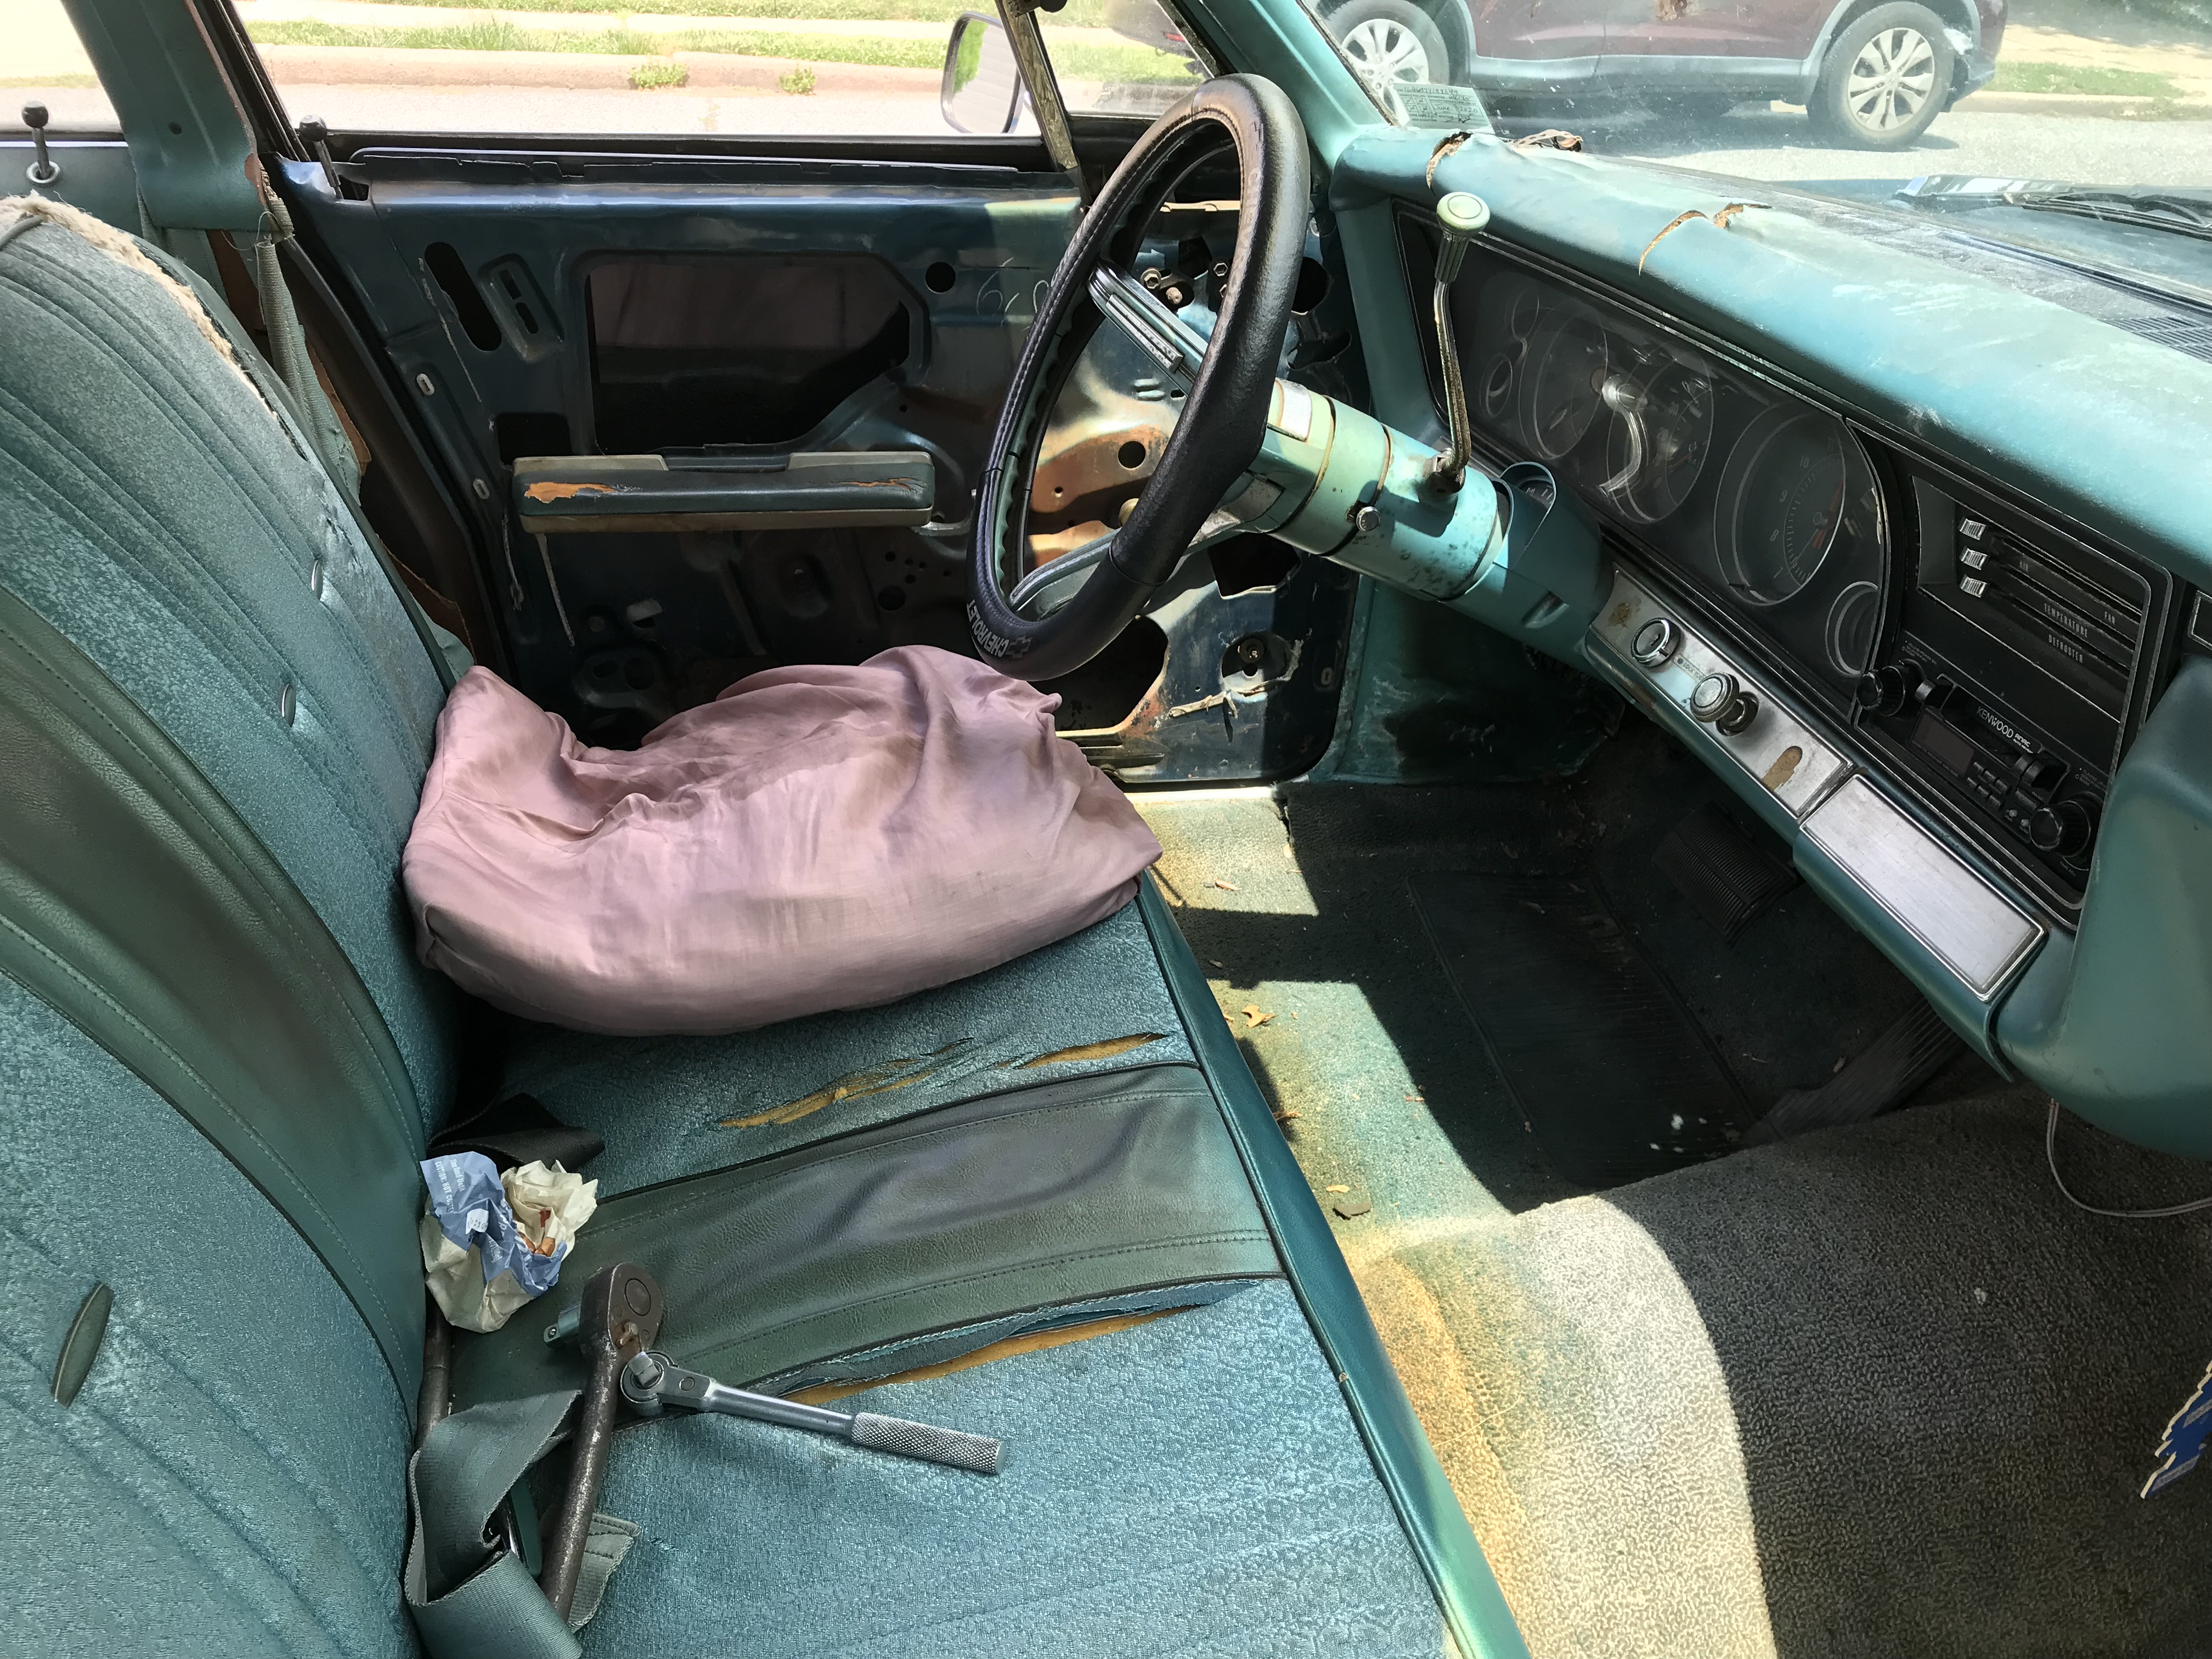
Got back into the car and worked out the logistics of getting the 283 engine and 2 speed powerglide out of the impala. Got an Duralast Engine lift and stand built just for this and am hoping get the engine out by the end of this month. We also took apart more of the interior, focusing specifically on the dash. Was extrememly difficult, but we got the top of the dash off and also loosened the instrument cluster and removed the broken kenwood radio/cassette tape player. In that process, we accidently got the clock working again on the main dash. Turns out the ground was loose. Next step is to order a bull bar for my Duragno, Mavis so I have the ability to push the impala in and out of the driveway while the engine is out. As for the engine, I am going to break it down, power wash all the components, inspect everything and replace what's worn or broken. Suspecting the engine cylinders will have to be bored so I'll be sending the block out to a machine shop anyone who knows of a good shop in the PA tristate area, please reach out to me!!! Also going to send the transmission out for a rebuild. We looked at the kit and it's not something we want to get ourselves into. Then; gaskets, seals, and piston rings, oh my!
Mid July to Beginning of September
Project has been suspended due to unforeseen circumstances within the team. Will send out a social media blast when we resume
July 7th
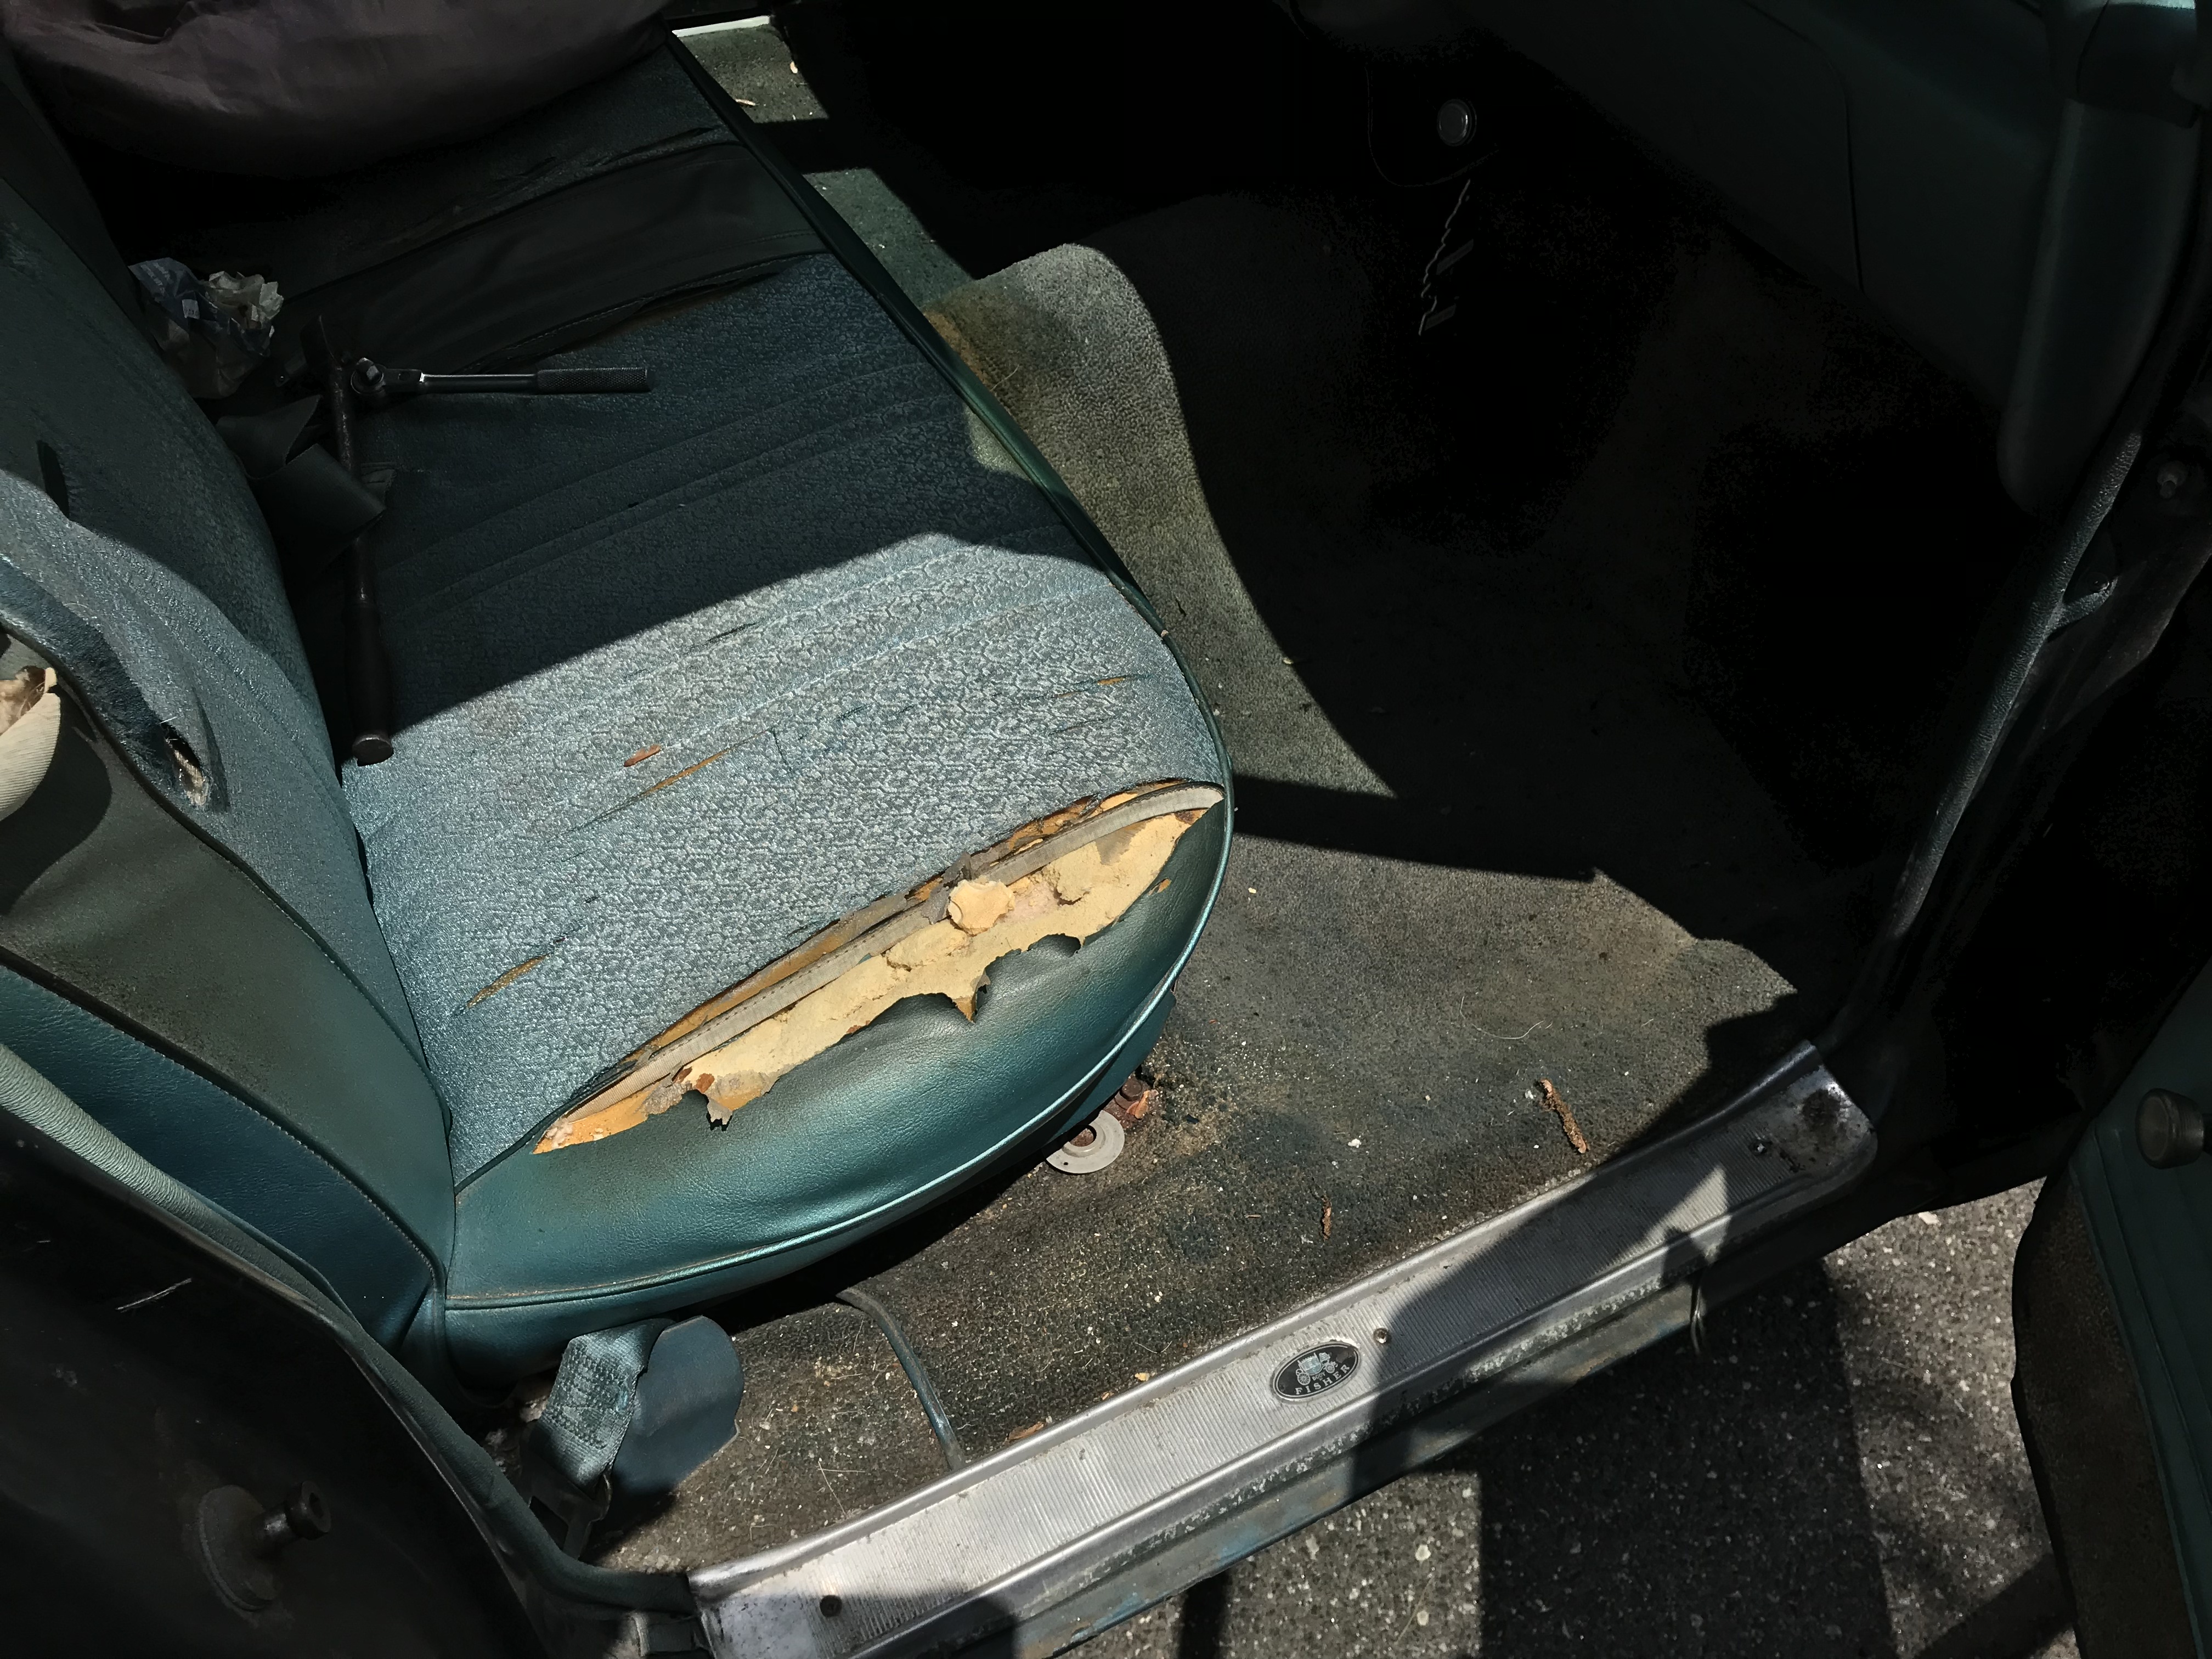
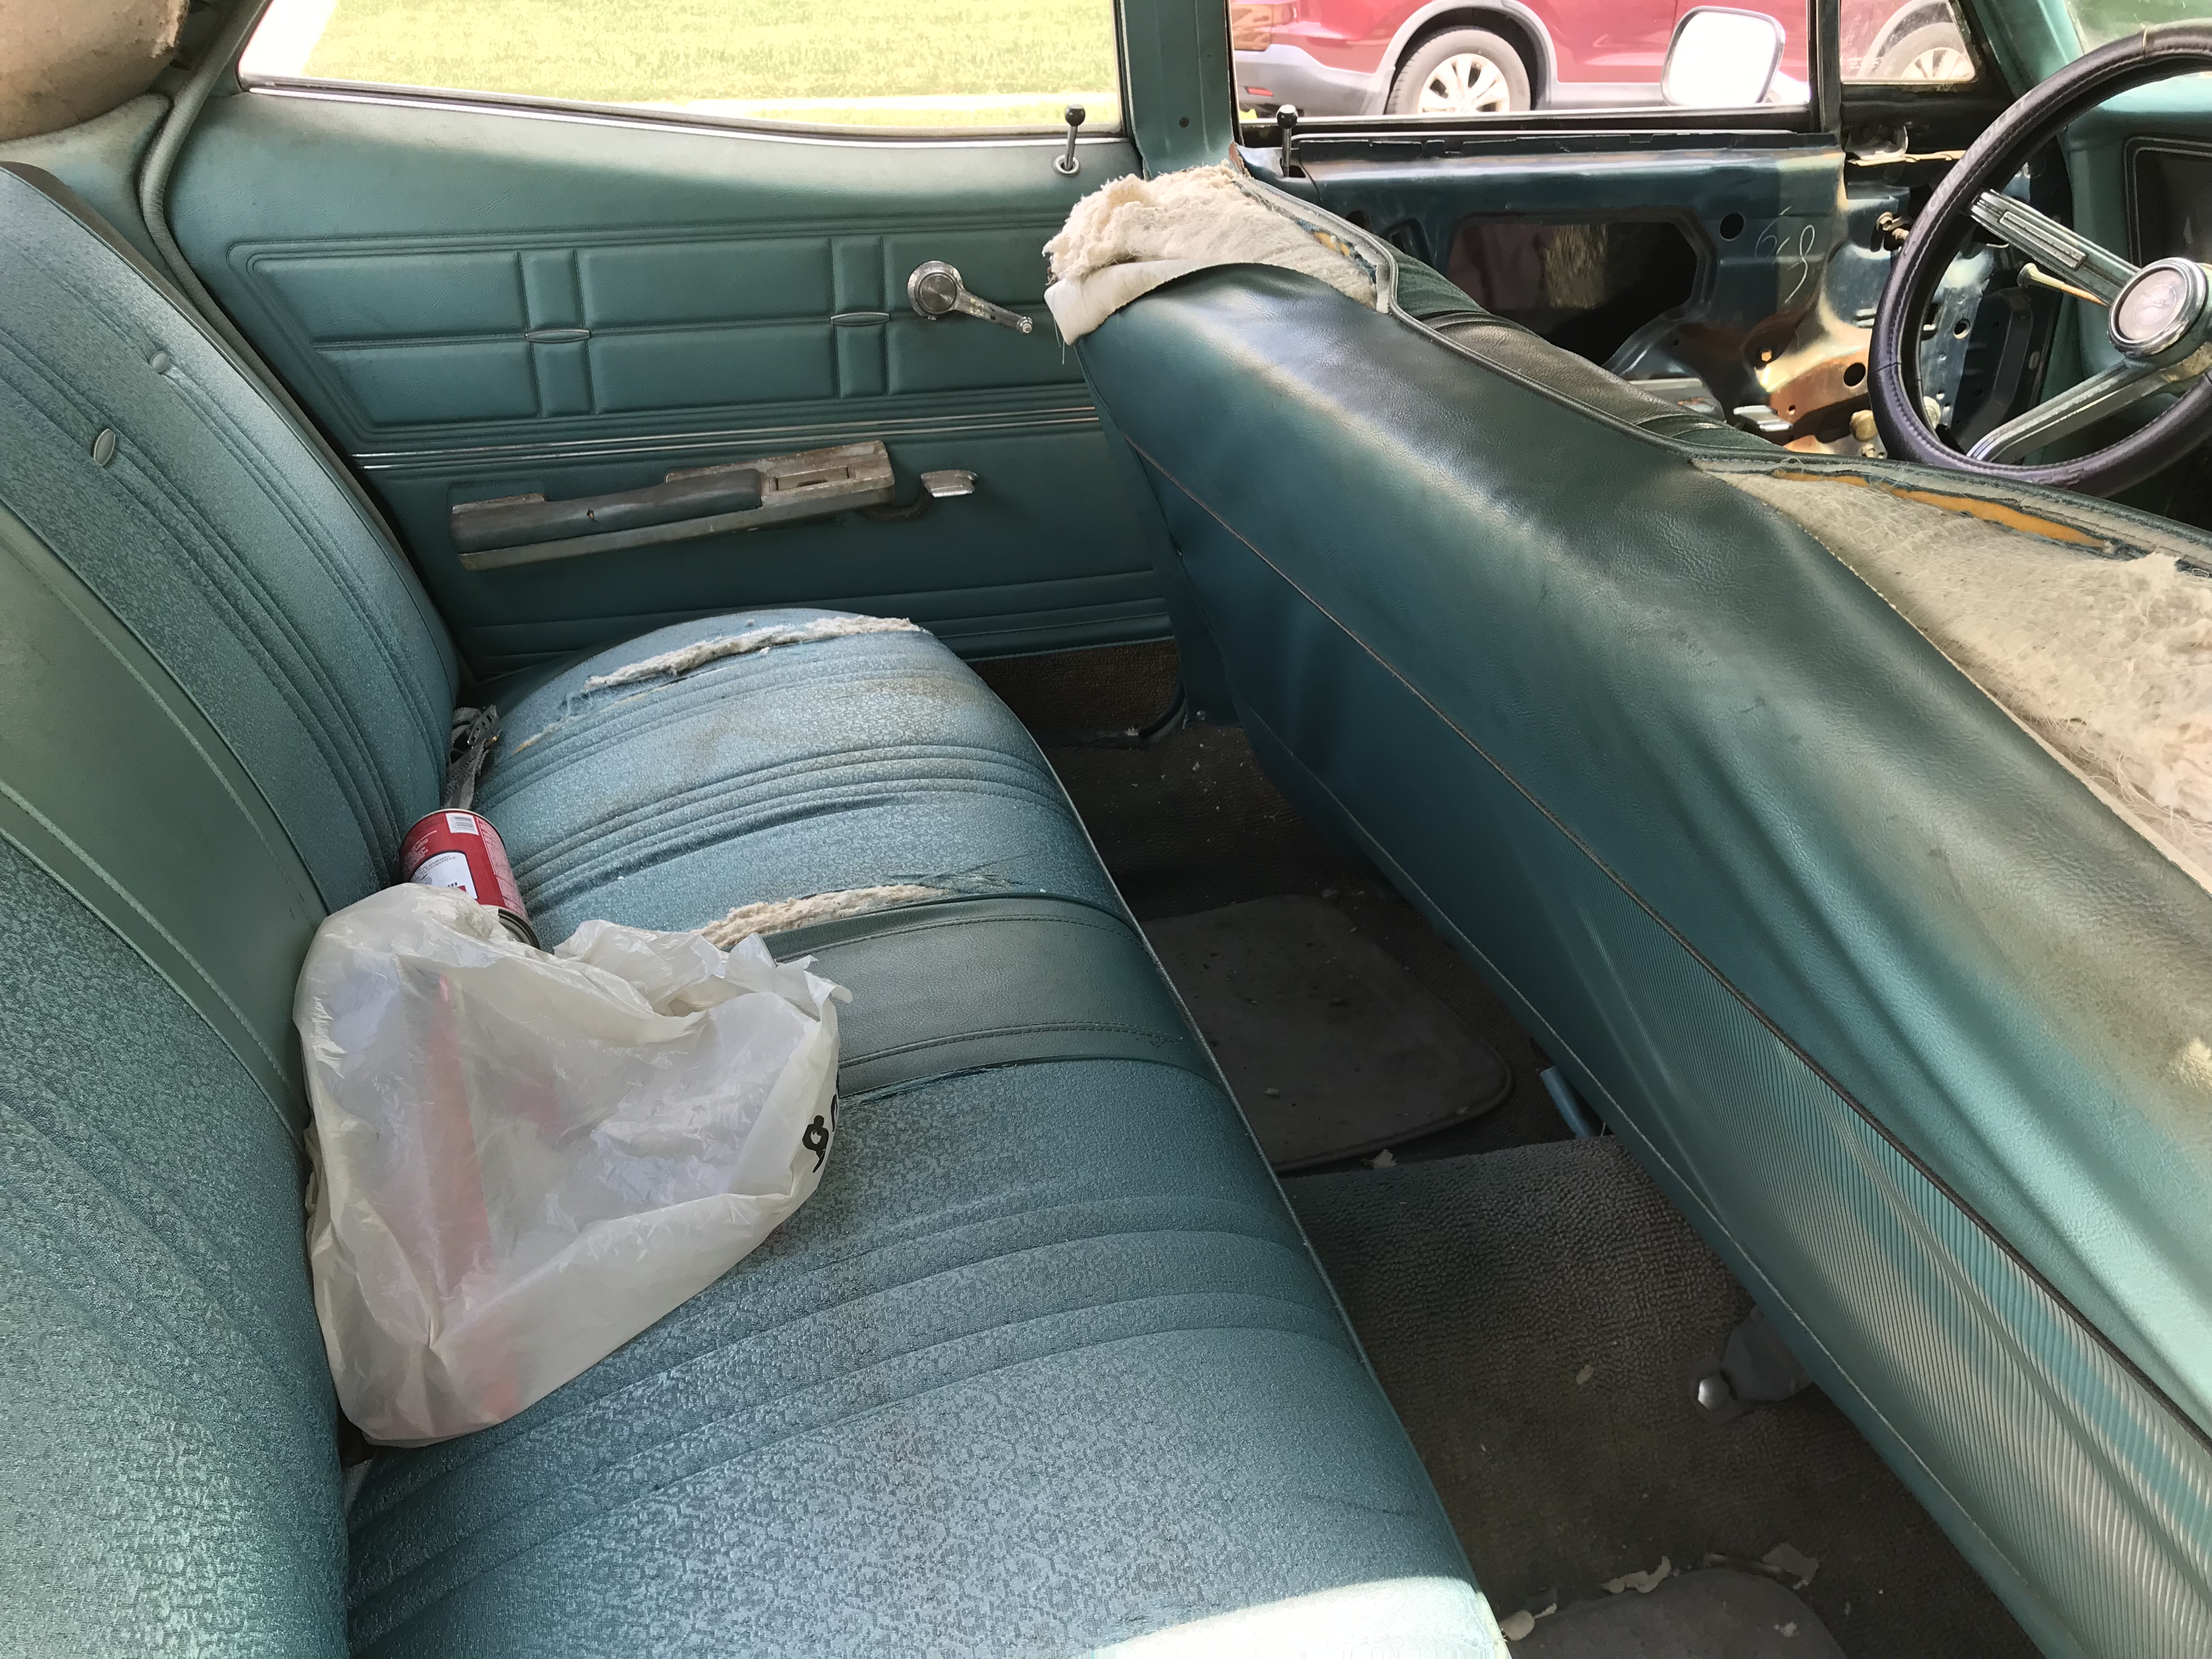
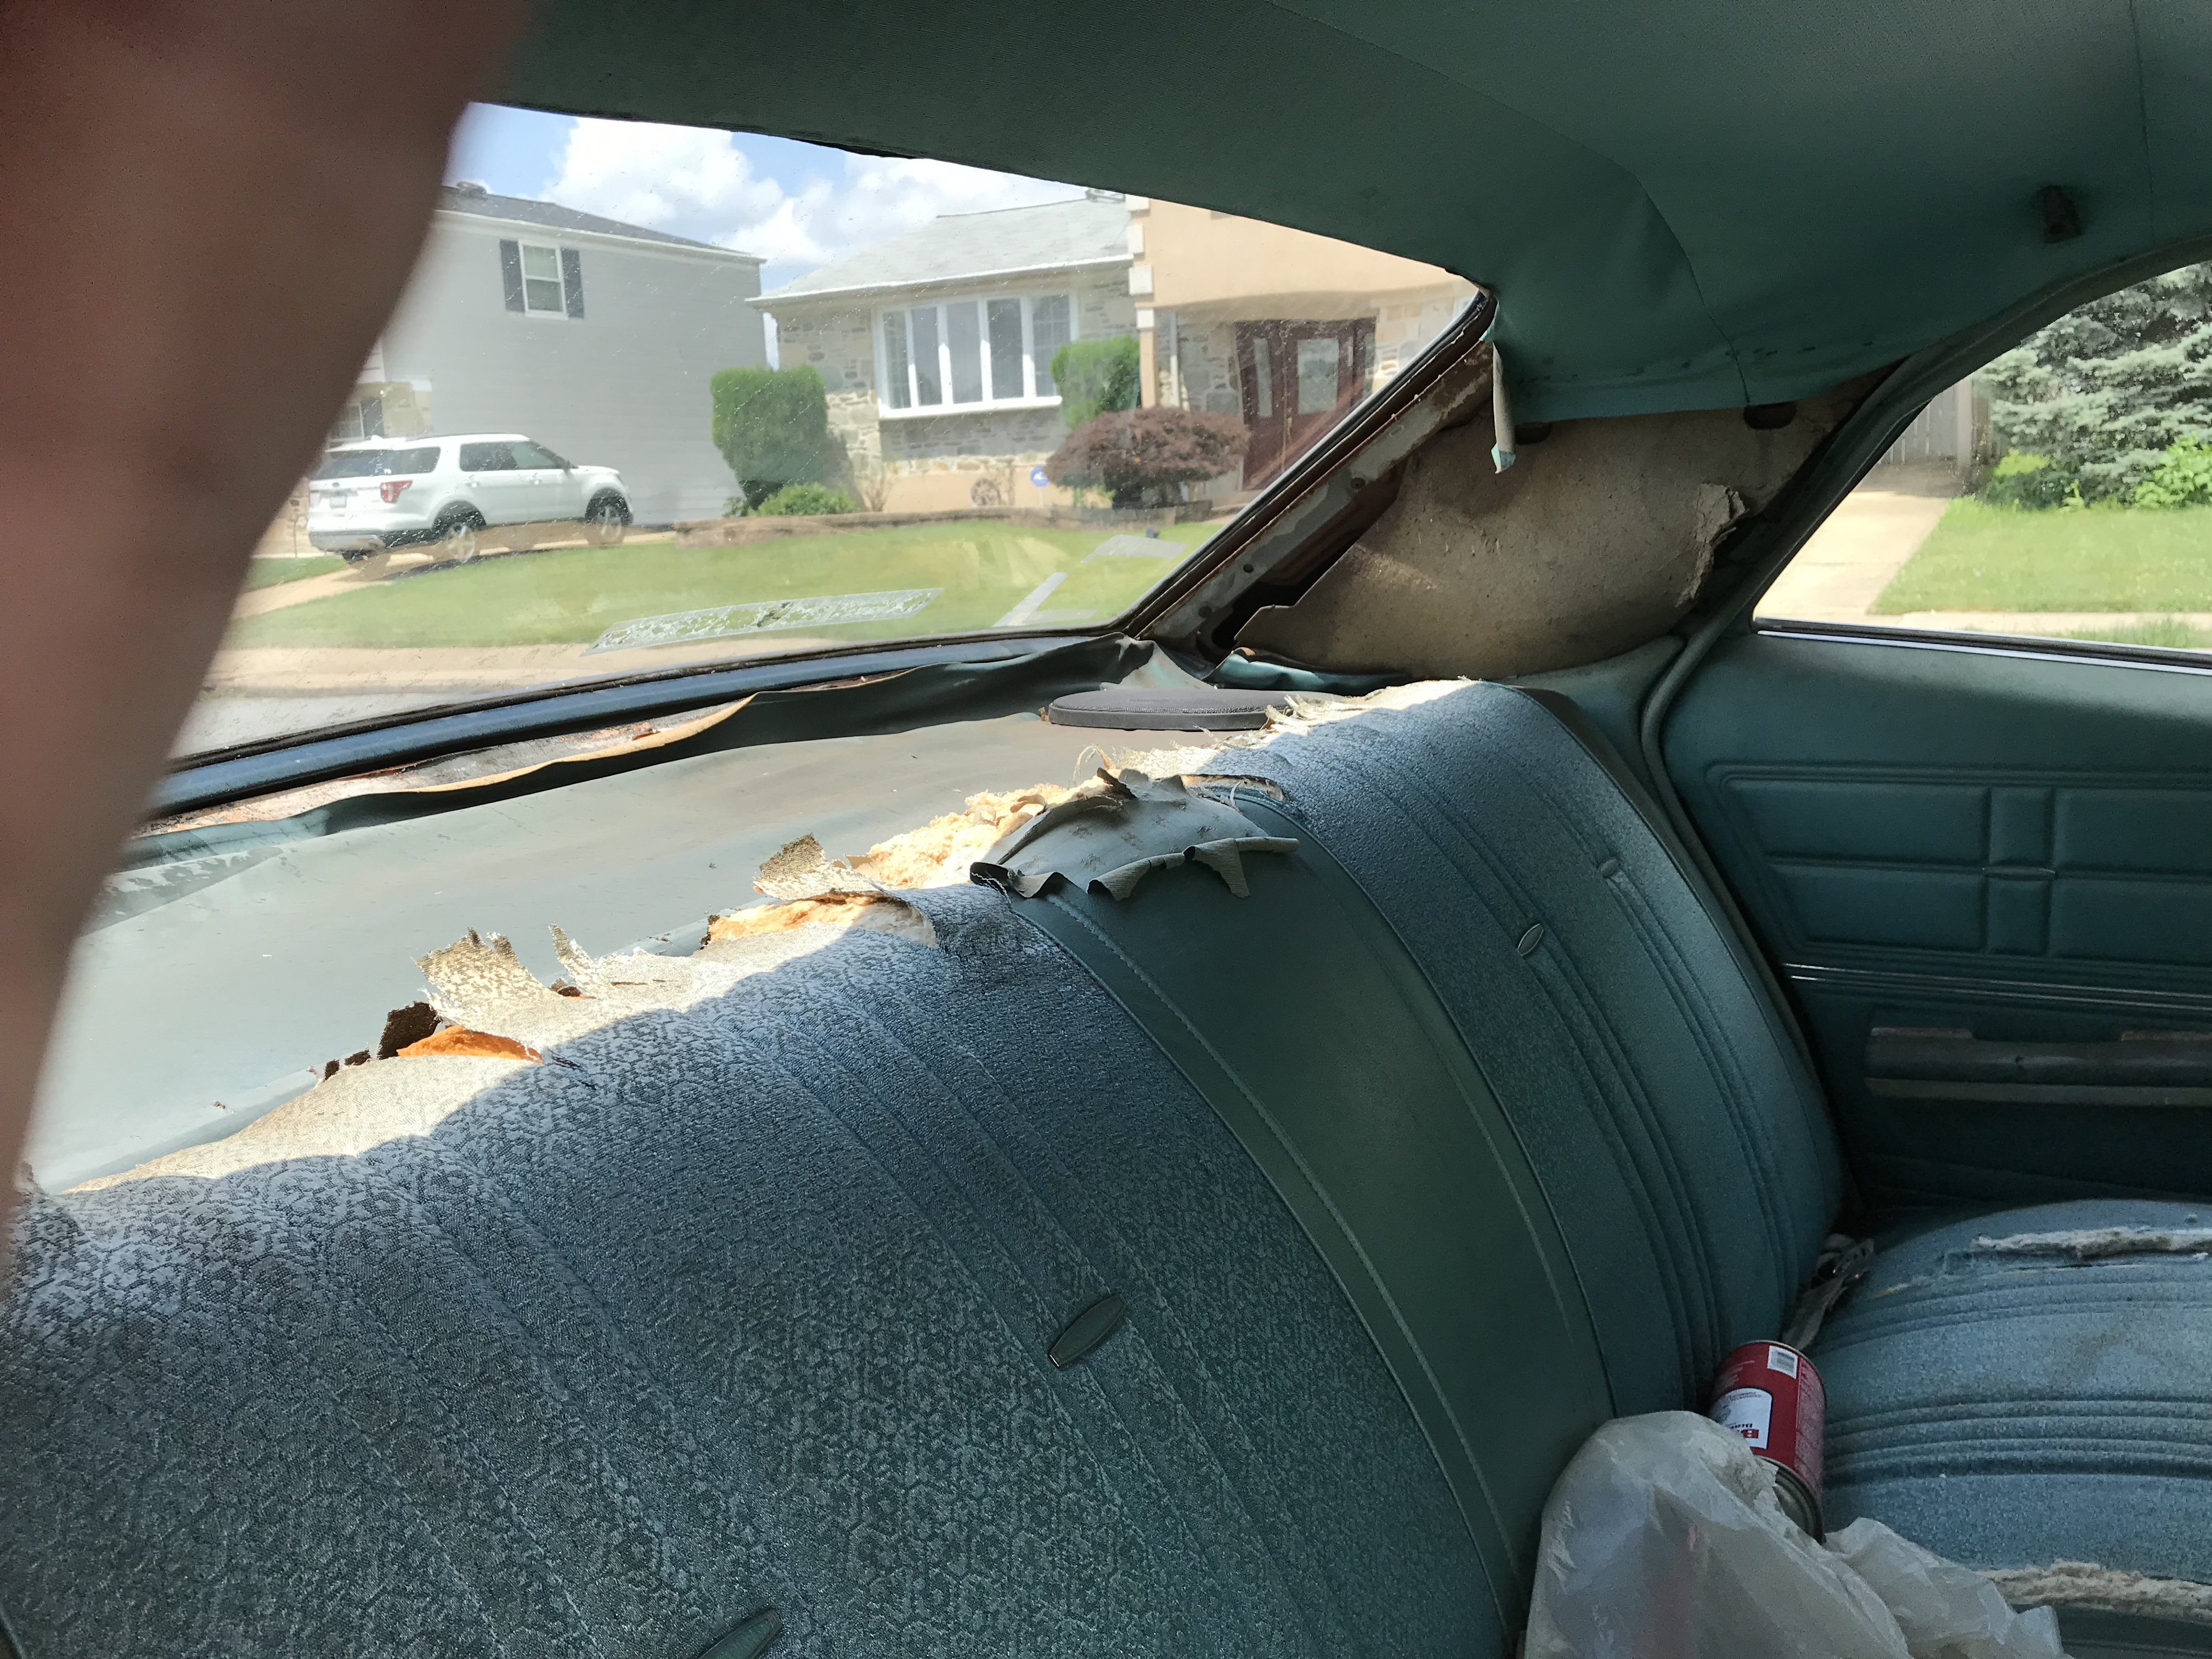
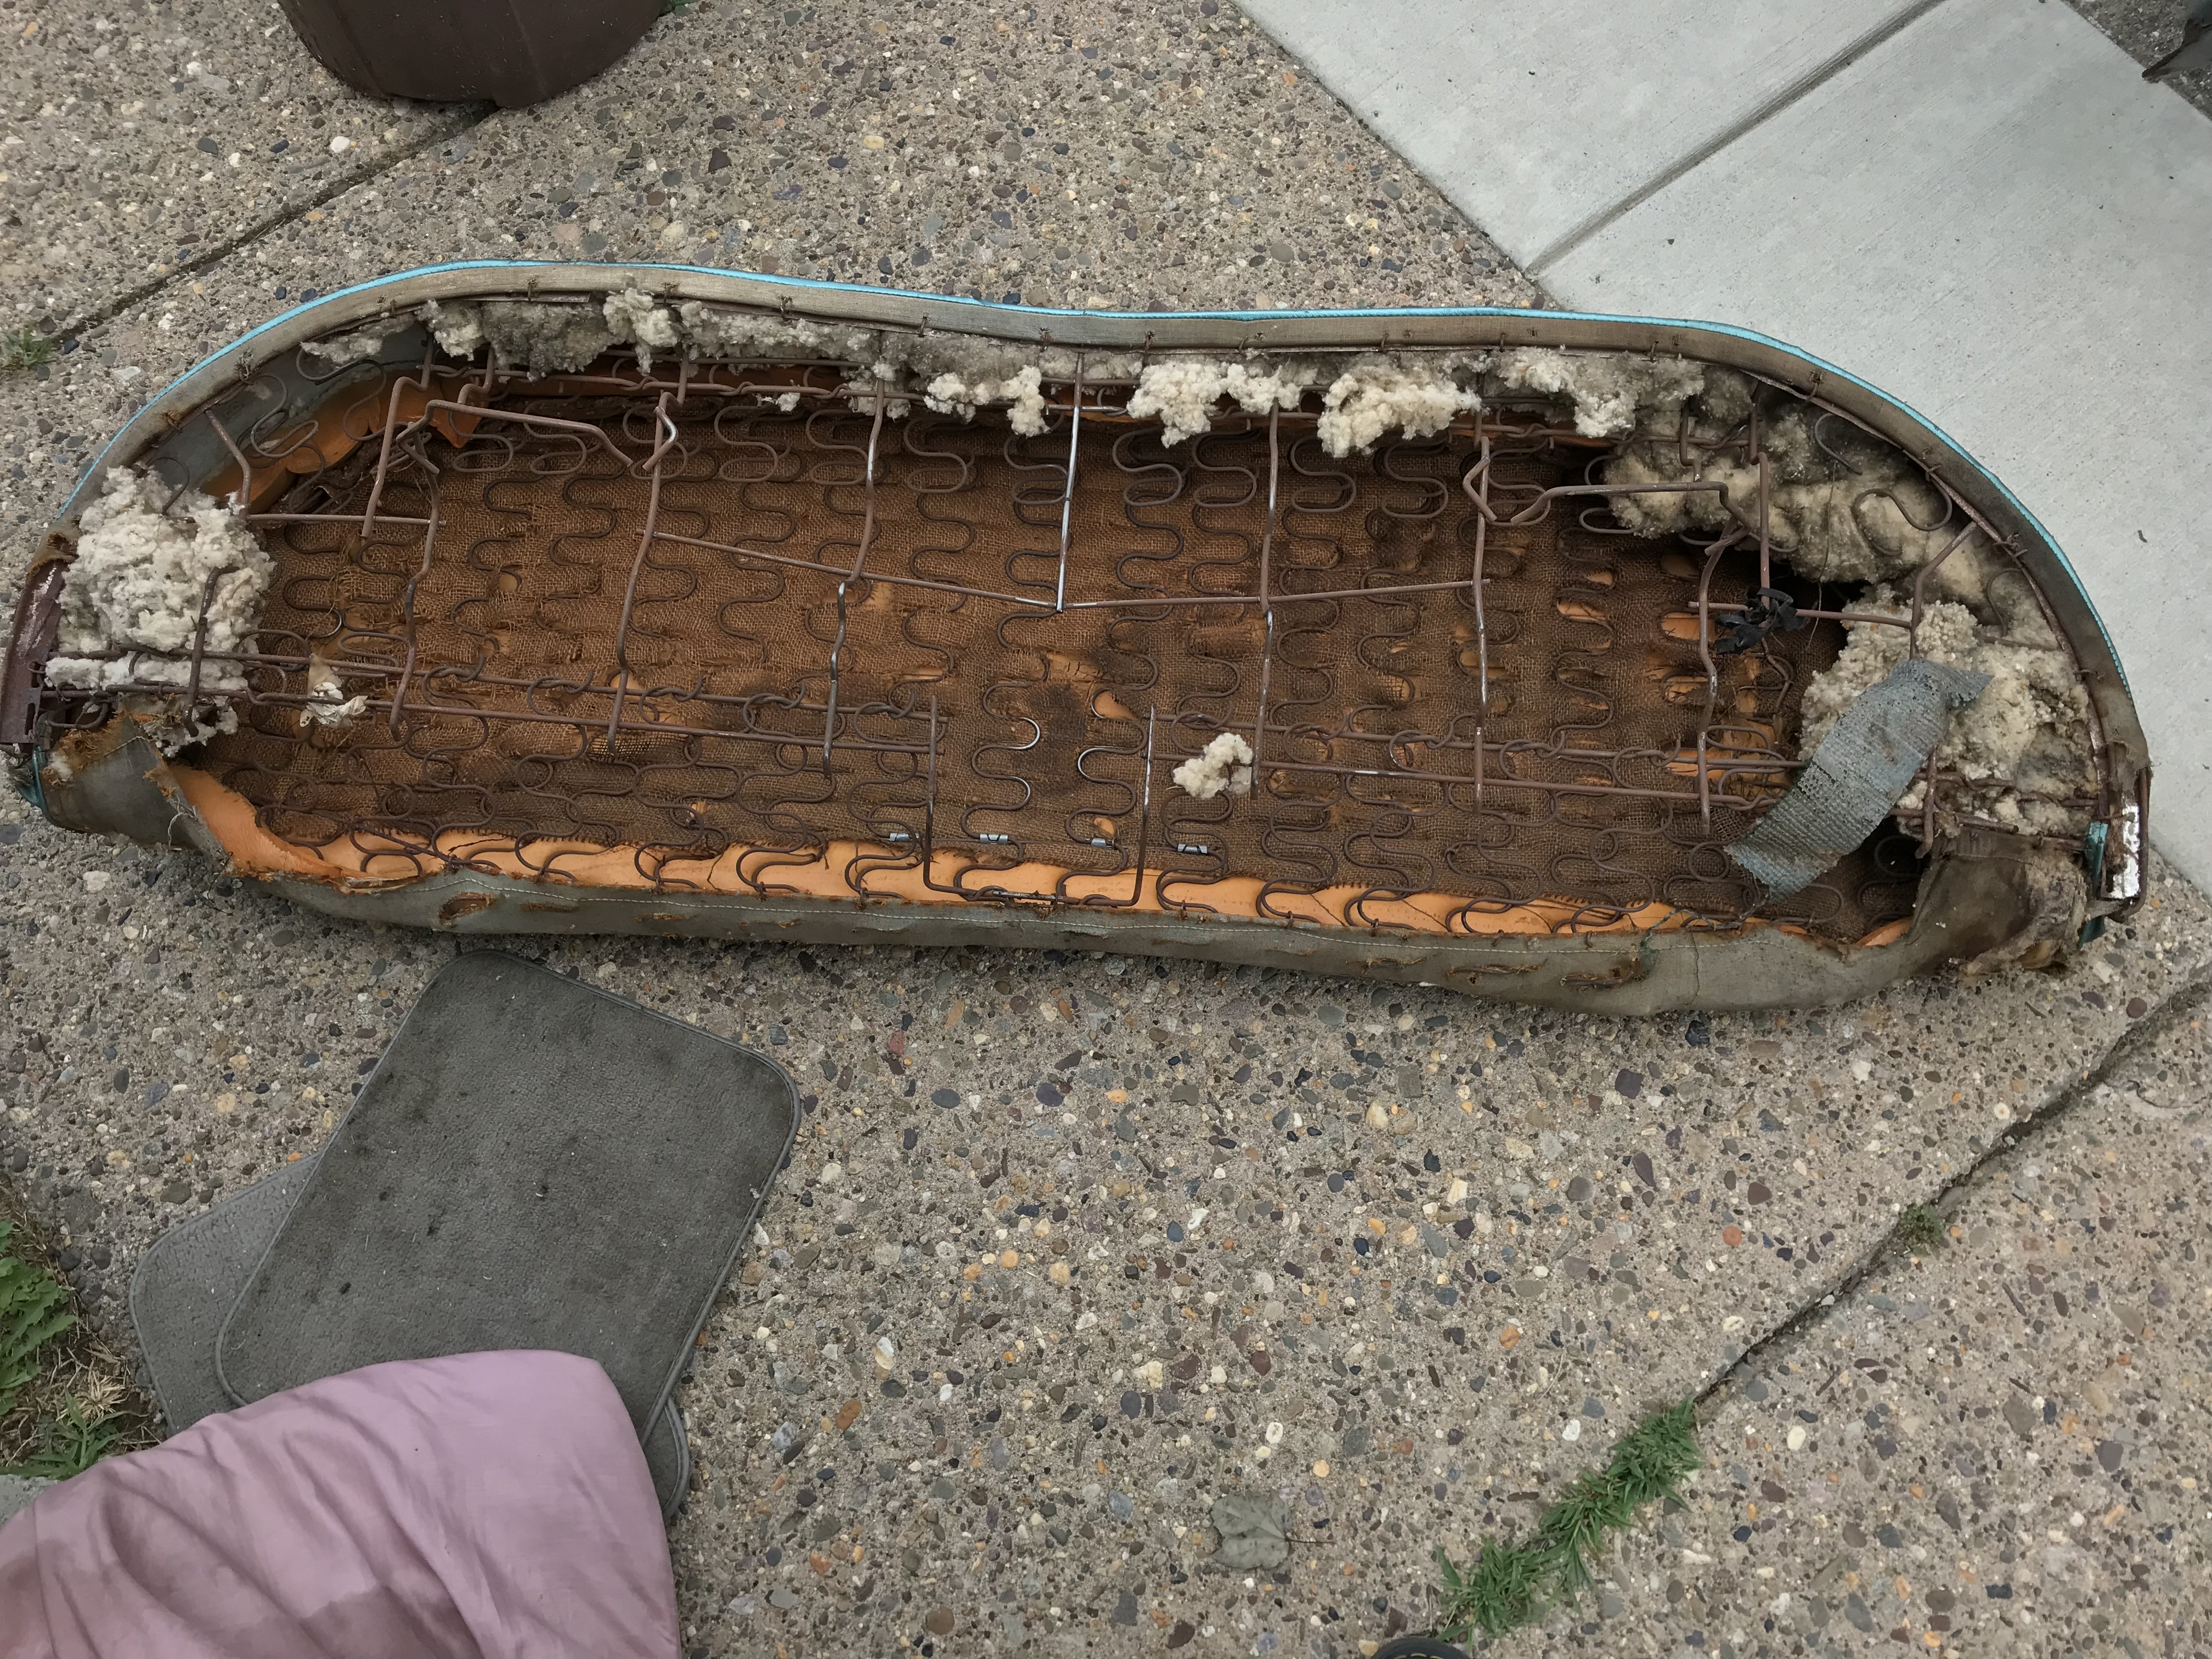
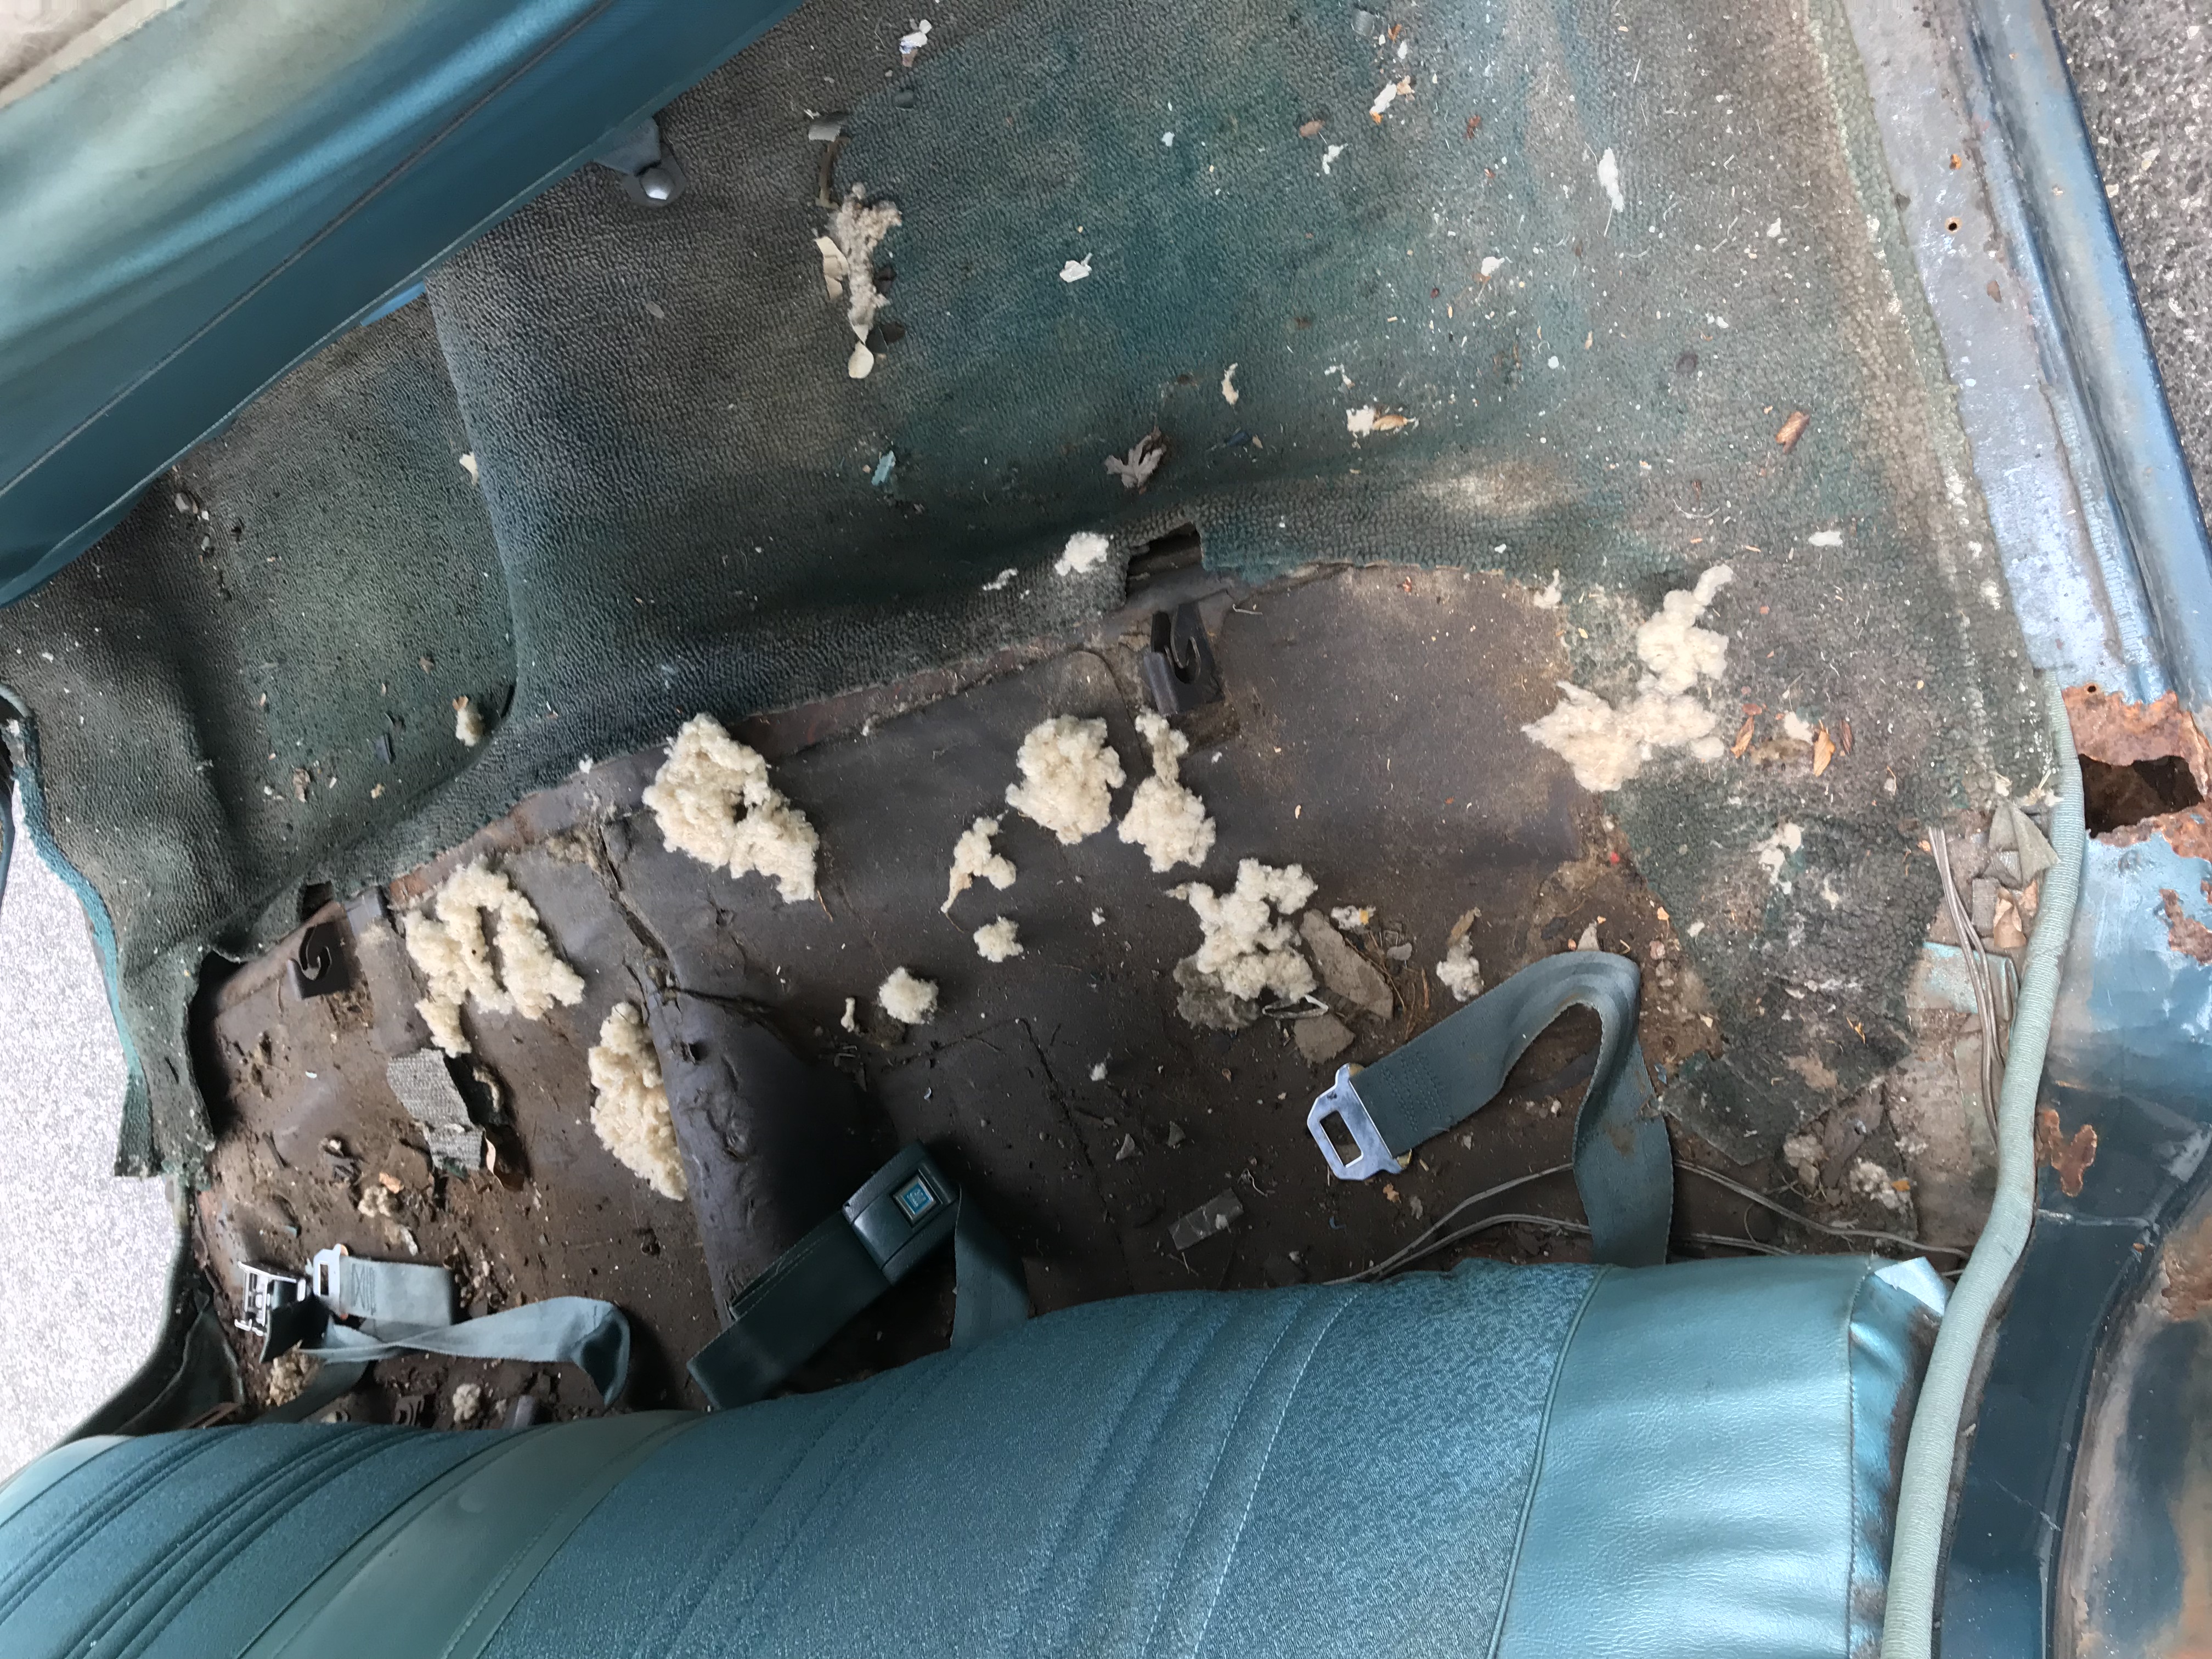
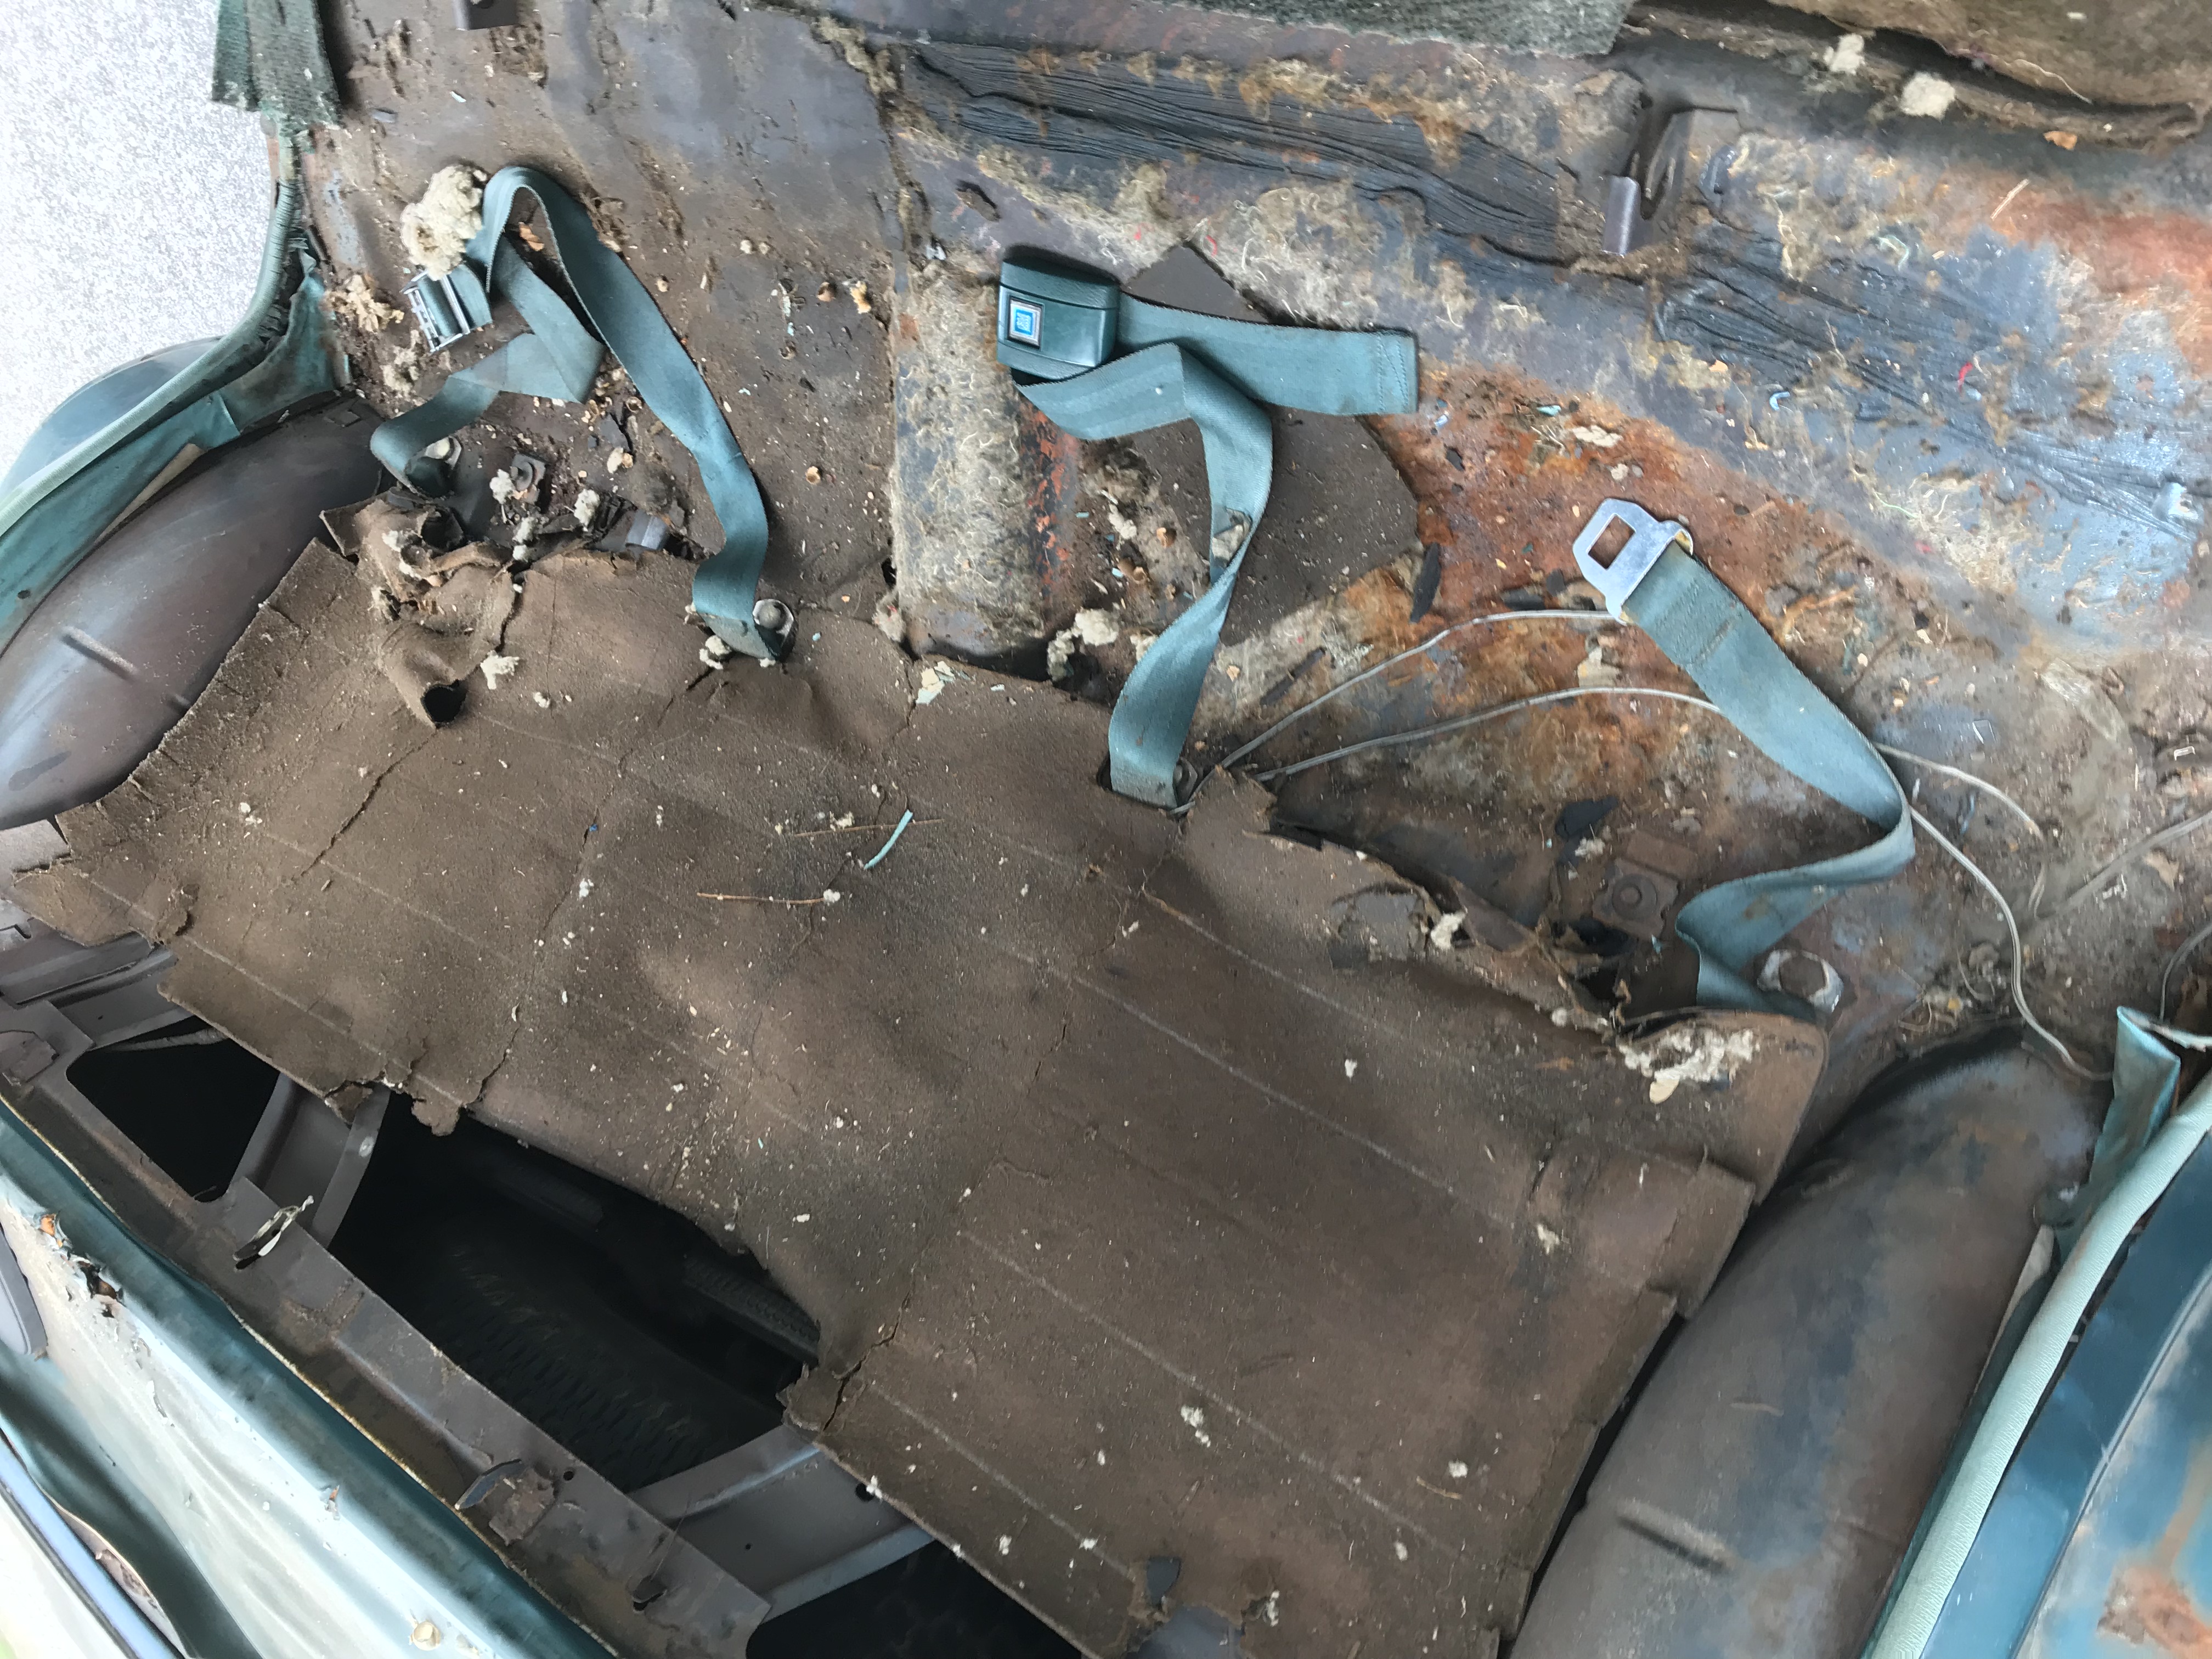
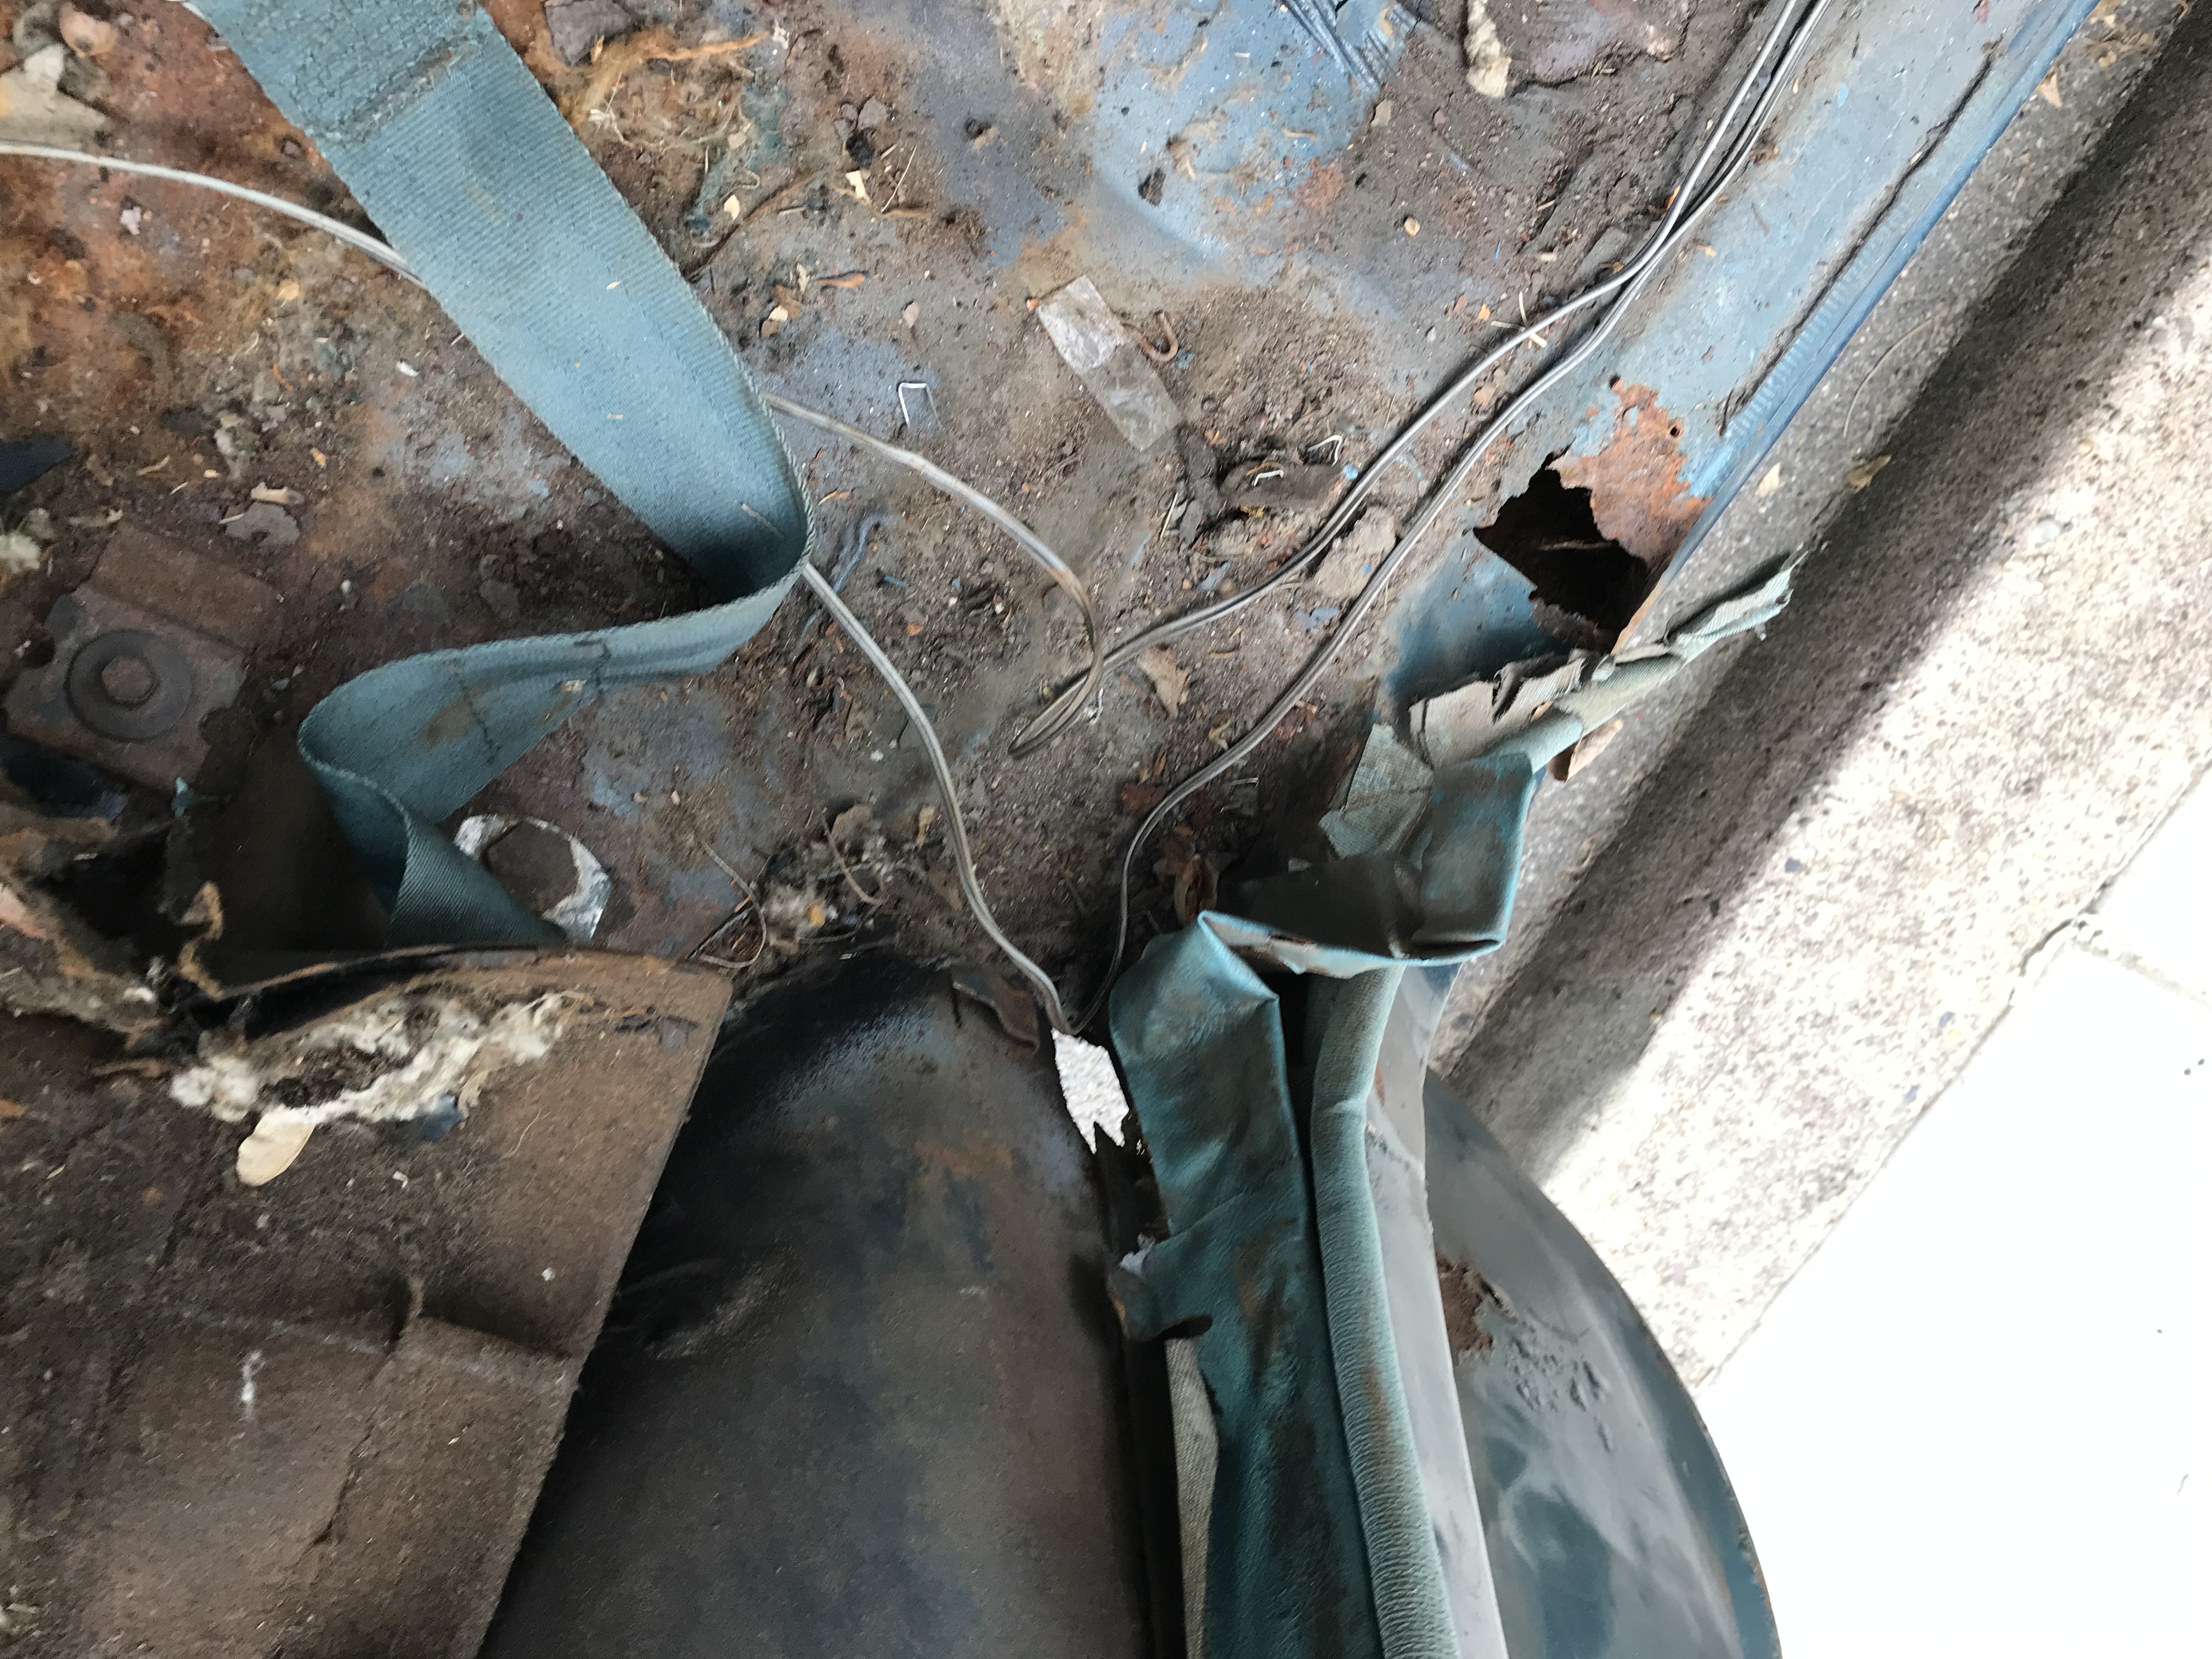
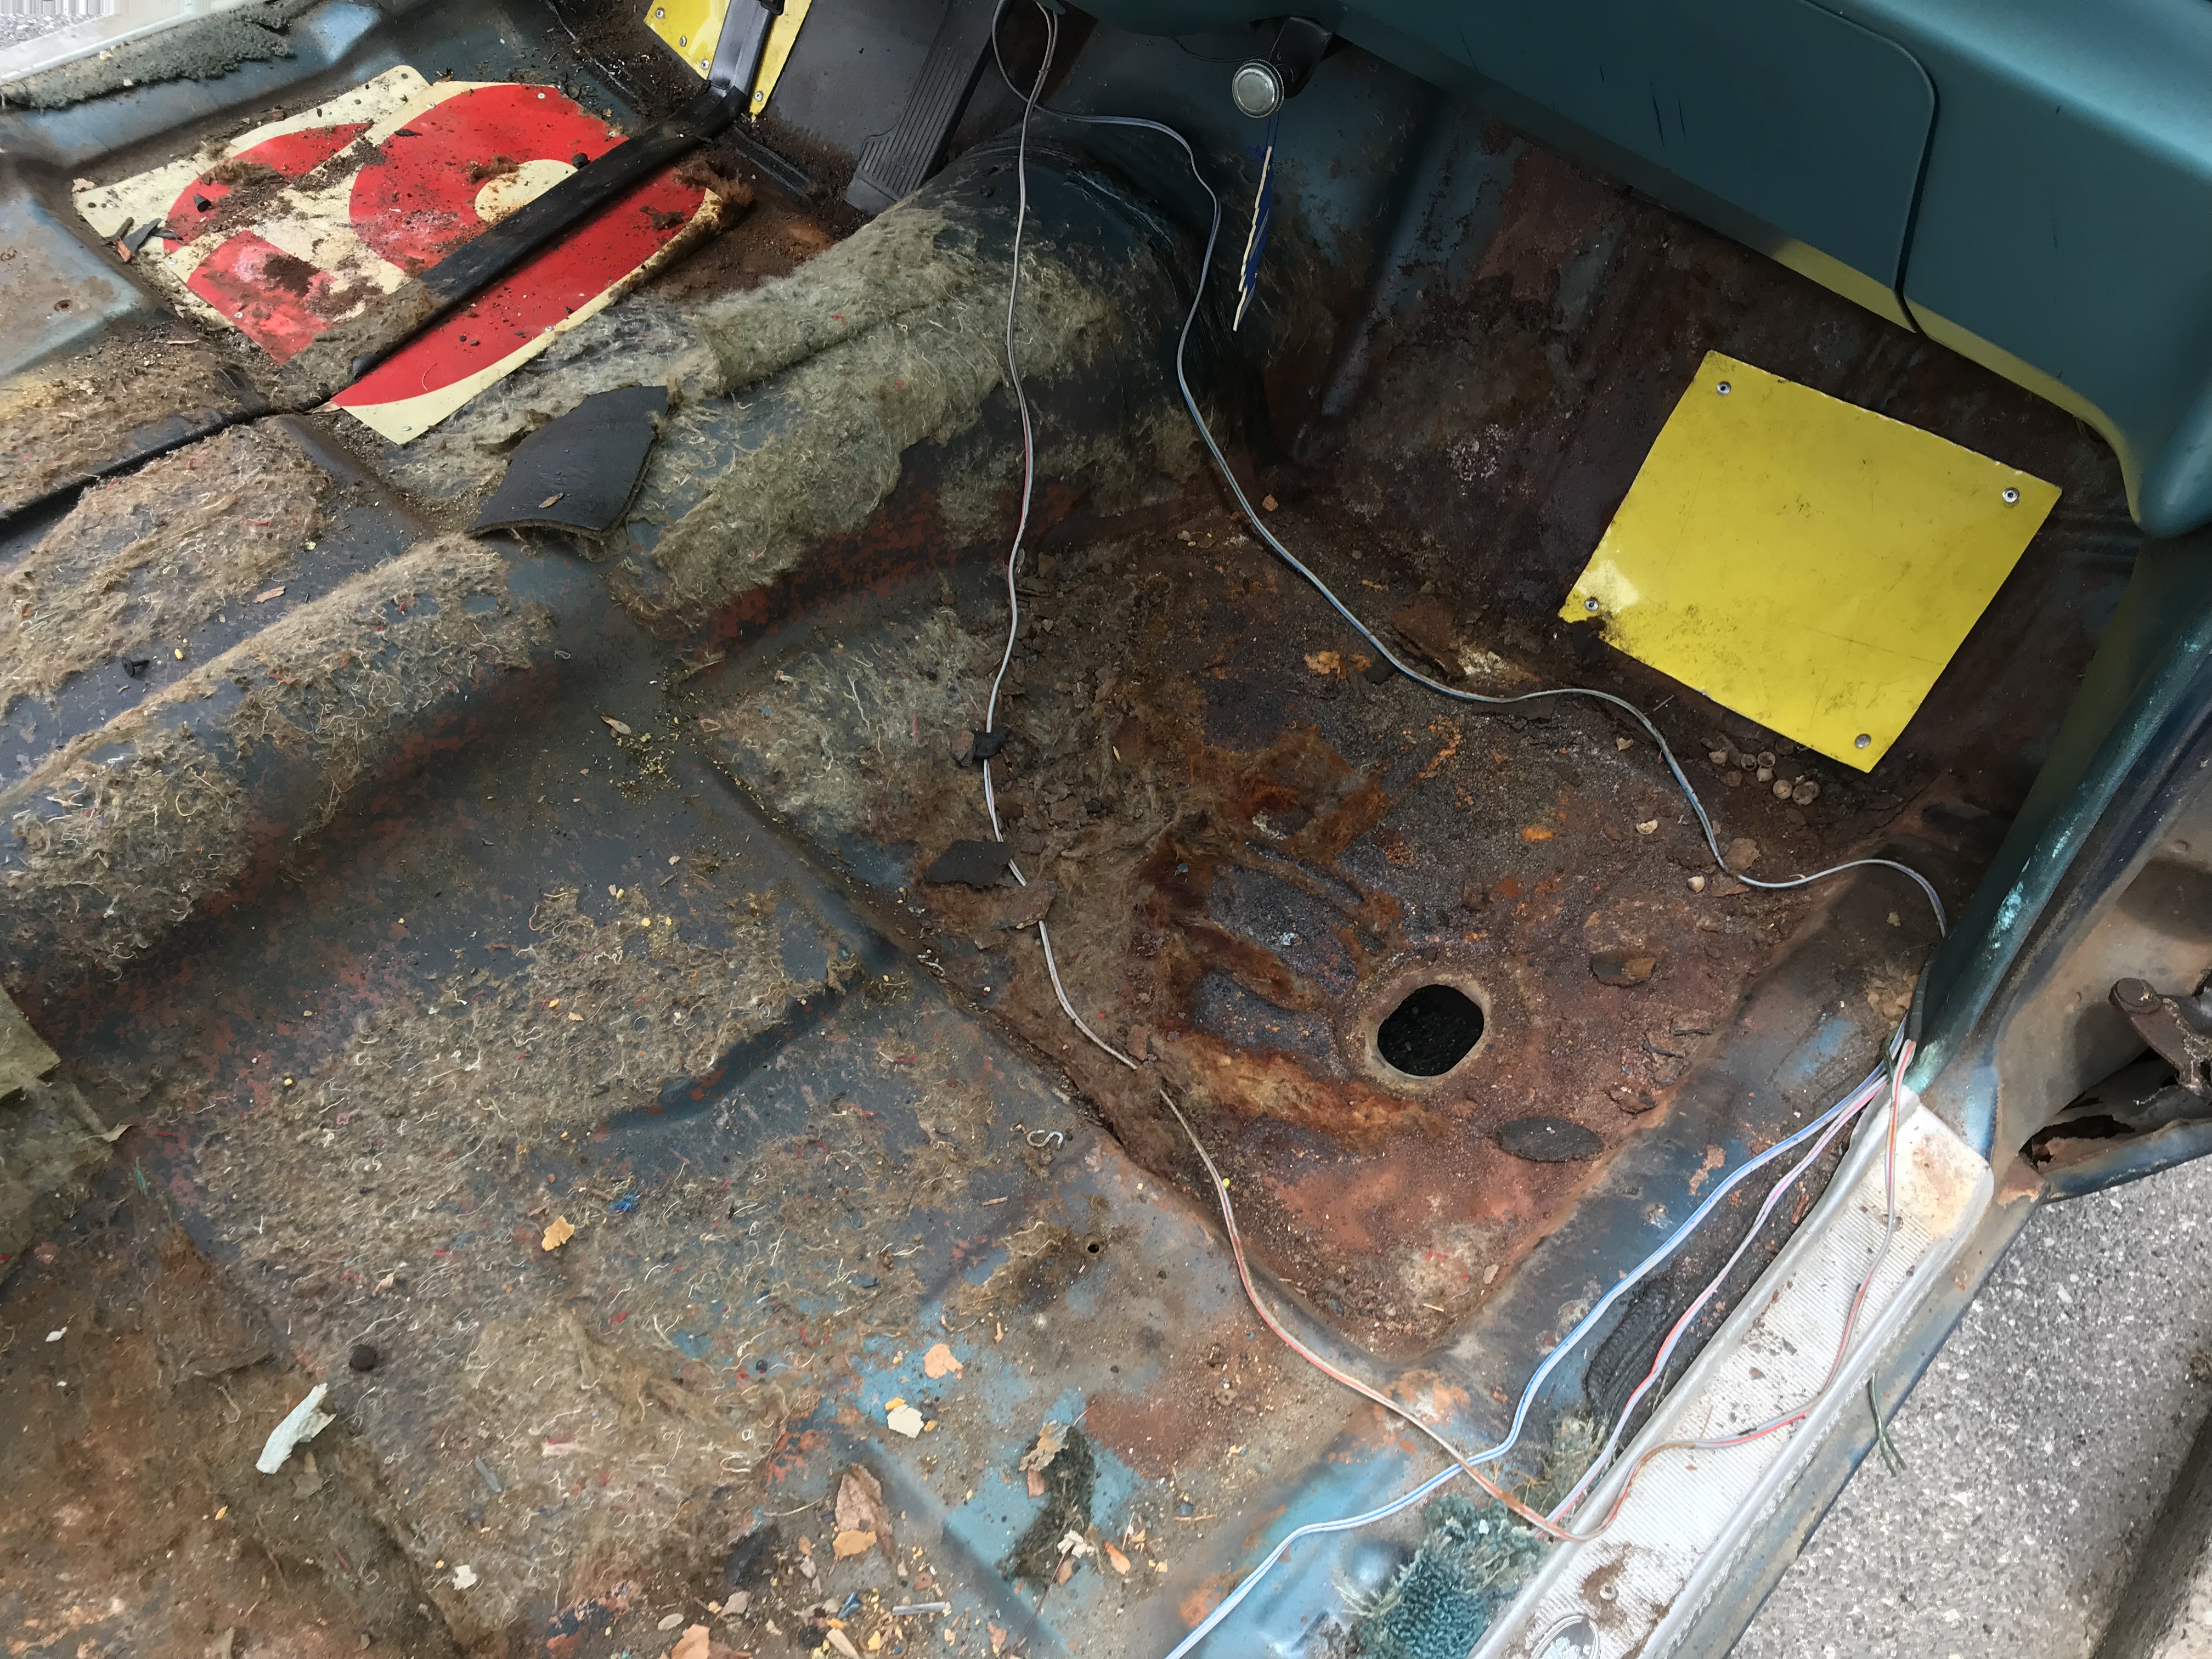
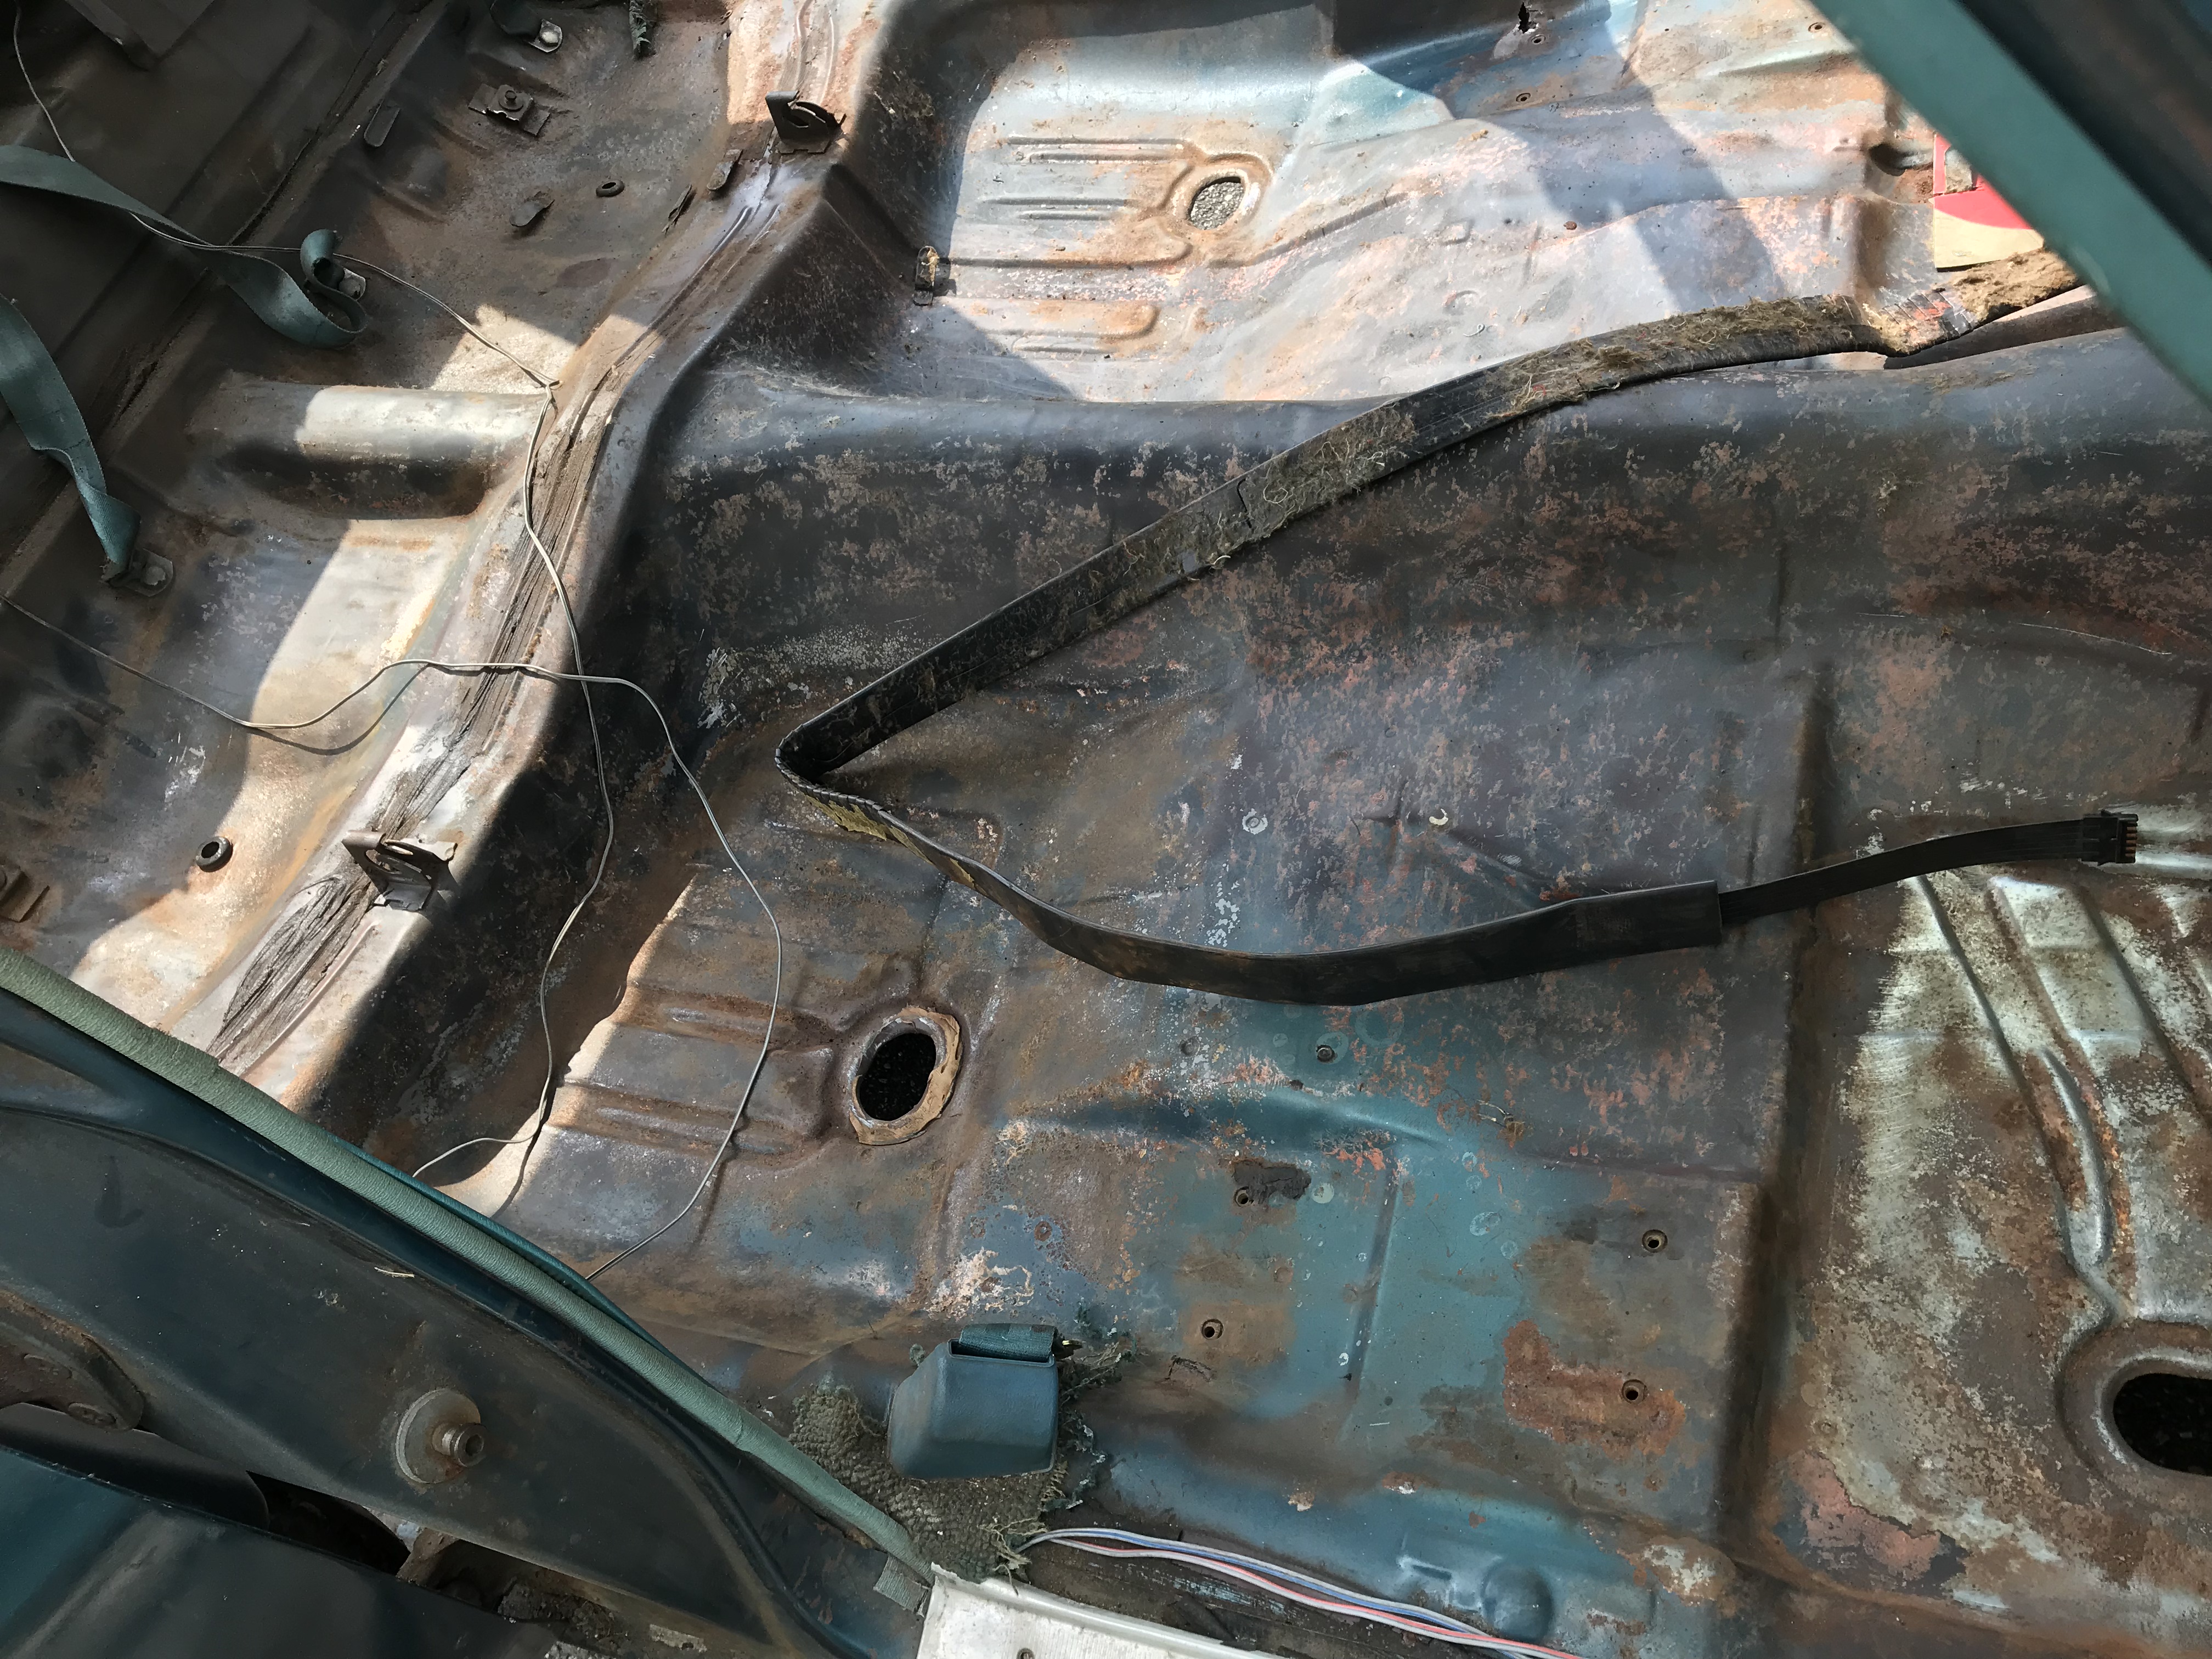
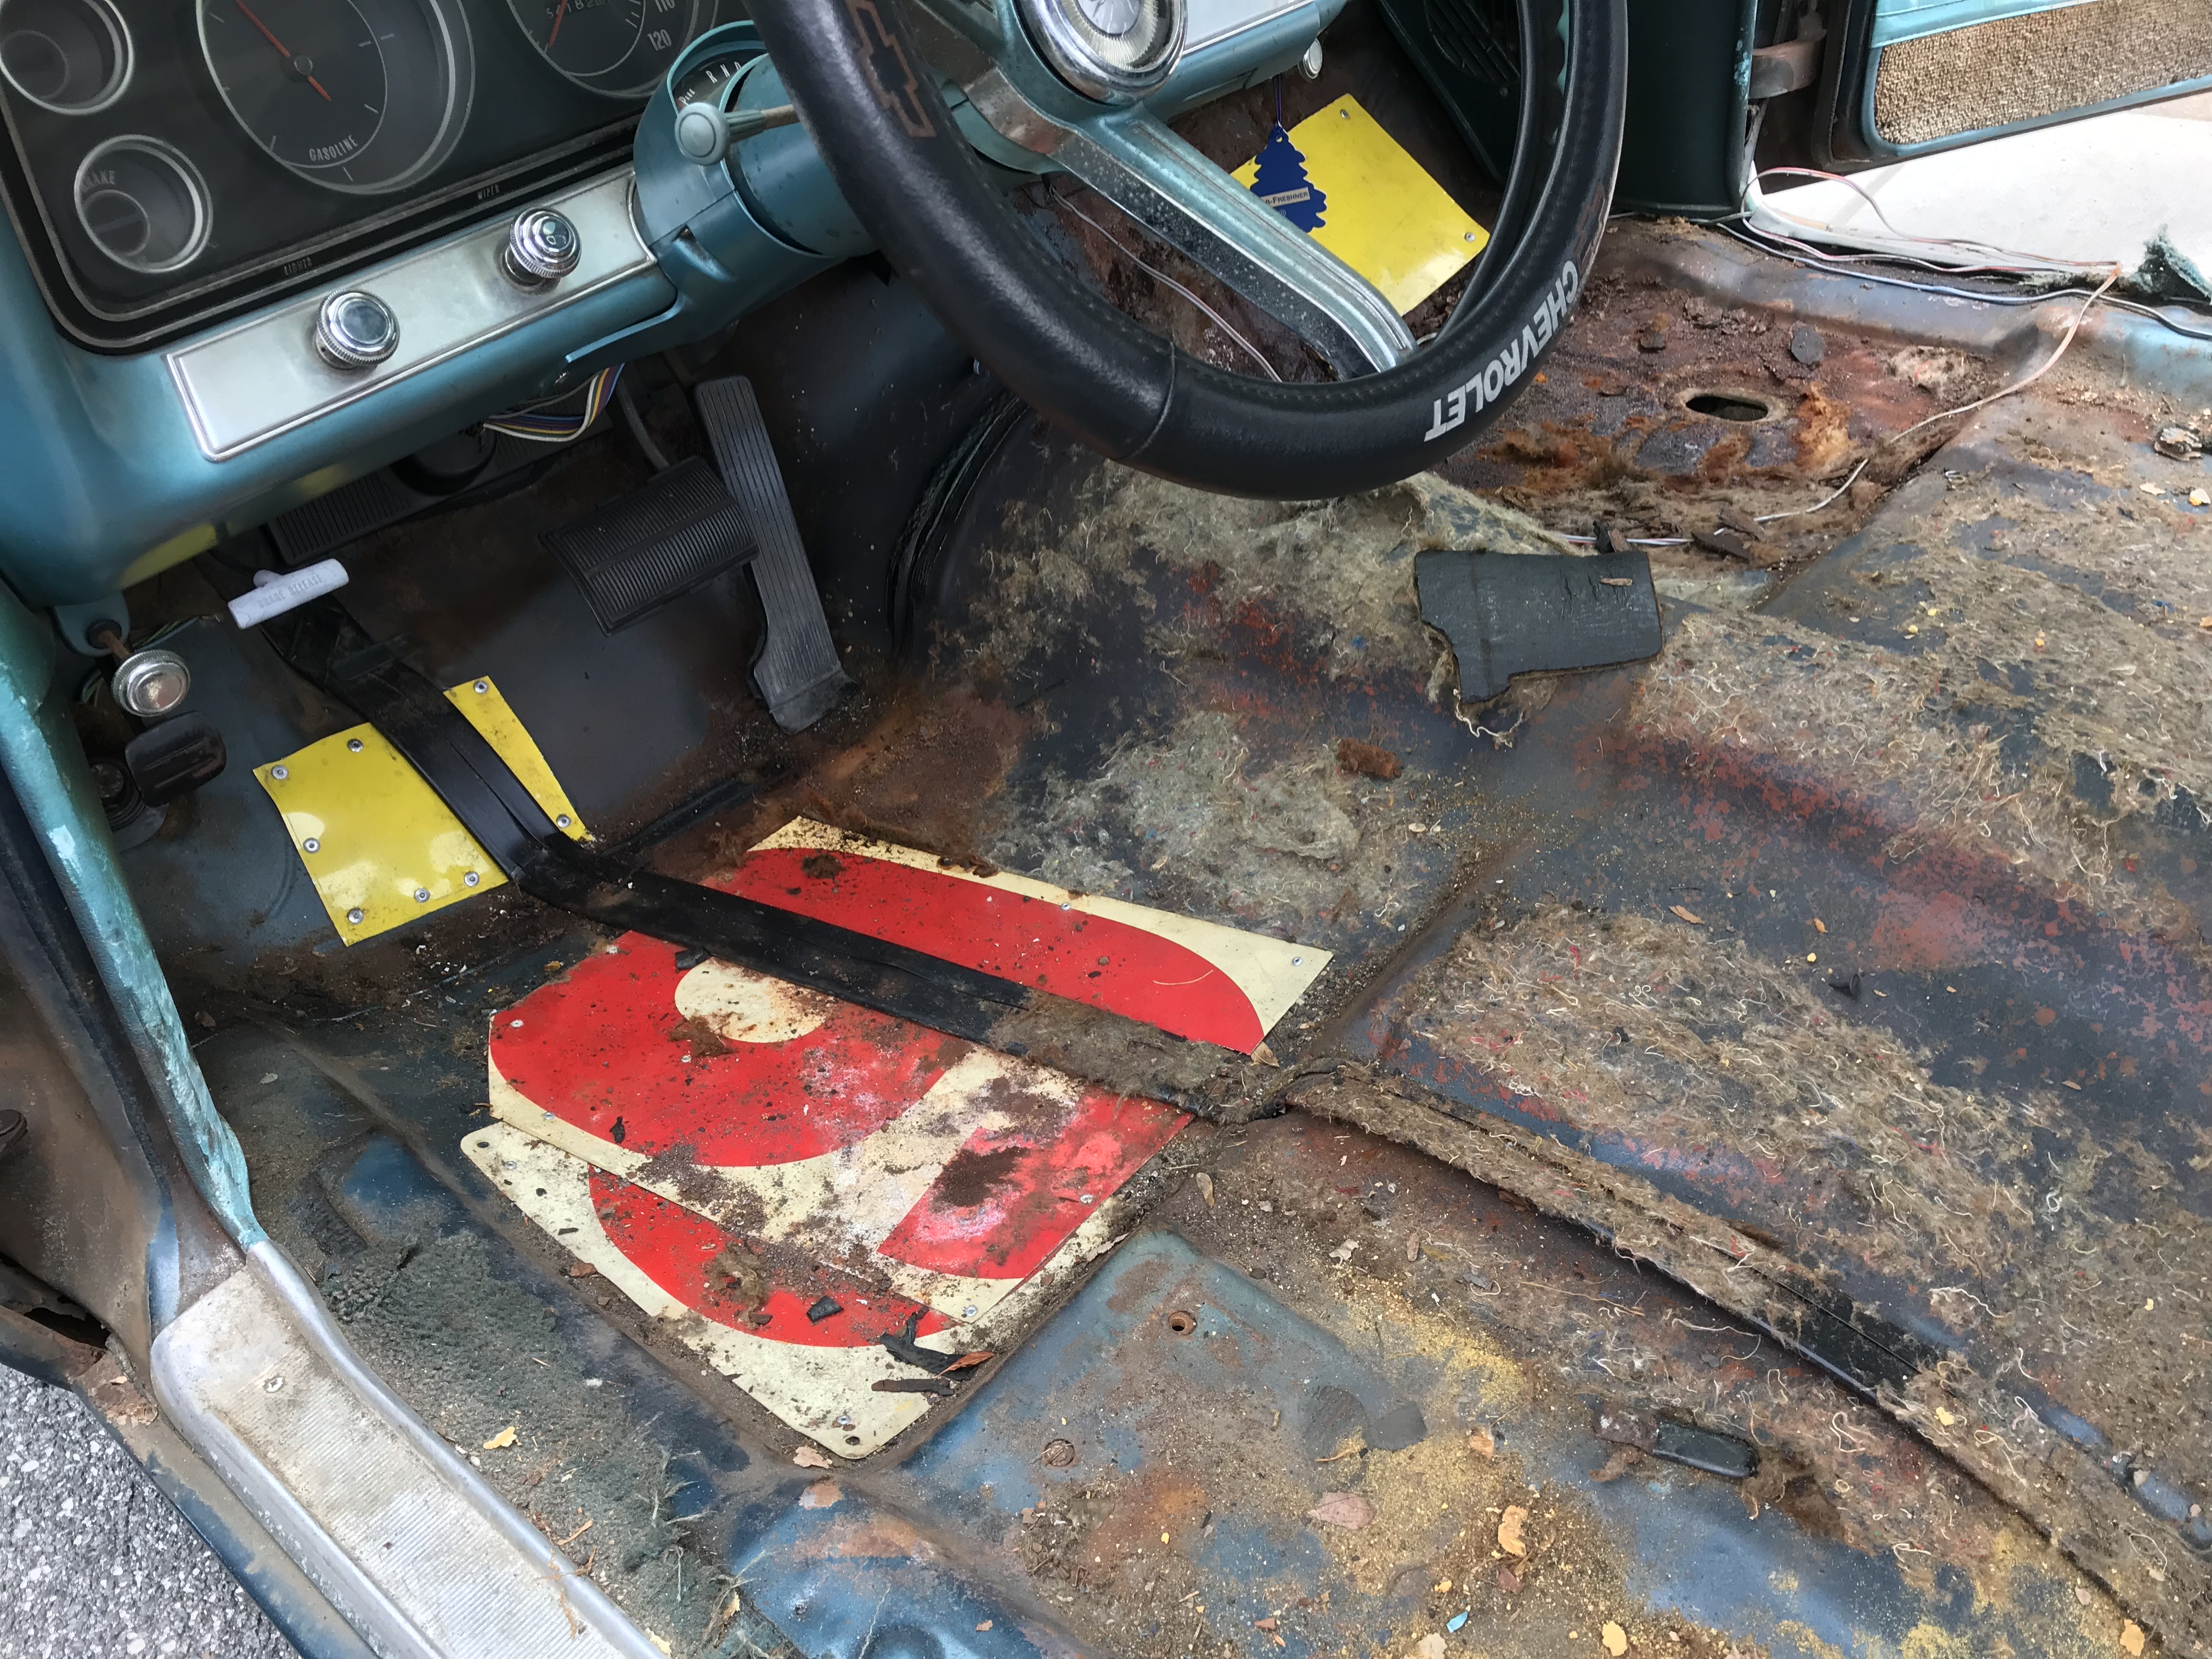
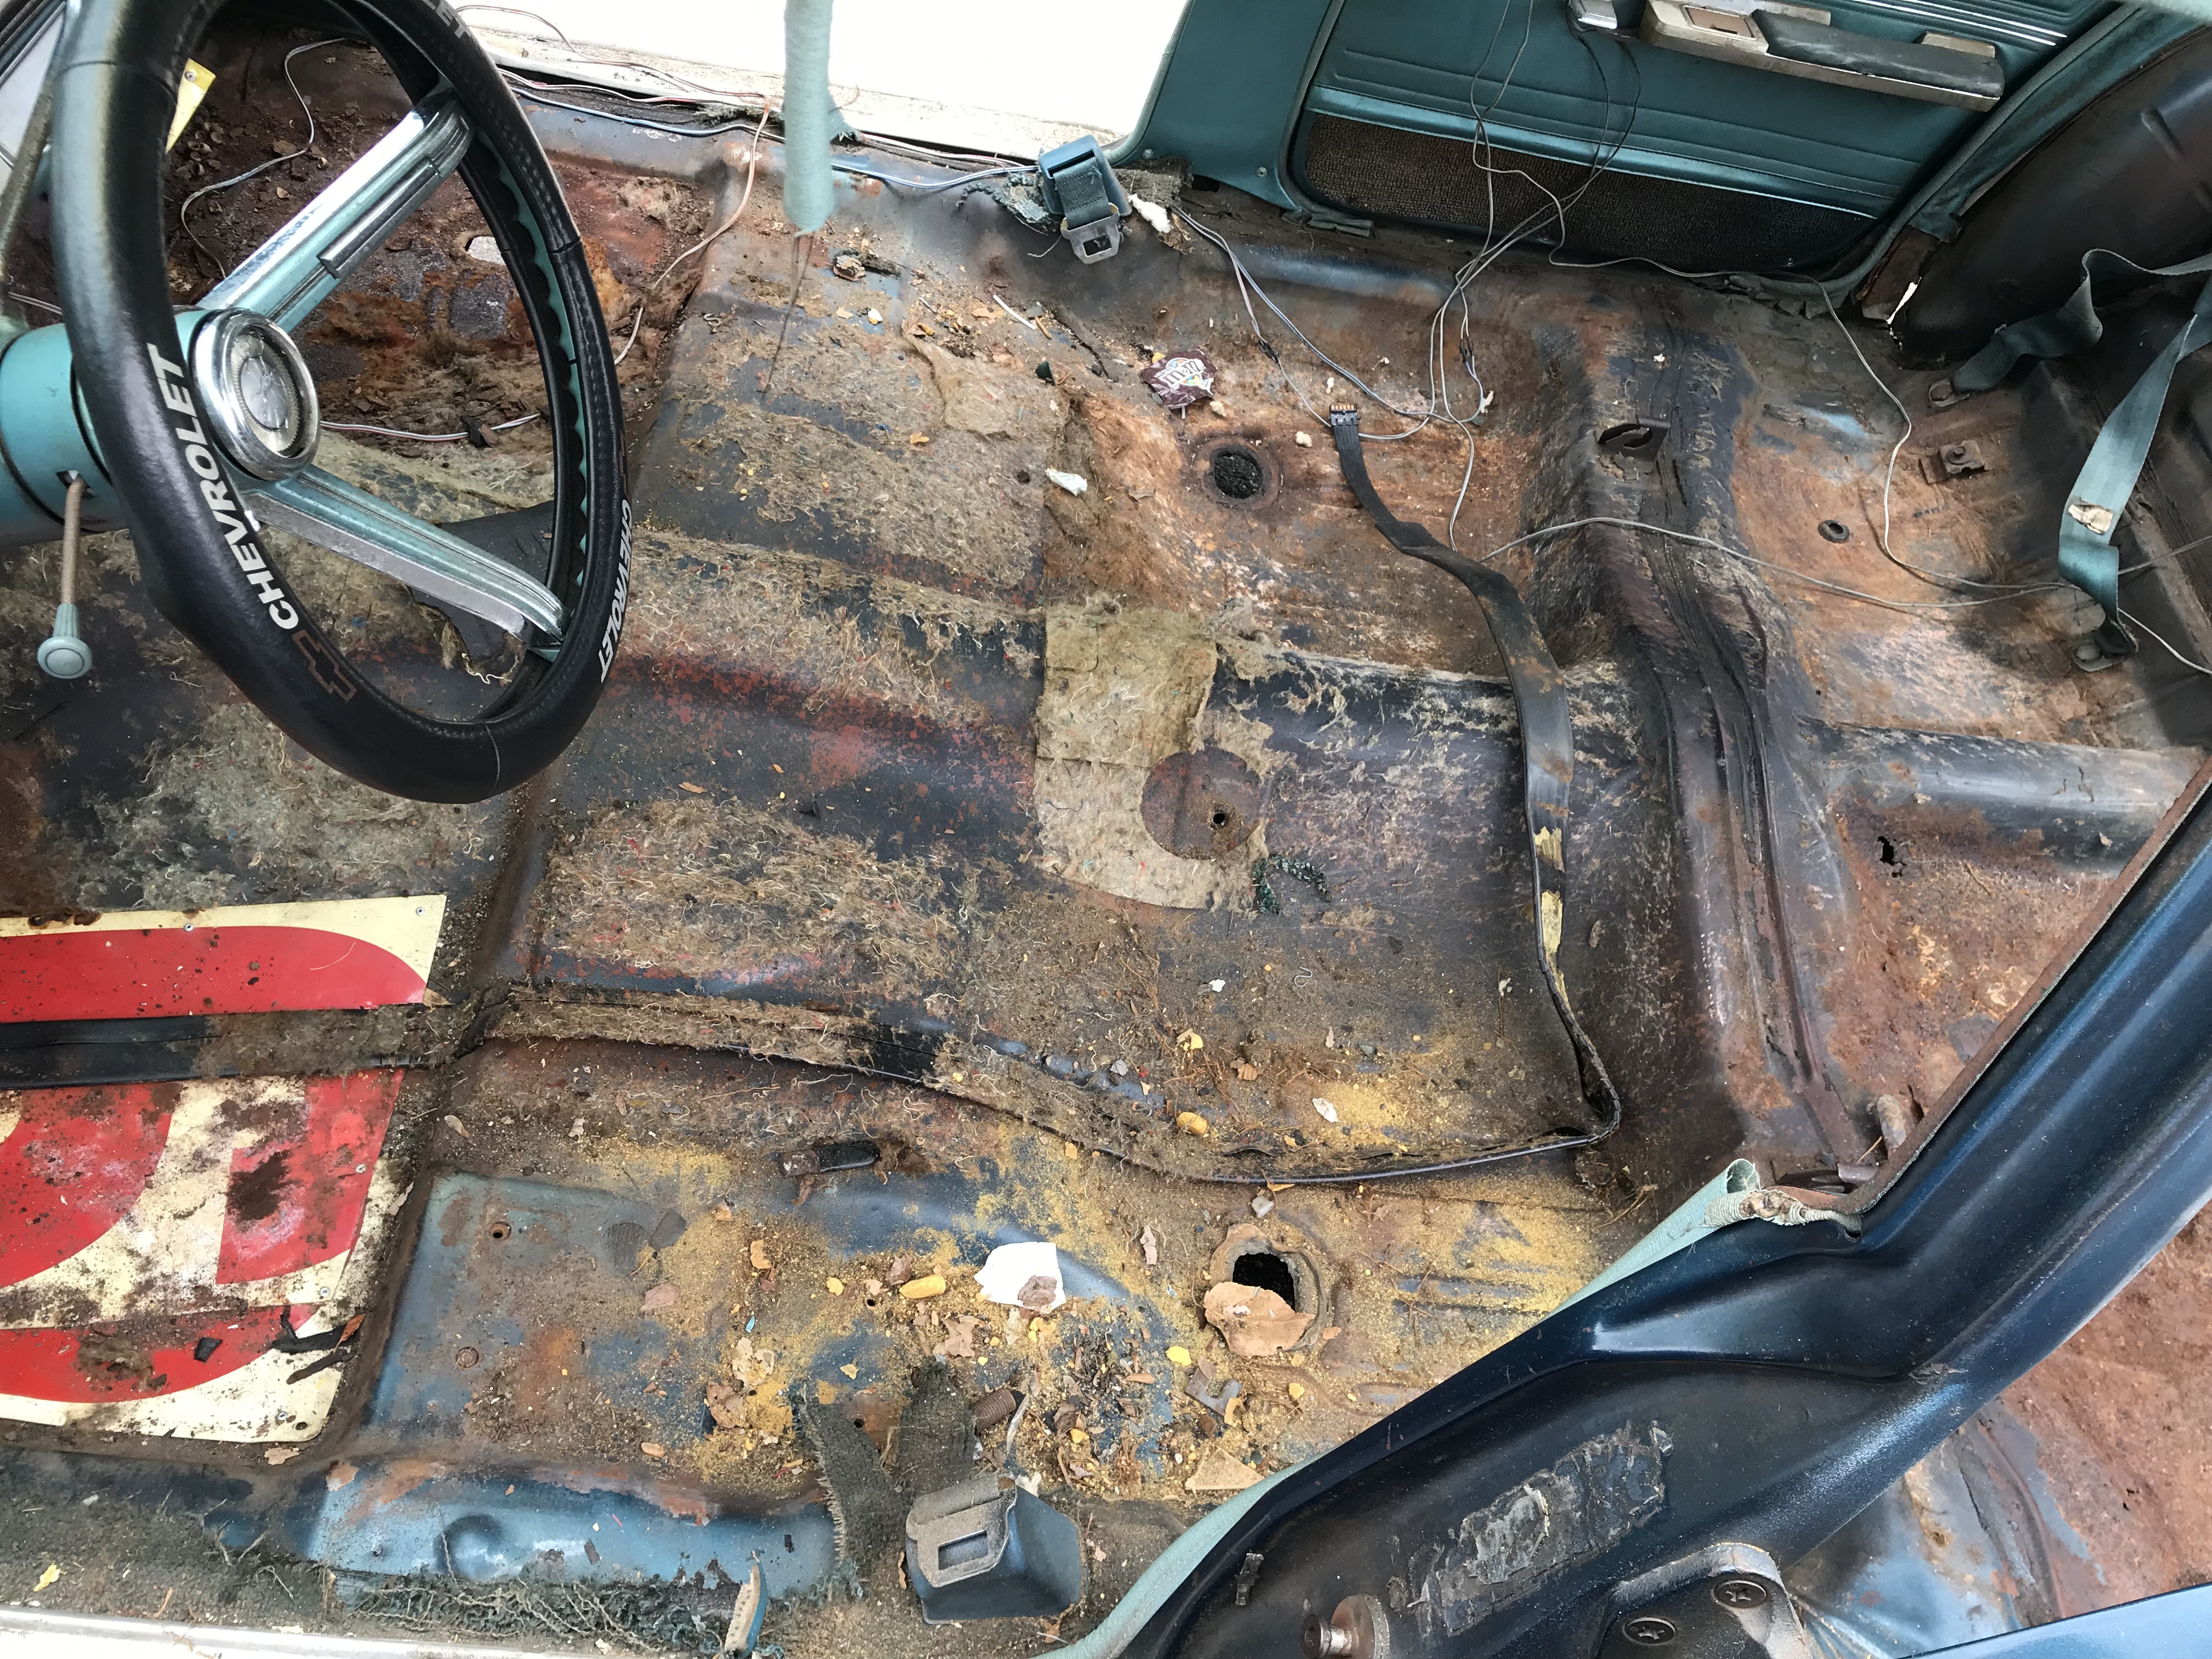
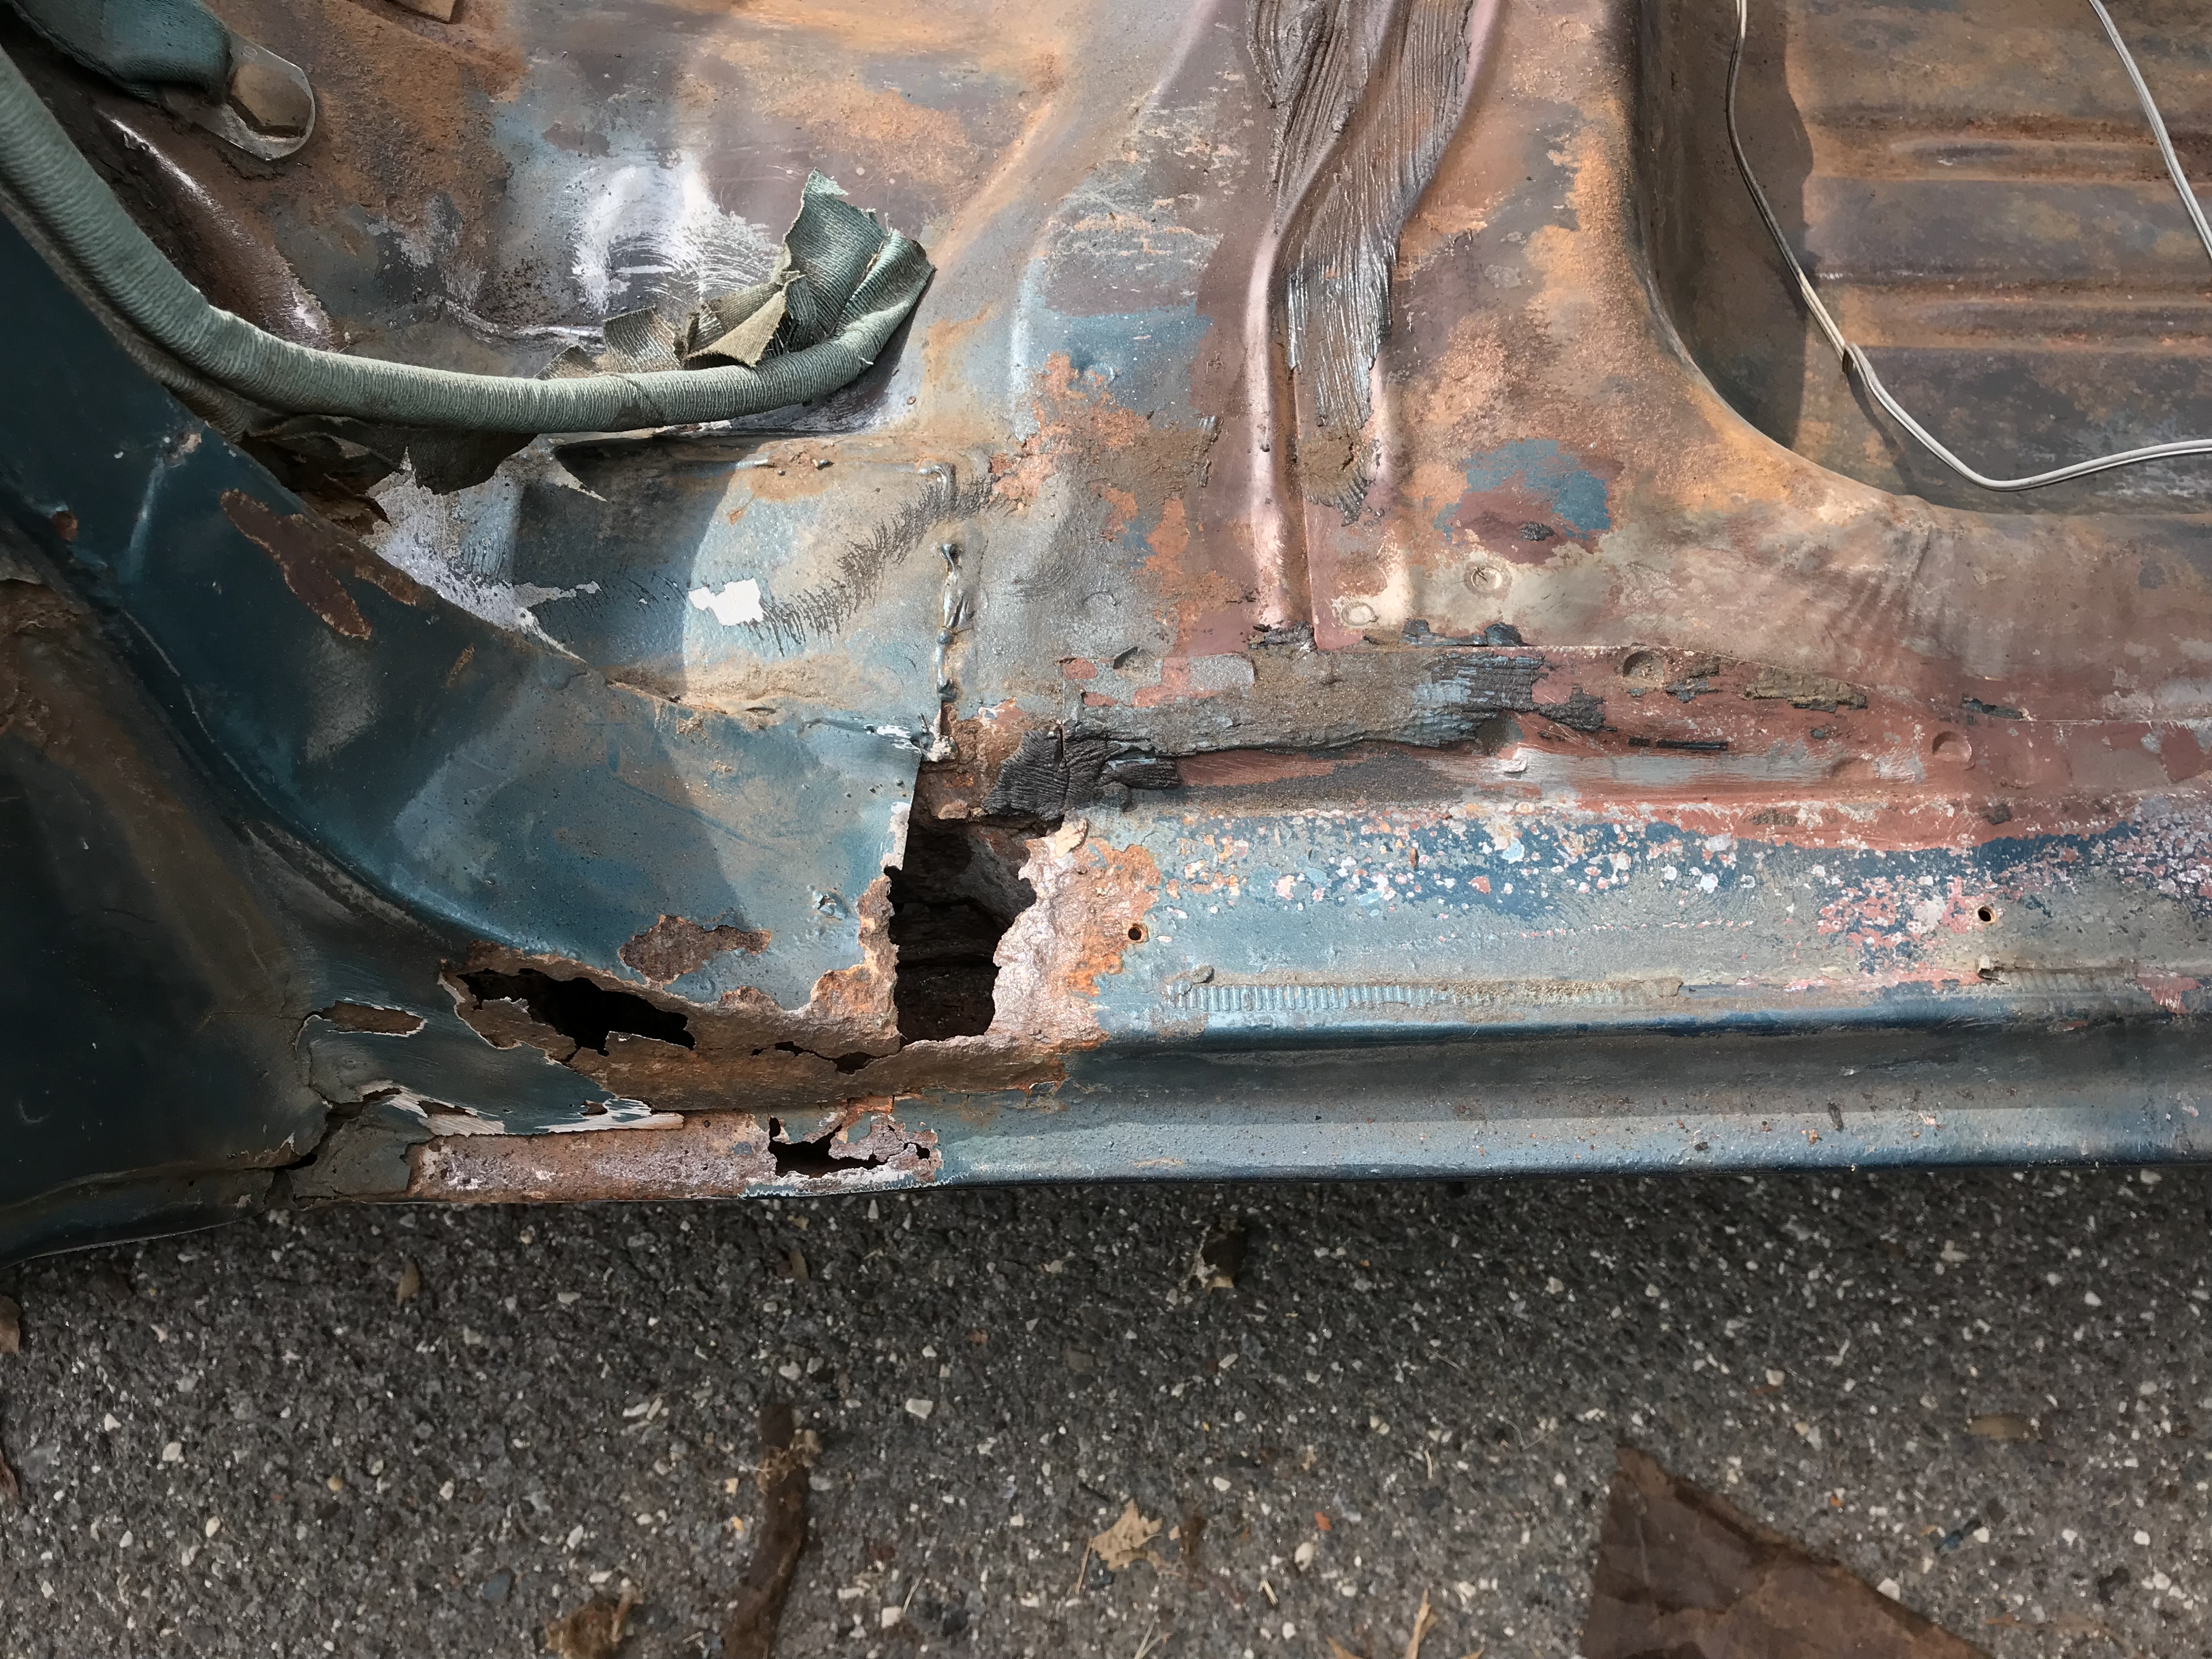
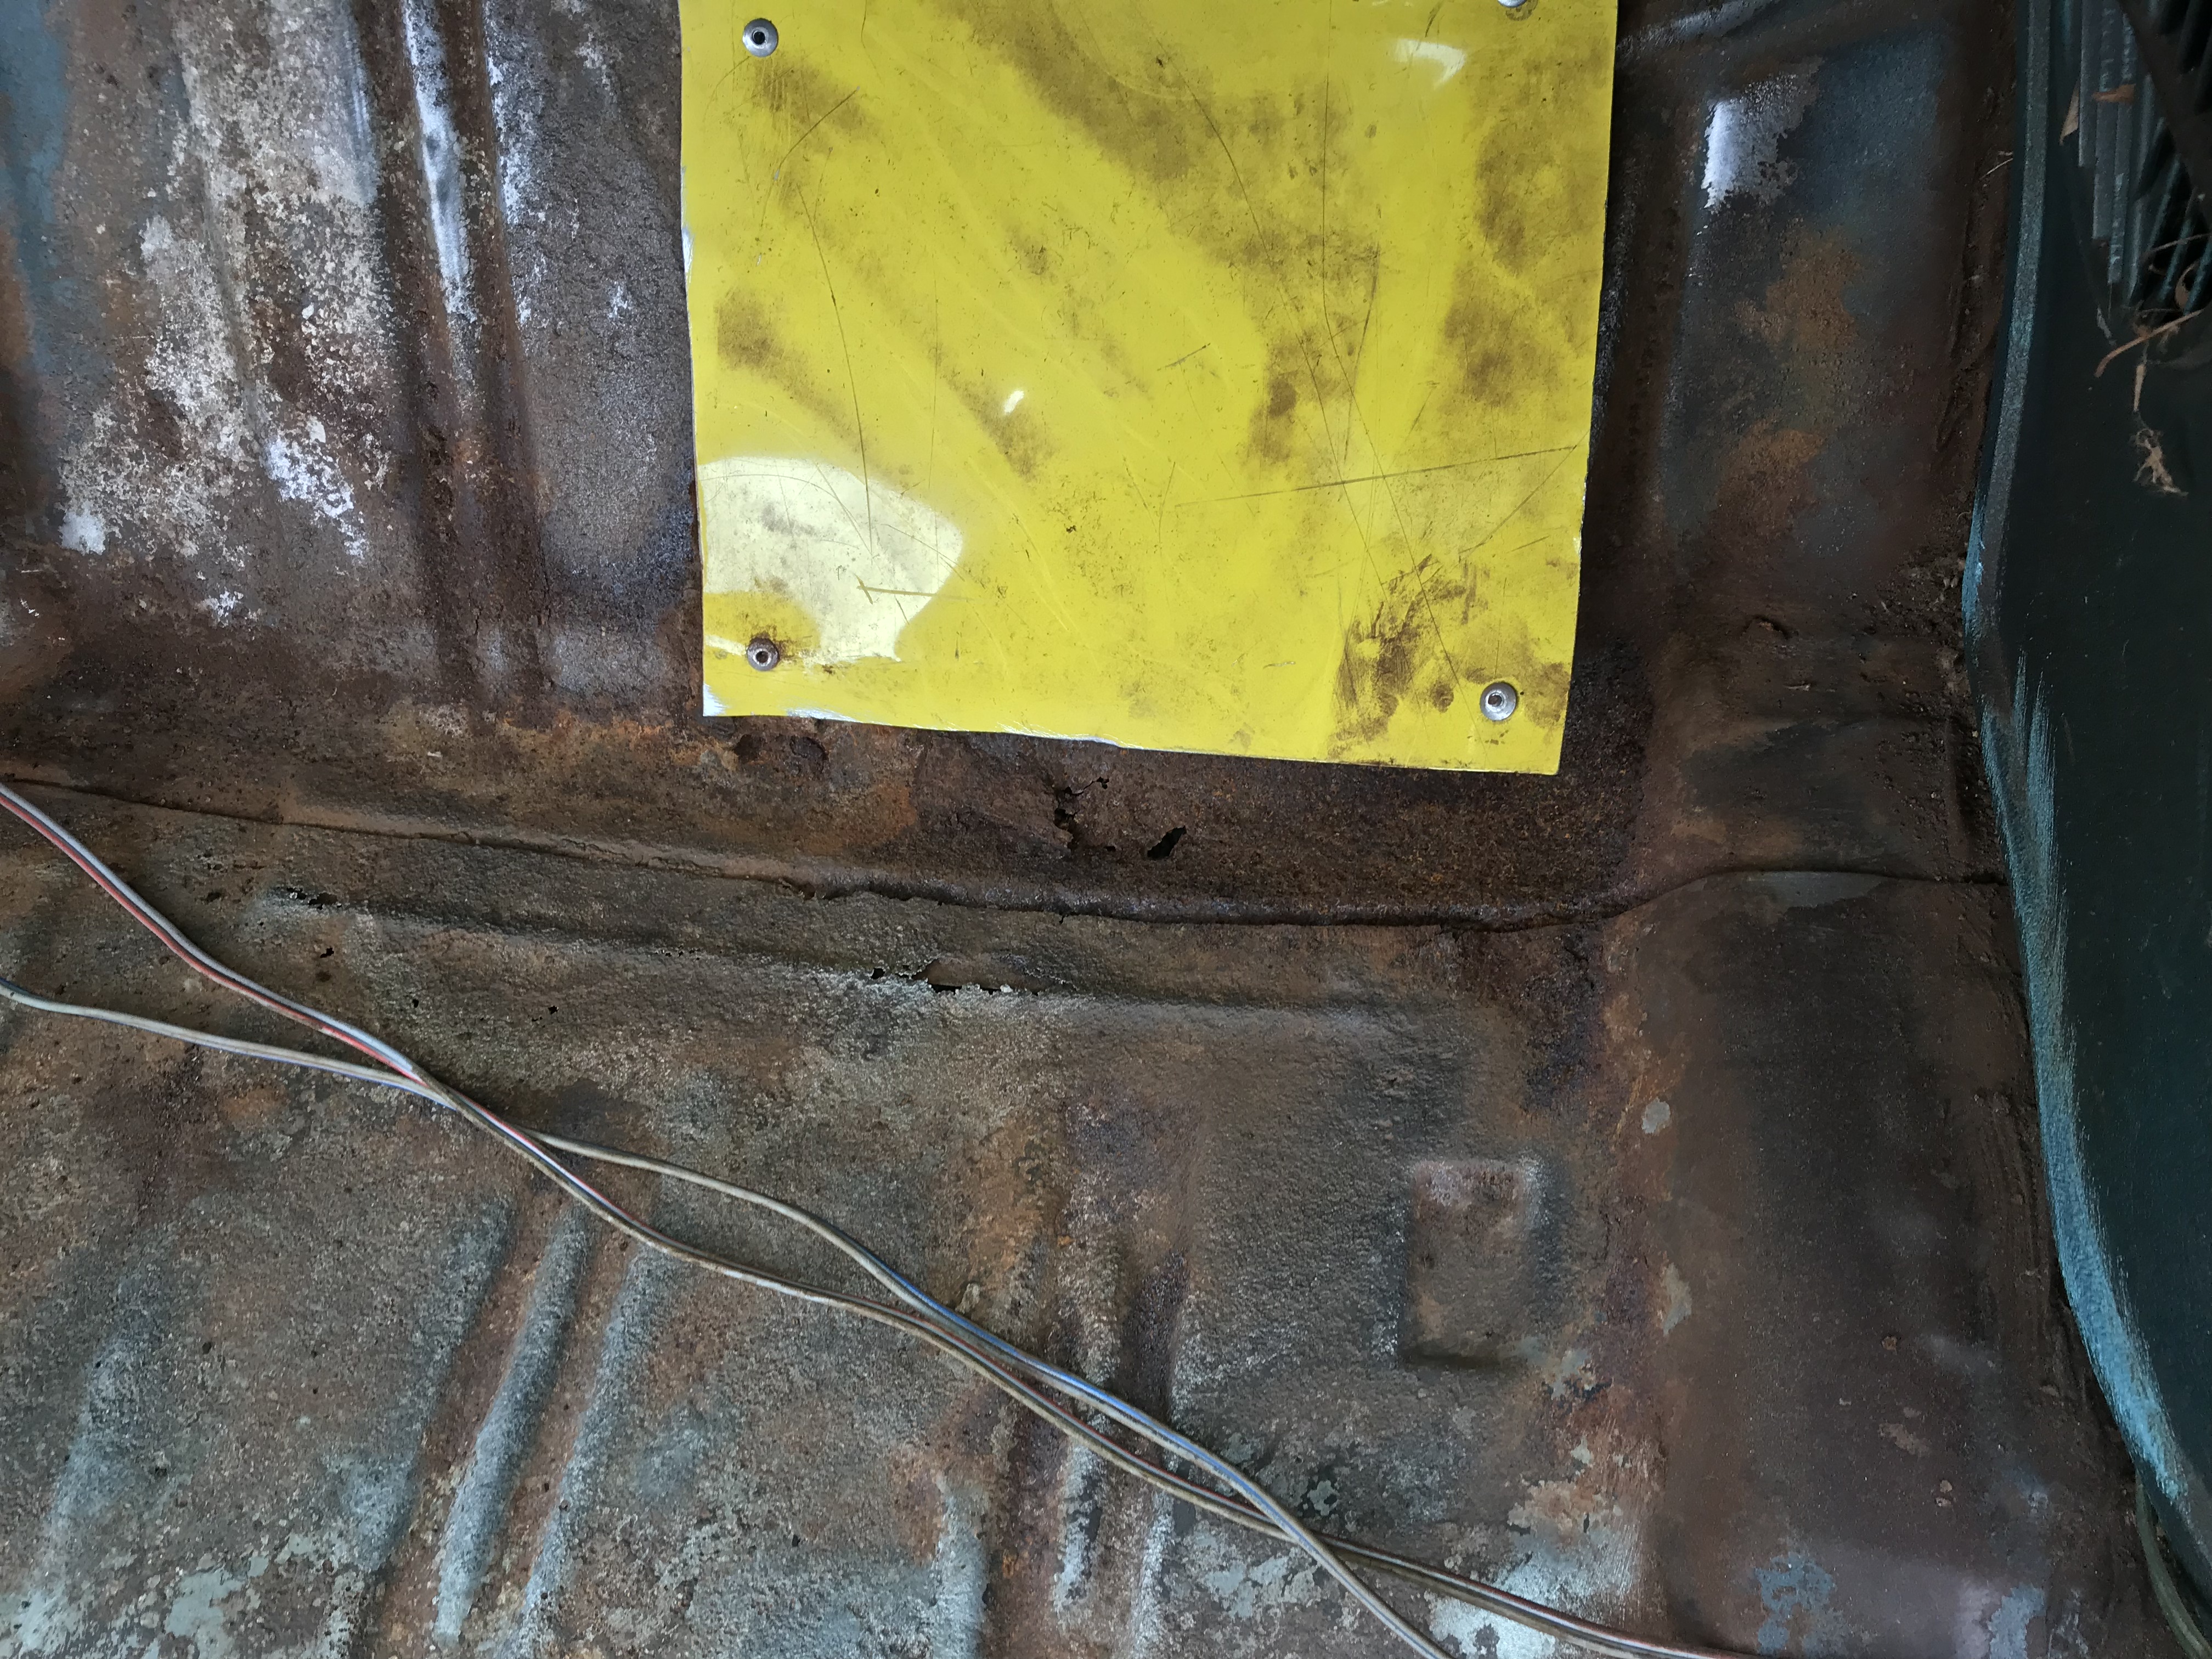
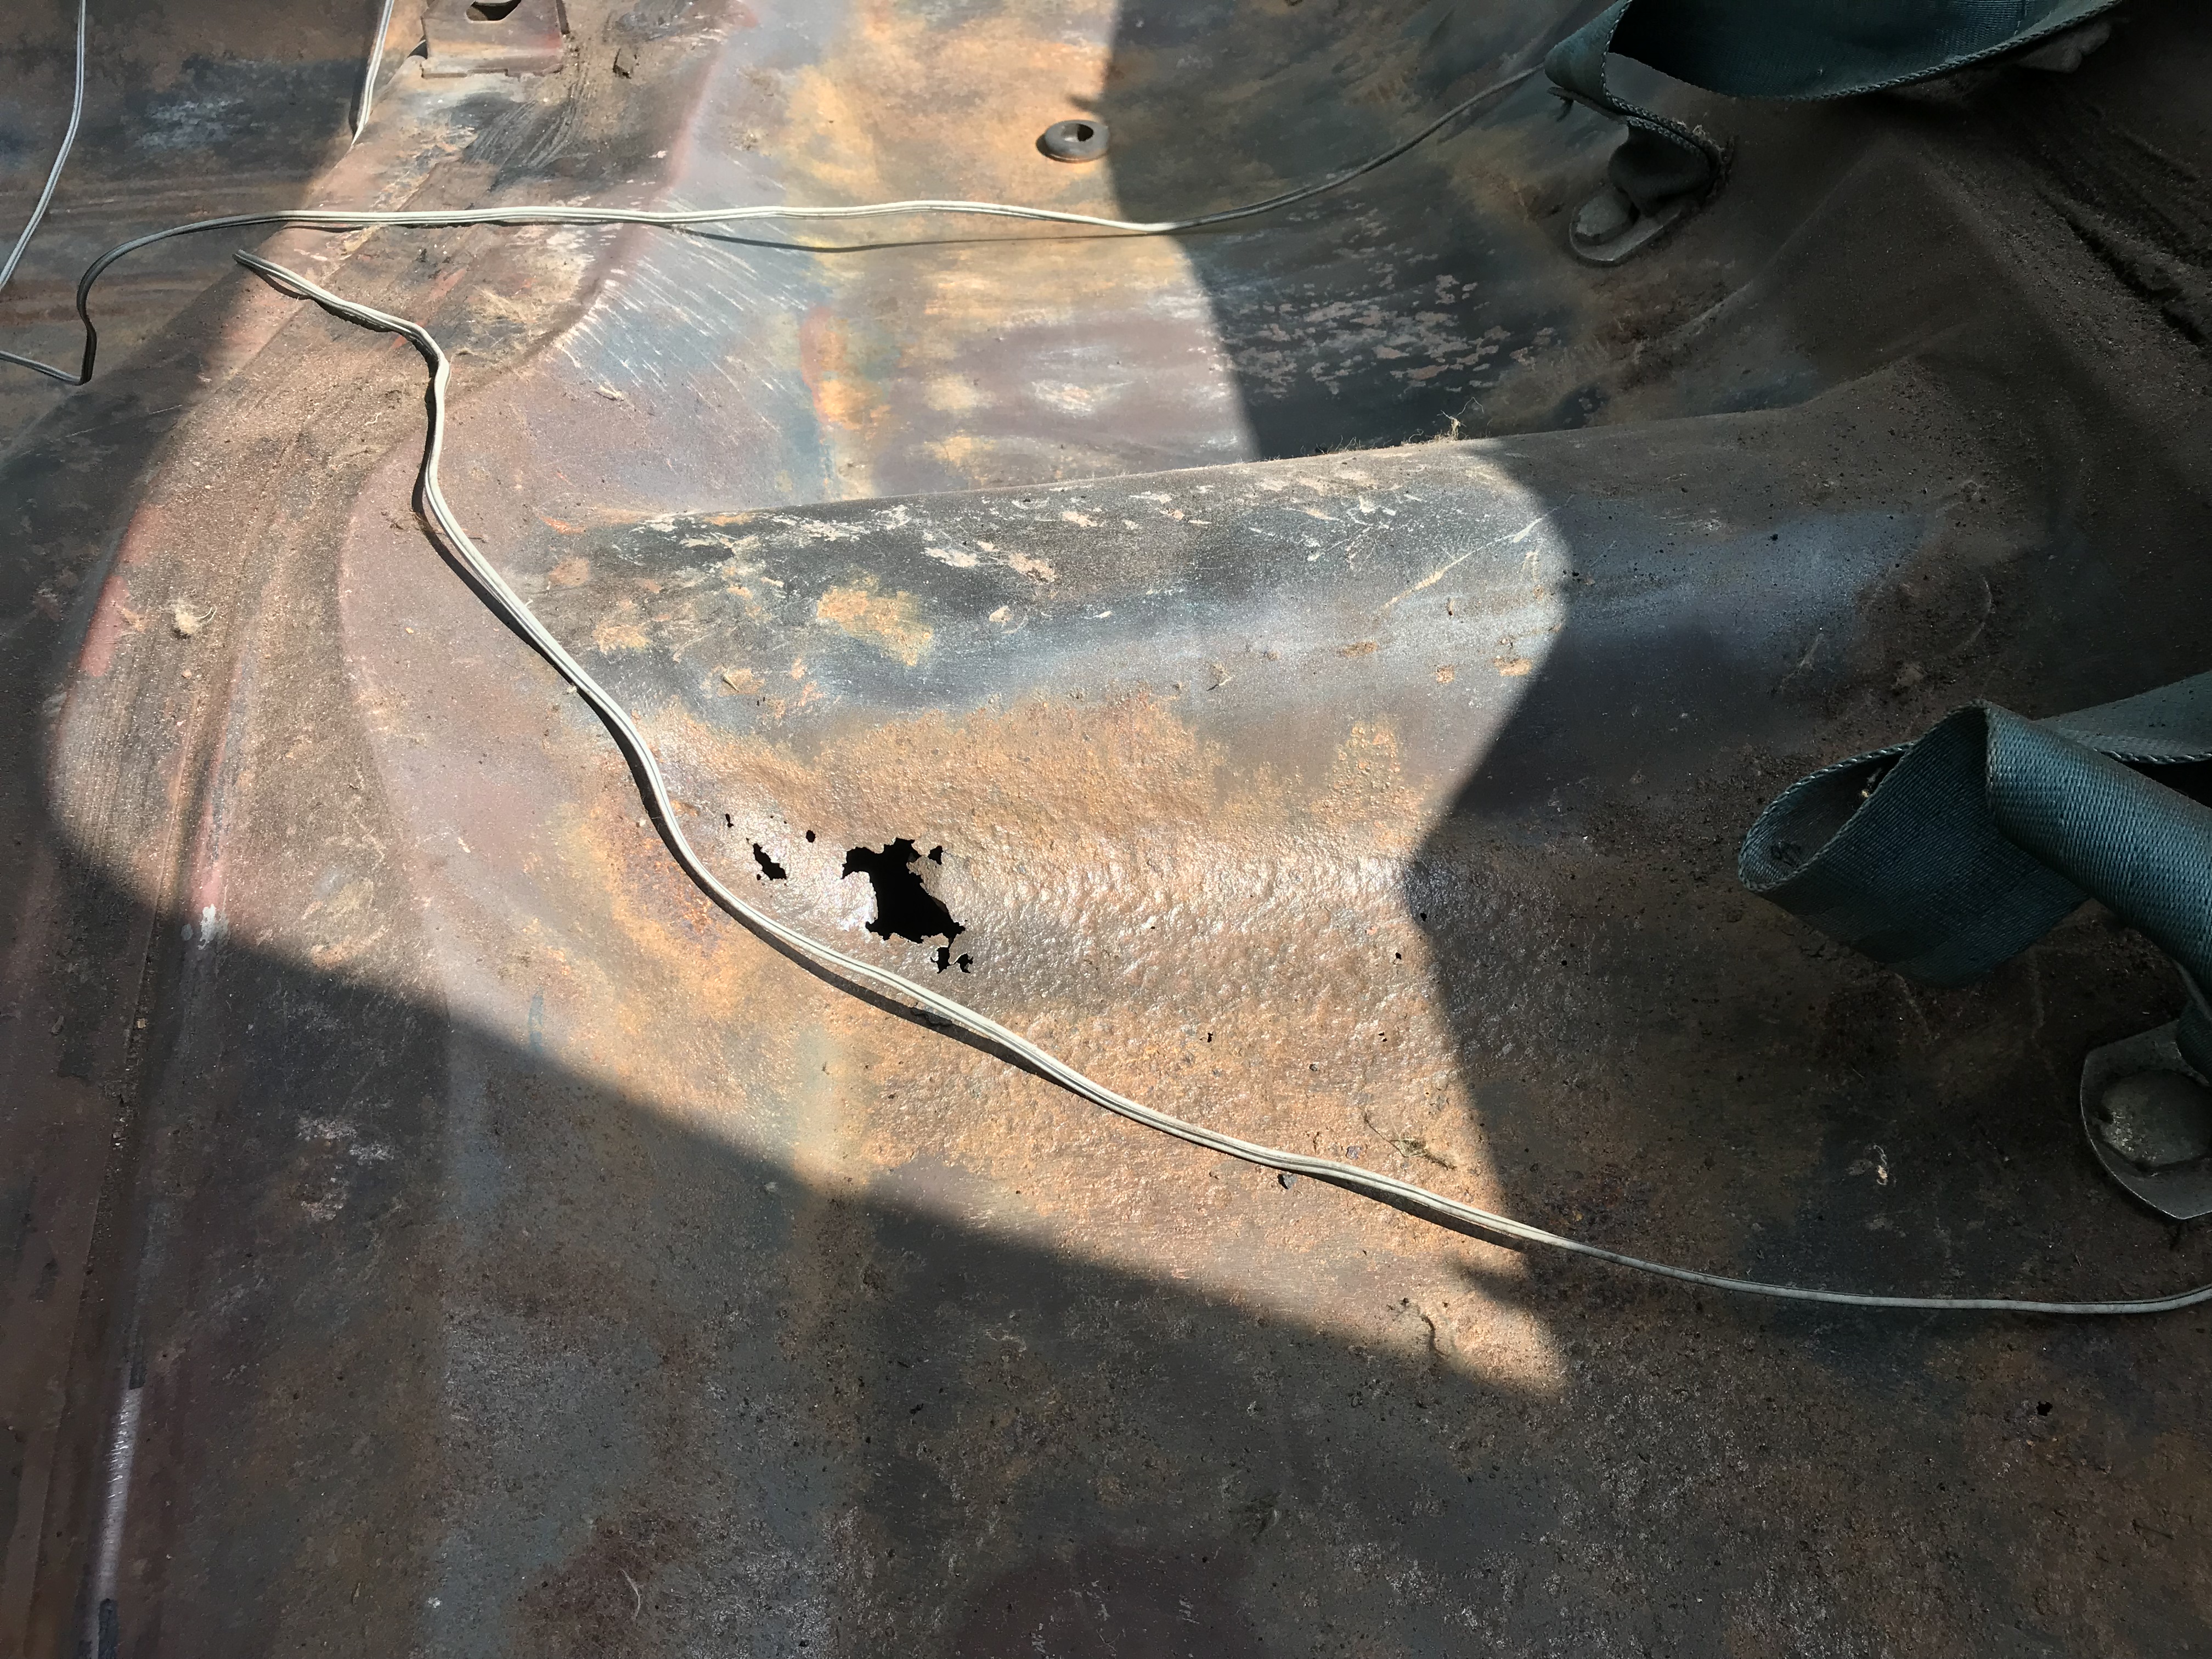
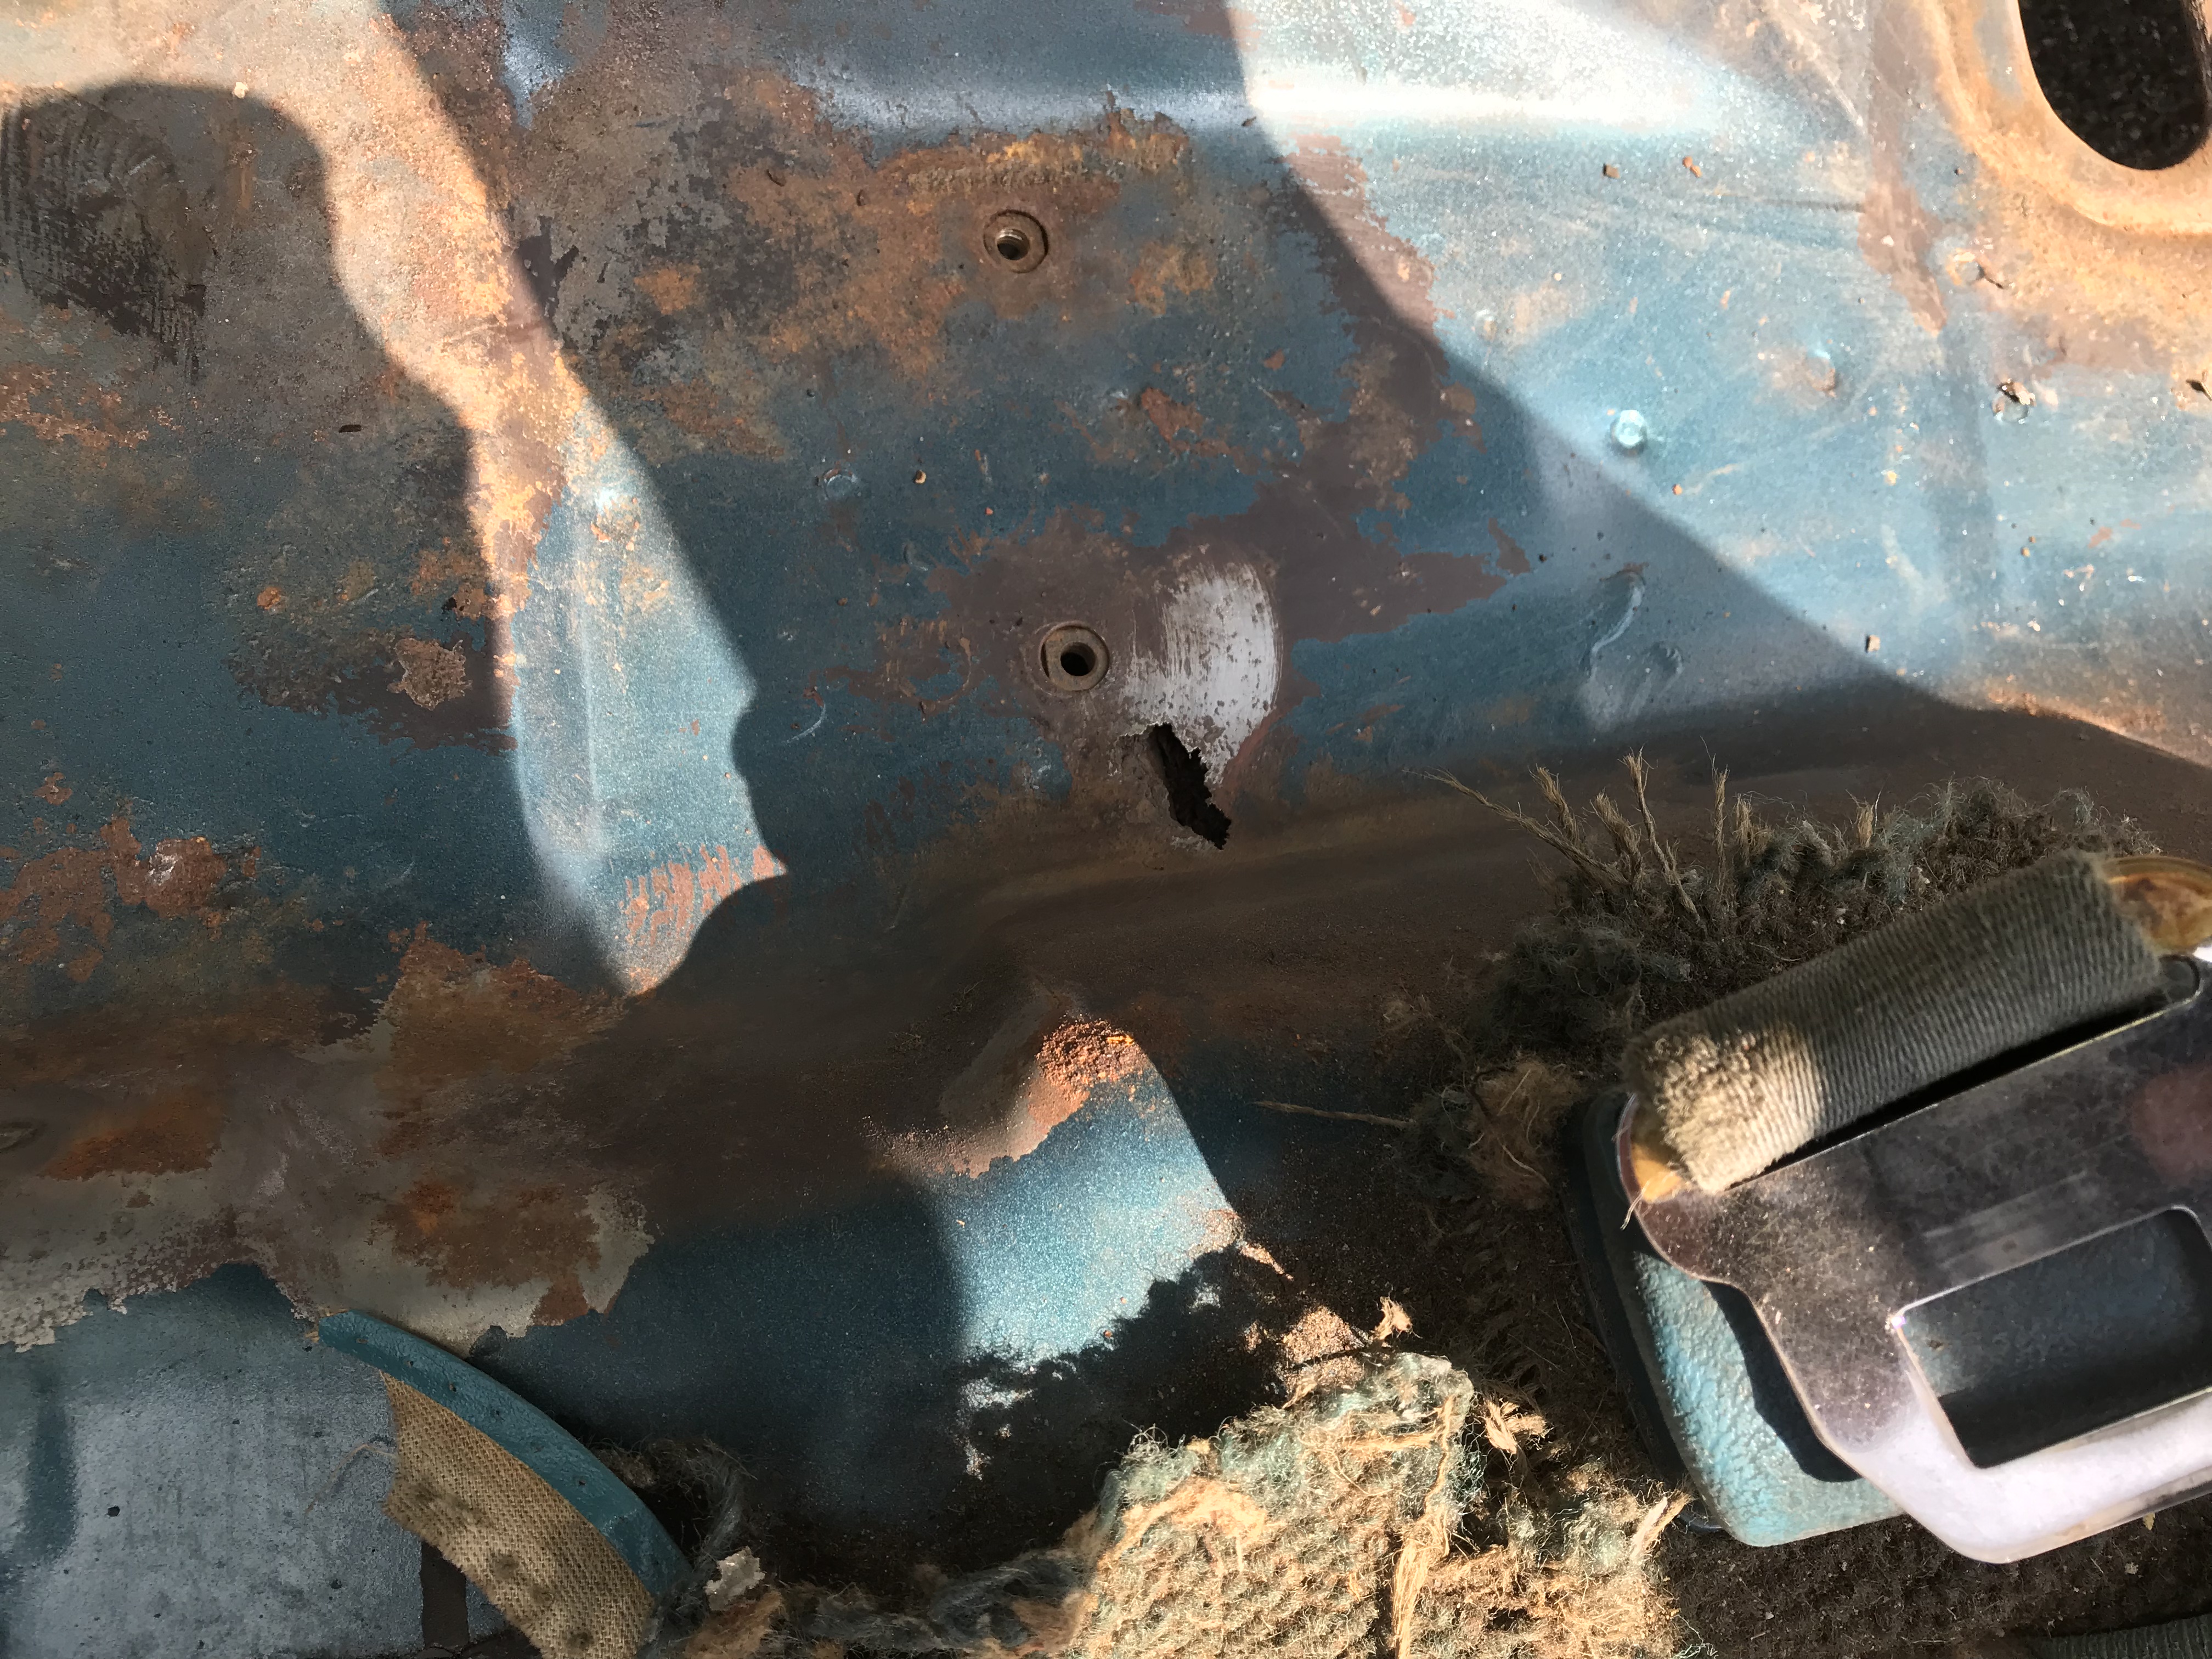
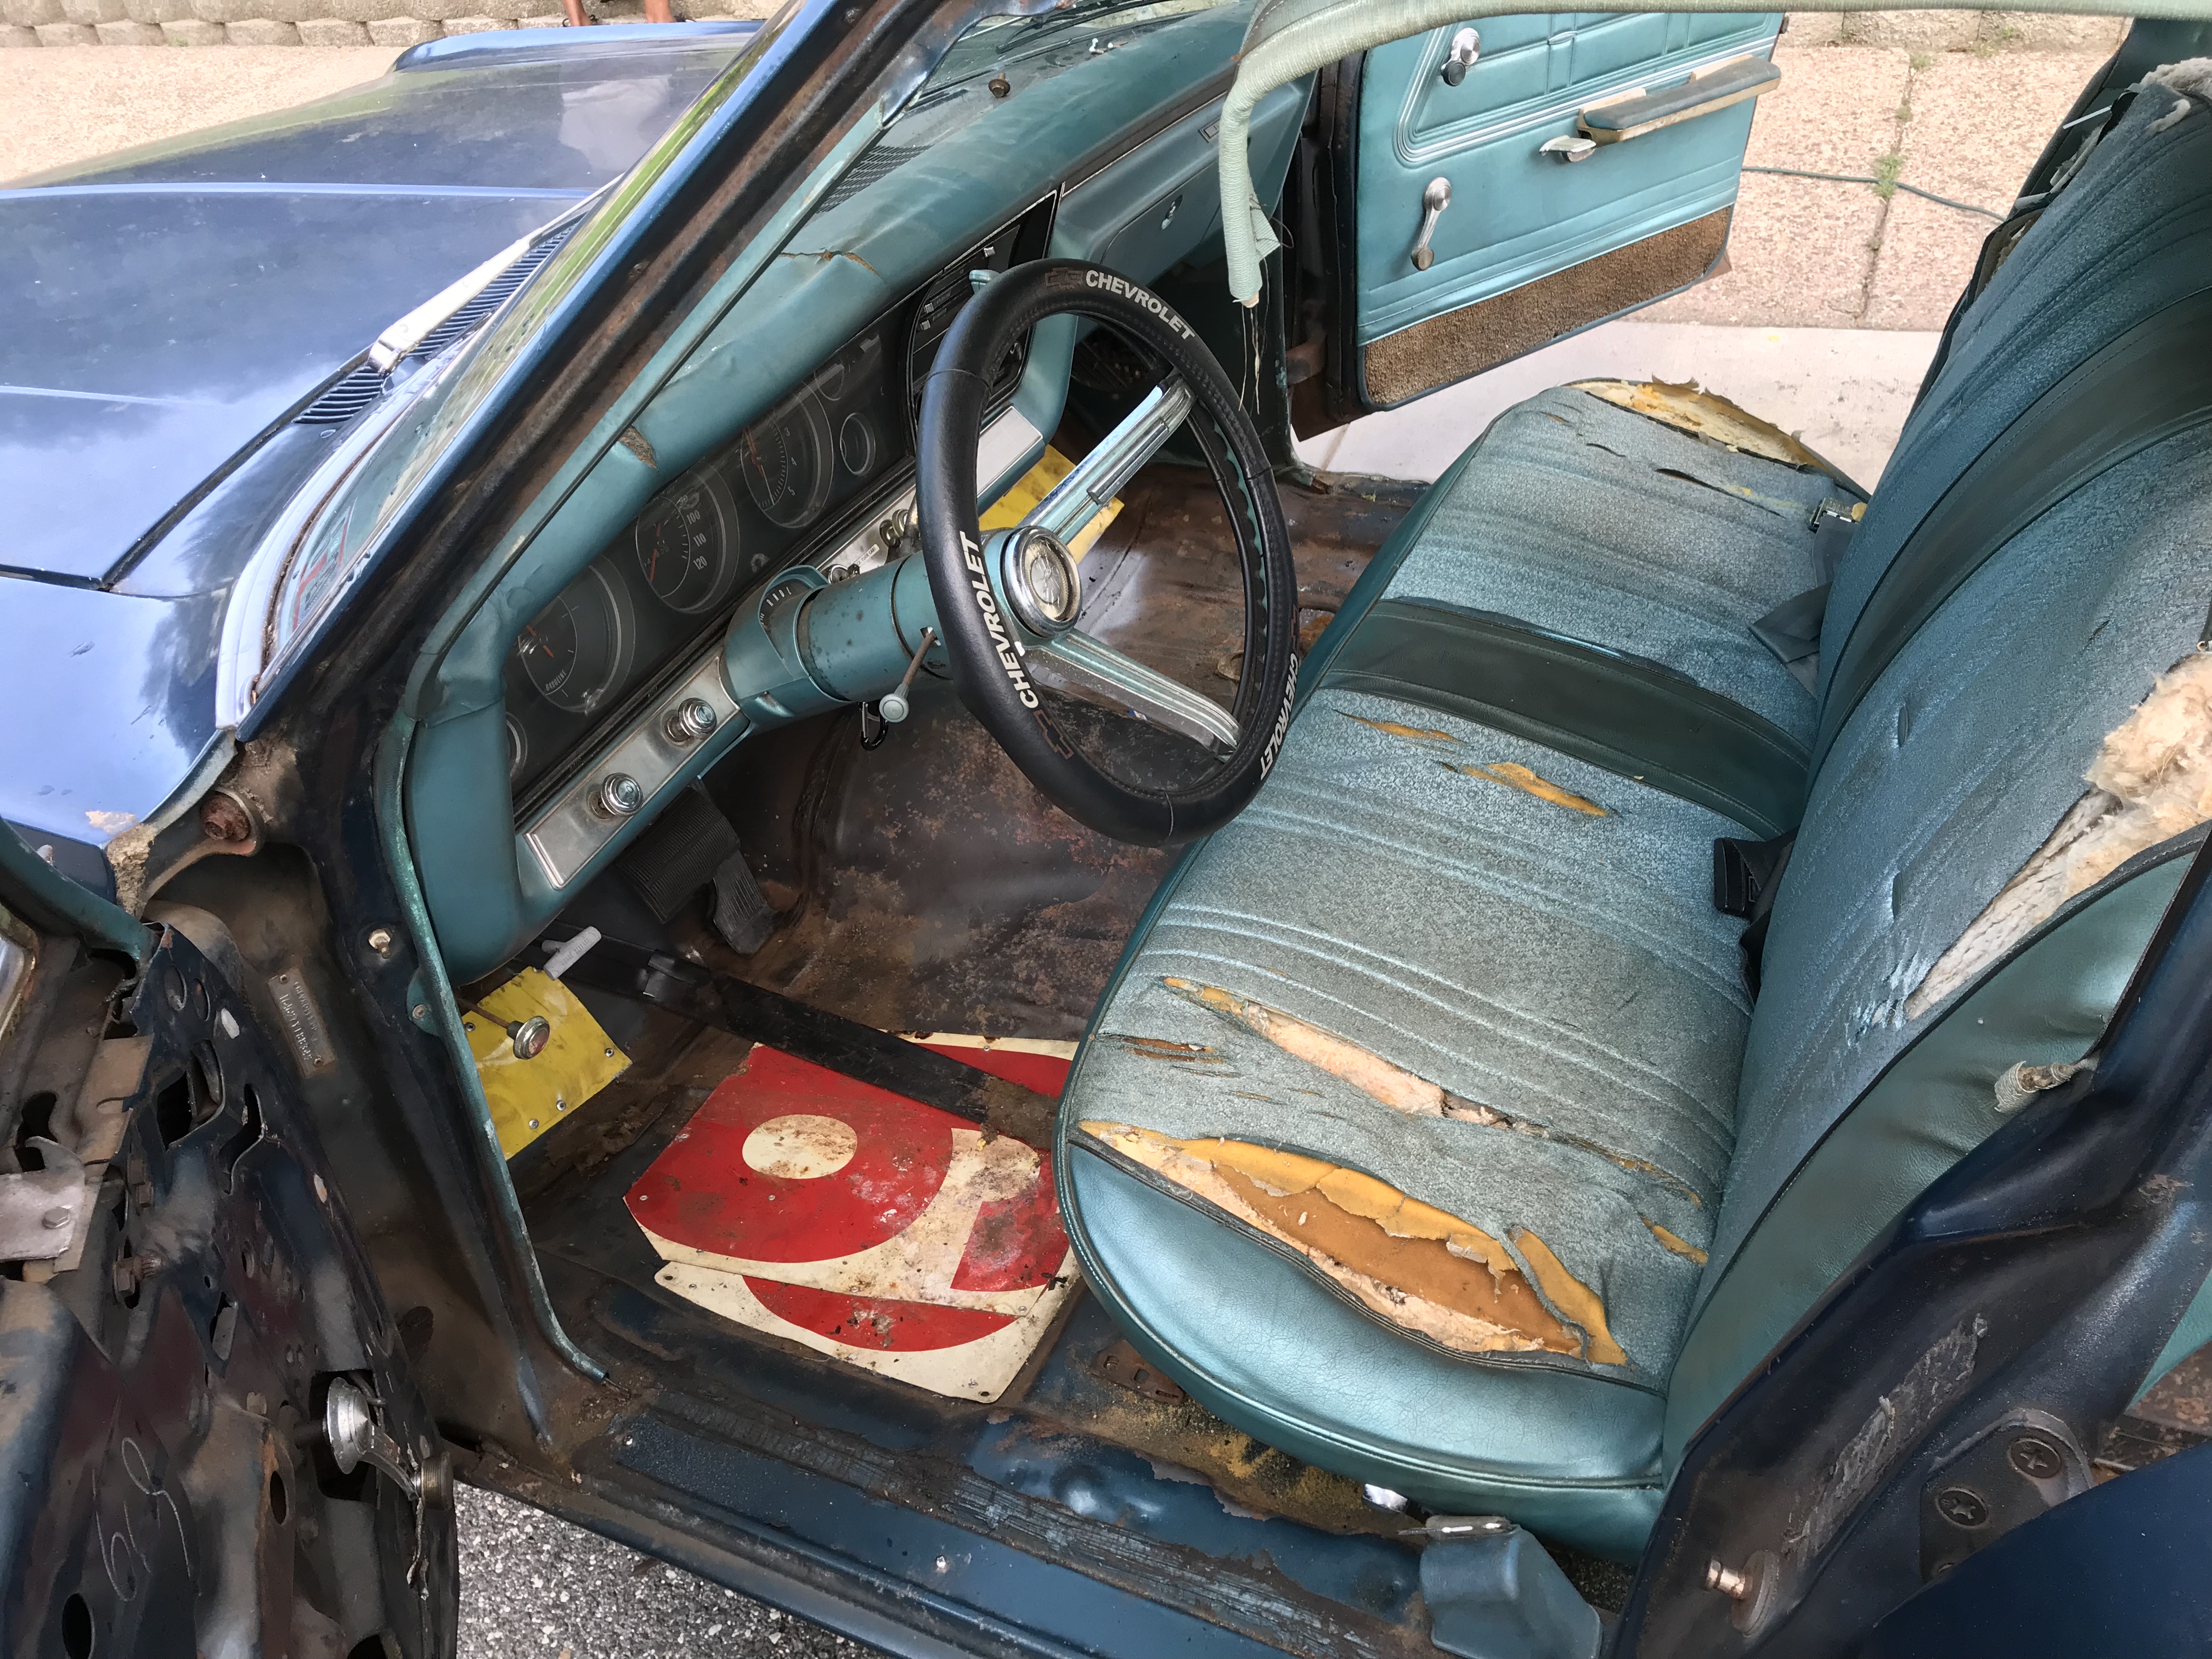
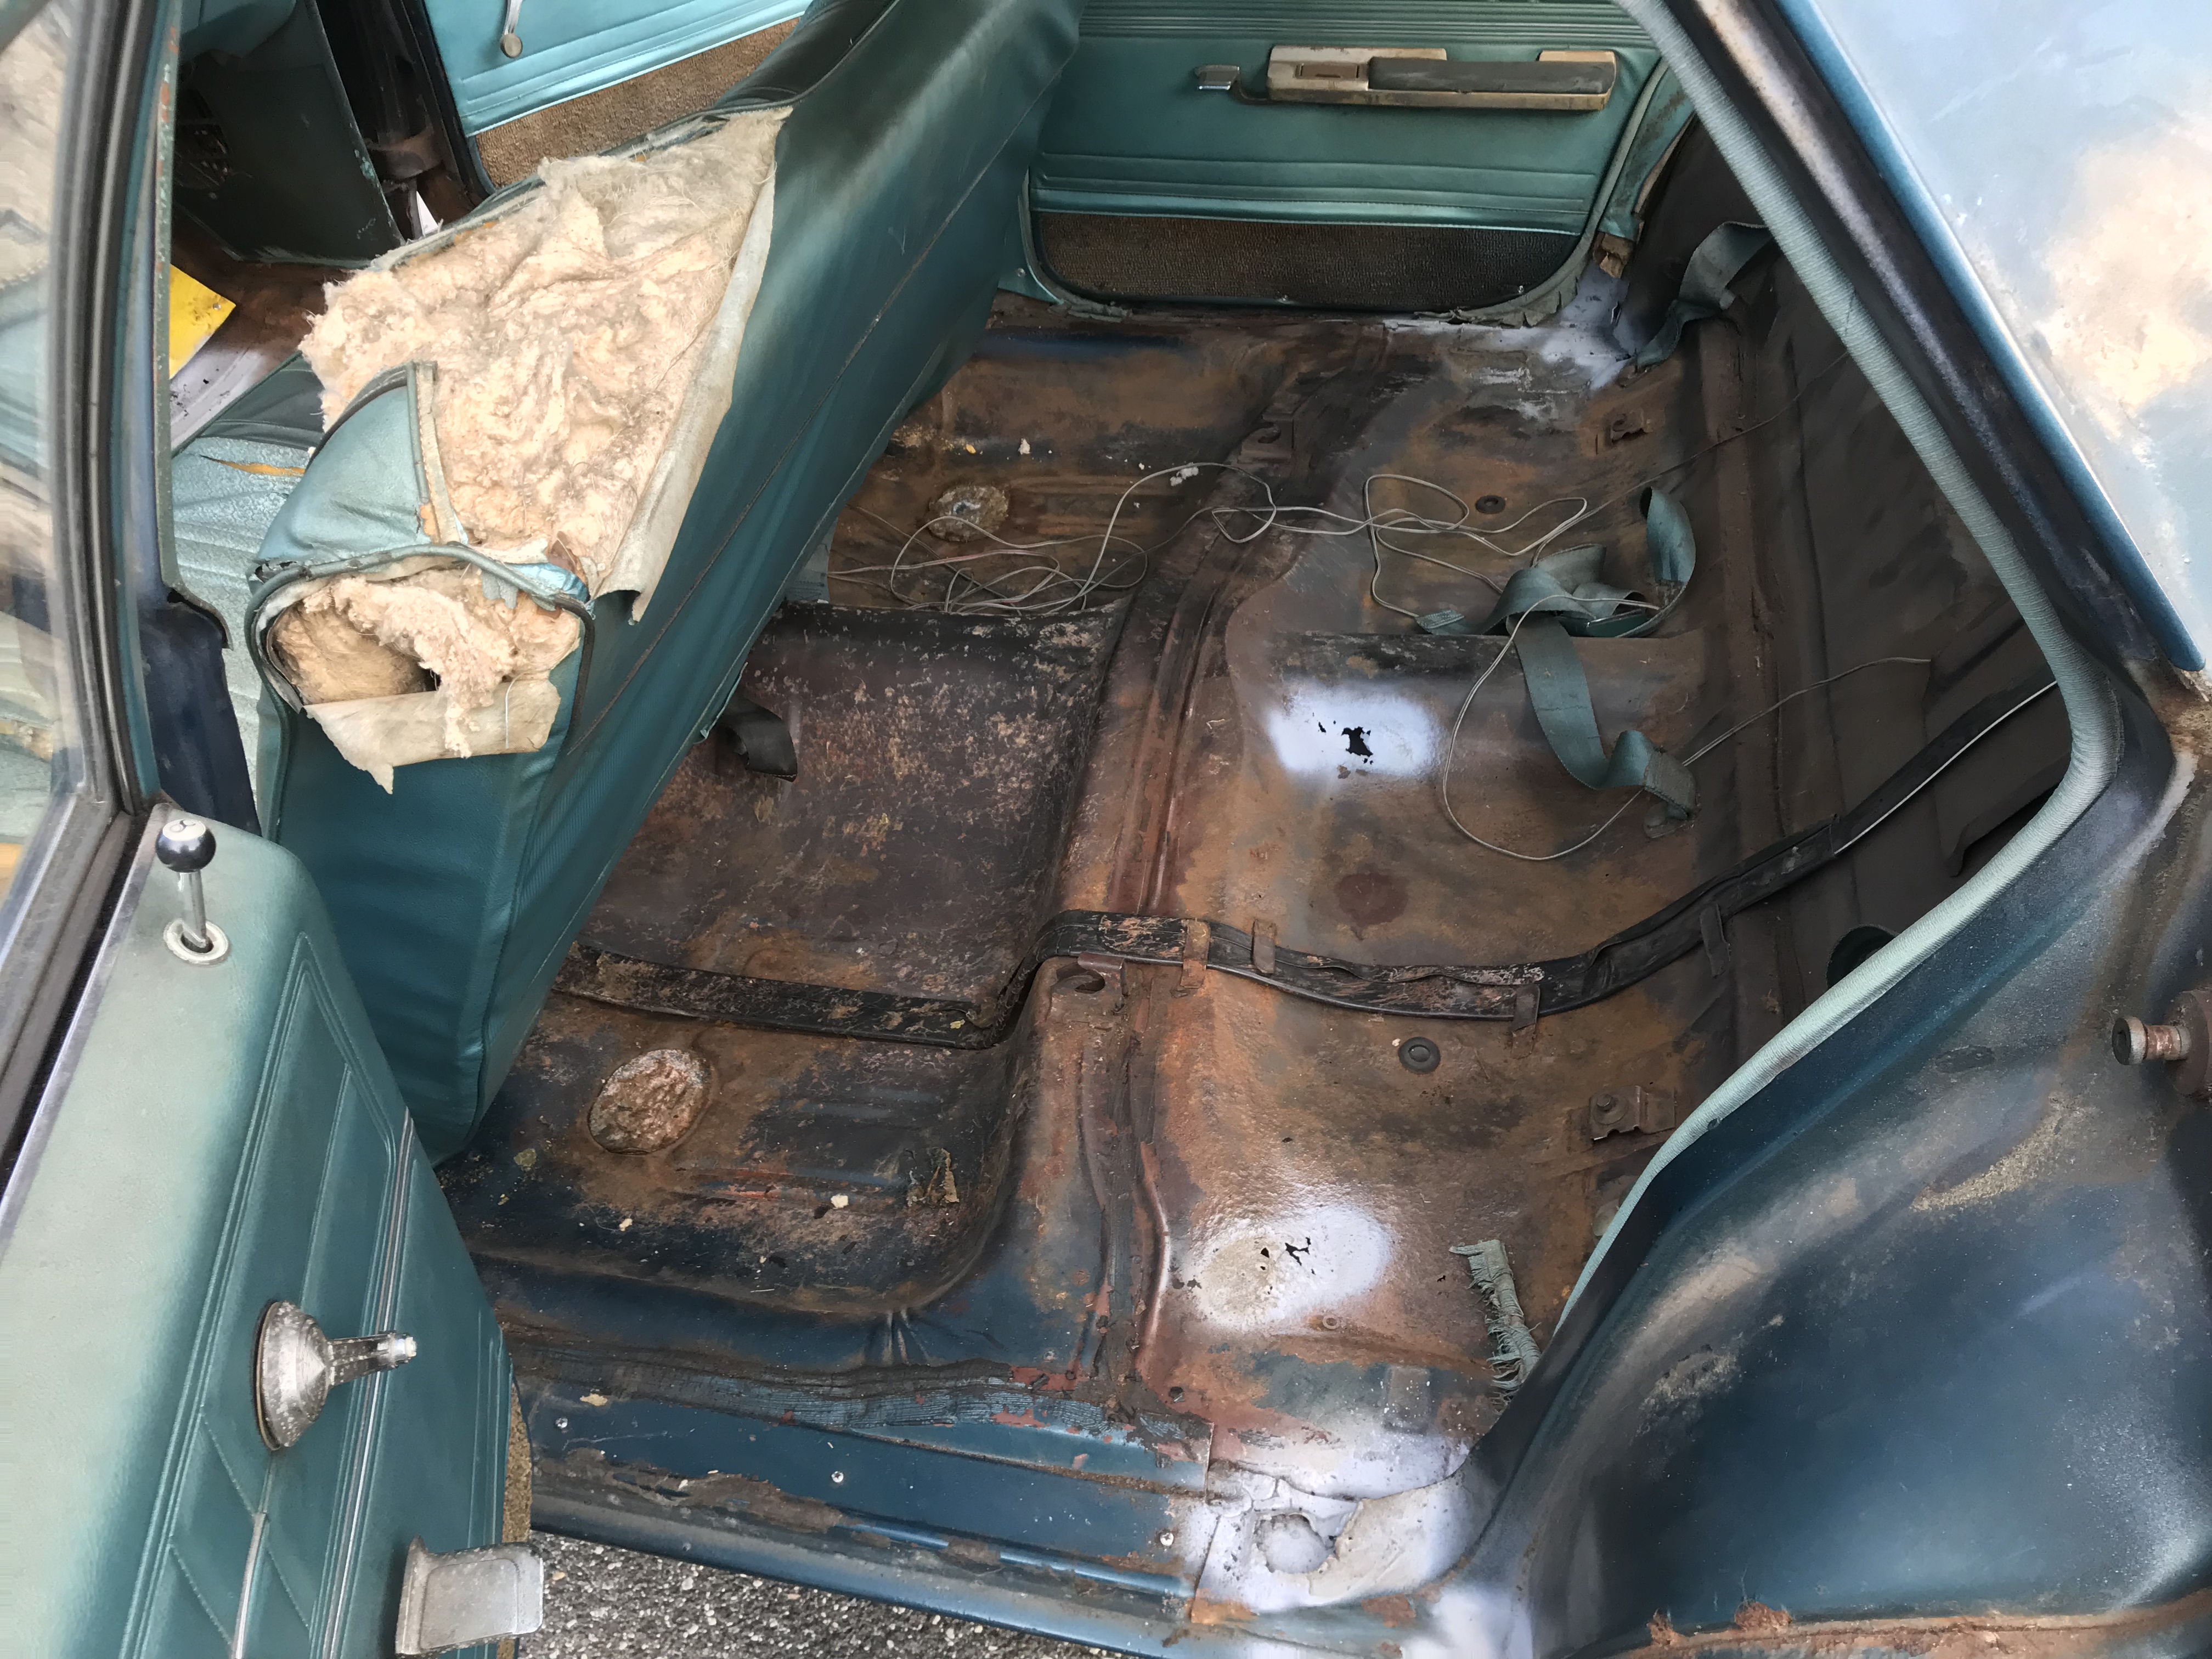
Stripped the Interior of the Impala. Found a slew of rust spots. lots of holes. Sections in the front have been patched with sheet metal and rivets. See photos. Overall the floor pan is done. So we're looking at a new one. Classic Industries has one for the full impala for almost $1,500. good thing I have a budget for this. Took the back bench seats out and bagged them up to be taken to an upholsterer later on this year. We took the front bench out too to remove the old dry-rotted carpet, padding, and insulation. Kinda disapointed that we didn't find any treasures from the past wegded into the seats or underneath. Was hard to get the front seat back in afterwards, holes weren't lining up for the botls, turns out the springs in the bench were warping it so I had to sit on it to bend it back whule Stephen bolted it back in. We sanded down all the rust and sprayed rustoleum primer on the holes so they don't get worse. We'll look into getting the new floor pan probably after the engine. Hoping to pull the engine out by the end of July, clearing out some space in the one shed to house the engine in. As of right now still going with the 283 smallblock, though it's probably not the best powerhouse for a 4 door impala. We did have some fun with it afterwards once we got the seat back in. Took it on a stretch of freeway in my area with minimal traffic and got it up to 100mph. smokes like a chimney and shakes like bowl of jello.
June 27th
IMPALA PASSED INSPECTION! Things are looking good. We're going to strip down the interior and identify all rust spots on the body. Then we should be ready to pull the engine and trans out. Still debating on whether we're shipping the trans out for rebuild or if we'll do it ourselves. Still suspecting the engine will need to be bored. We'll find out soon!
June 21st and 22nd
One last thing we have to do to pass inspection, get those windshield wiper washers working. All because we need those state stickers so it's legal to move the car on it's own power and park in the street. We replaced the Wiper motor and installed new nozzles to spray the wiper fluid.
Topped off the transmission fluid as it's slowly leaking from the transmission modulator, which we'll fix once we pull it all apart. Dropped off the Impala to my mechanic Monday for the next inspection attempt. We feel everything is ready.
Once we pass inspection, the real fun starts. We'll be stripping down the interior and pulling the engine and trans out in July. It'll be picking up momentum come July. Need to buy a welder for some body work and a large air compressor for pneumatic tools. CHECK BACK SOON TO SEE IF WE PASSED INSPECTION!
May 8th to June 21st
Personal life has been insane for all of us. Once things calm down, we'll be back. Shouldn't be too long.
May 7th
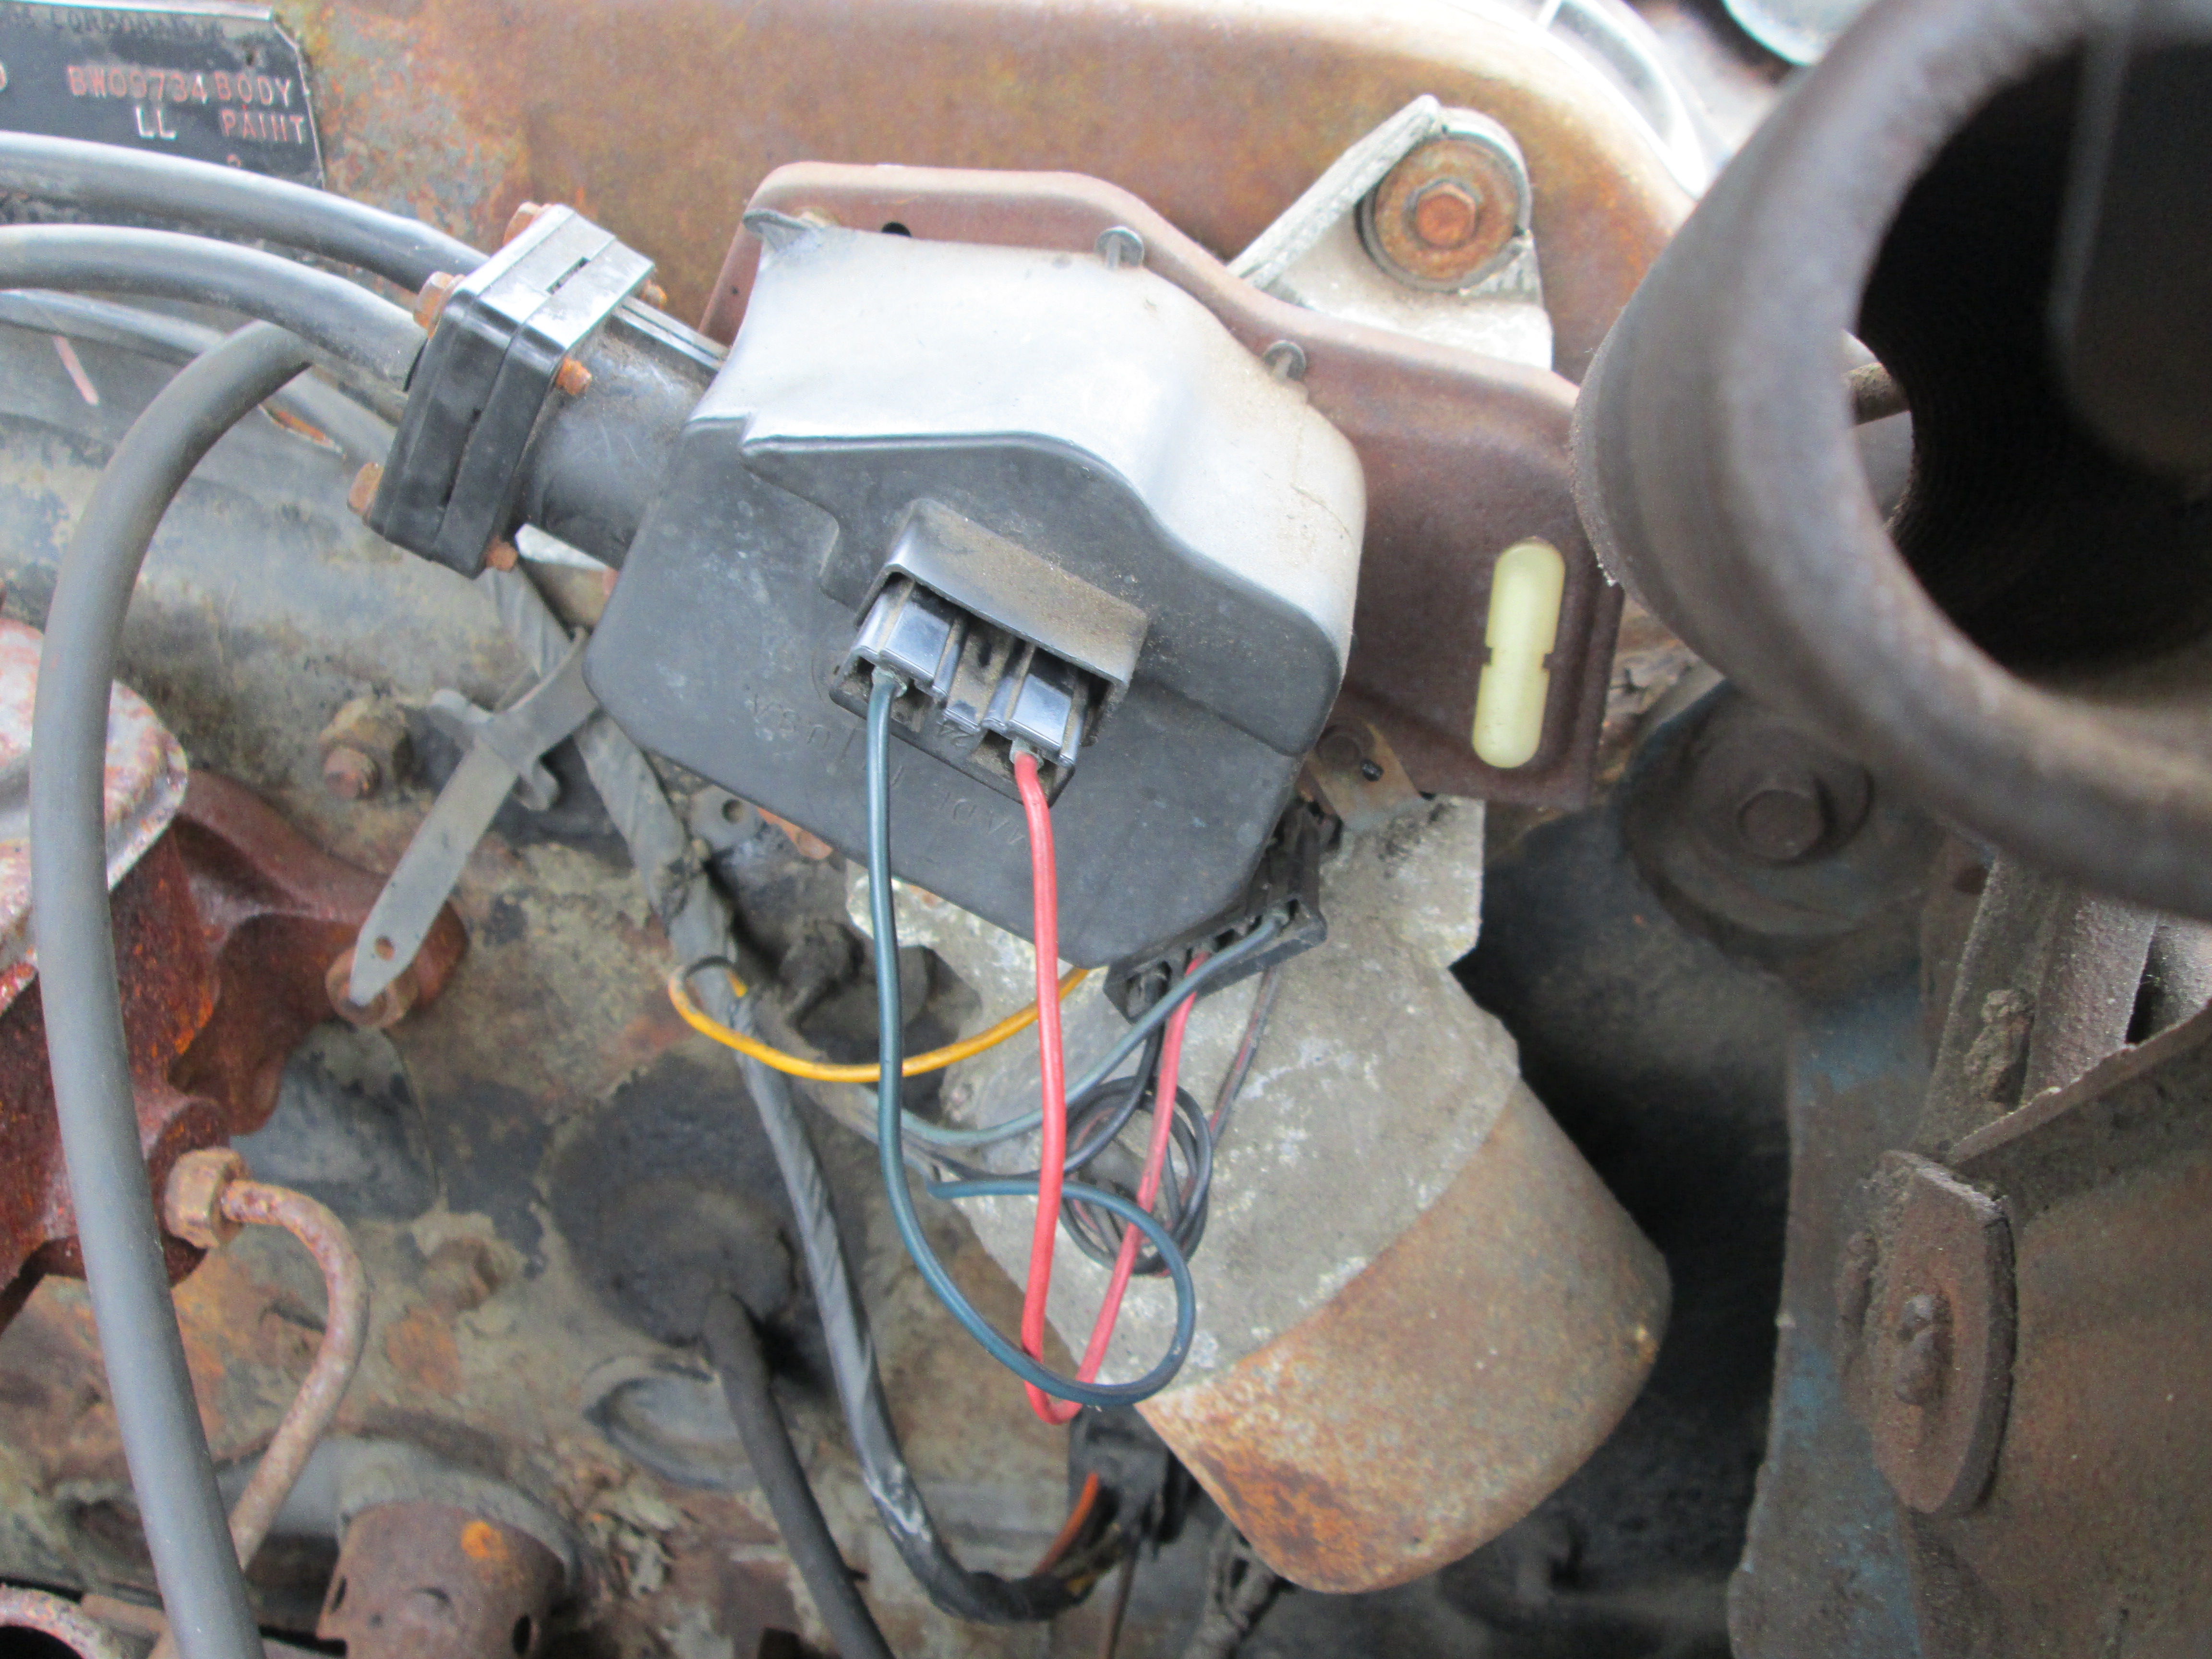
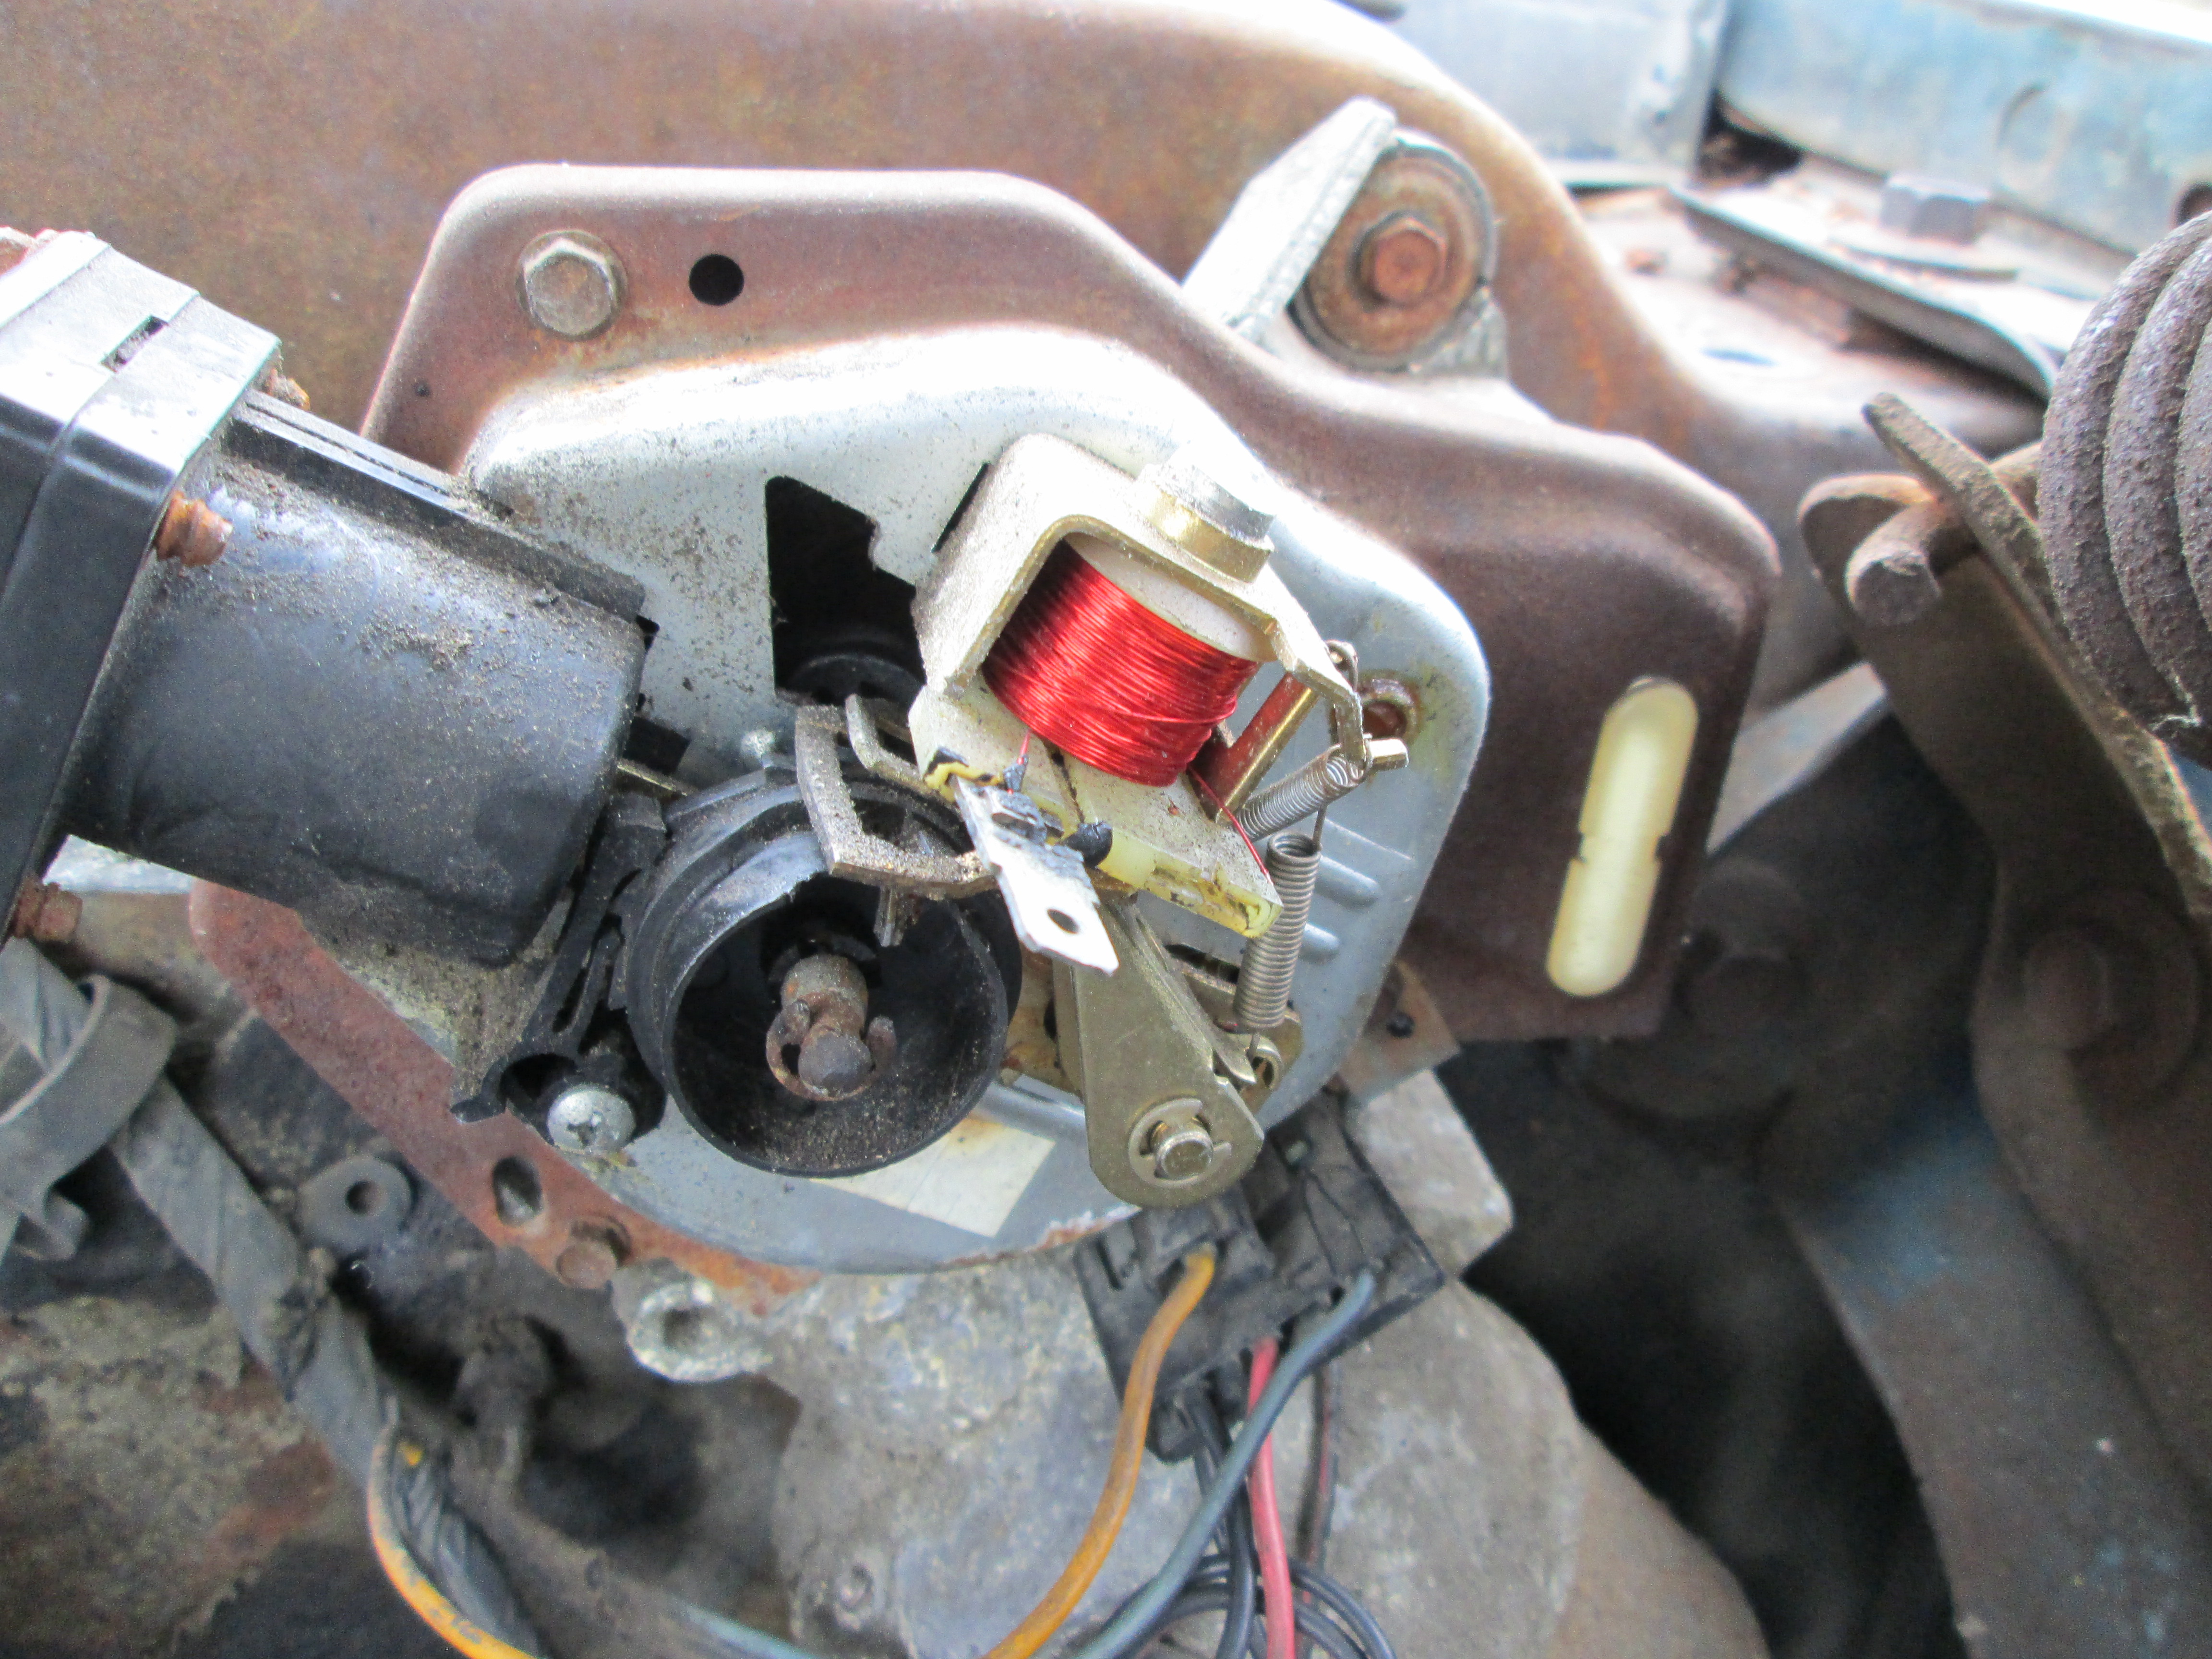
Been tinkering with thew windshield wiper motor and pump on and off over the last few weeks. Ultimately ended up ordering a new motor as the original electrical resistor from 1967 was broken. Fixed the pump with some soldering on the electrical connections and cleaning out the "plumbing". Slapped the whole unit on the car today and it's working. Hooked the washer nozzles up to the pump and discovered the nozzles are angled wrong, tried adjusting it but found that the corrosion was pretty bad and the nozzles broke off their brackets. So close and yet so far. Ordered new ones through Summit Racing. All this just to pass inspection so I can get legal stickers to test drive this car for a year. Sheesh!
April 15th - May 6th.
Personal life has been busy for us, had to take a little break
April 12th-14th 2019
We've decided to make an attempt at fixing the items required to pass inspection.
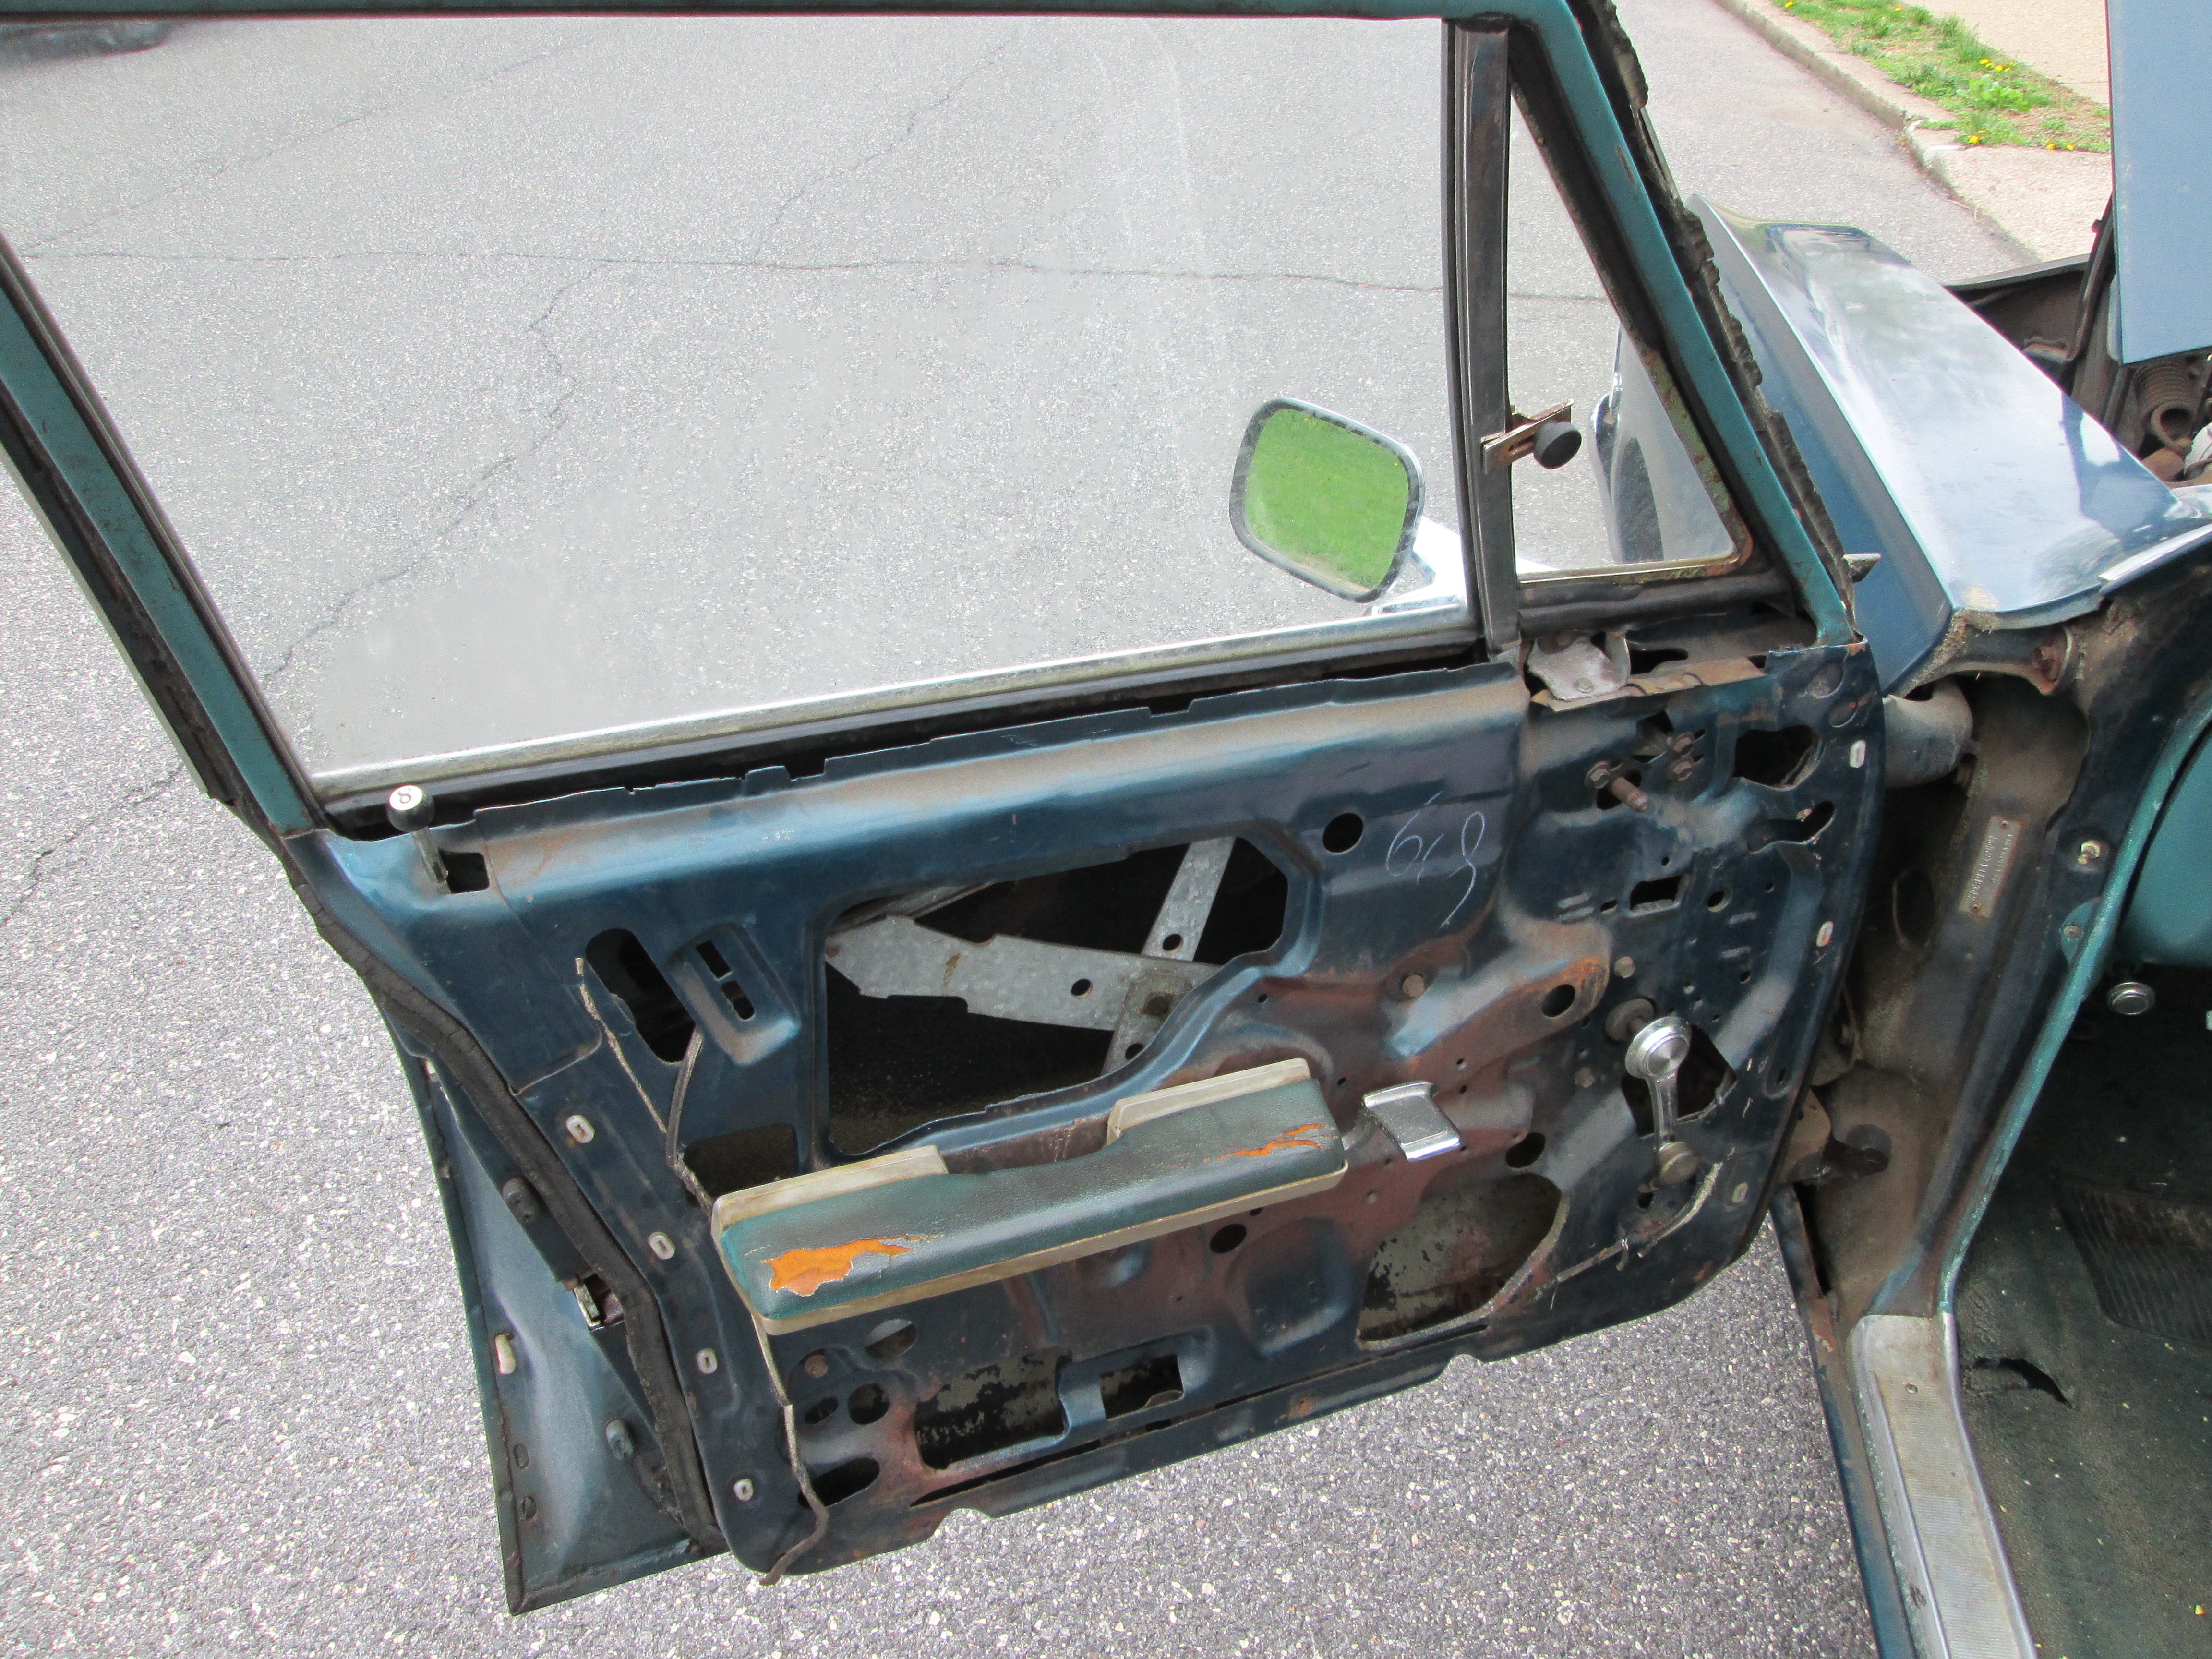
1. took apart driver side door to clean and fix the locking mechanism that keeps the door closed. FIXED
2. bolted on a universal exhaust hanger from AutoZone. FIXED
3. tighted the hood's lock bolt so that it closes tighter. FIXED
4. Found that the transmission has a leak. Further research into the repair and inspection records indicate that there is a slow leak in the transmission near the modulator unit. We added more fluid and that stopped the slipping. TEMPORARY FIX.
5. The solenoid that activates the washer pump was damaged, one of it's leads came off the electric contact. Soldered that back on. Later found a short in the wiper motor. WIll have to redo the wires on the motor as I suspect theres a wire touching the metal housing.