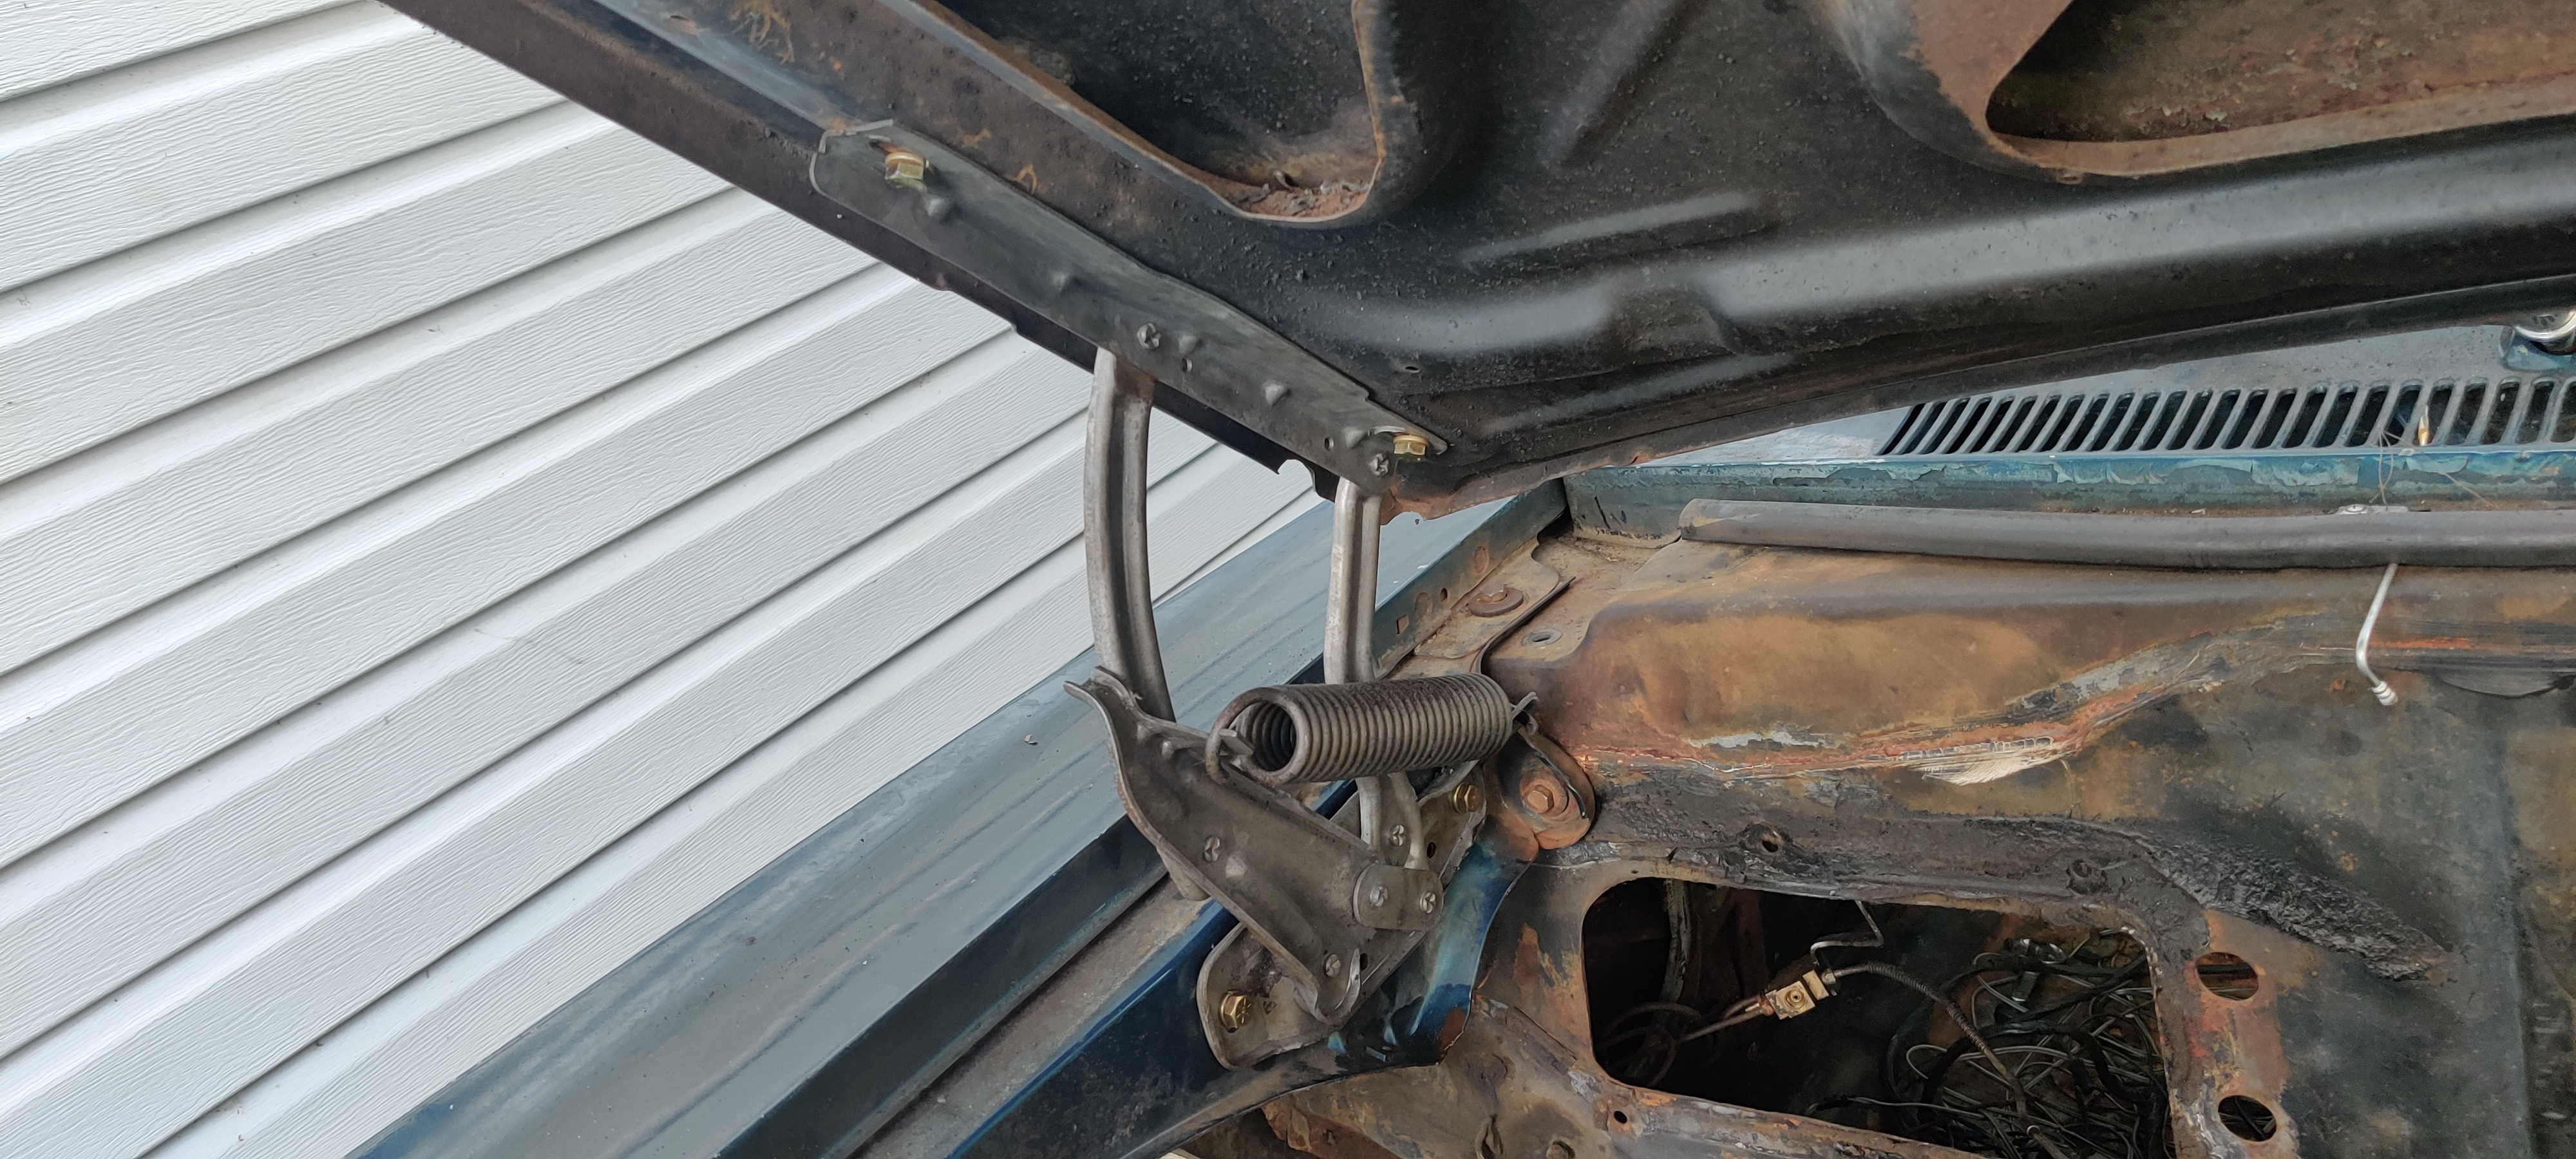
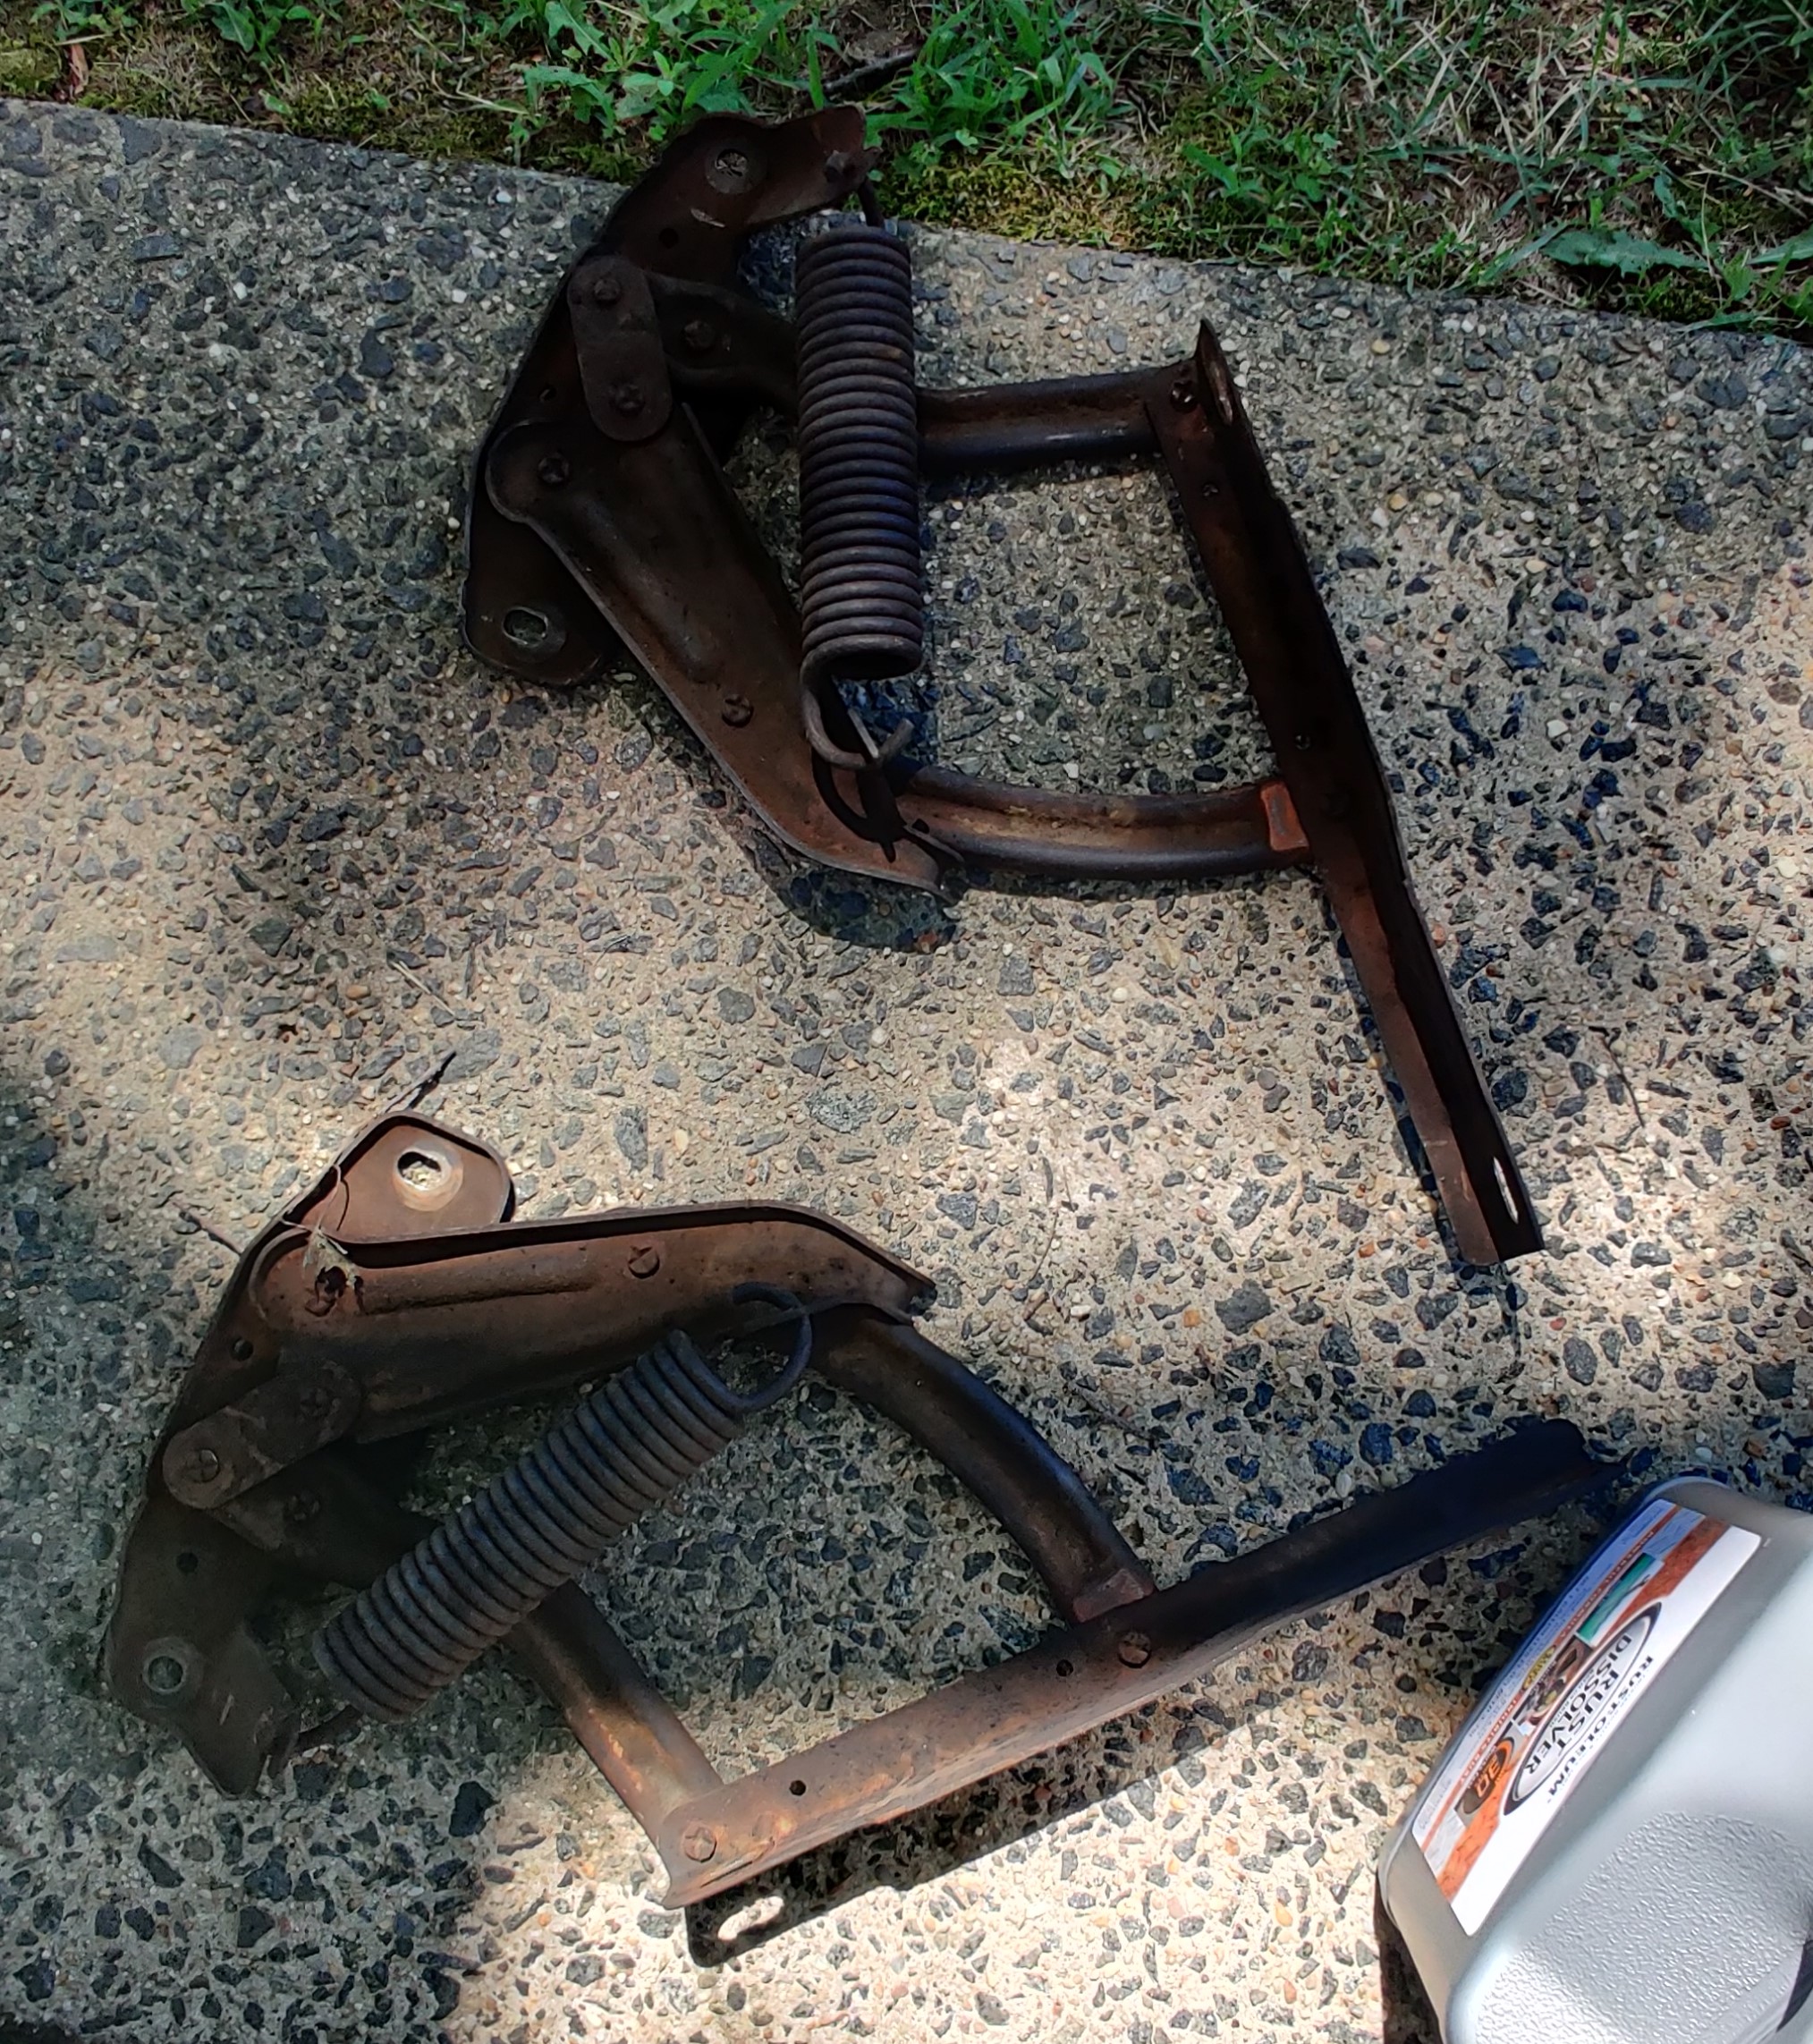
Installed the hinges back onto the quarter panels and mounted the hood back onto the hinges. It is so much better, you can actually open the hood with two fingers now, the movement is smooth and there's no binding or stiffness. So I would say thats a success!
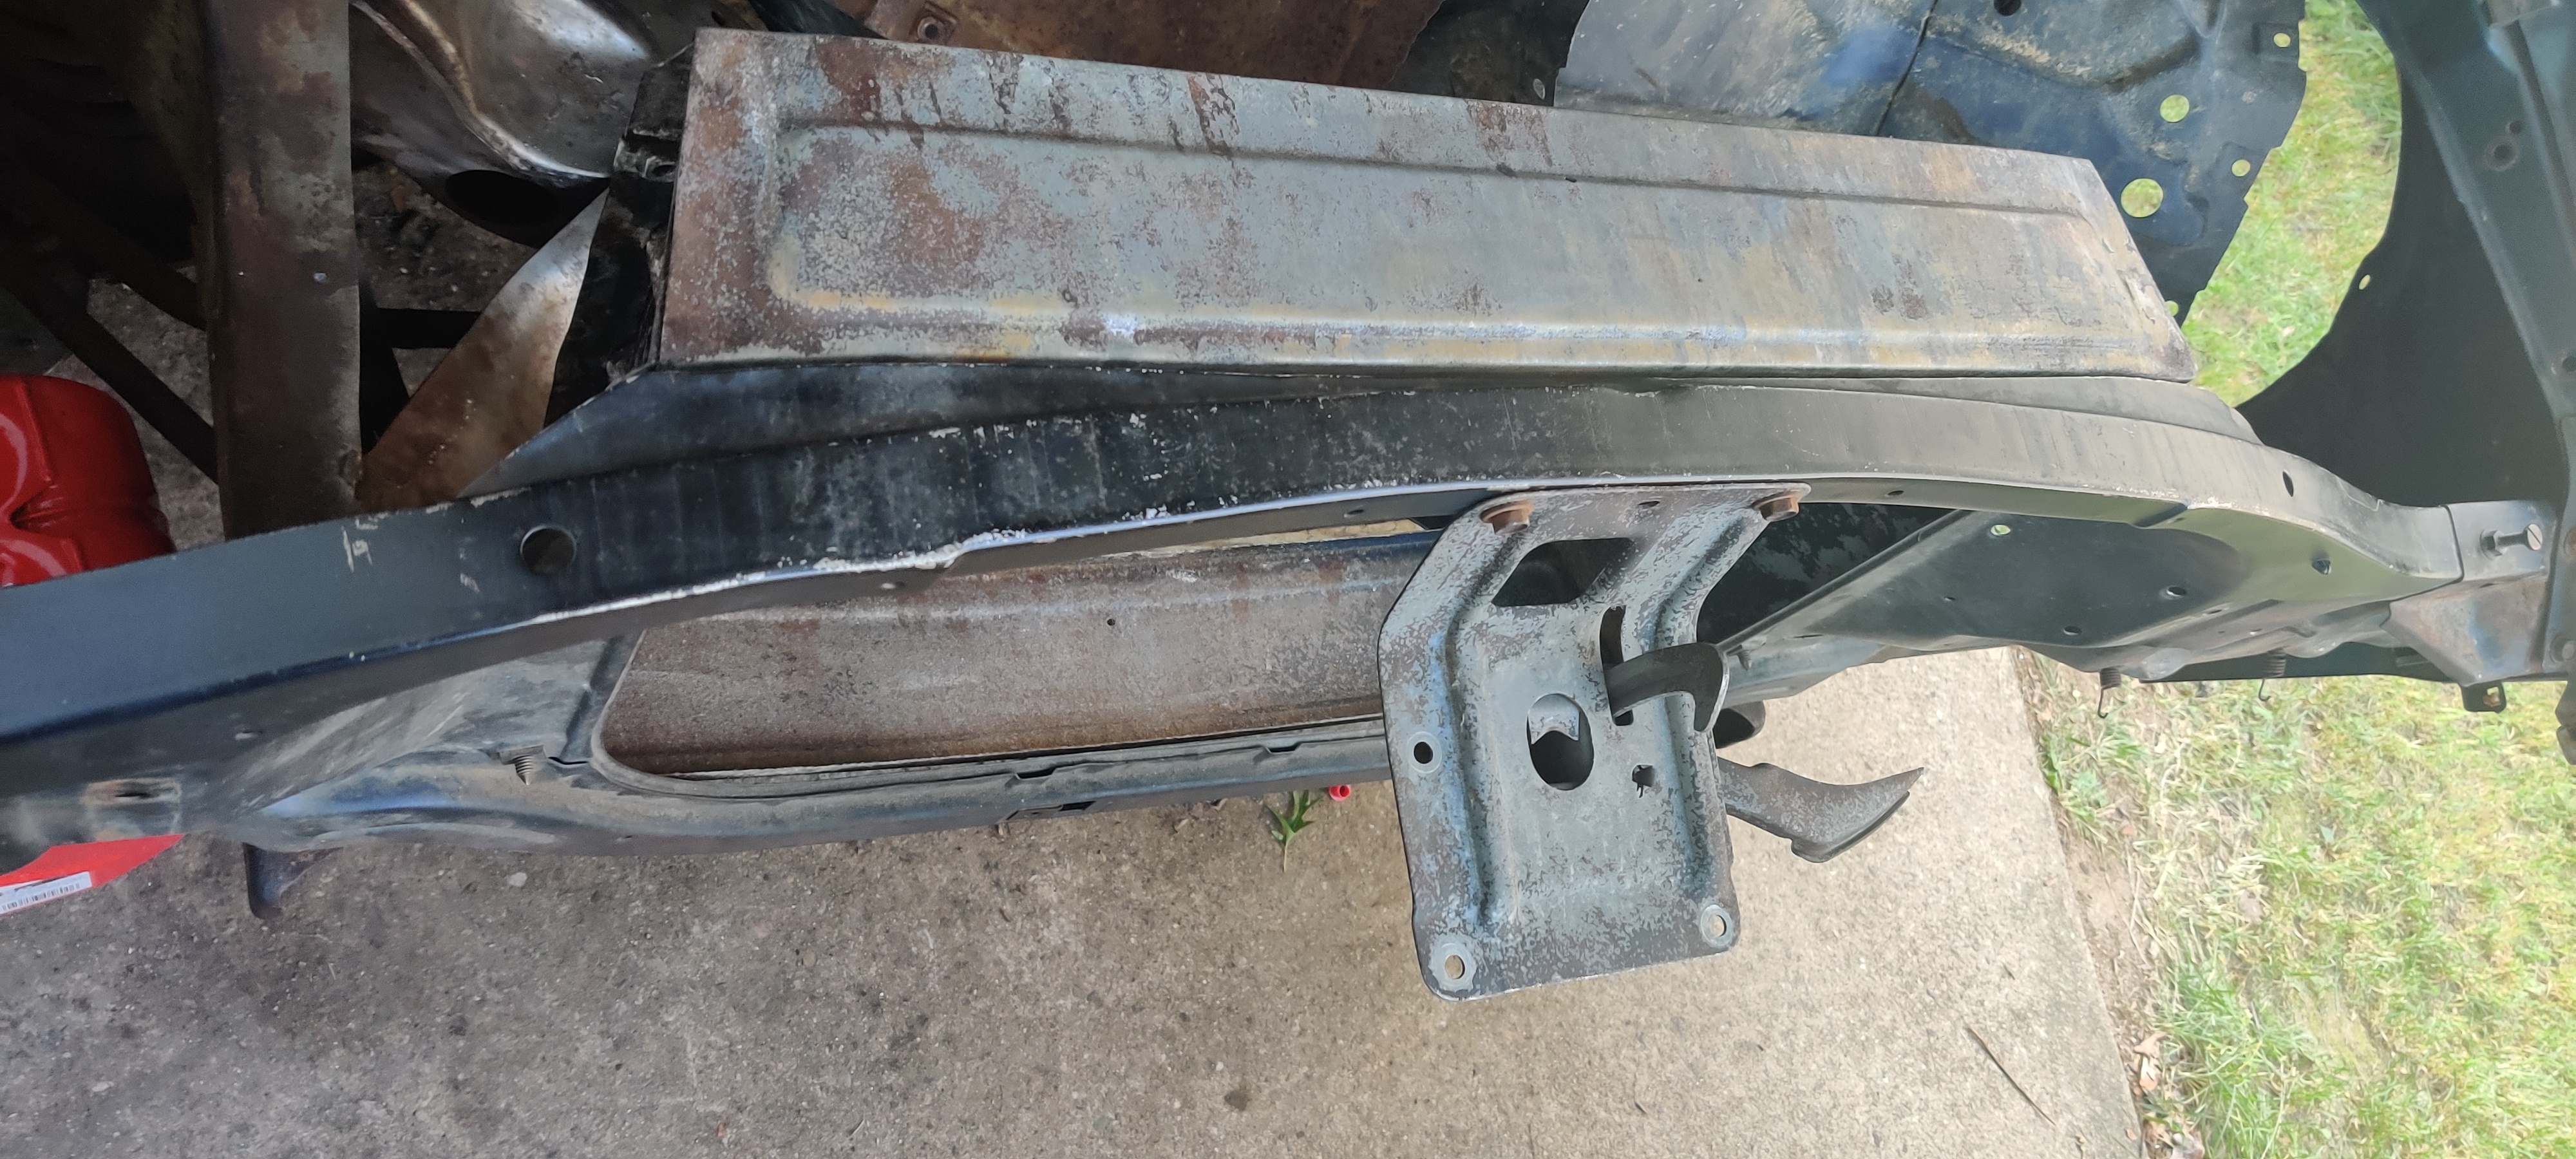
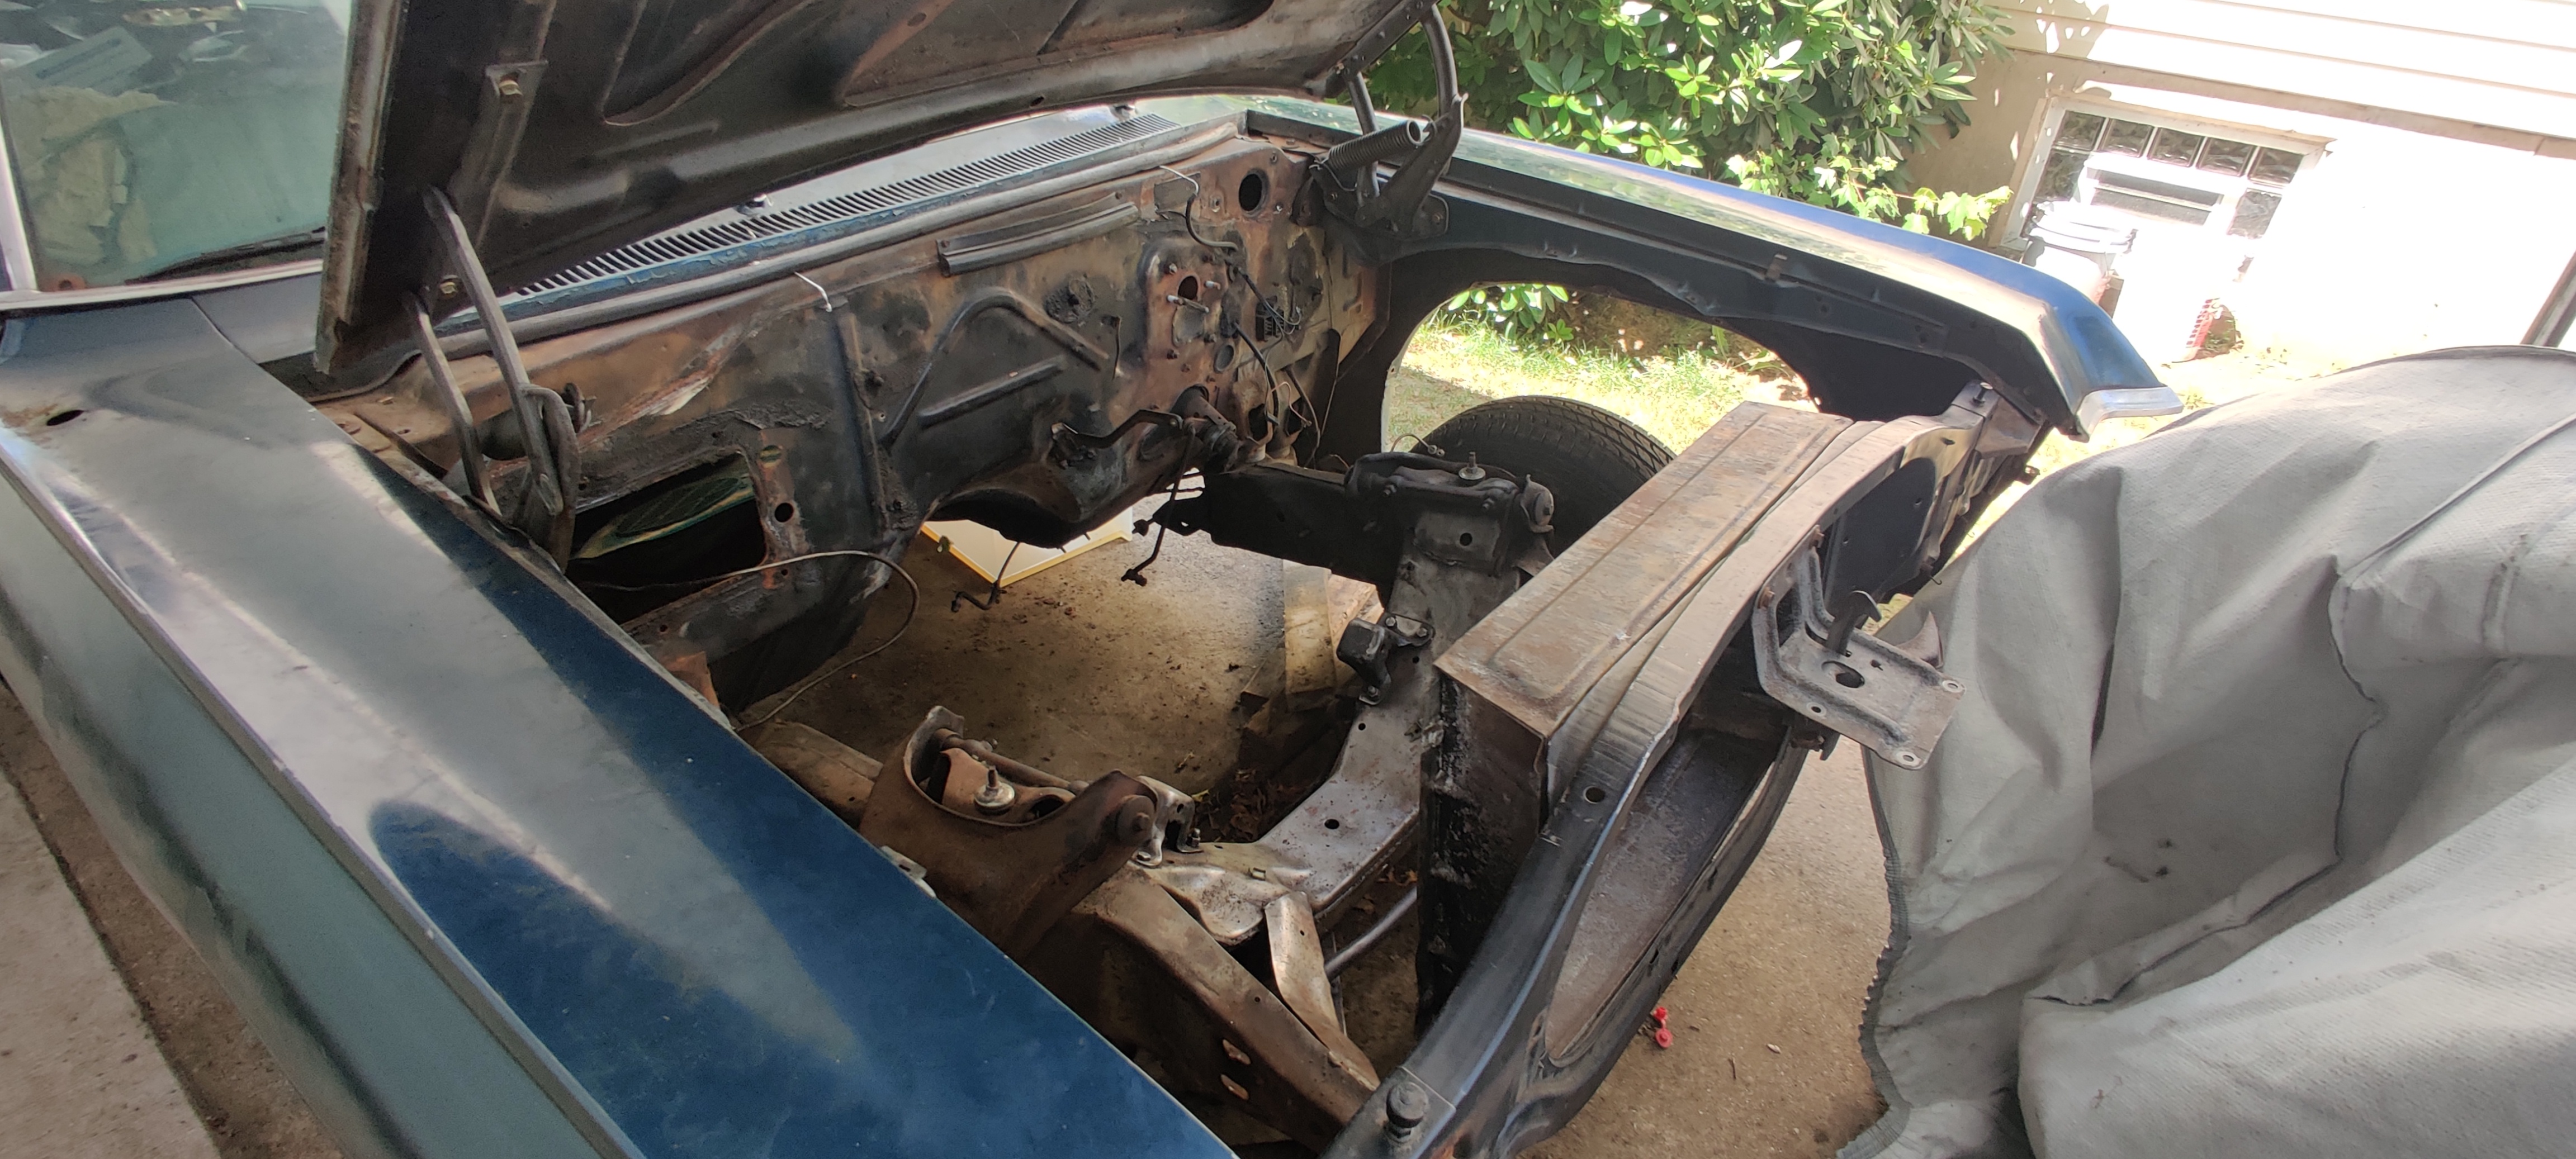
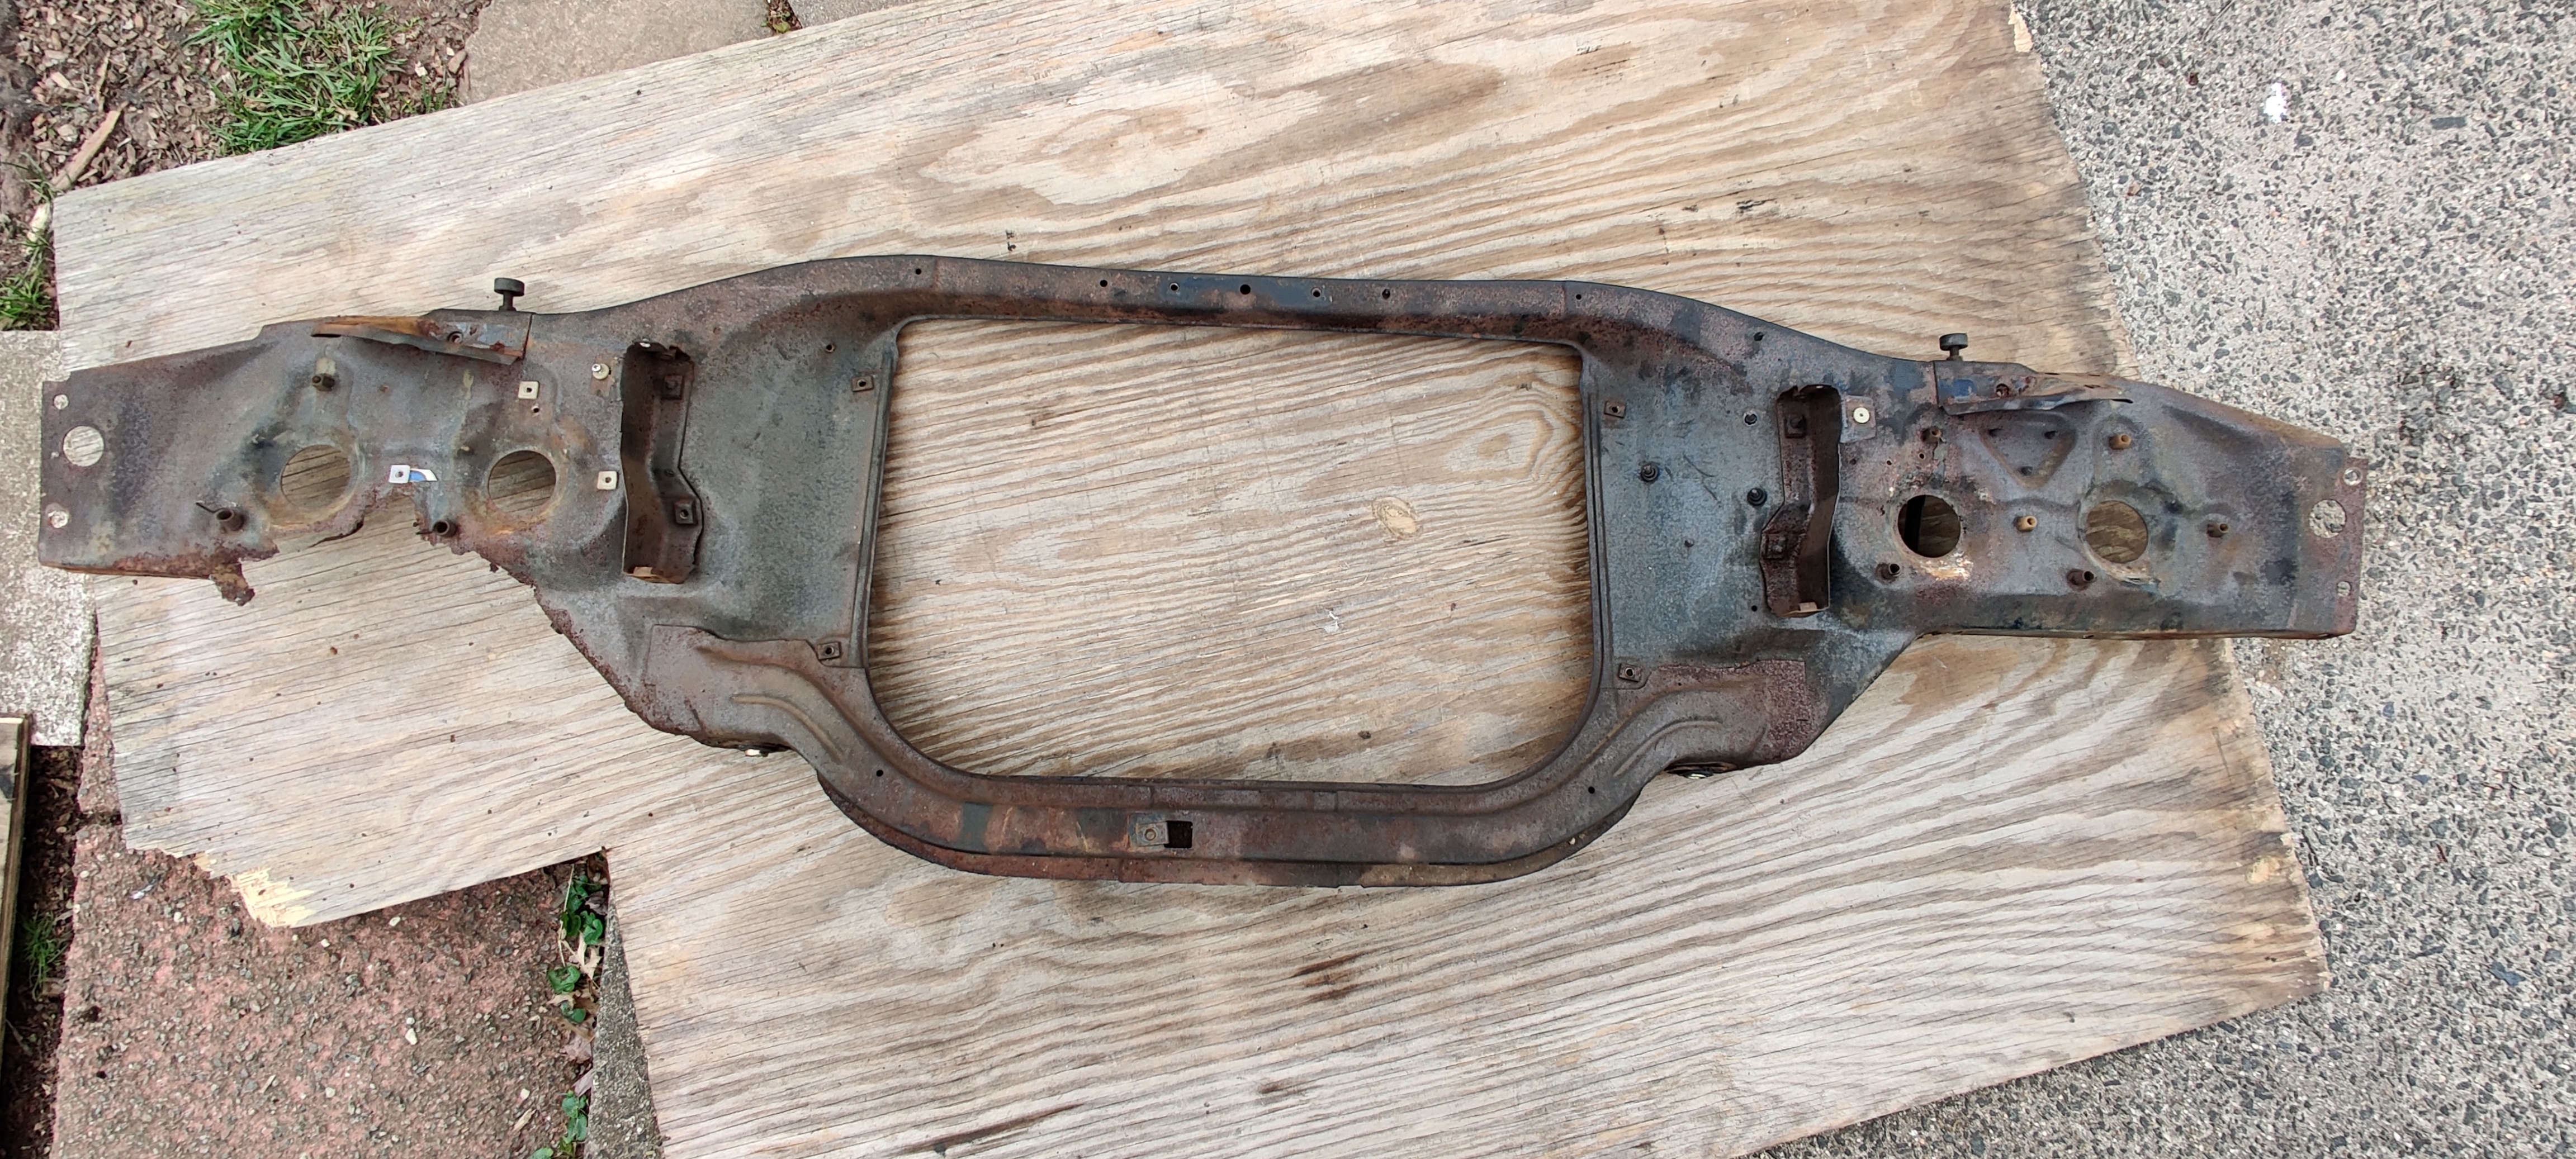
We mounted a newer radiator core support and joined the quarter panels to it as well. Wasn't exactly as easy as just lining bolt holes together though, had some slight fitment issues but we eventually resolved them.
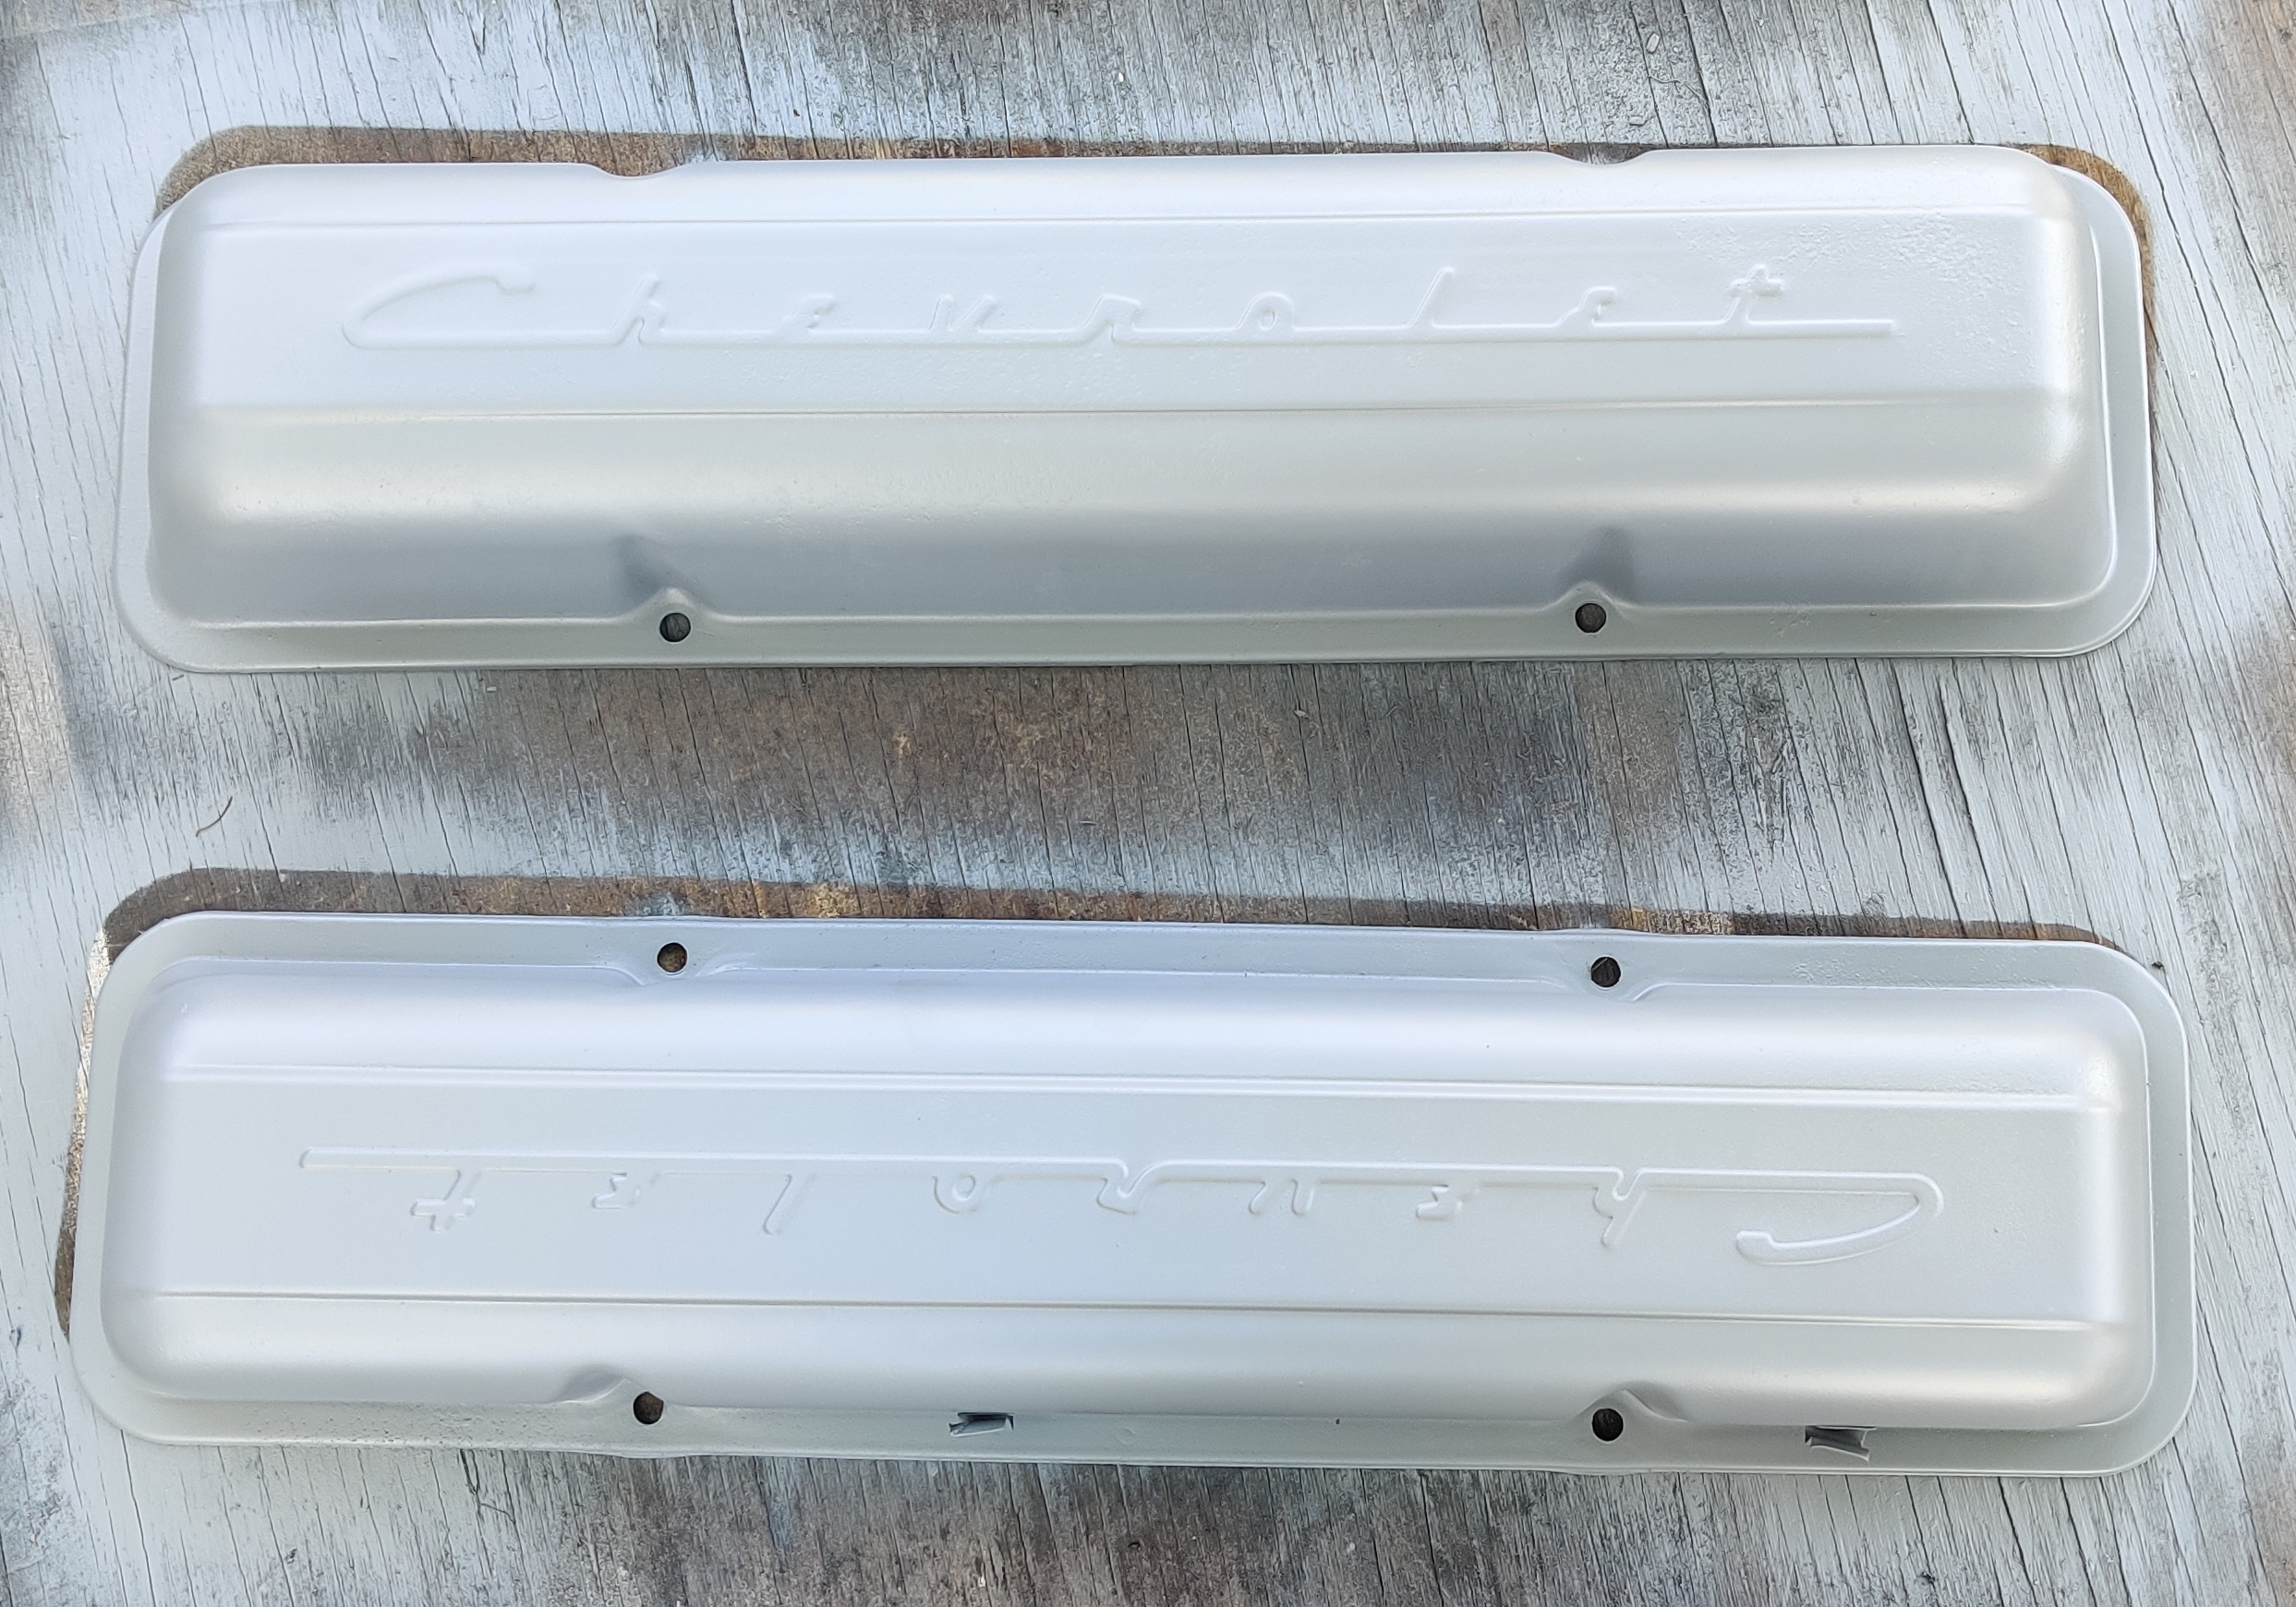
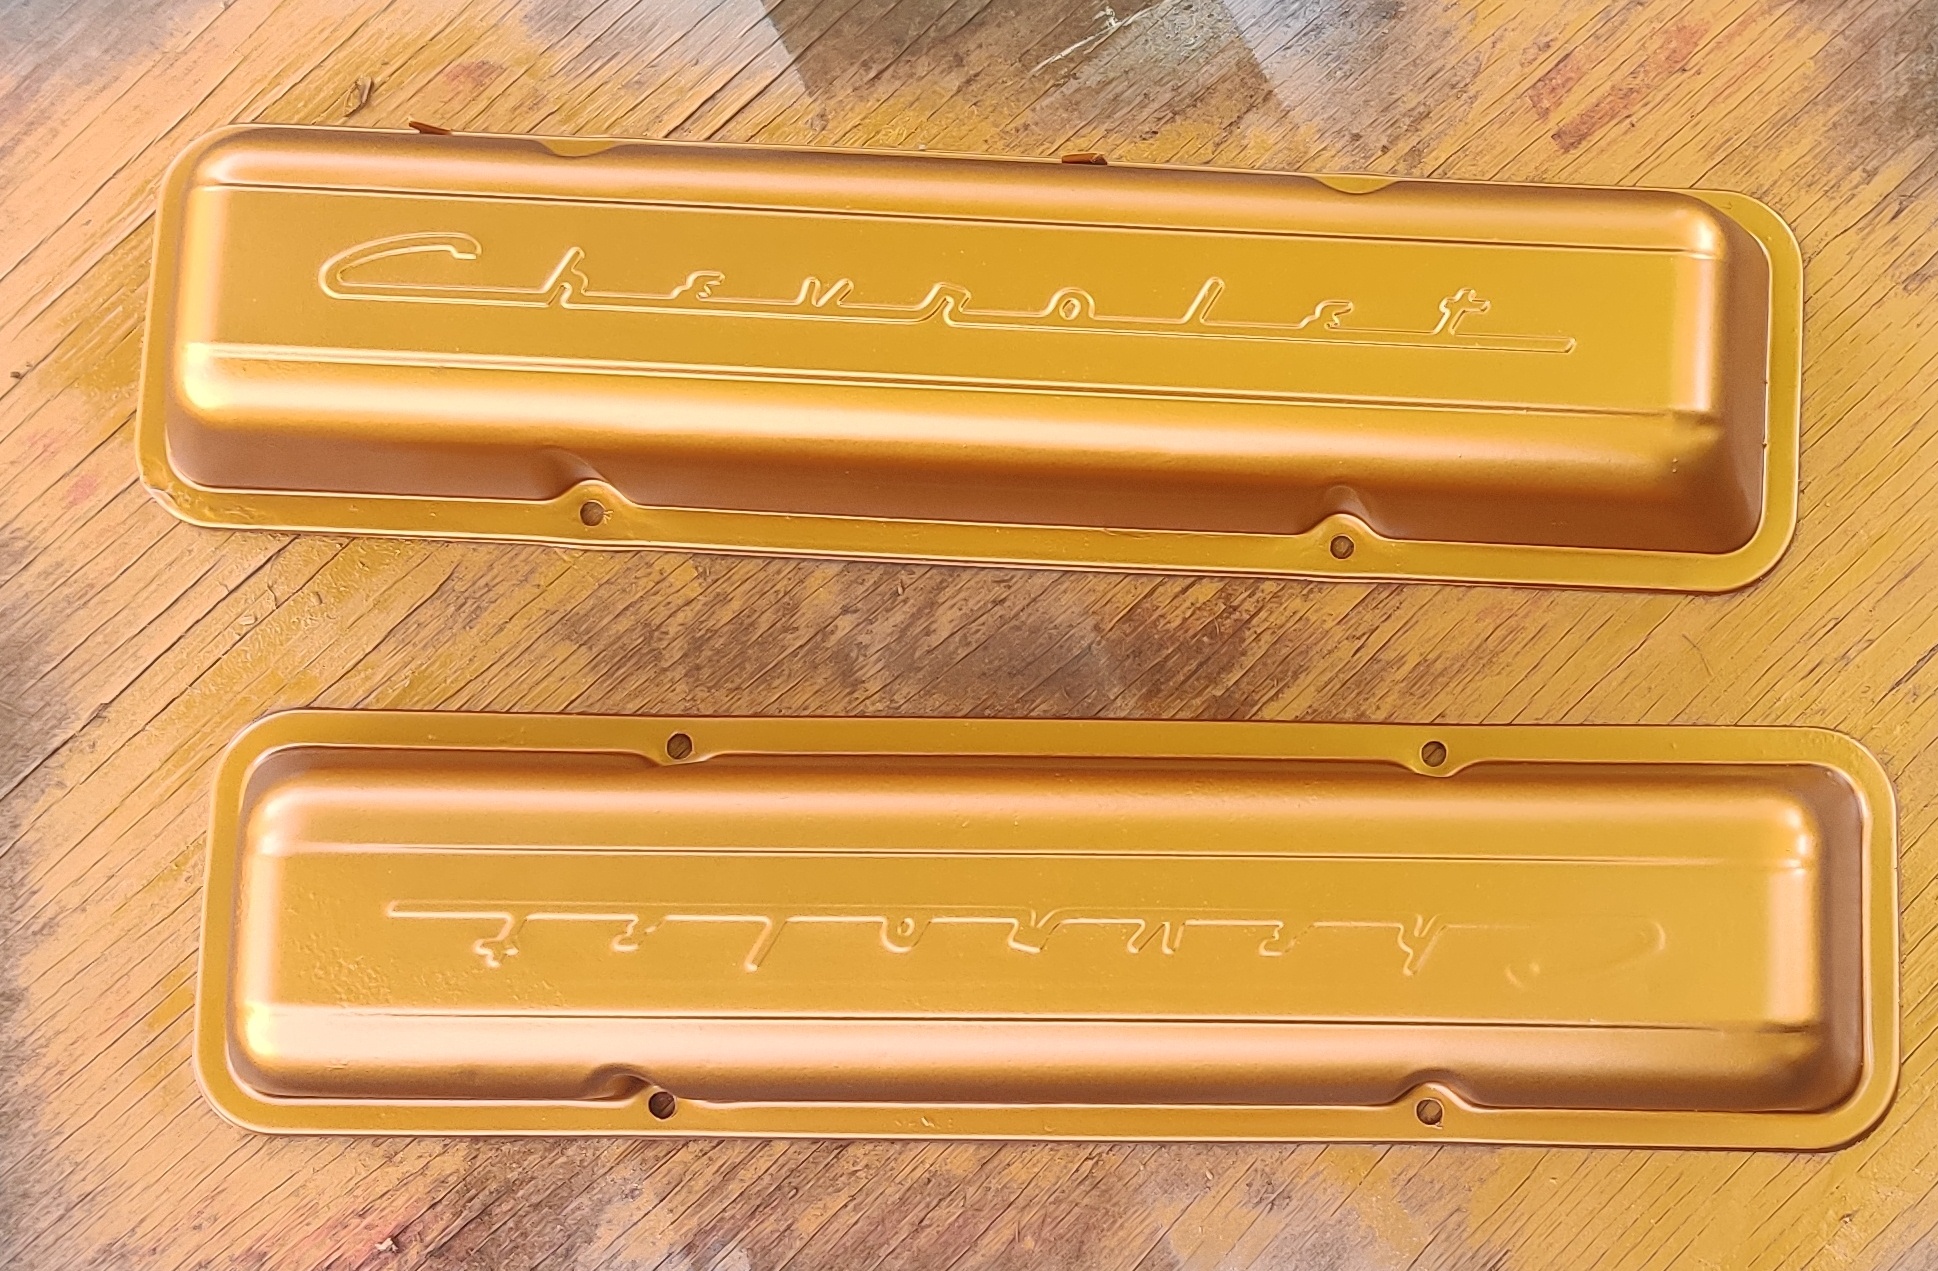
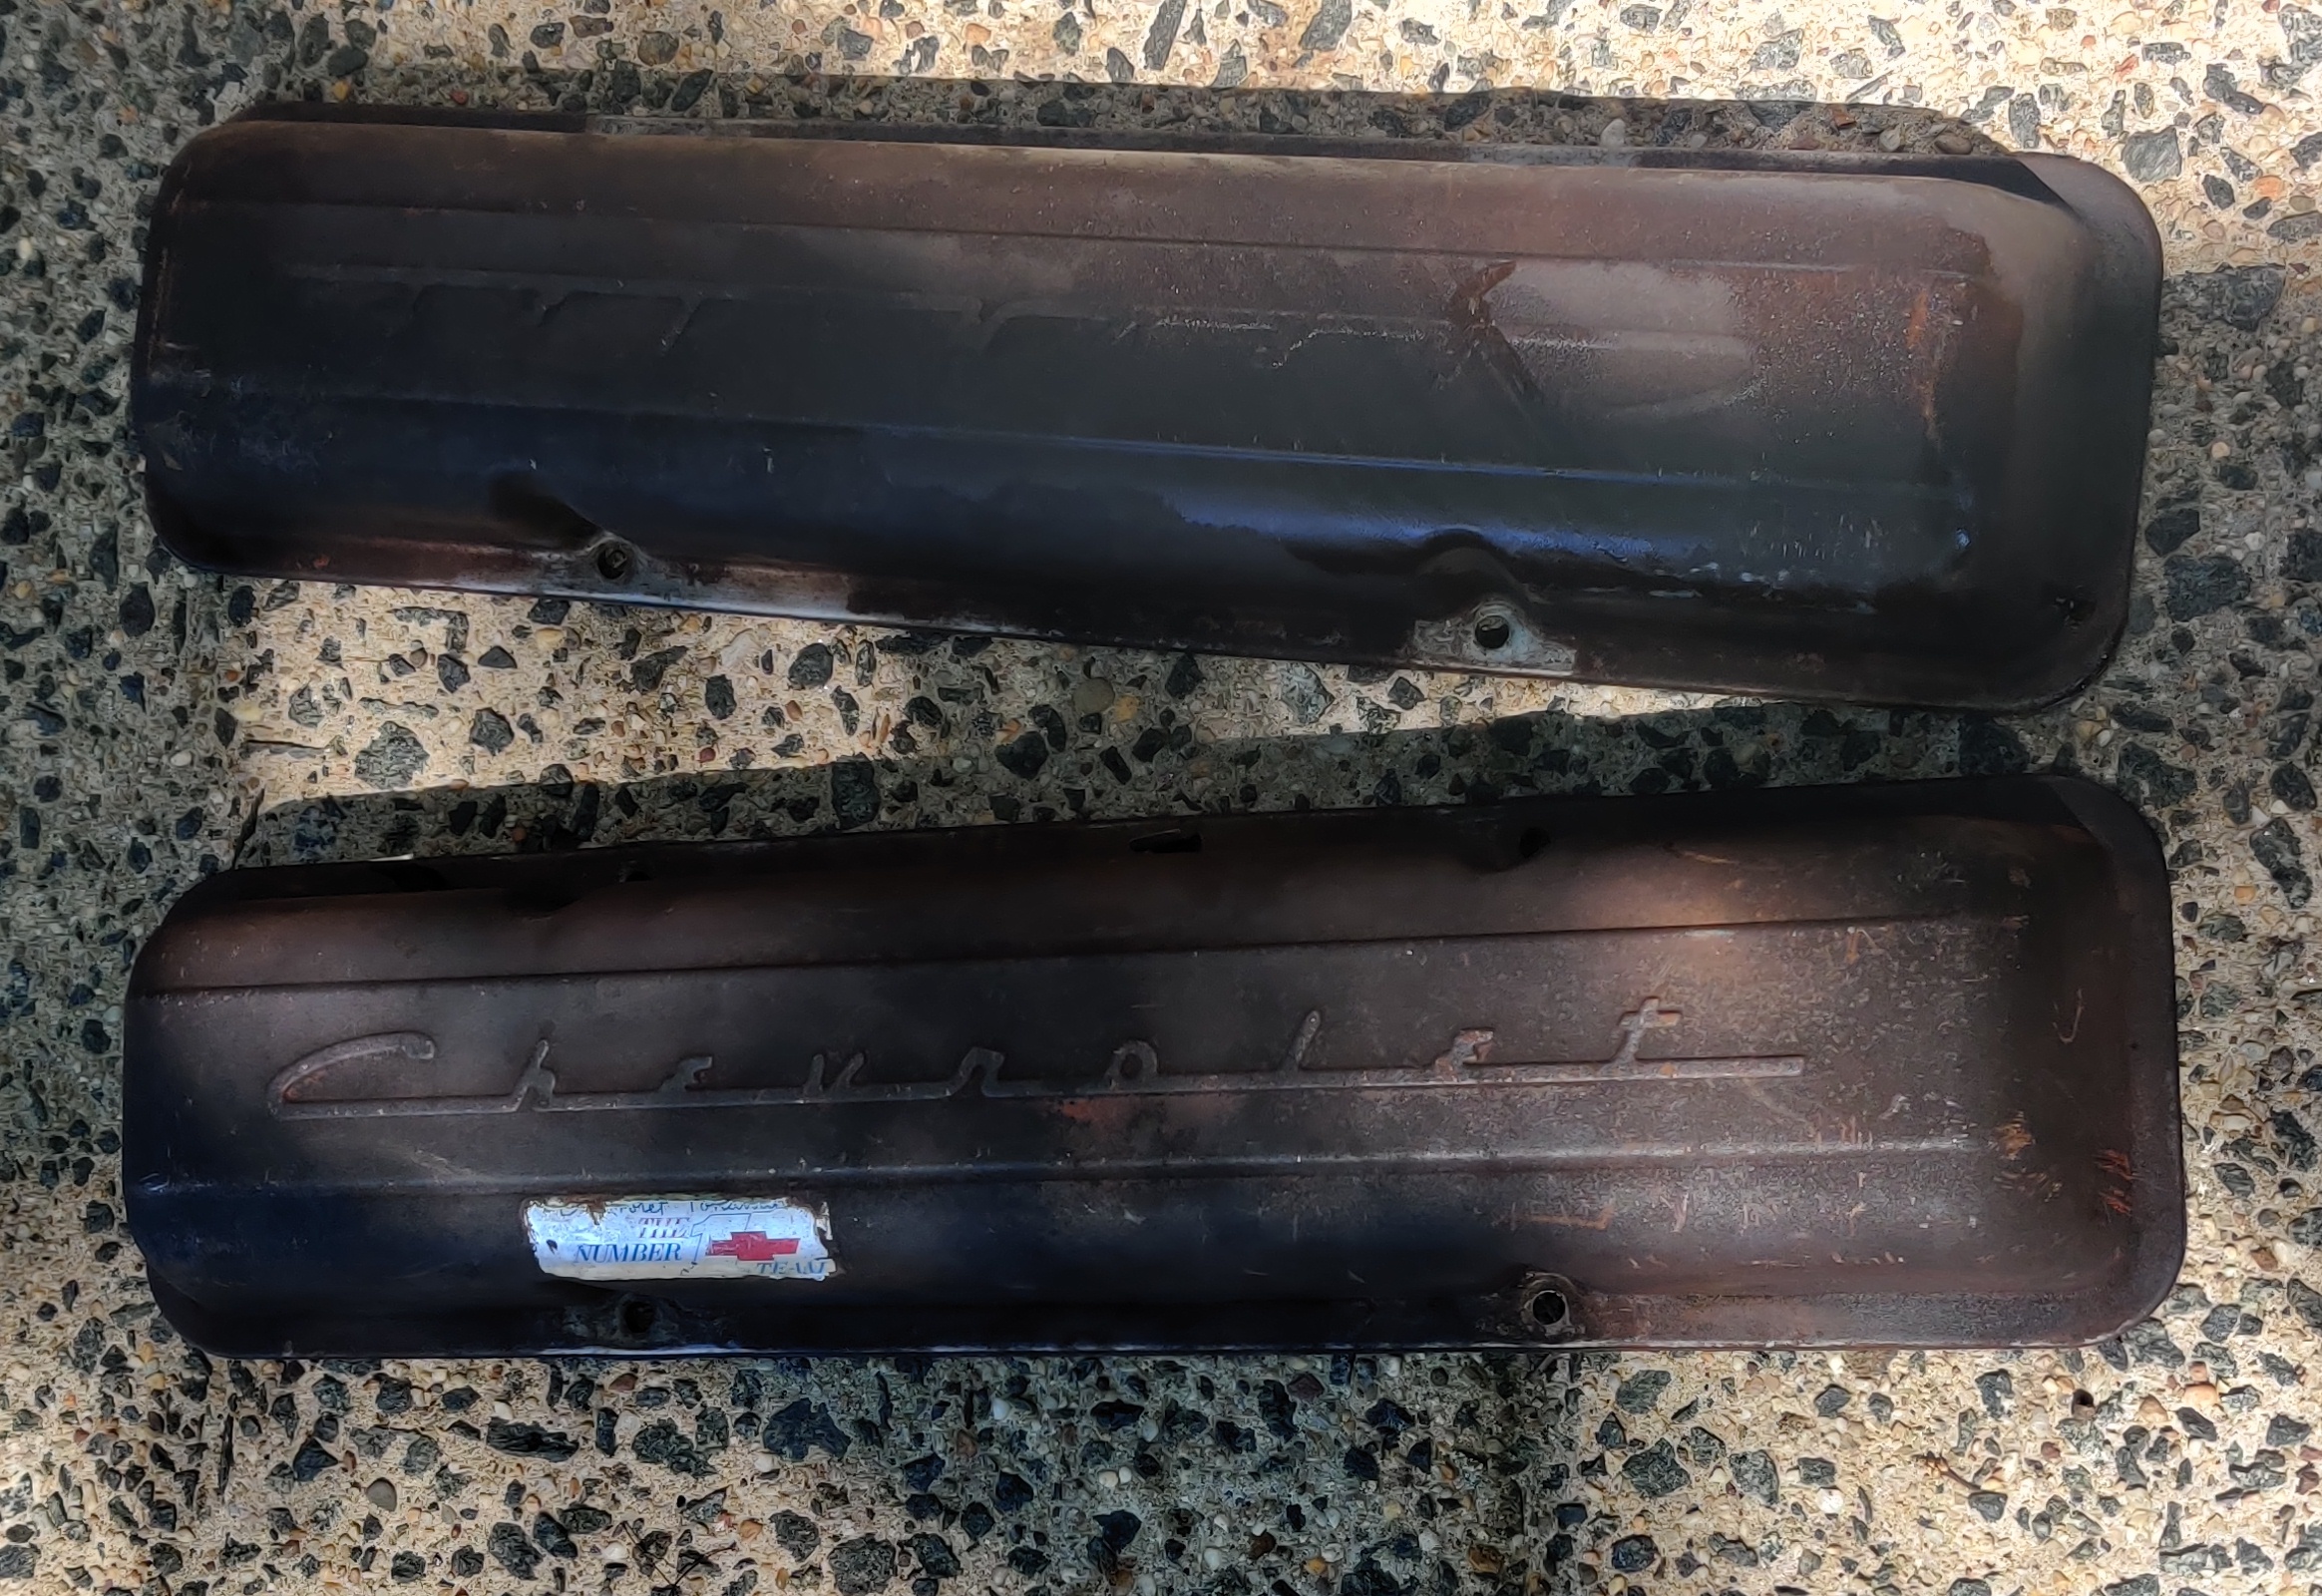
Alright, not too much was done today cause I didn't get any sleep, due to working 3rd shift. Basically we primed and painted the valve covers. Used high temperature engine enamel primer and then metallic Orange high temperature spray paint to complete the job.
Looking for a local artist in the Philly region to hand paint the Chevrolet lettering on the valve covers black. Let me know if you're interested, will pay $80 for both, price is negotiable.
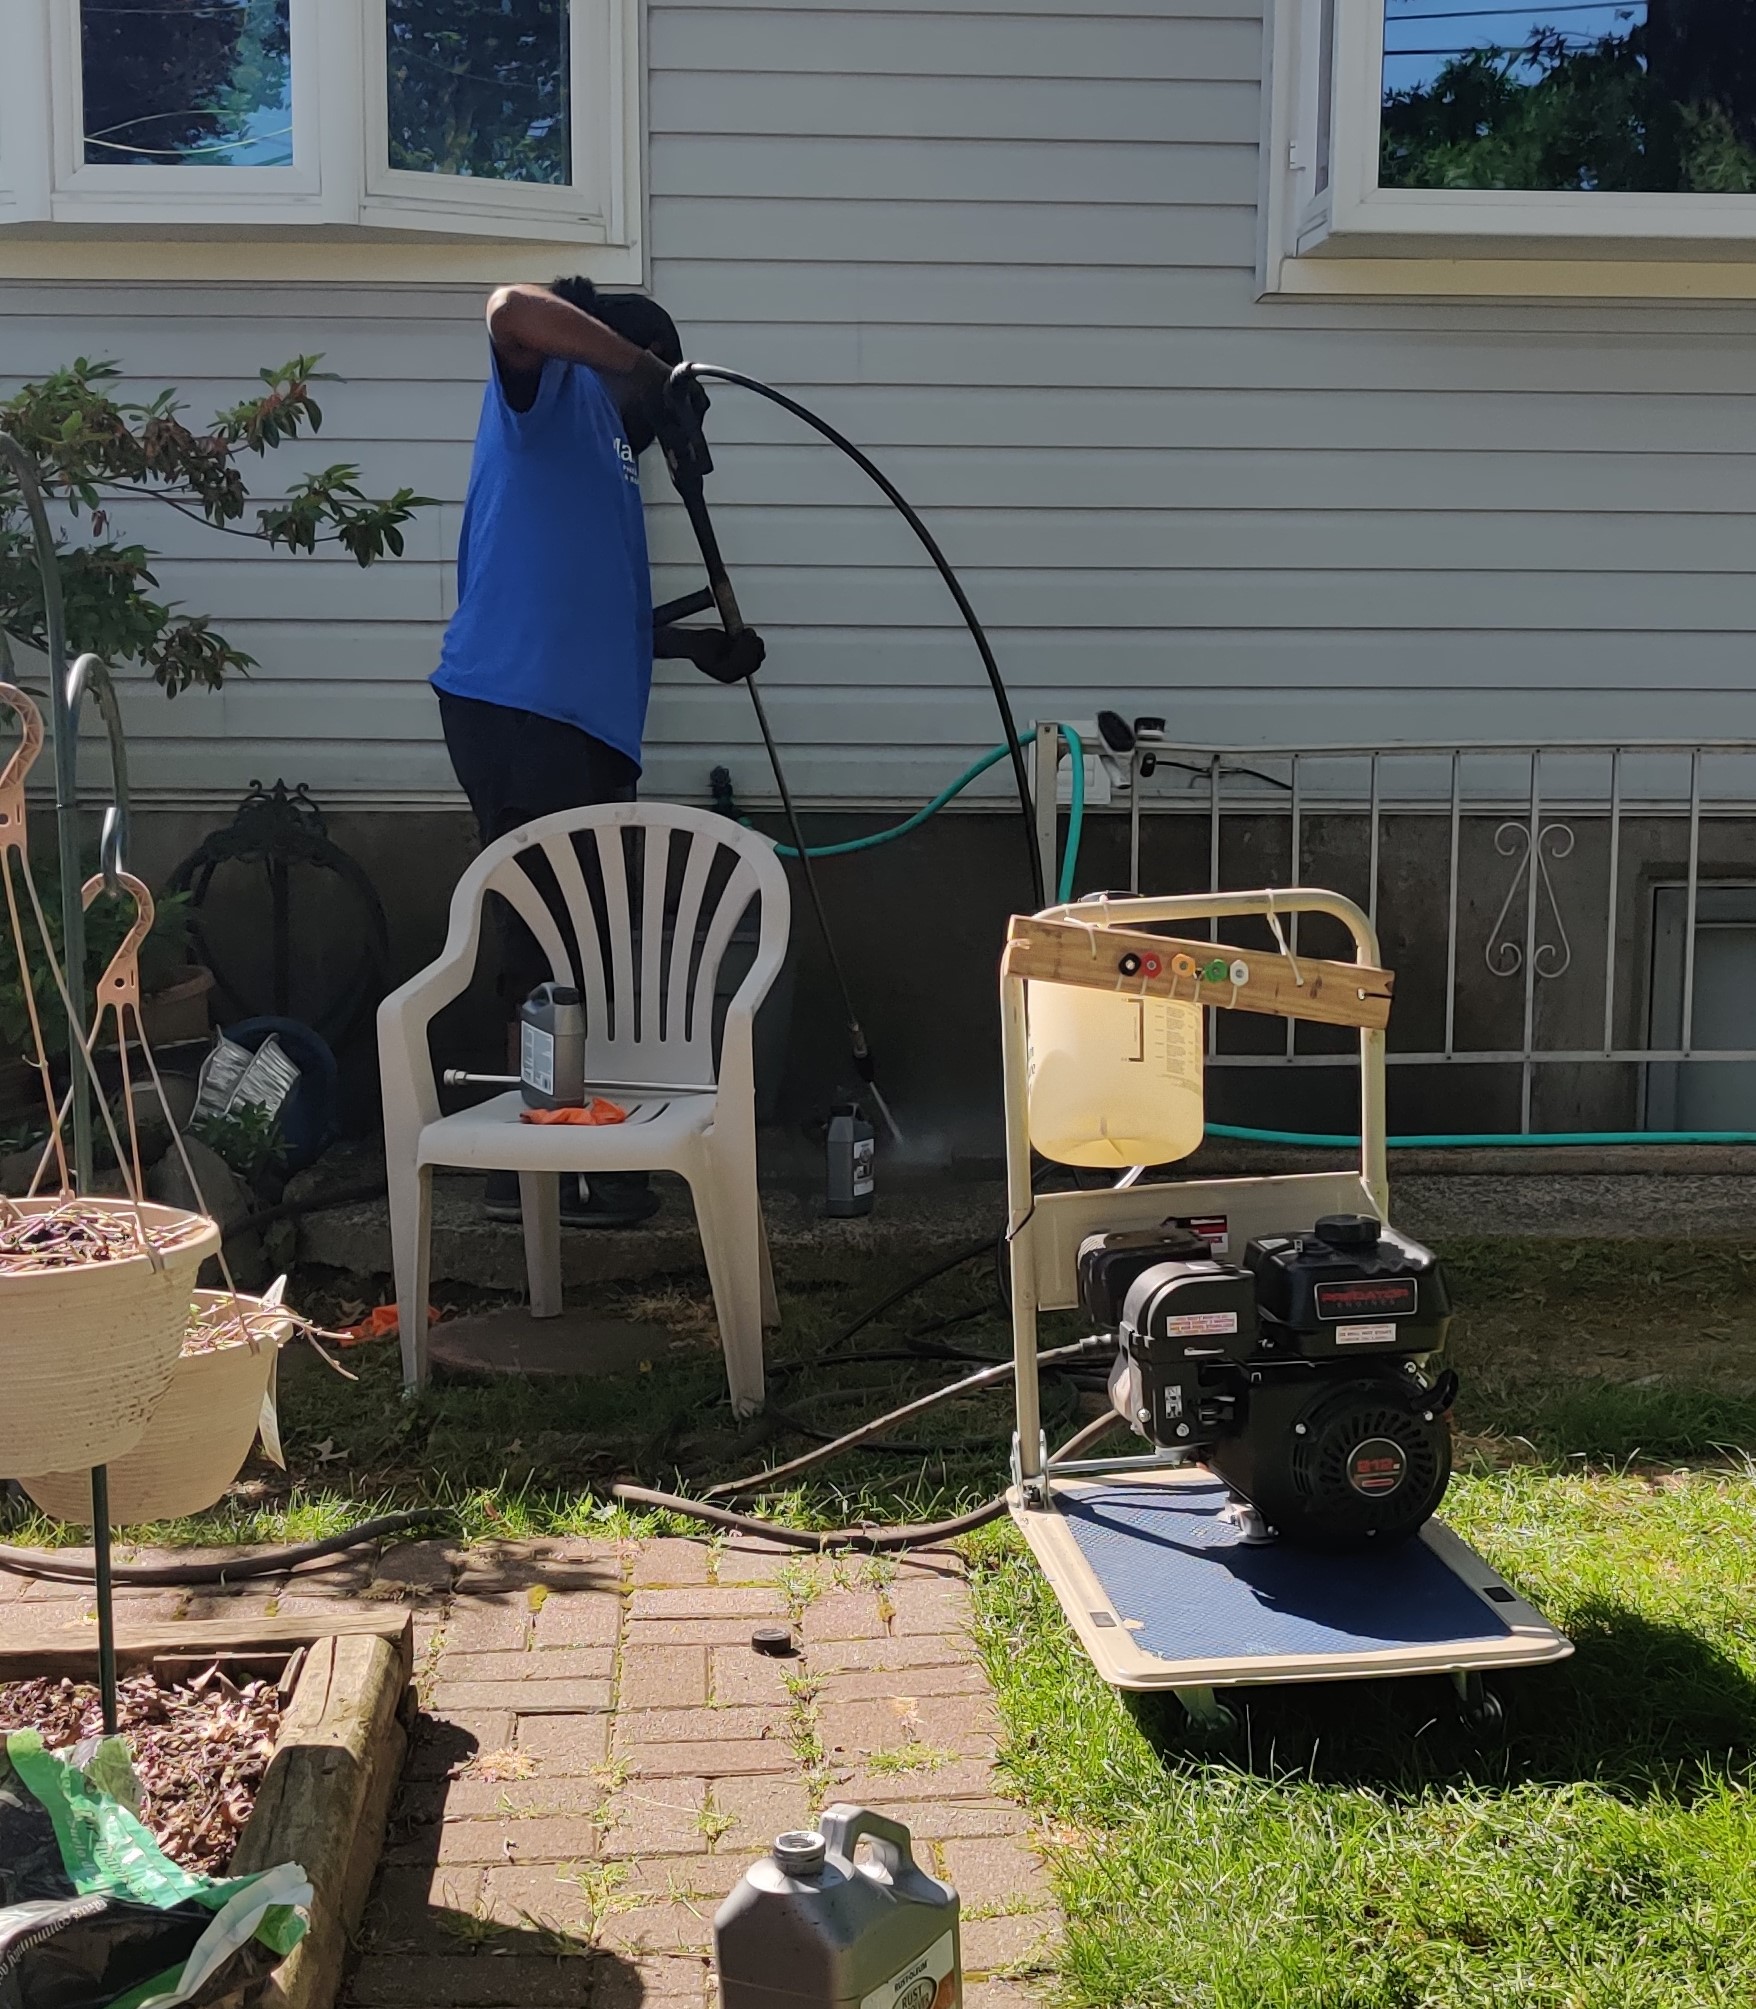
Stephen made a DIY pressure washer, and it's the most badass thing I've seen in a while. Predator 212 engine hooked up to a pump. Works really well actually!
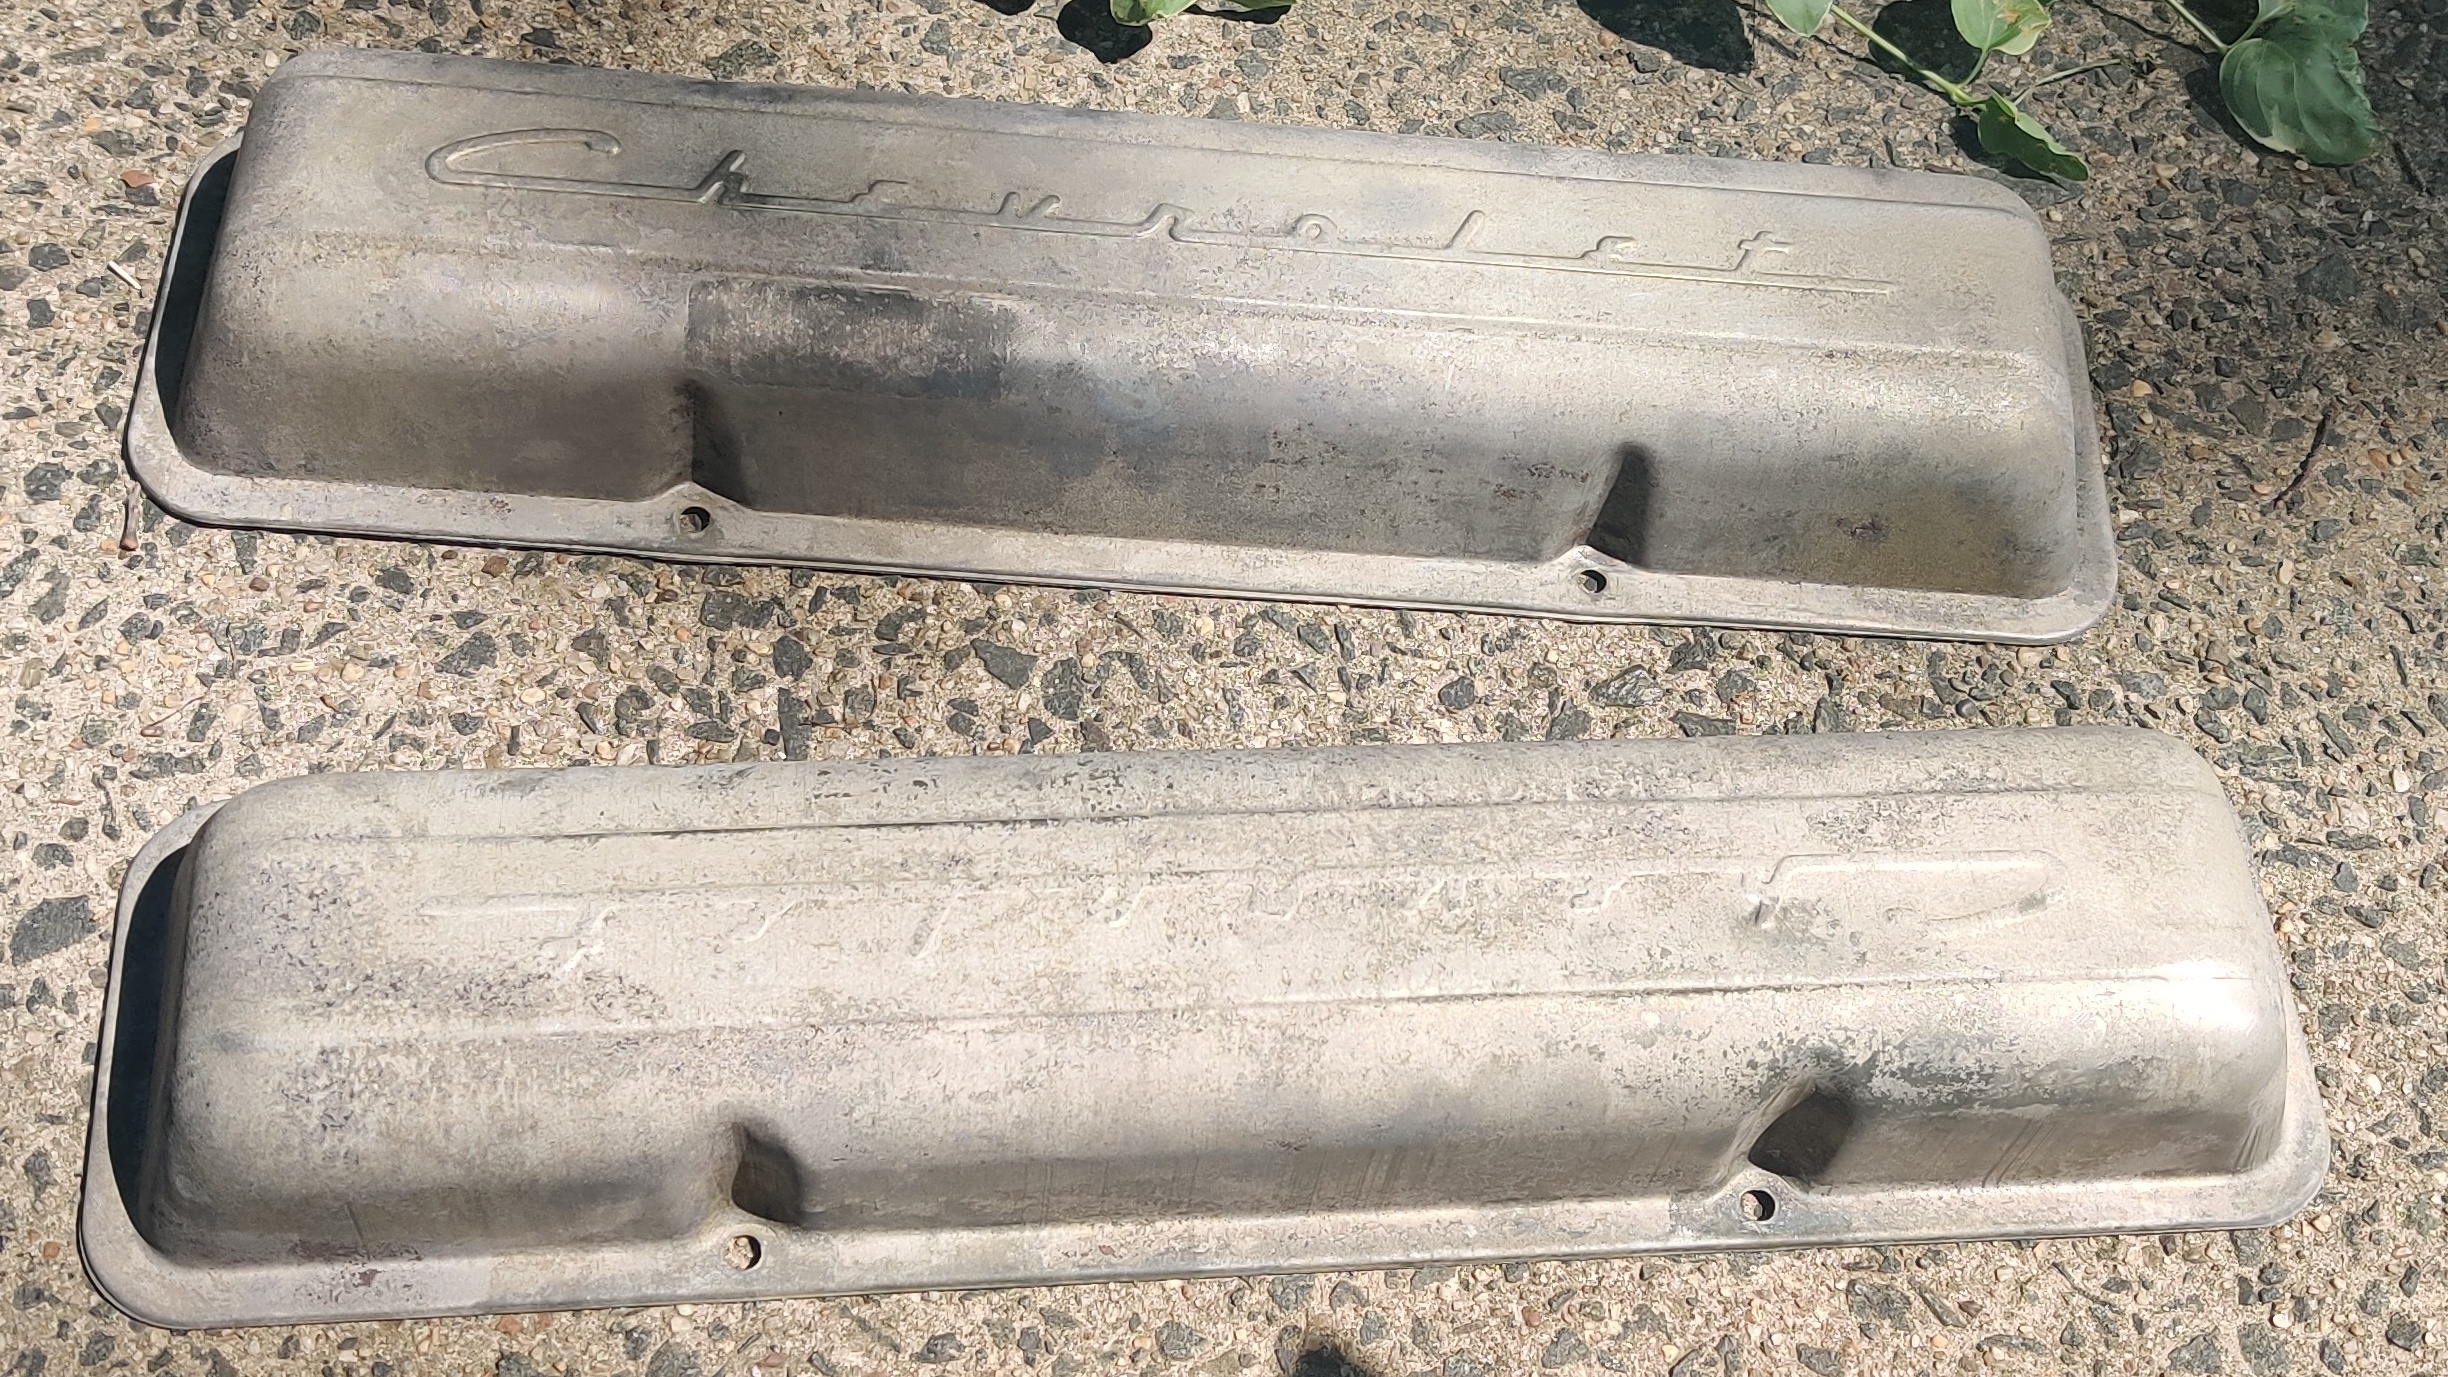
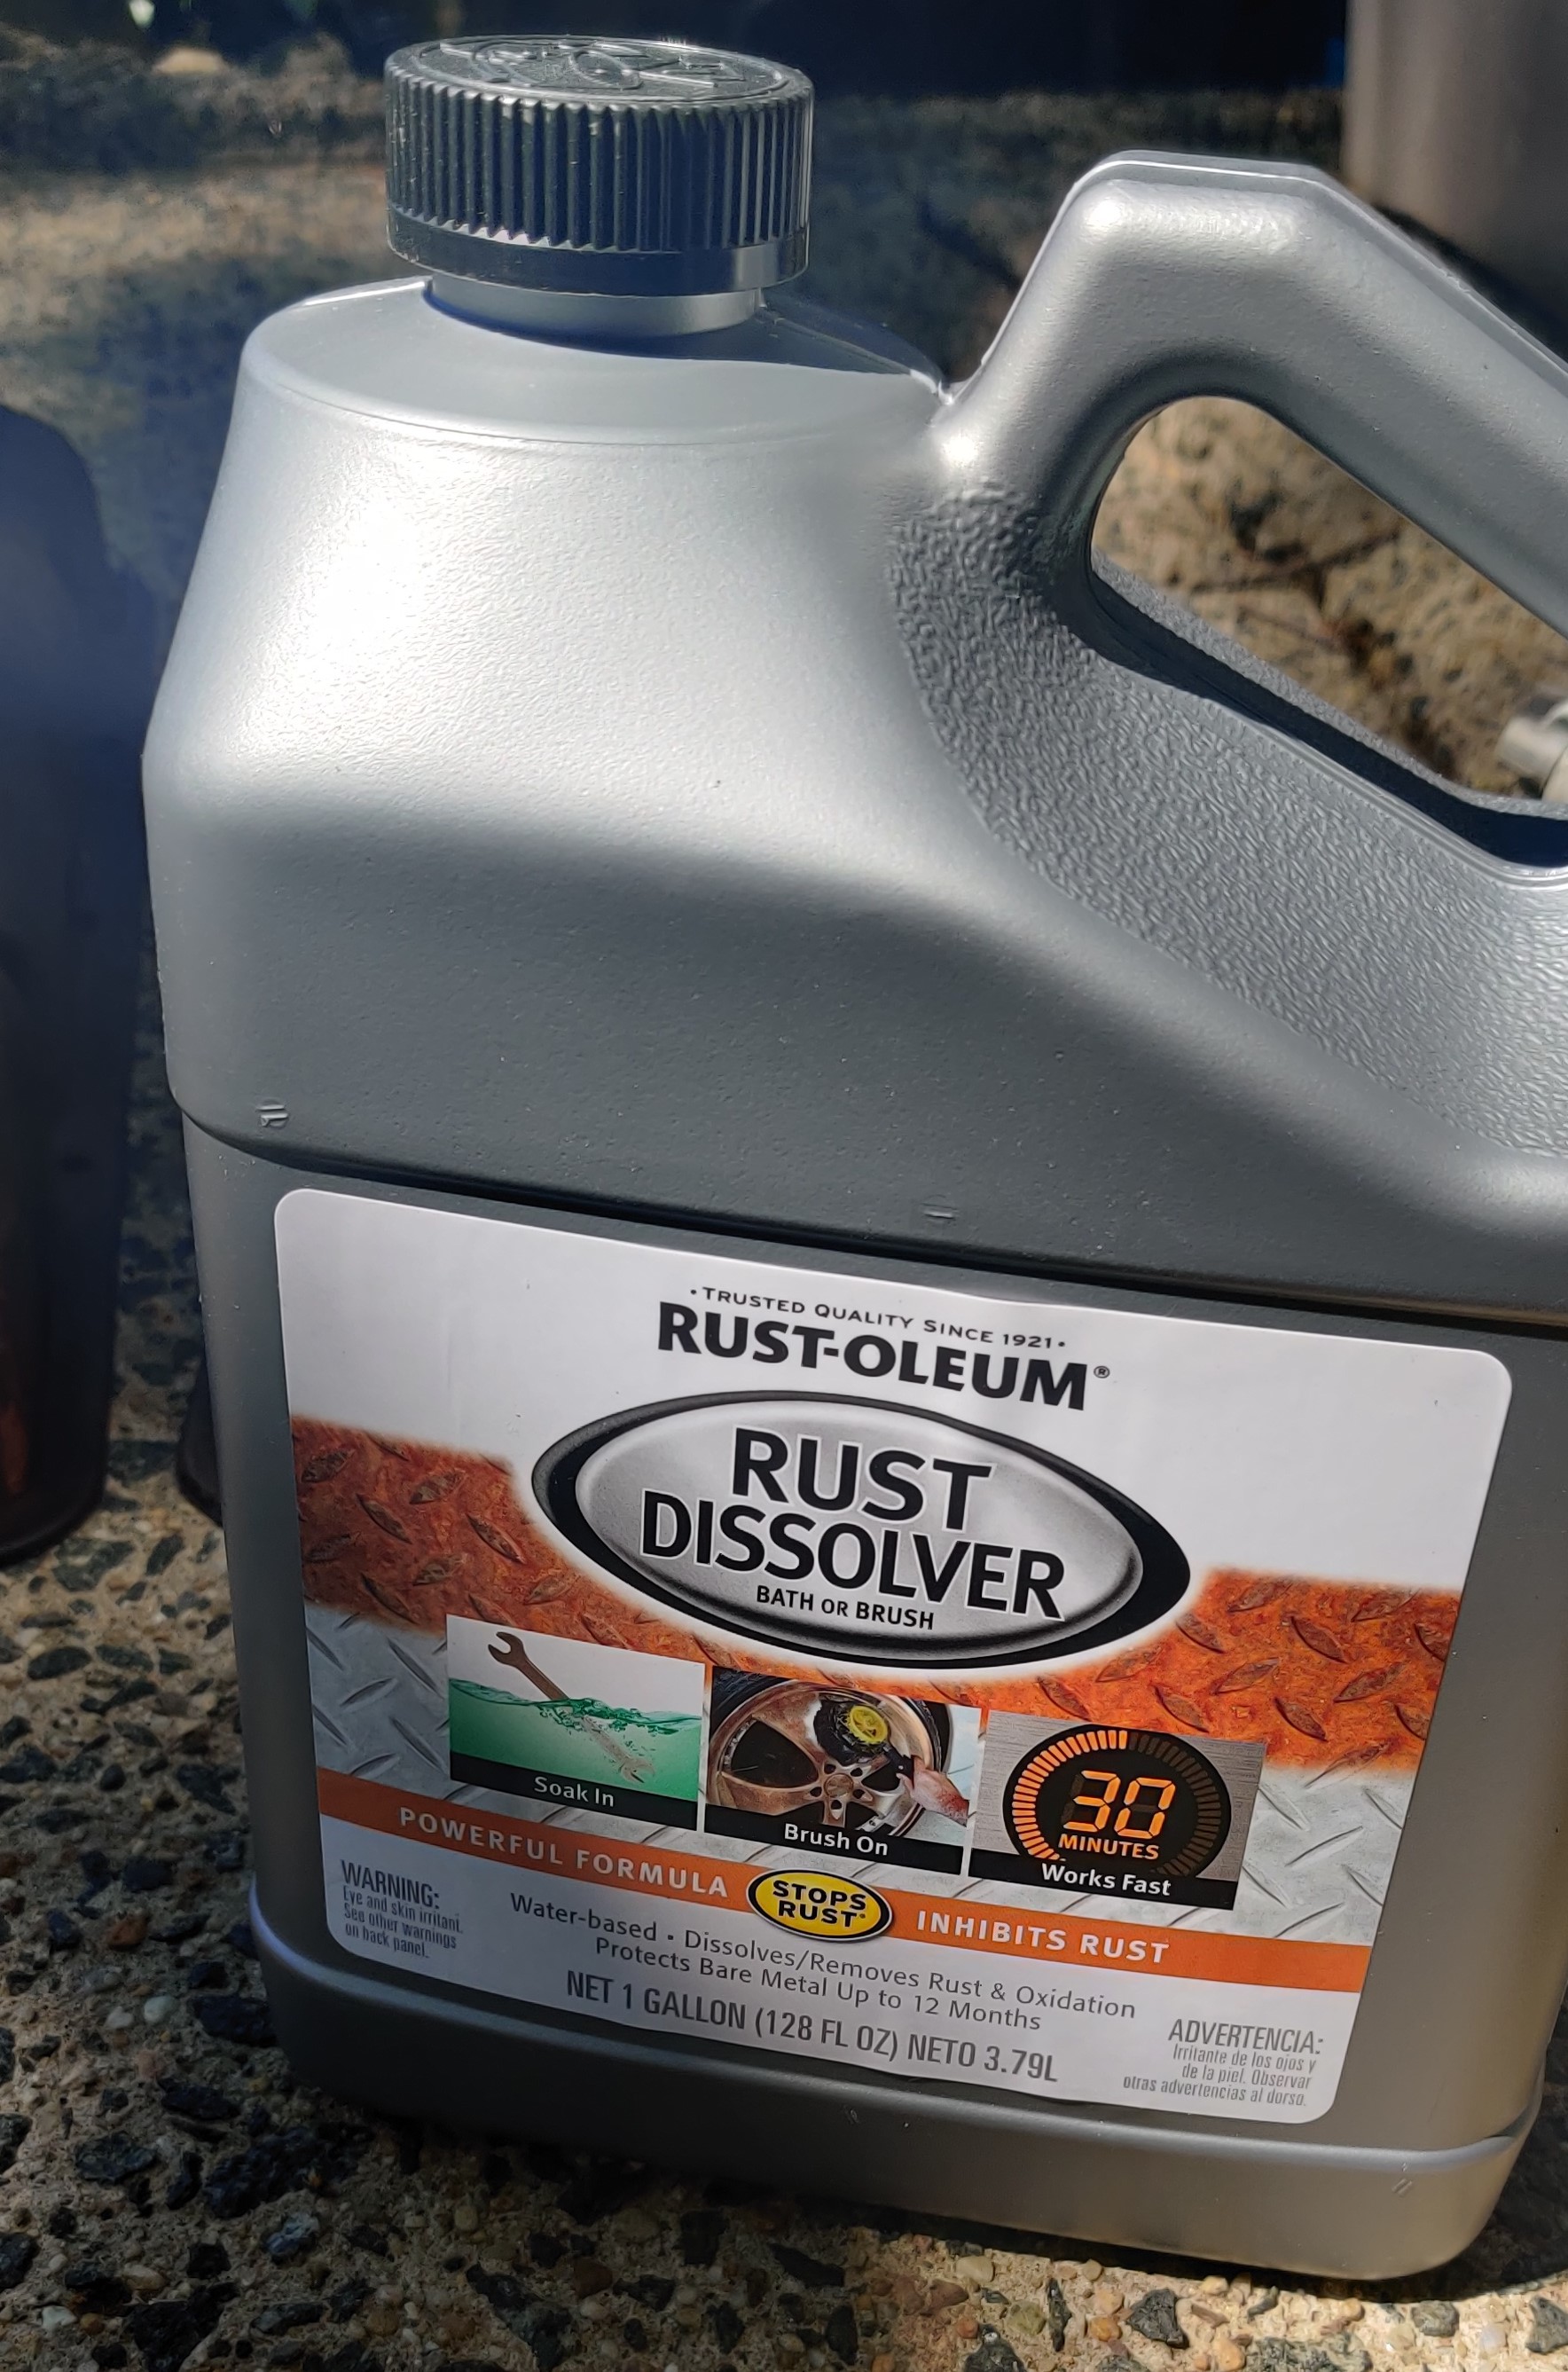
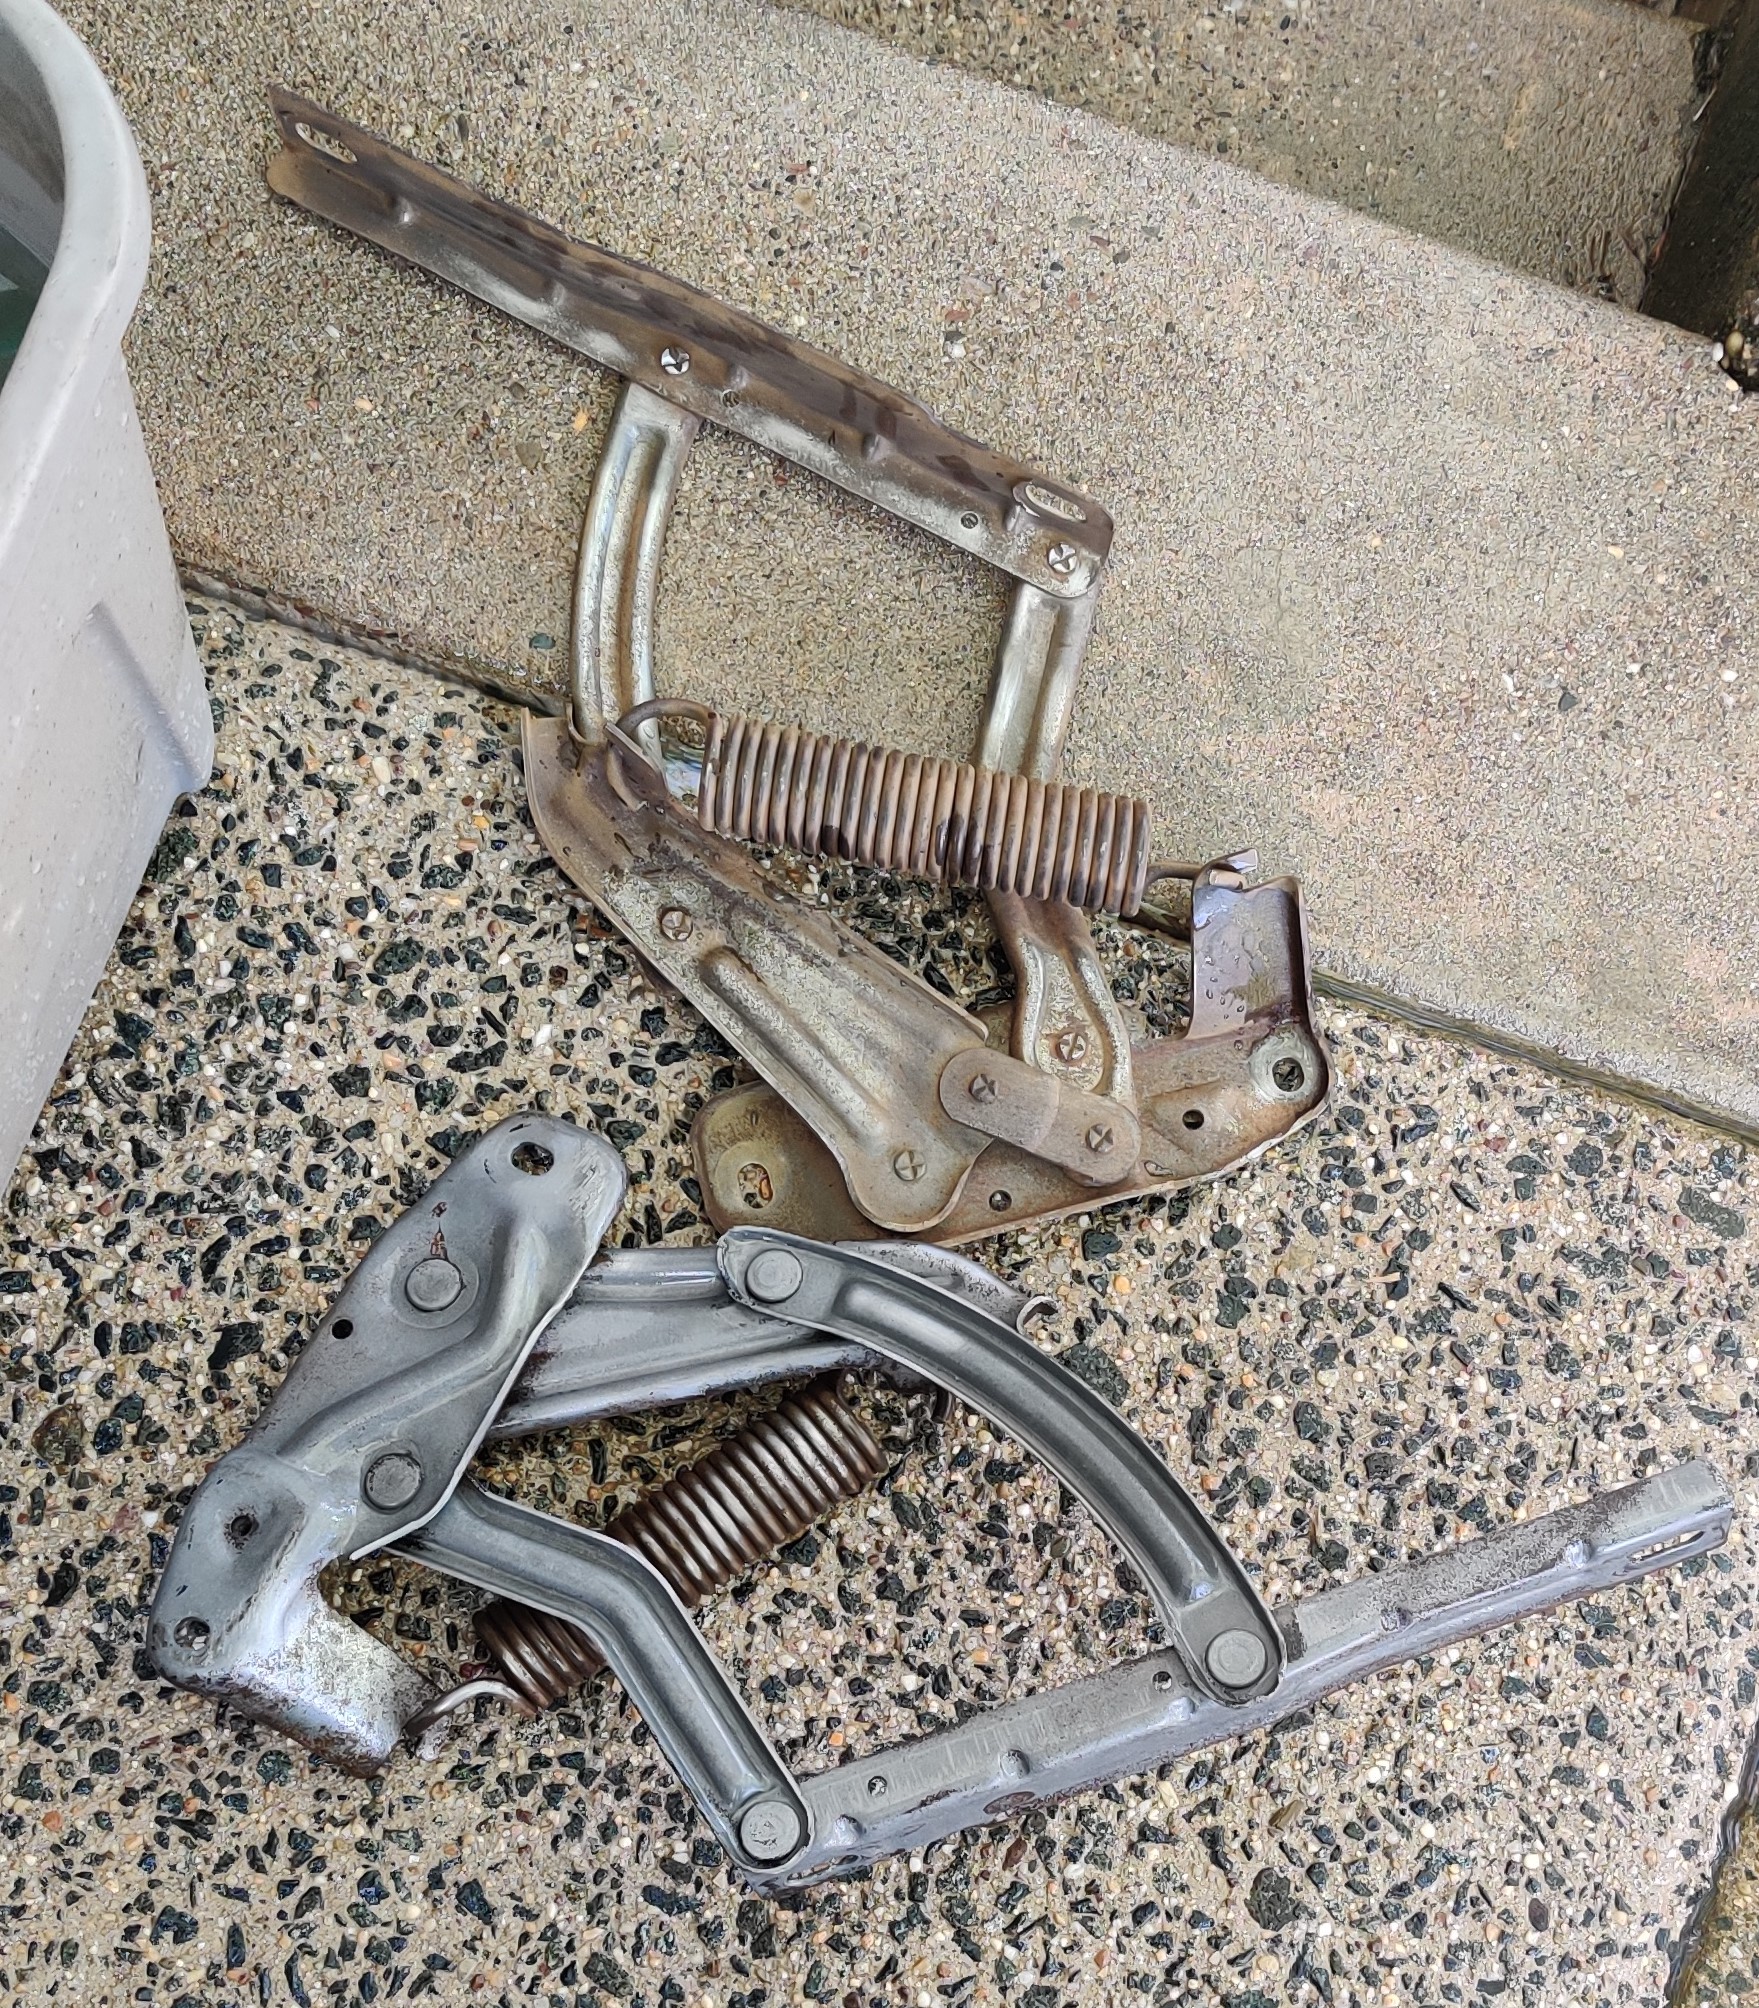
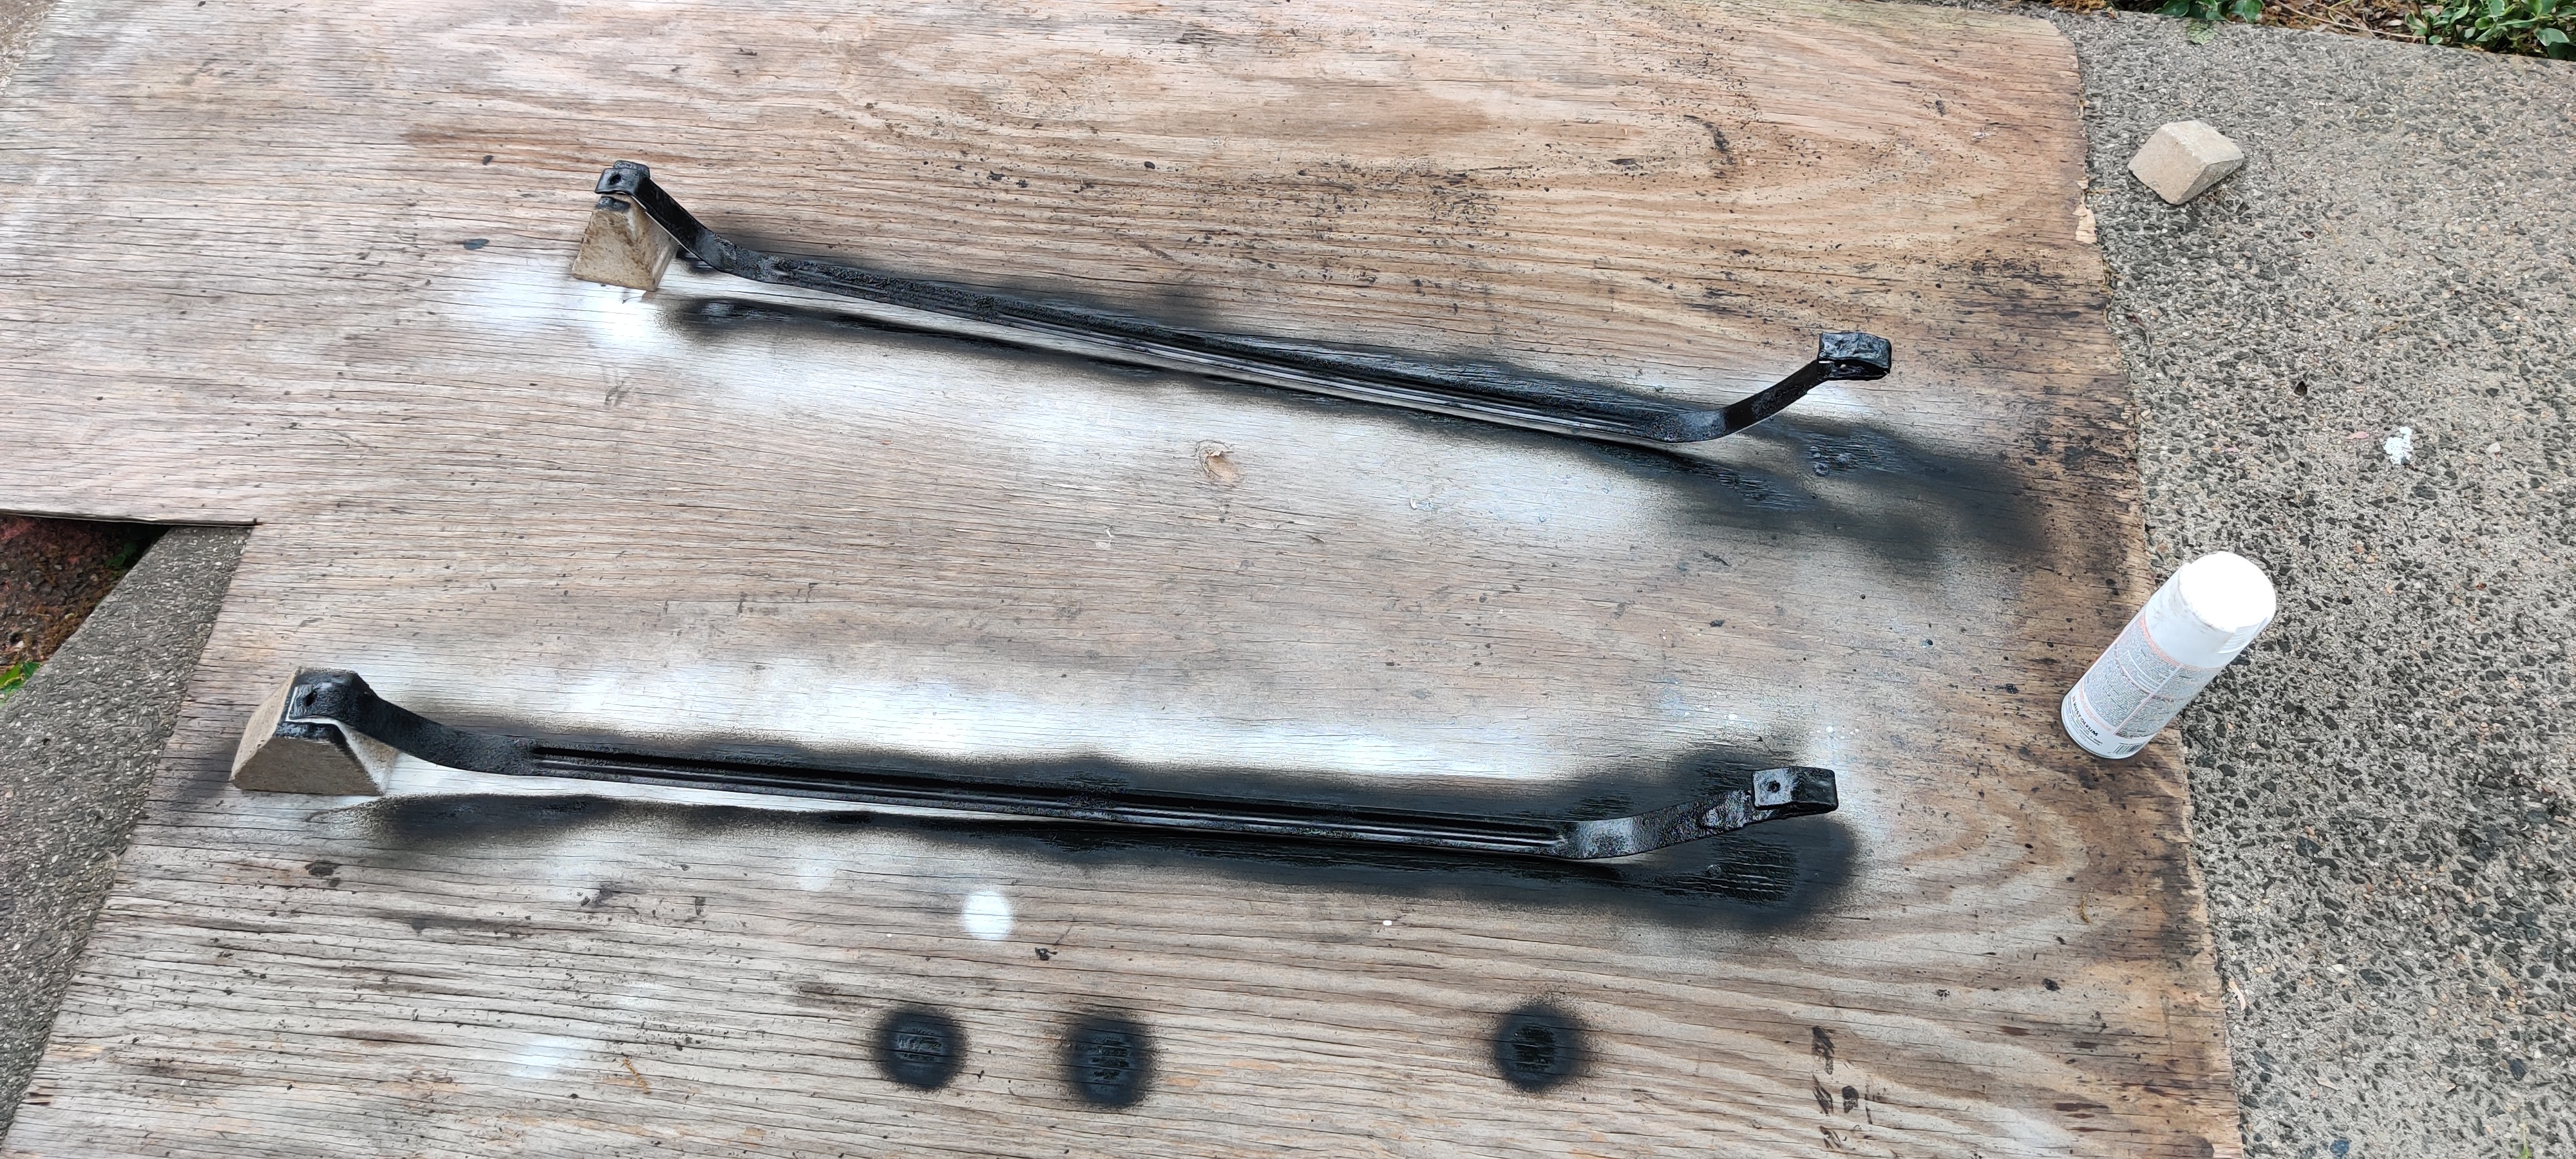
So today, we're cleaning up the valve covers and hinges for the hood. Soaked them in Rust-oleum Rust Disolver solution for a couple hours and then blasted the rust off the metal with the pressure washer. The hinges cleaned up easily. We had to soak valve covers in the solution overnight to get all that rust off. After the hood hinges dried, we soaked them in three gallons of WD-40 for a week to make sure they never sieze up anytime soon.
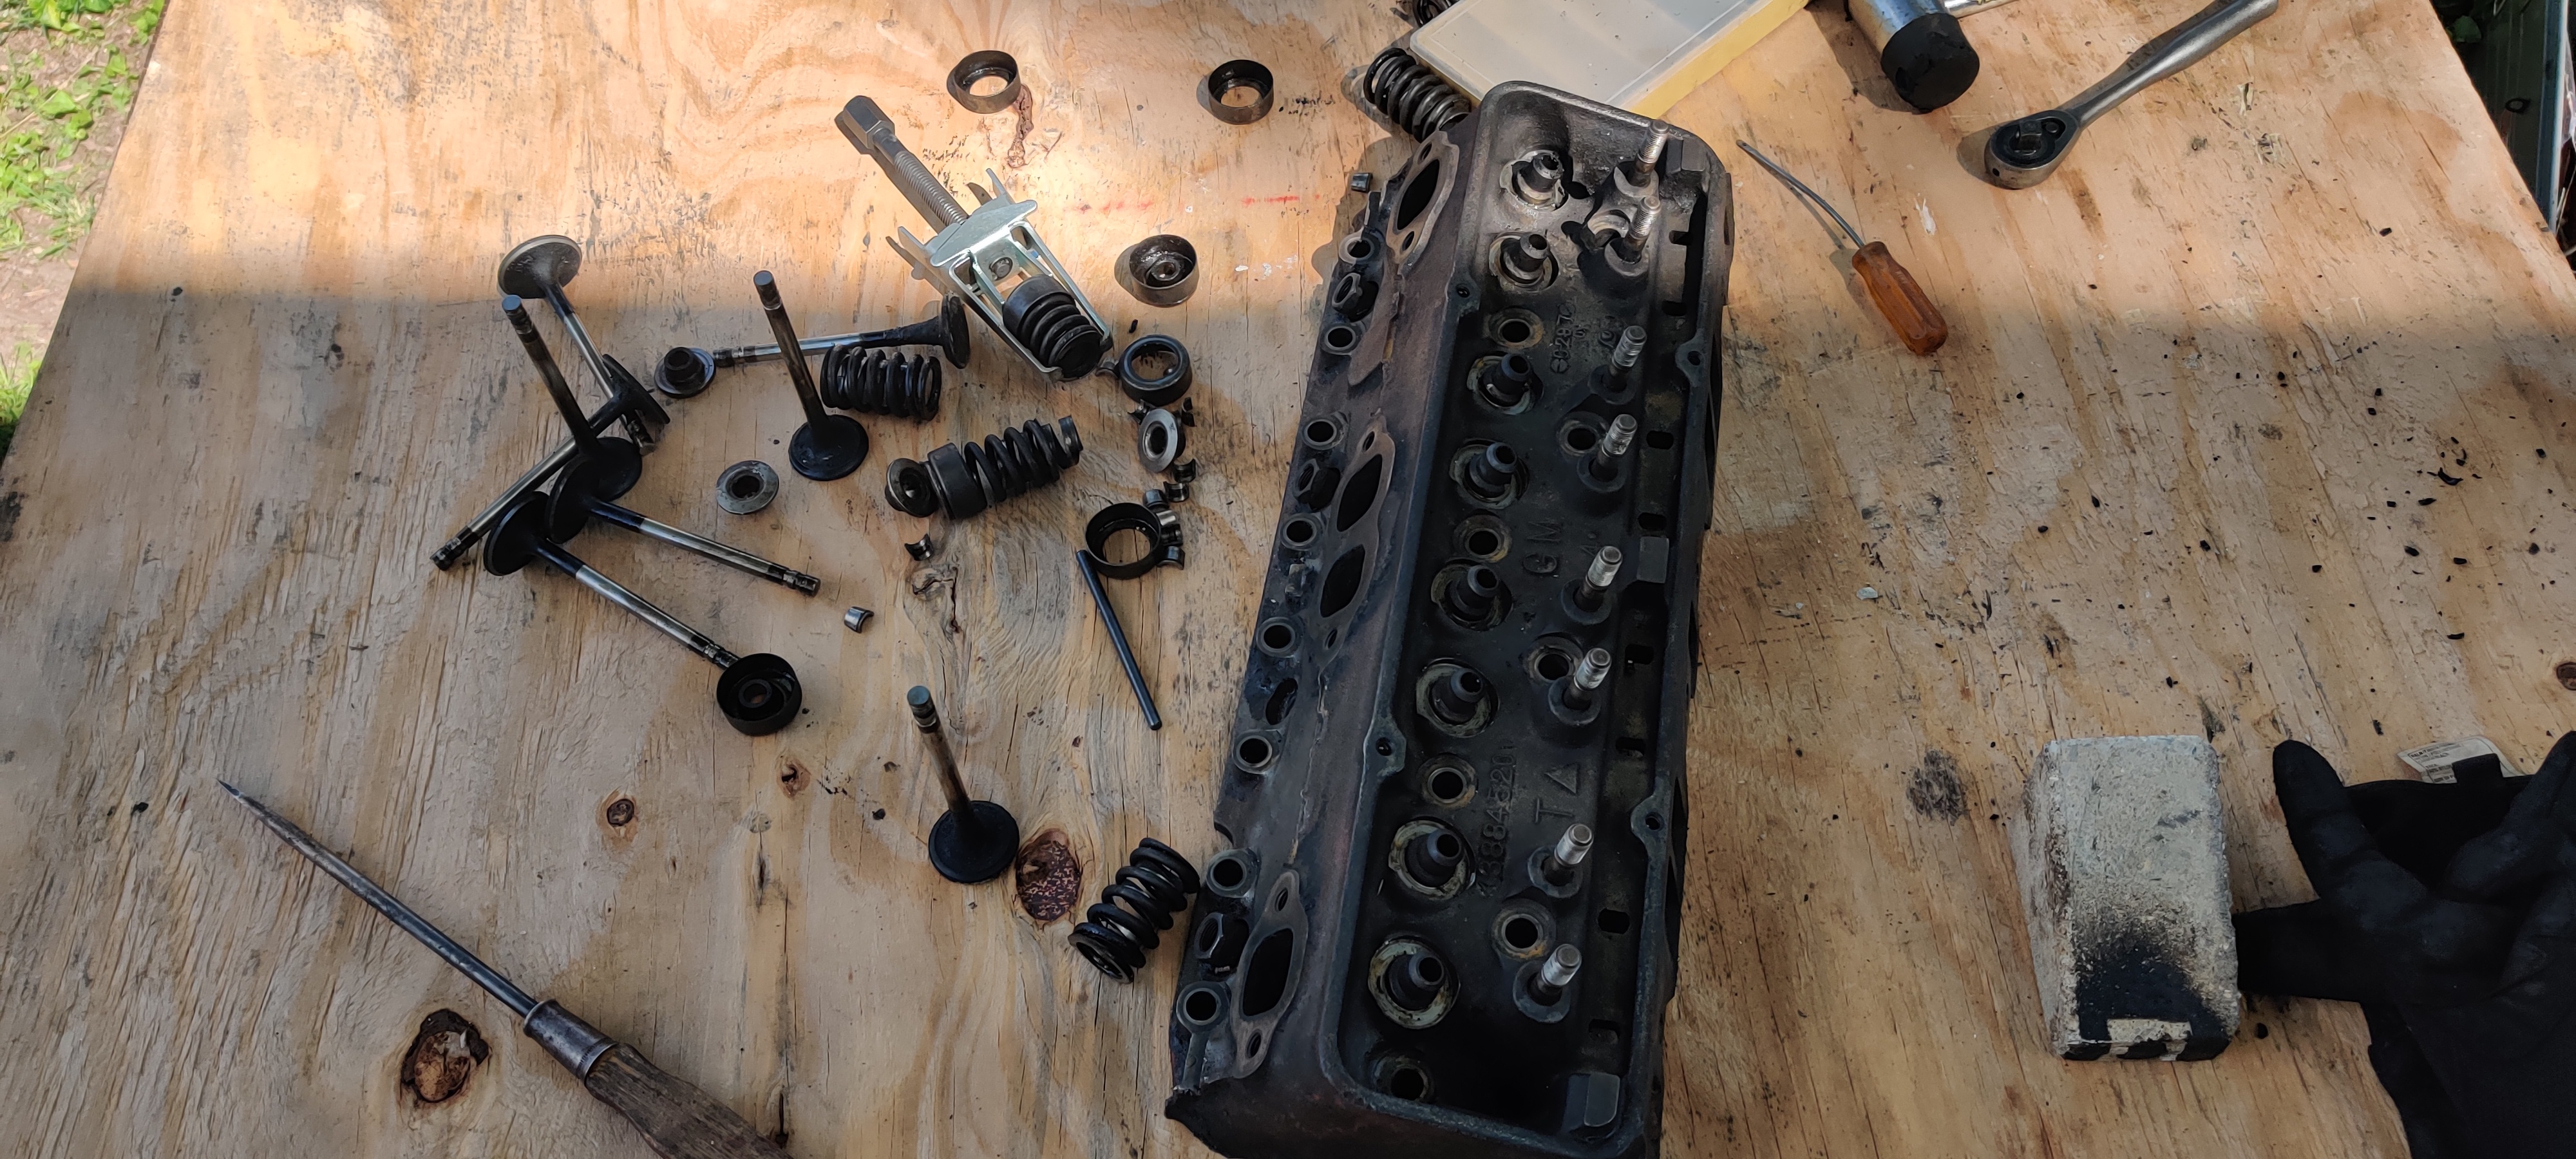
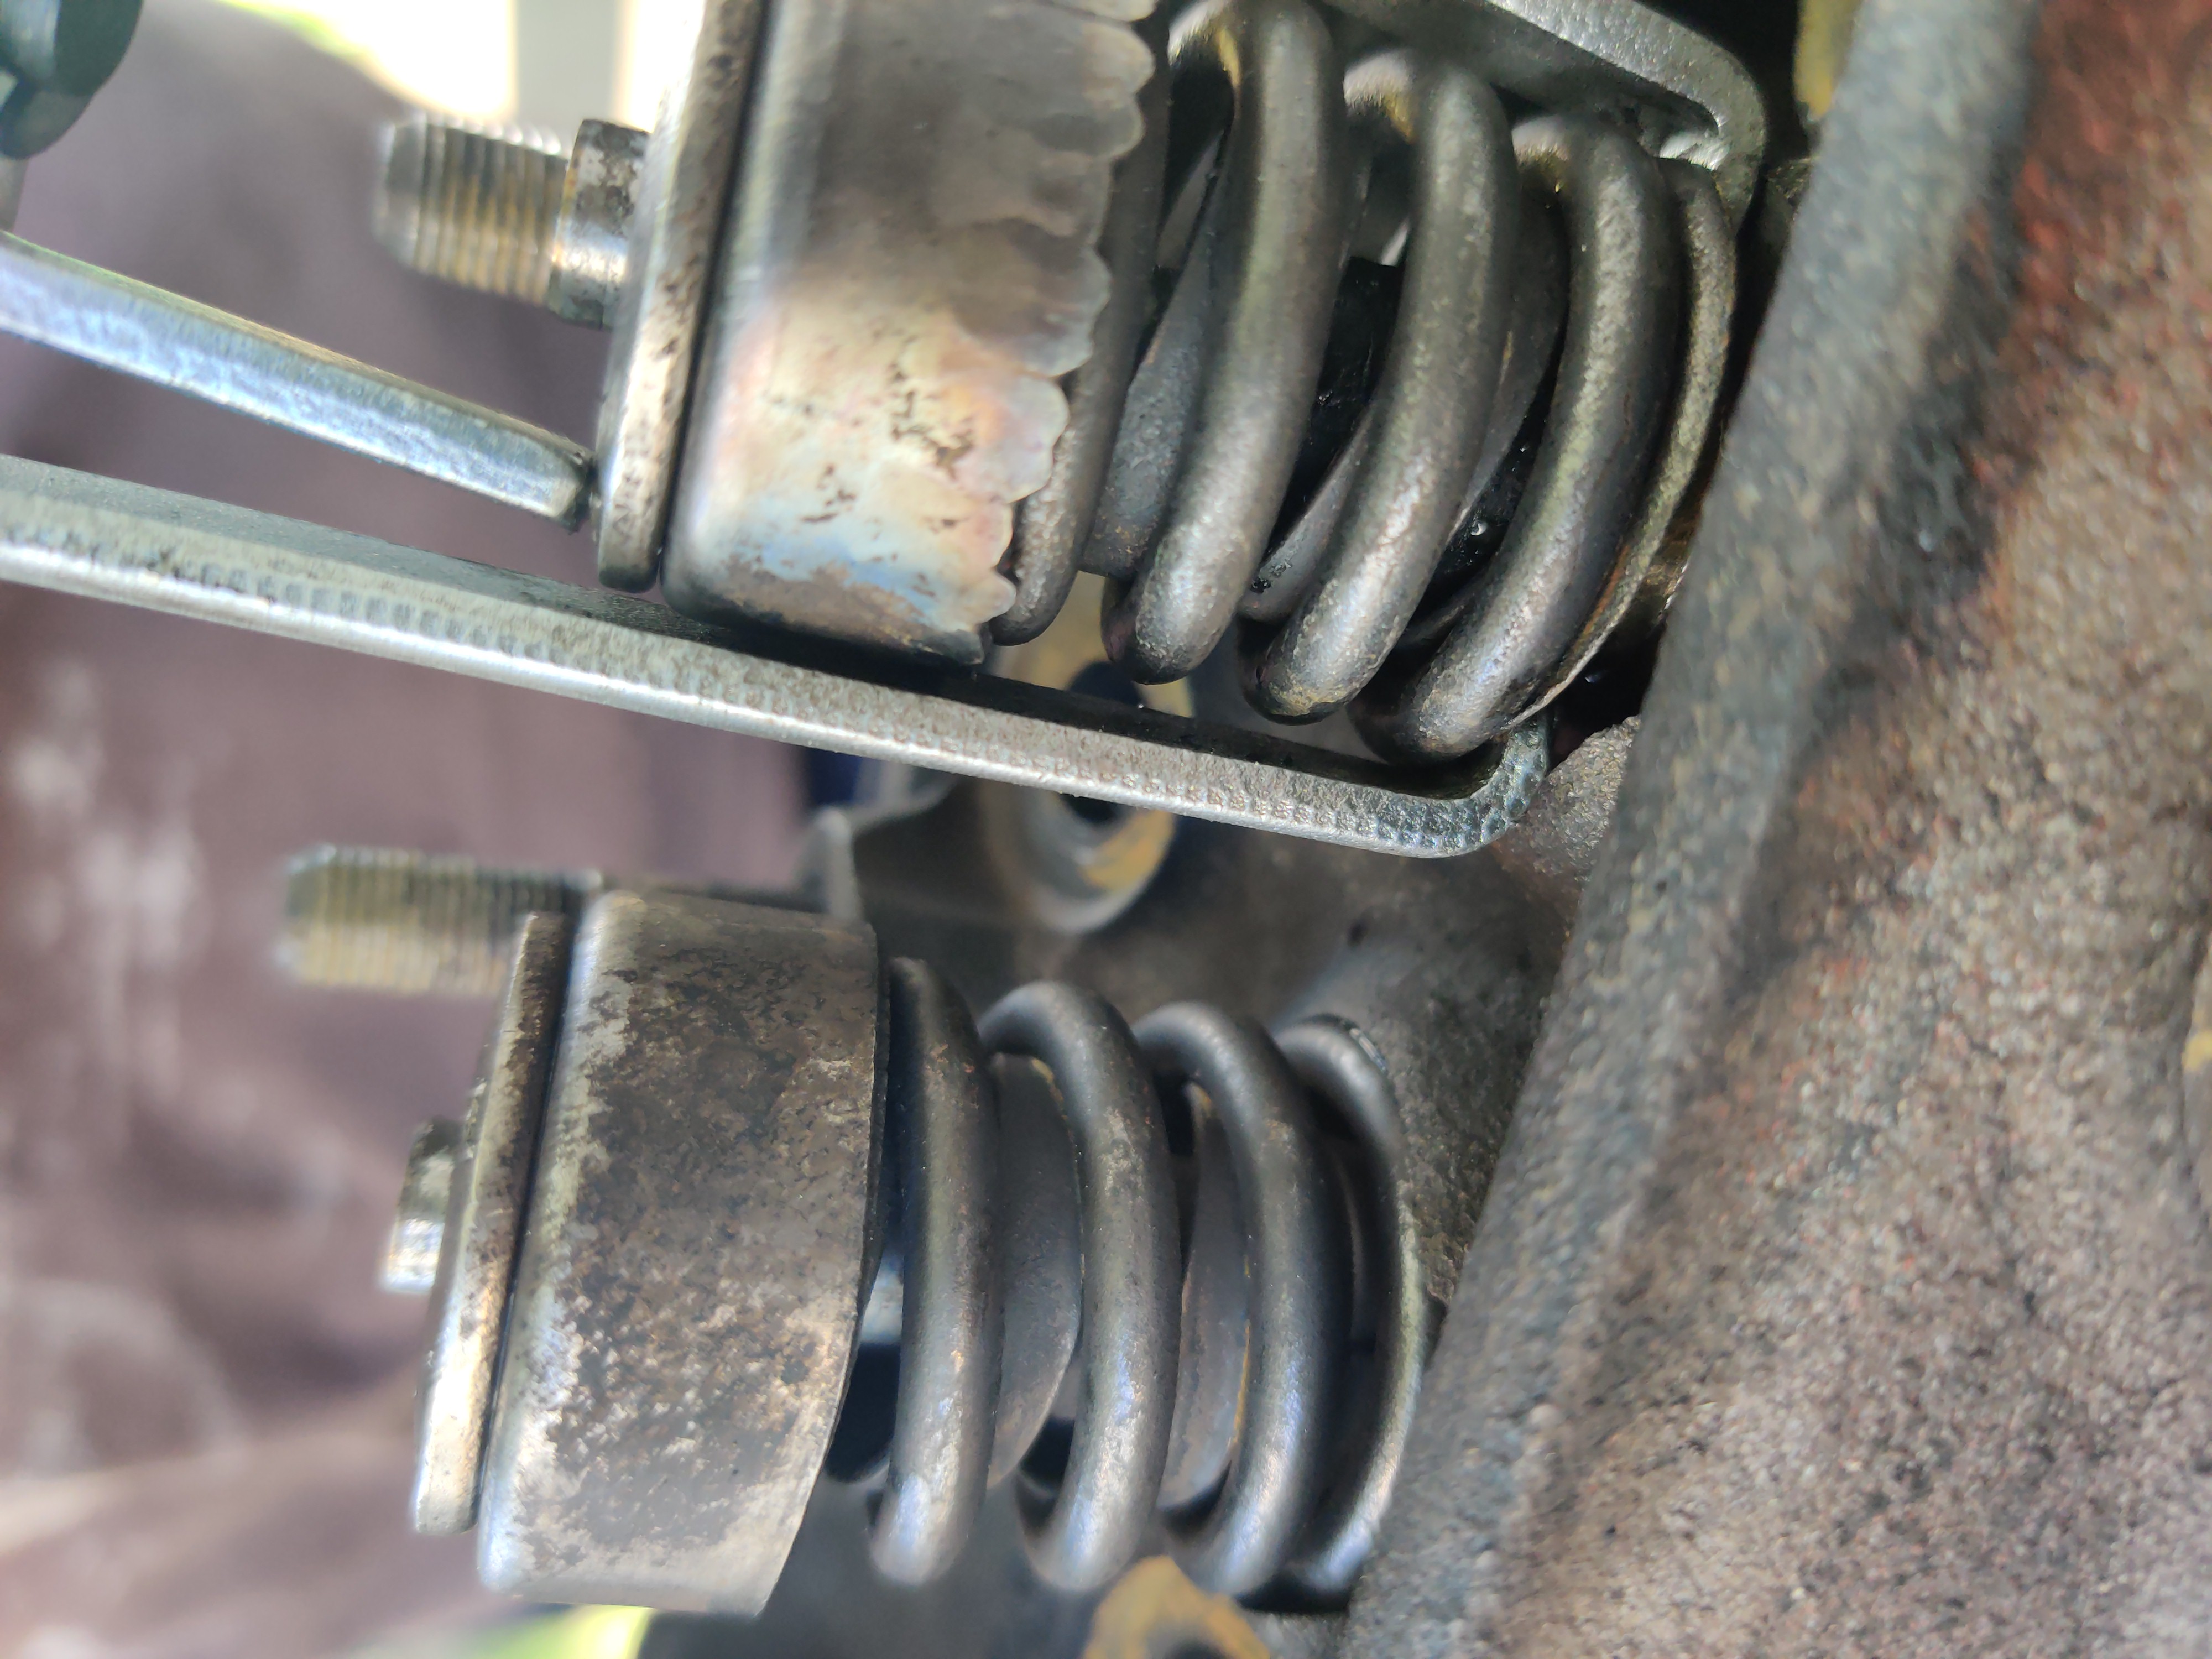
Today, we decided to try and remove the springs and valves off the cylinder heads again. We tried before with a cheap tool from Advanced Auto and had little luck. This time we bought a more expensive valve spring compressor from AutoZone and was able to get the springs off.
Once the springs were compressed, the valve stem would not separate from the collar at the top. We ended up having to use a small mallet to break the stem from the collar and remove the retaining clips. By the 4th spring, we had our method figured out and was able to complete the removal.
Next the cylinder heads will be taken to Philly Racing Engines for a 3 way valve job and cleaning.
Today we cleaned out the differential with brake cleaner and then installed a new gasket from Mahle. Then filled the differental with 2 quarts of STP 80W90 gear oil. Gasket sealed up well with no leaks.
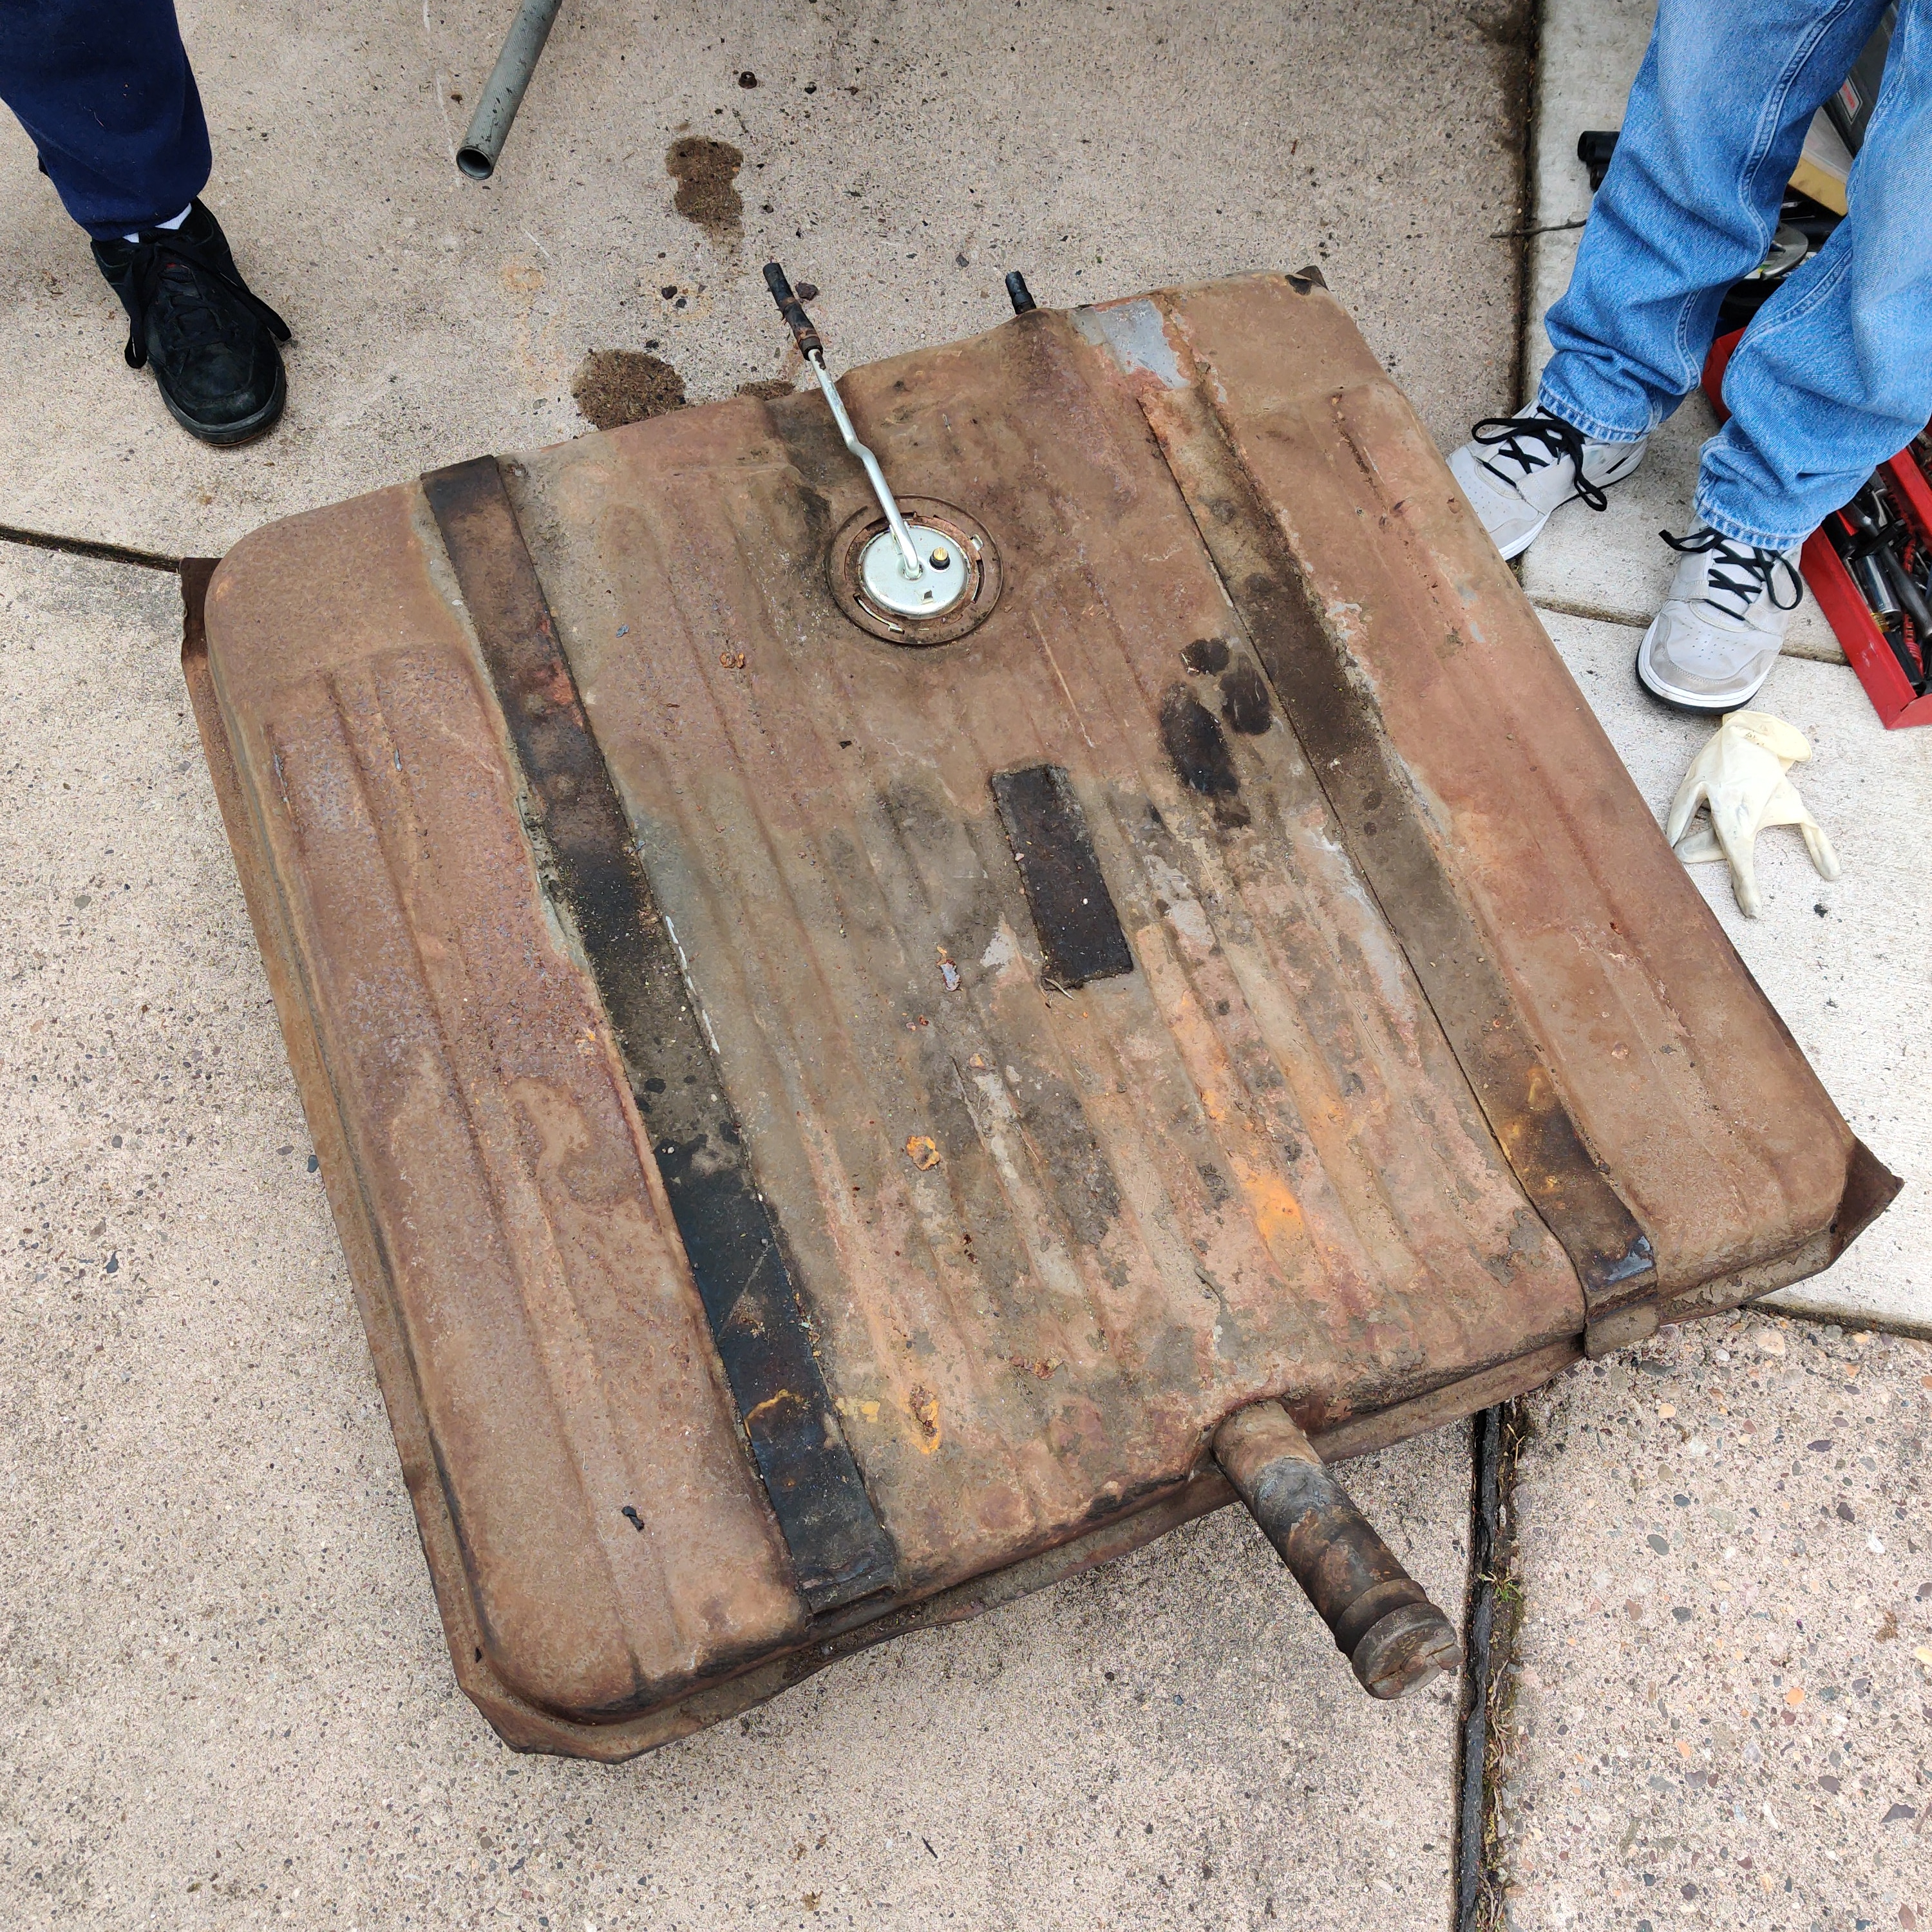
Next we installed a new fuel sending unit on the fuel tank as the old one was kind of questionable. We then mocked up the fuel tank to make sure our new bolts worked and that the two brackets were bent correctly into place as they were adjusted for spraying the rubber on.
Next time we'll install the new oil pump for the motor and gaskets for the oil pan.
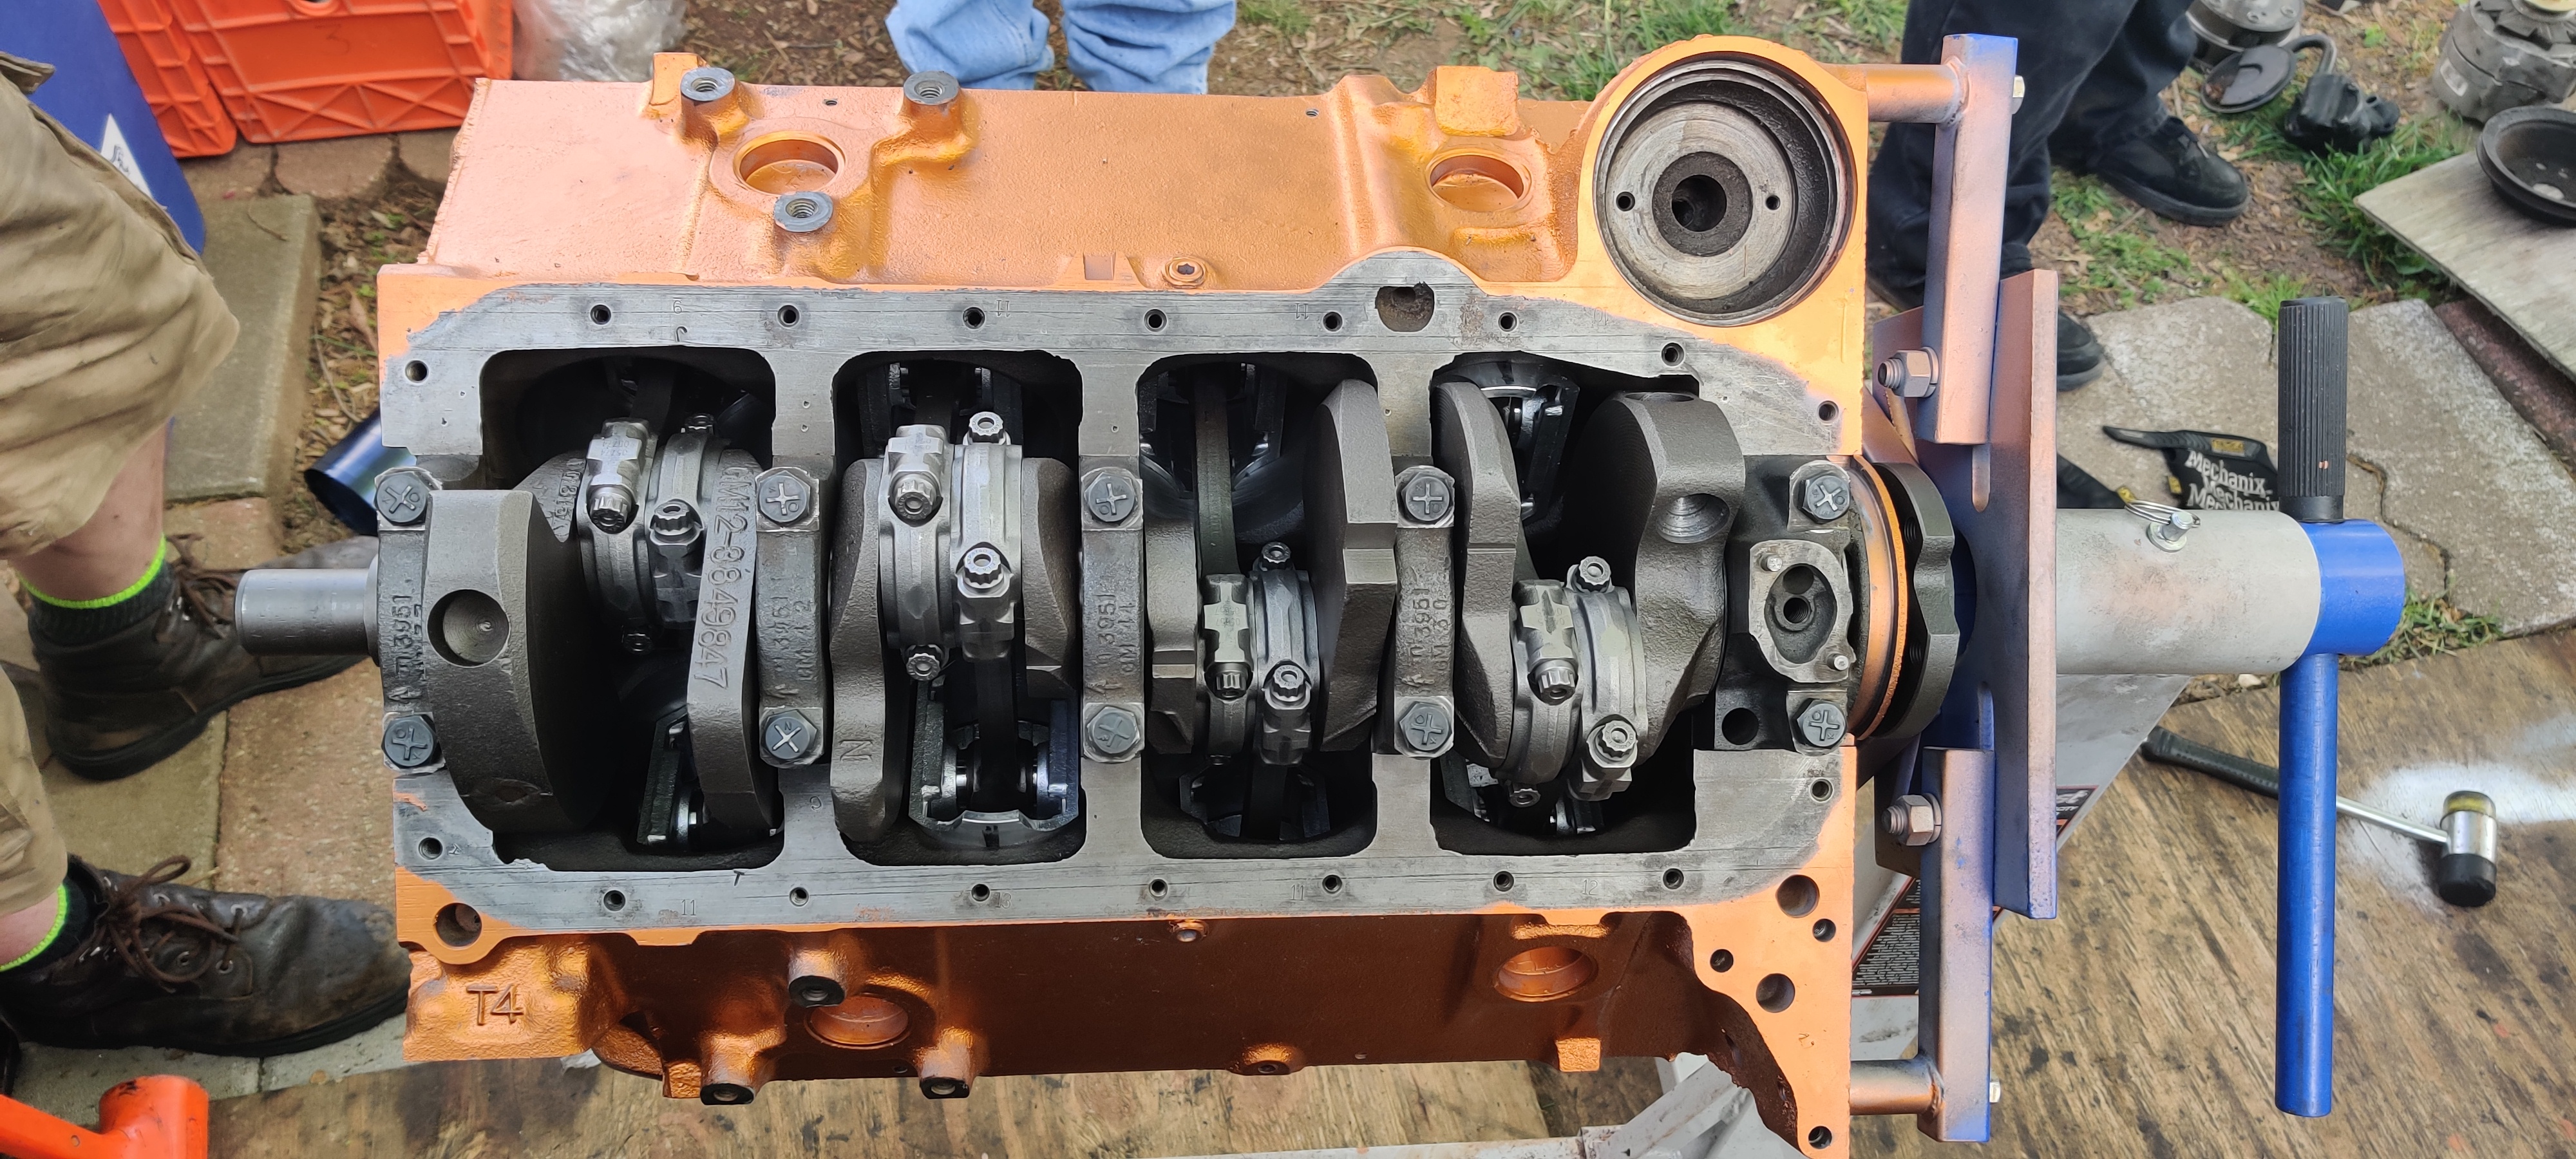
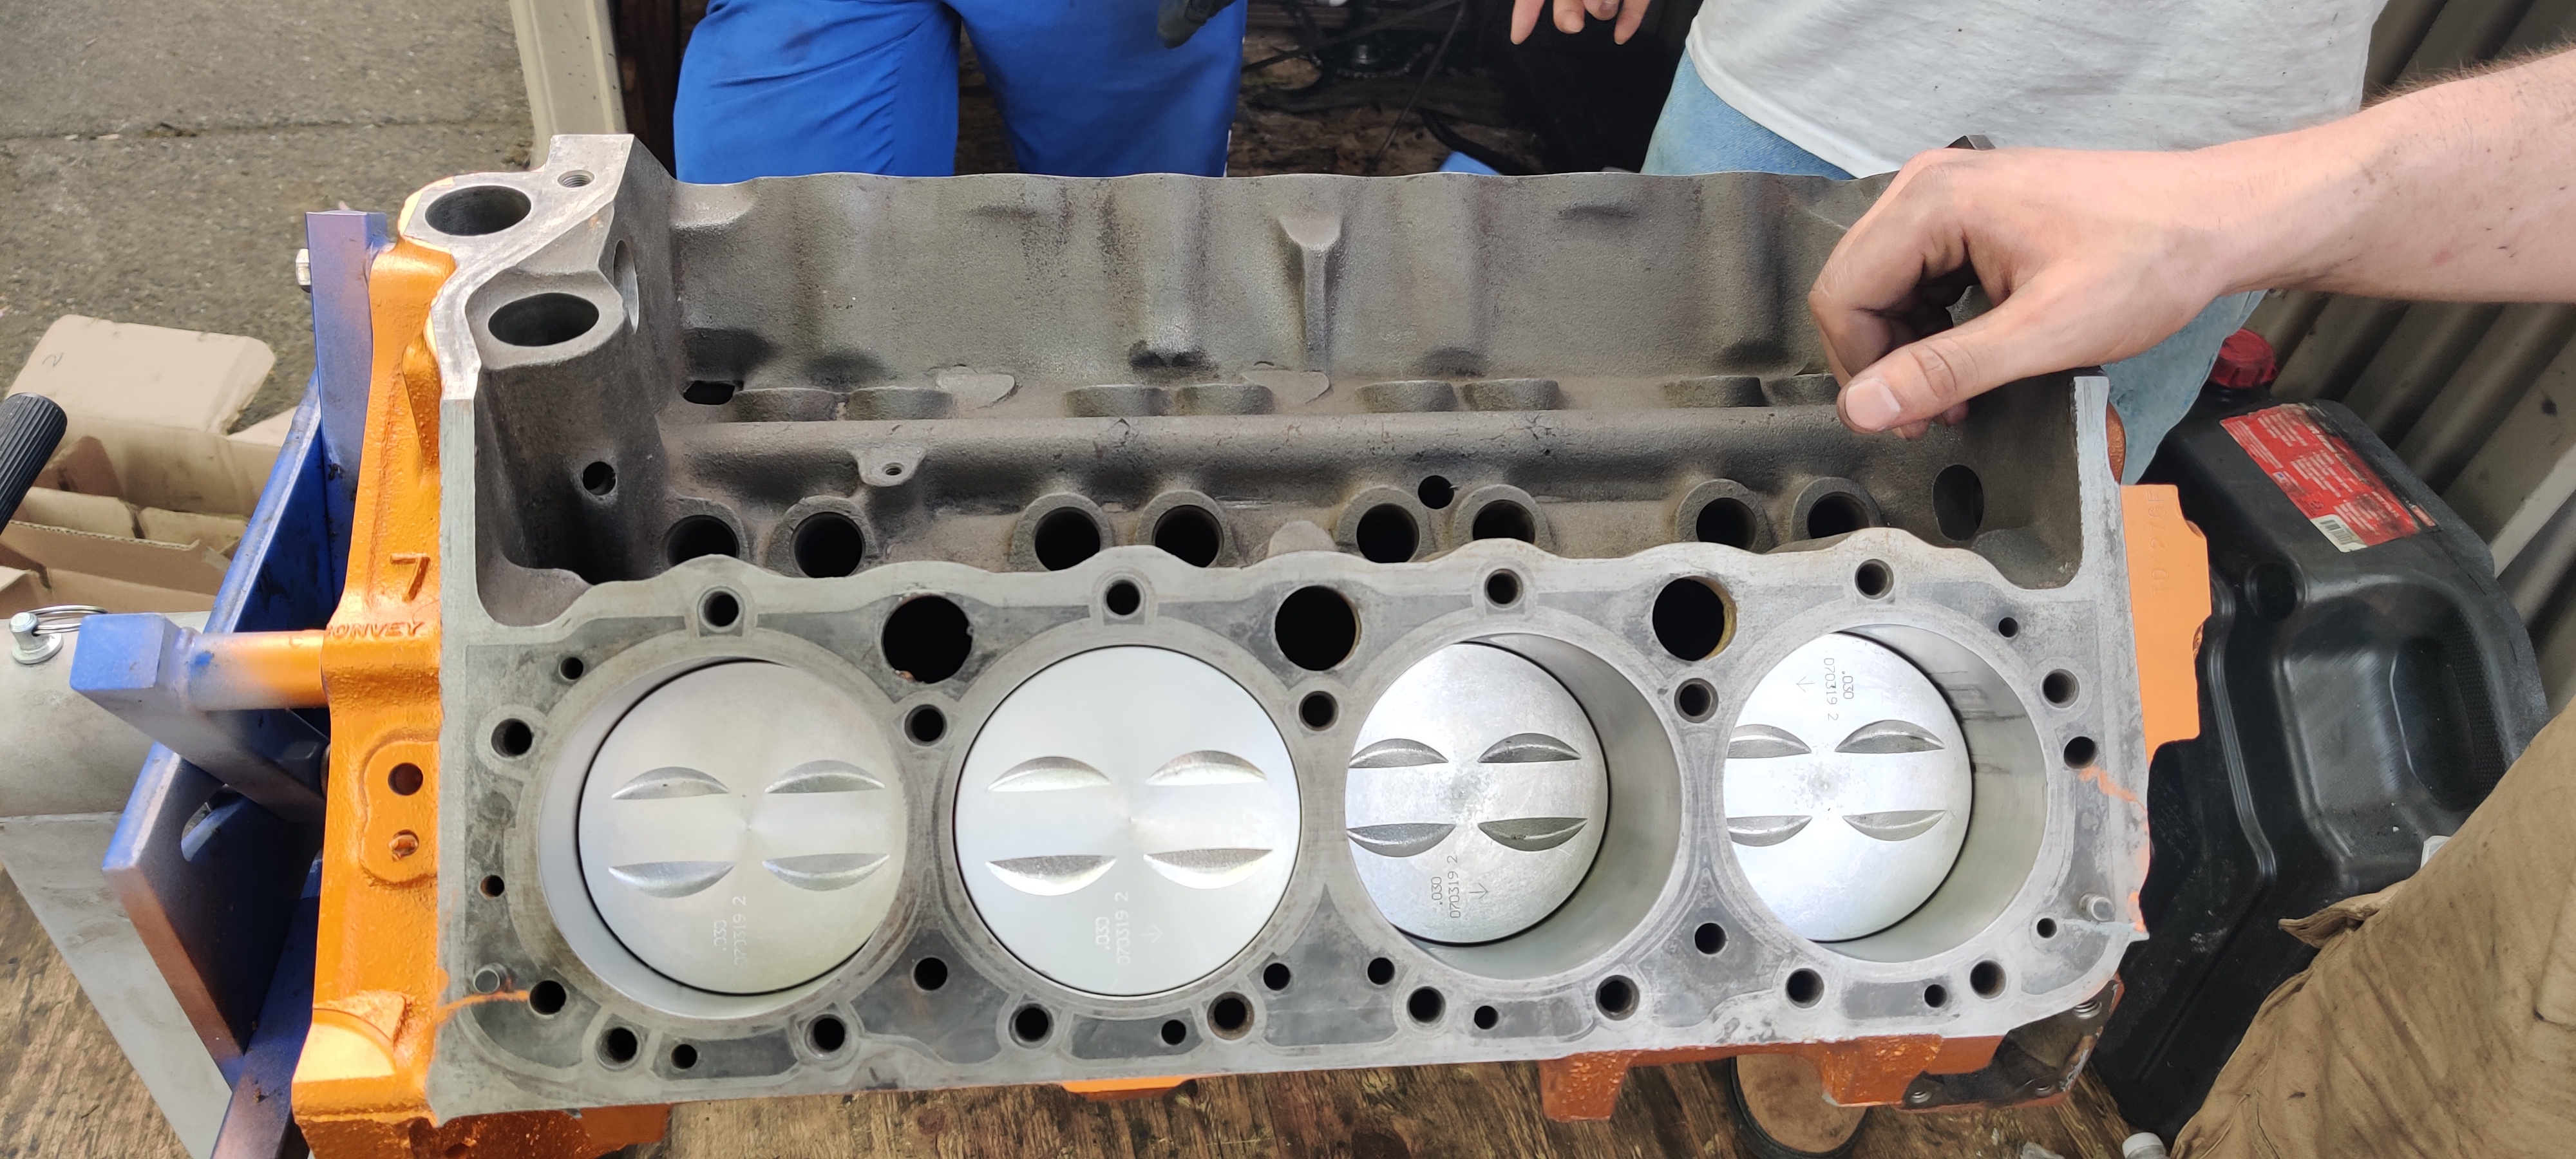
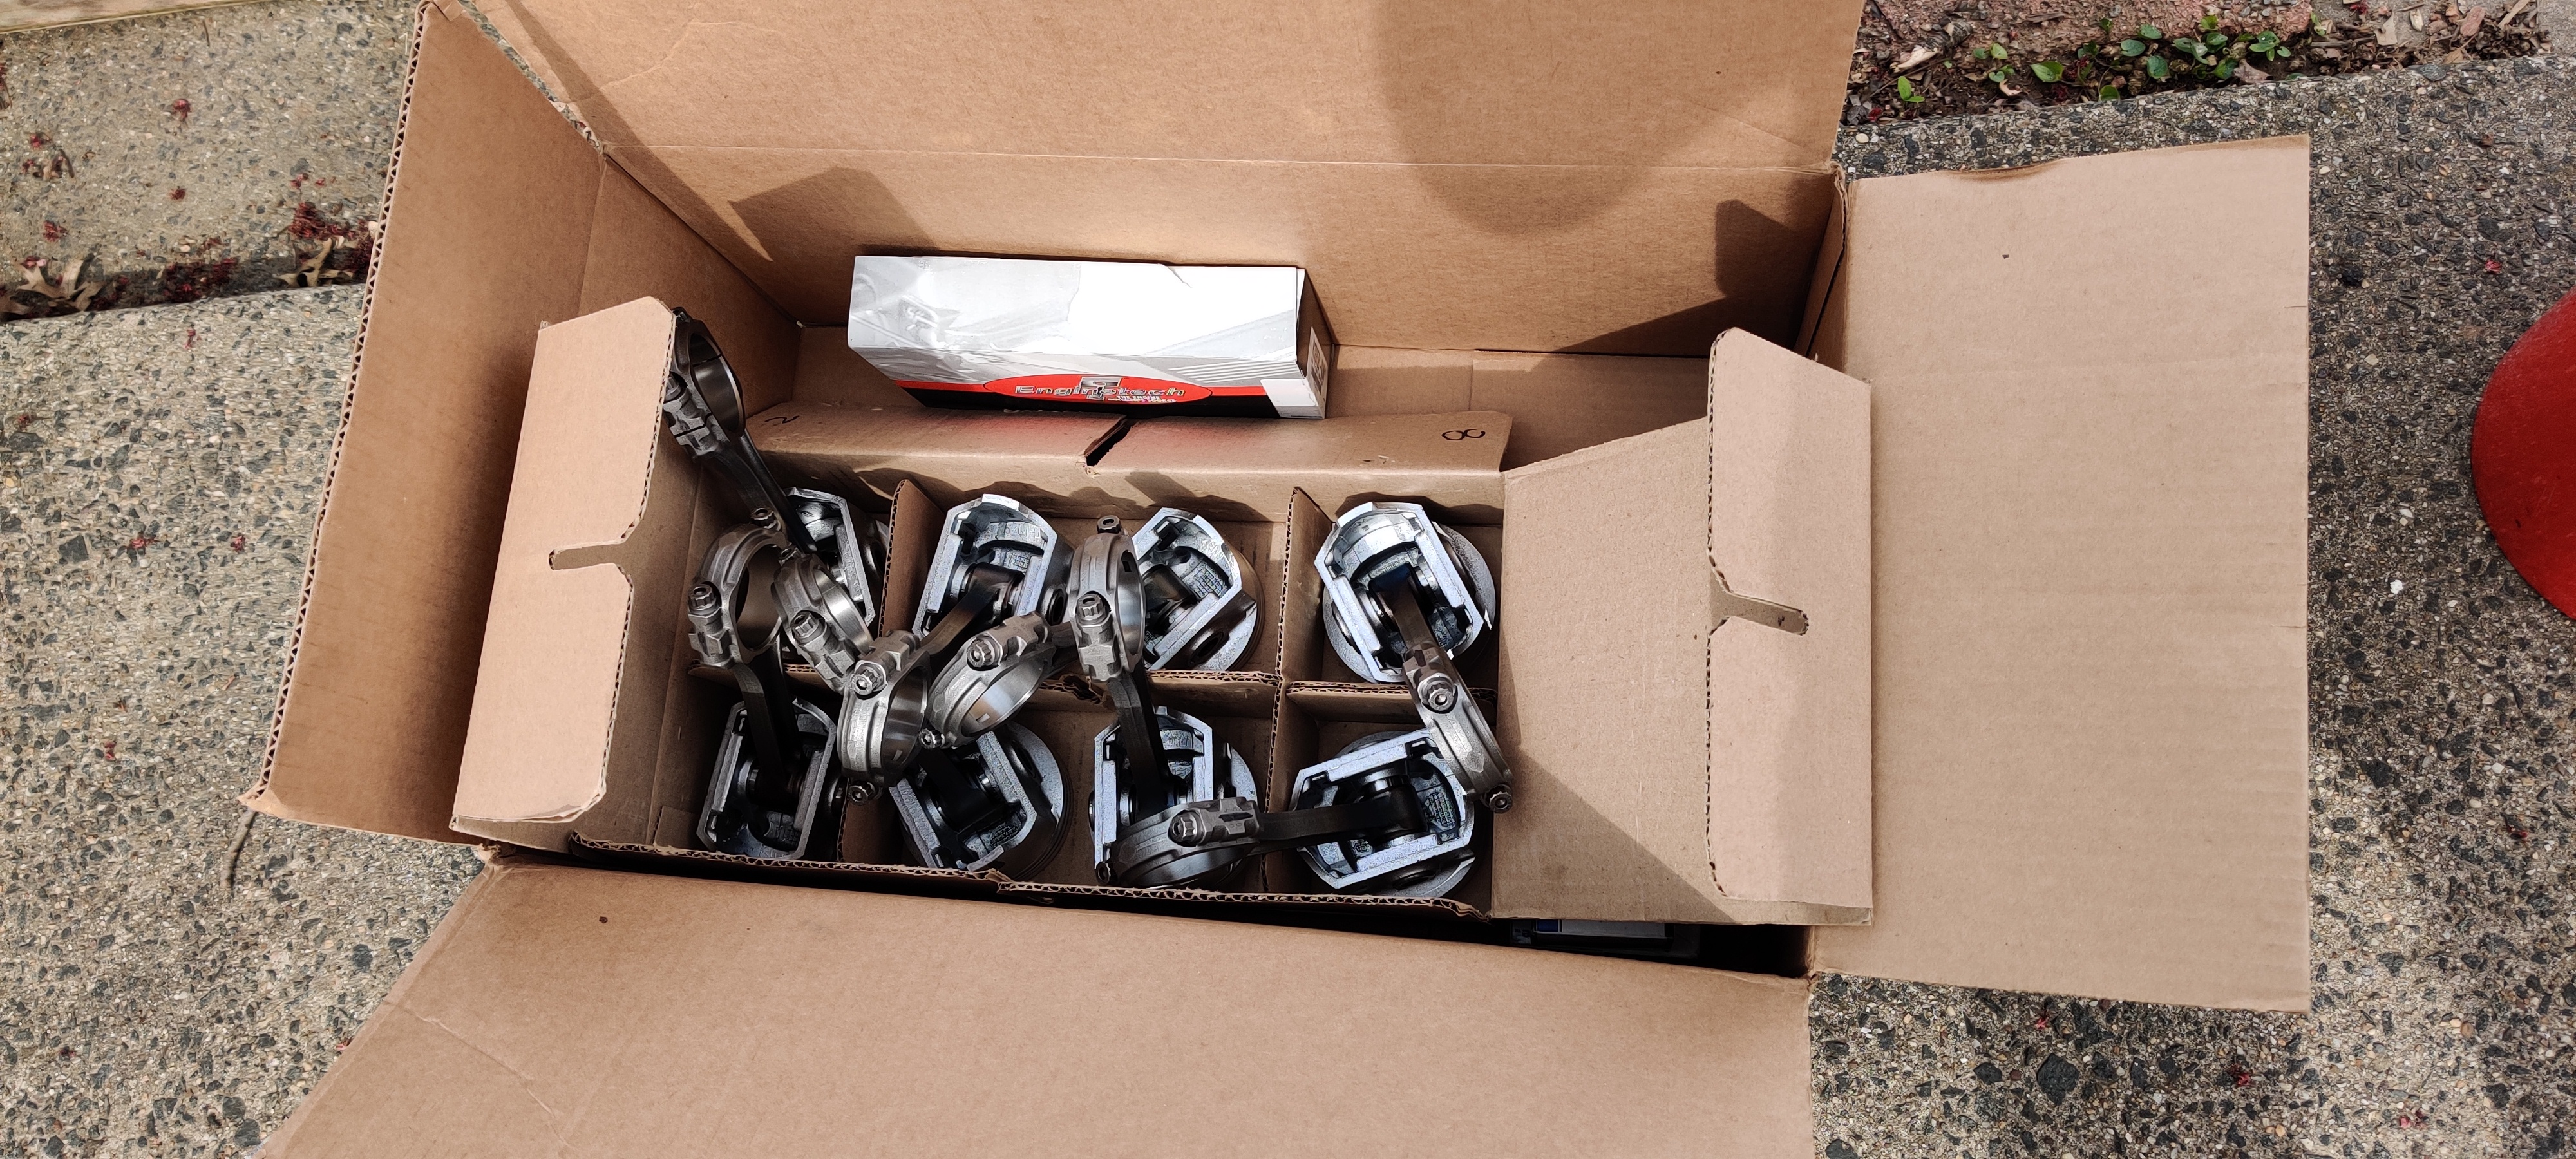
On Saturday we installed the Crankshaft and the pistons with rings and connecting rods. Torqued the connecting rods to 35 lbs and the crankshaft main bearings to 80 lbs. This all went pretty smoothy with our ring compressor and torque wrench.
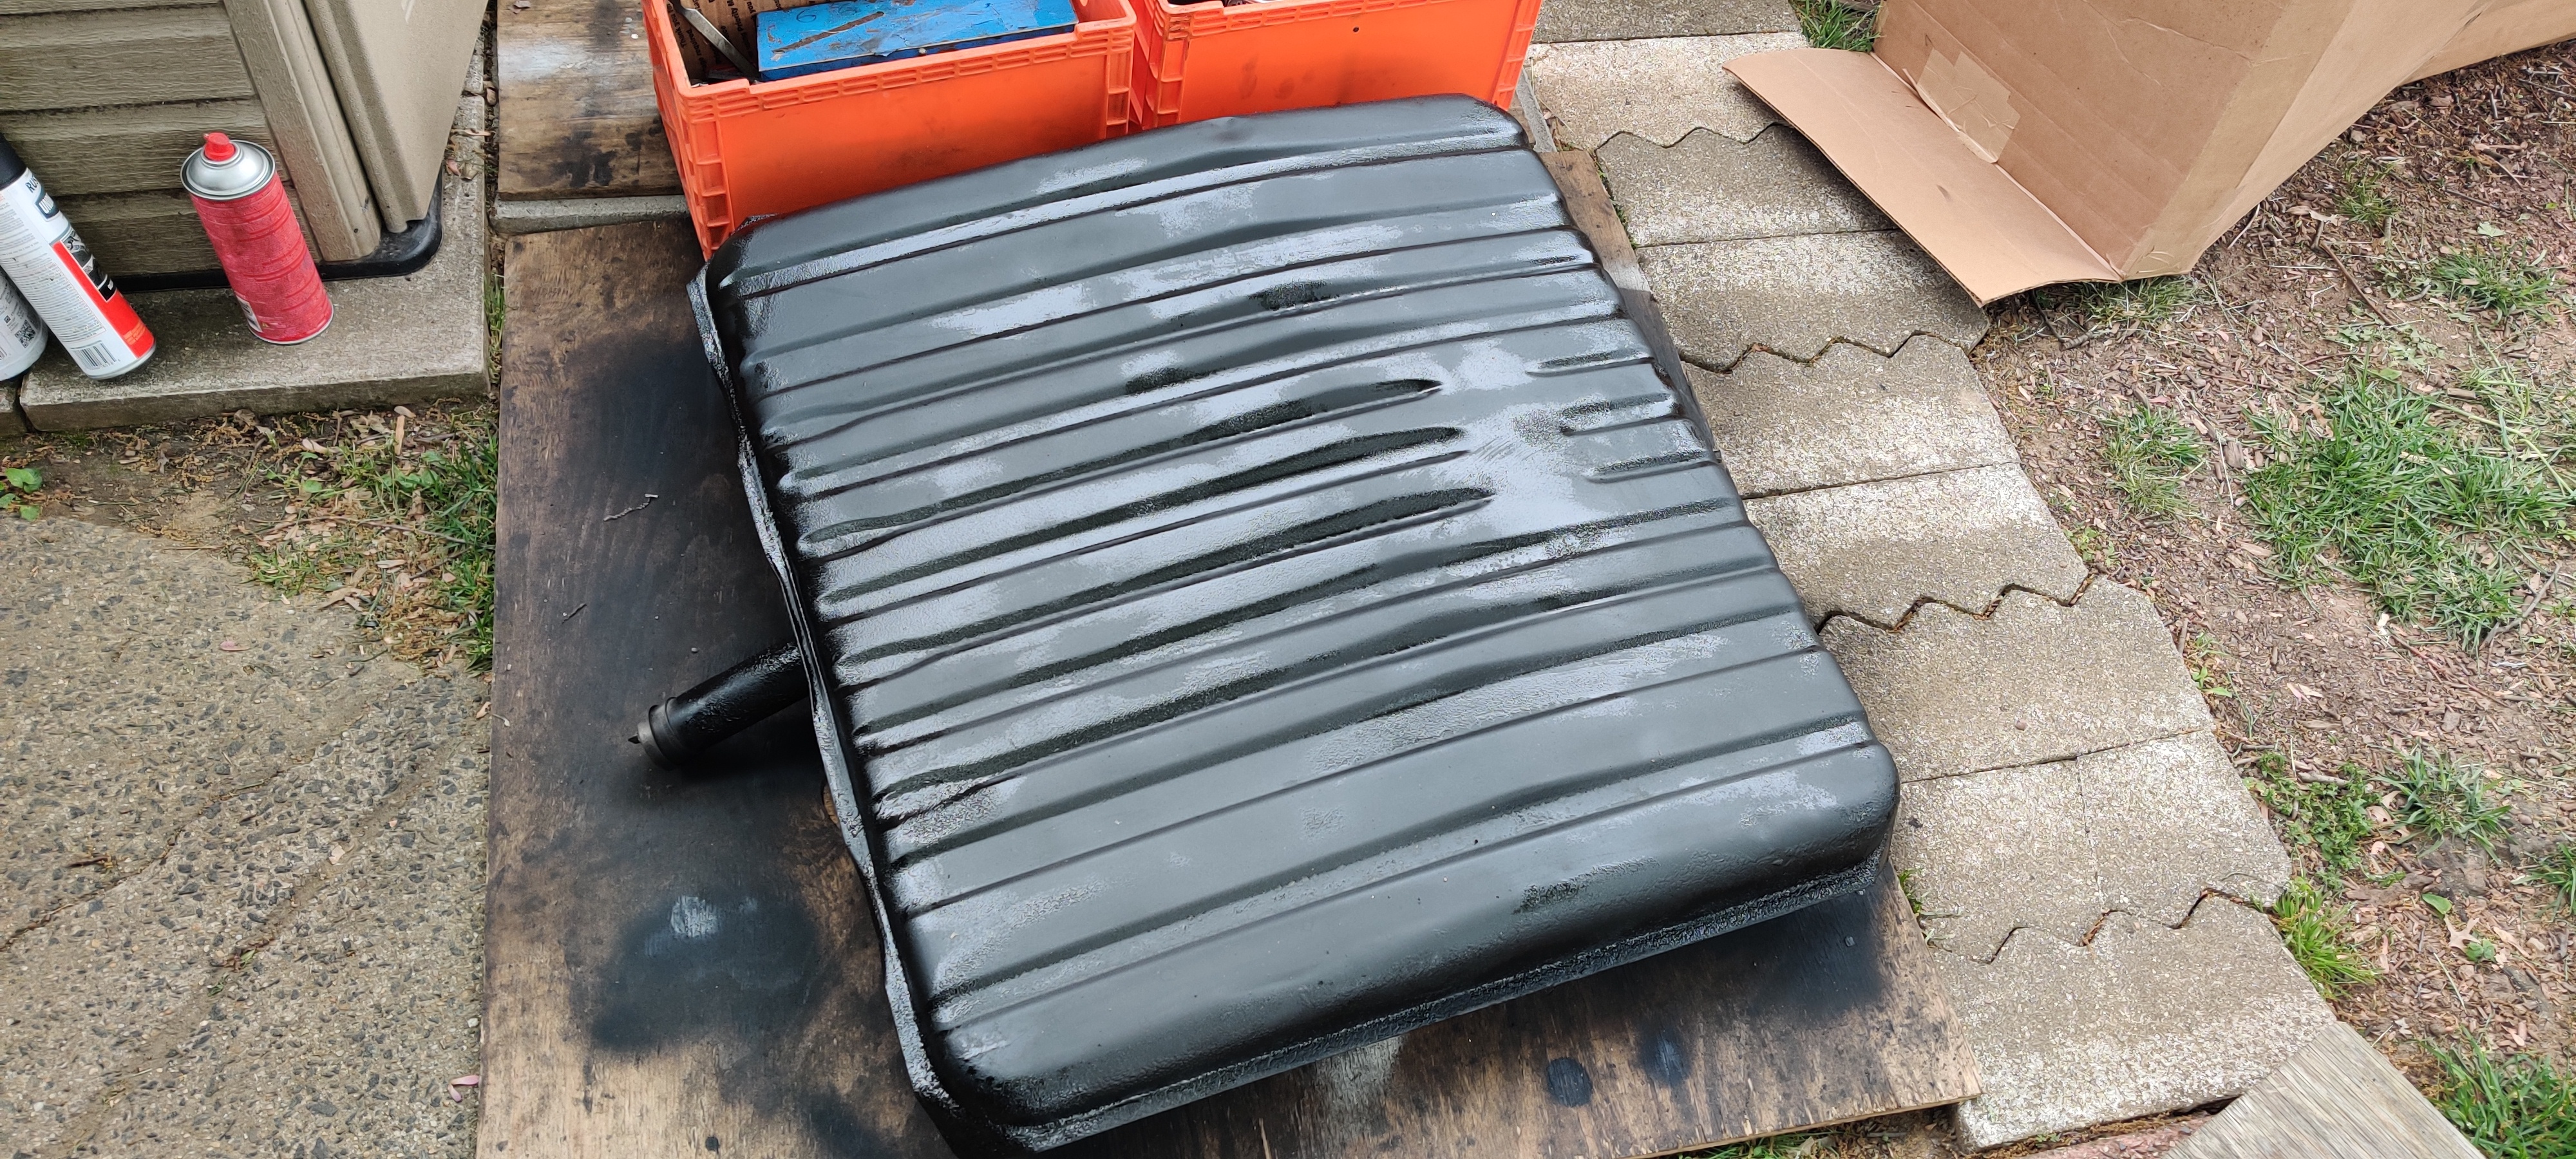
On Sunday we applied a couple coats of Rust-Oleum Rubber spray to the underside of the Impala's fuel tank. This will keep it protected from rocks and other road debris.
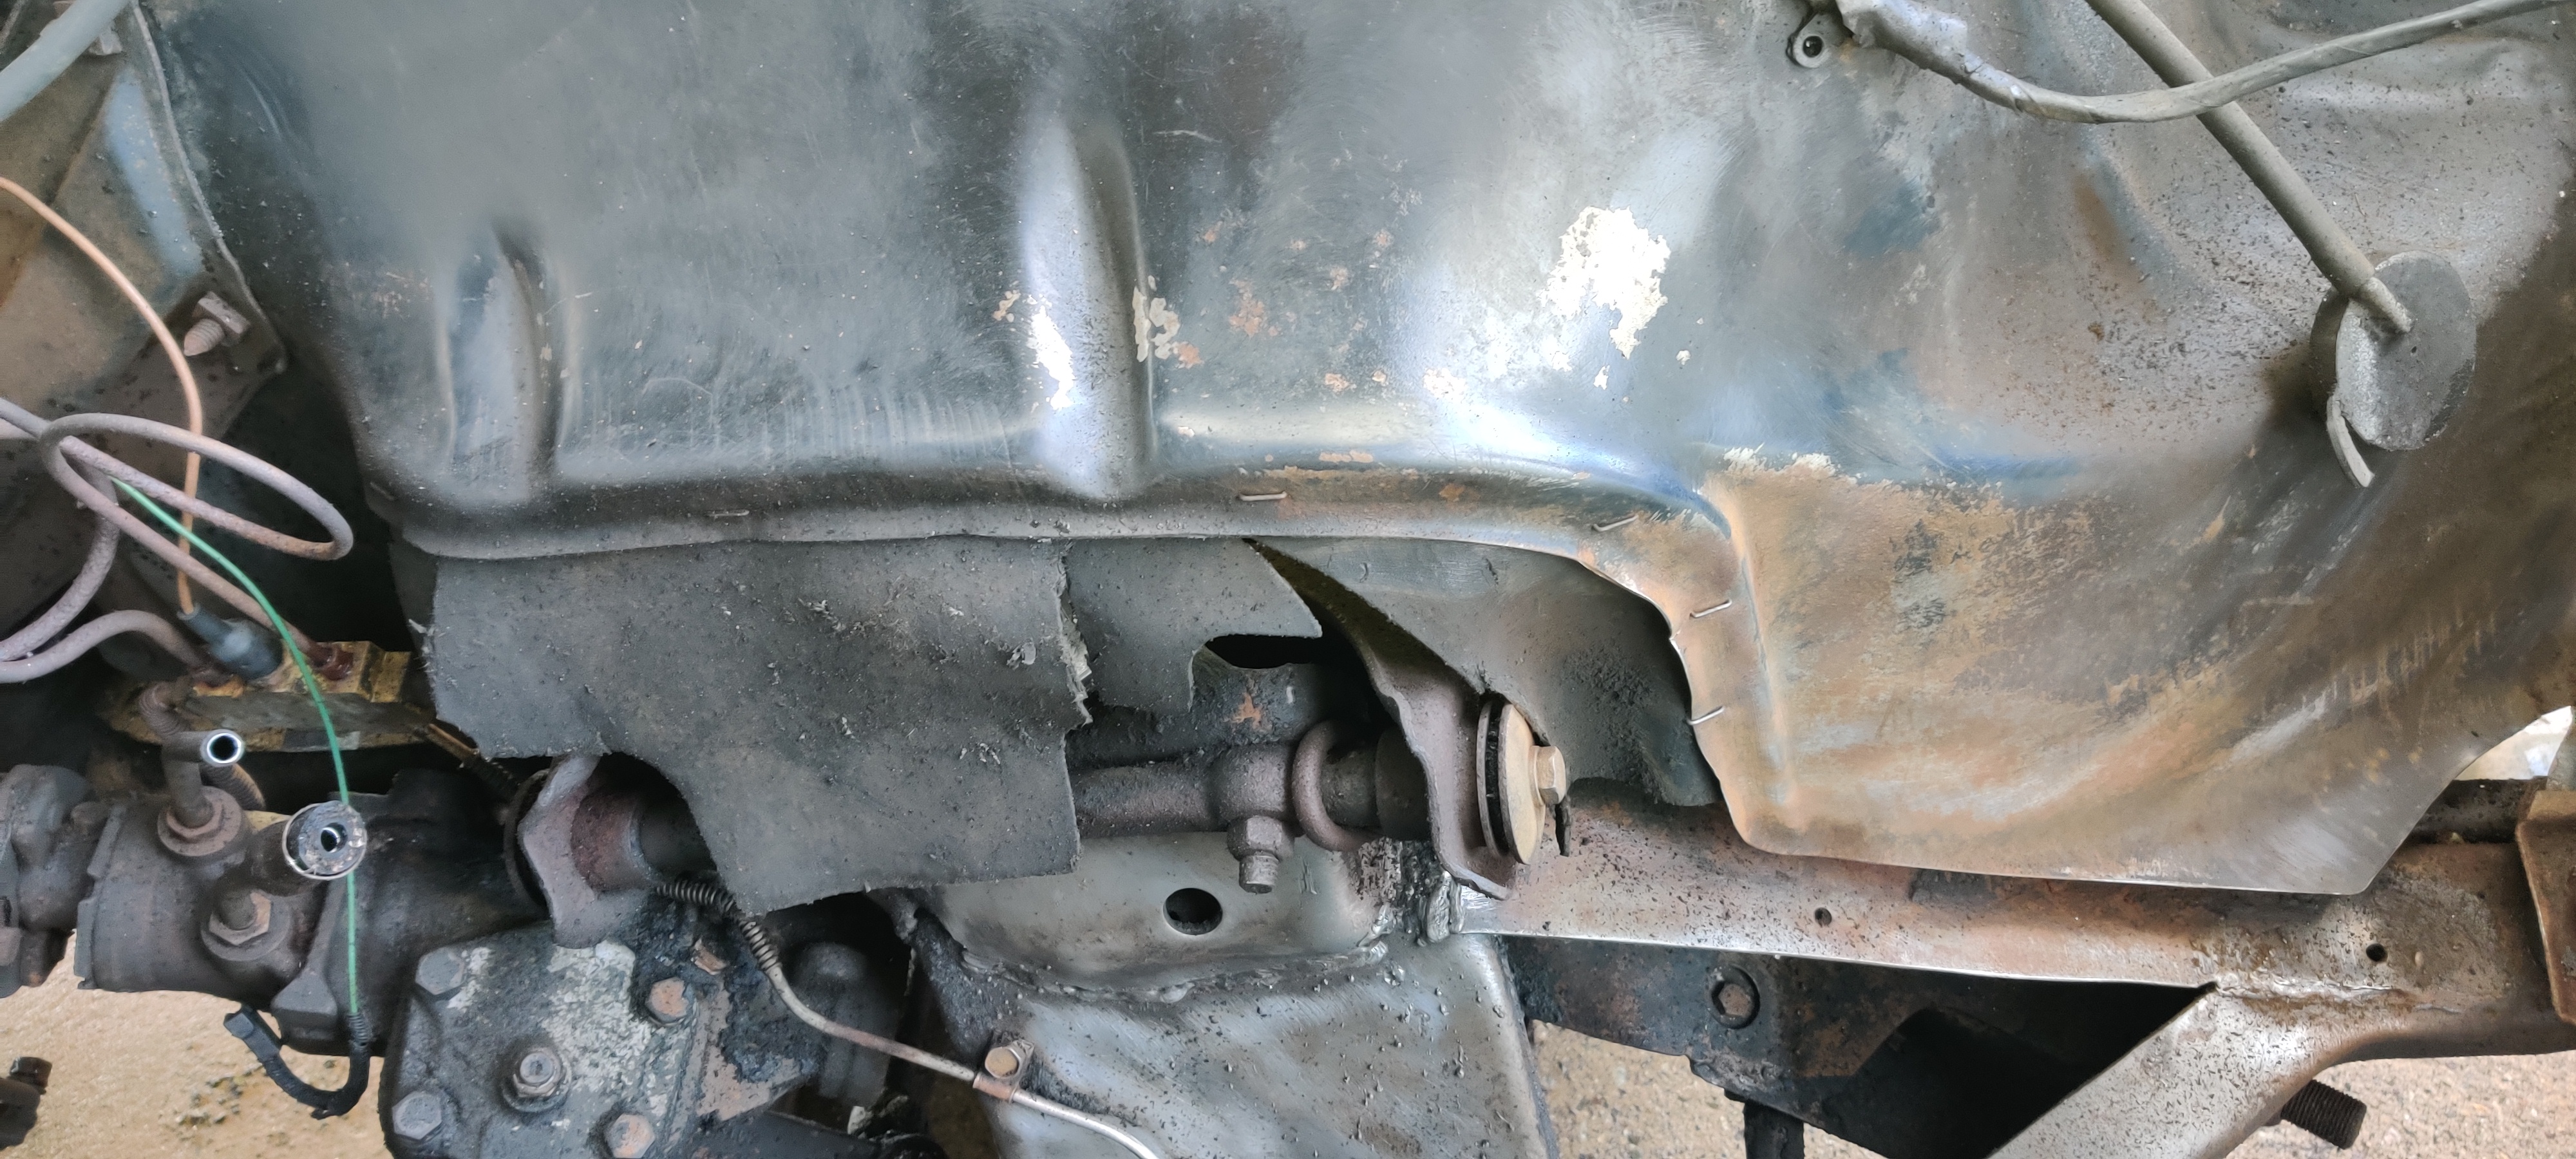
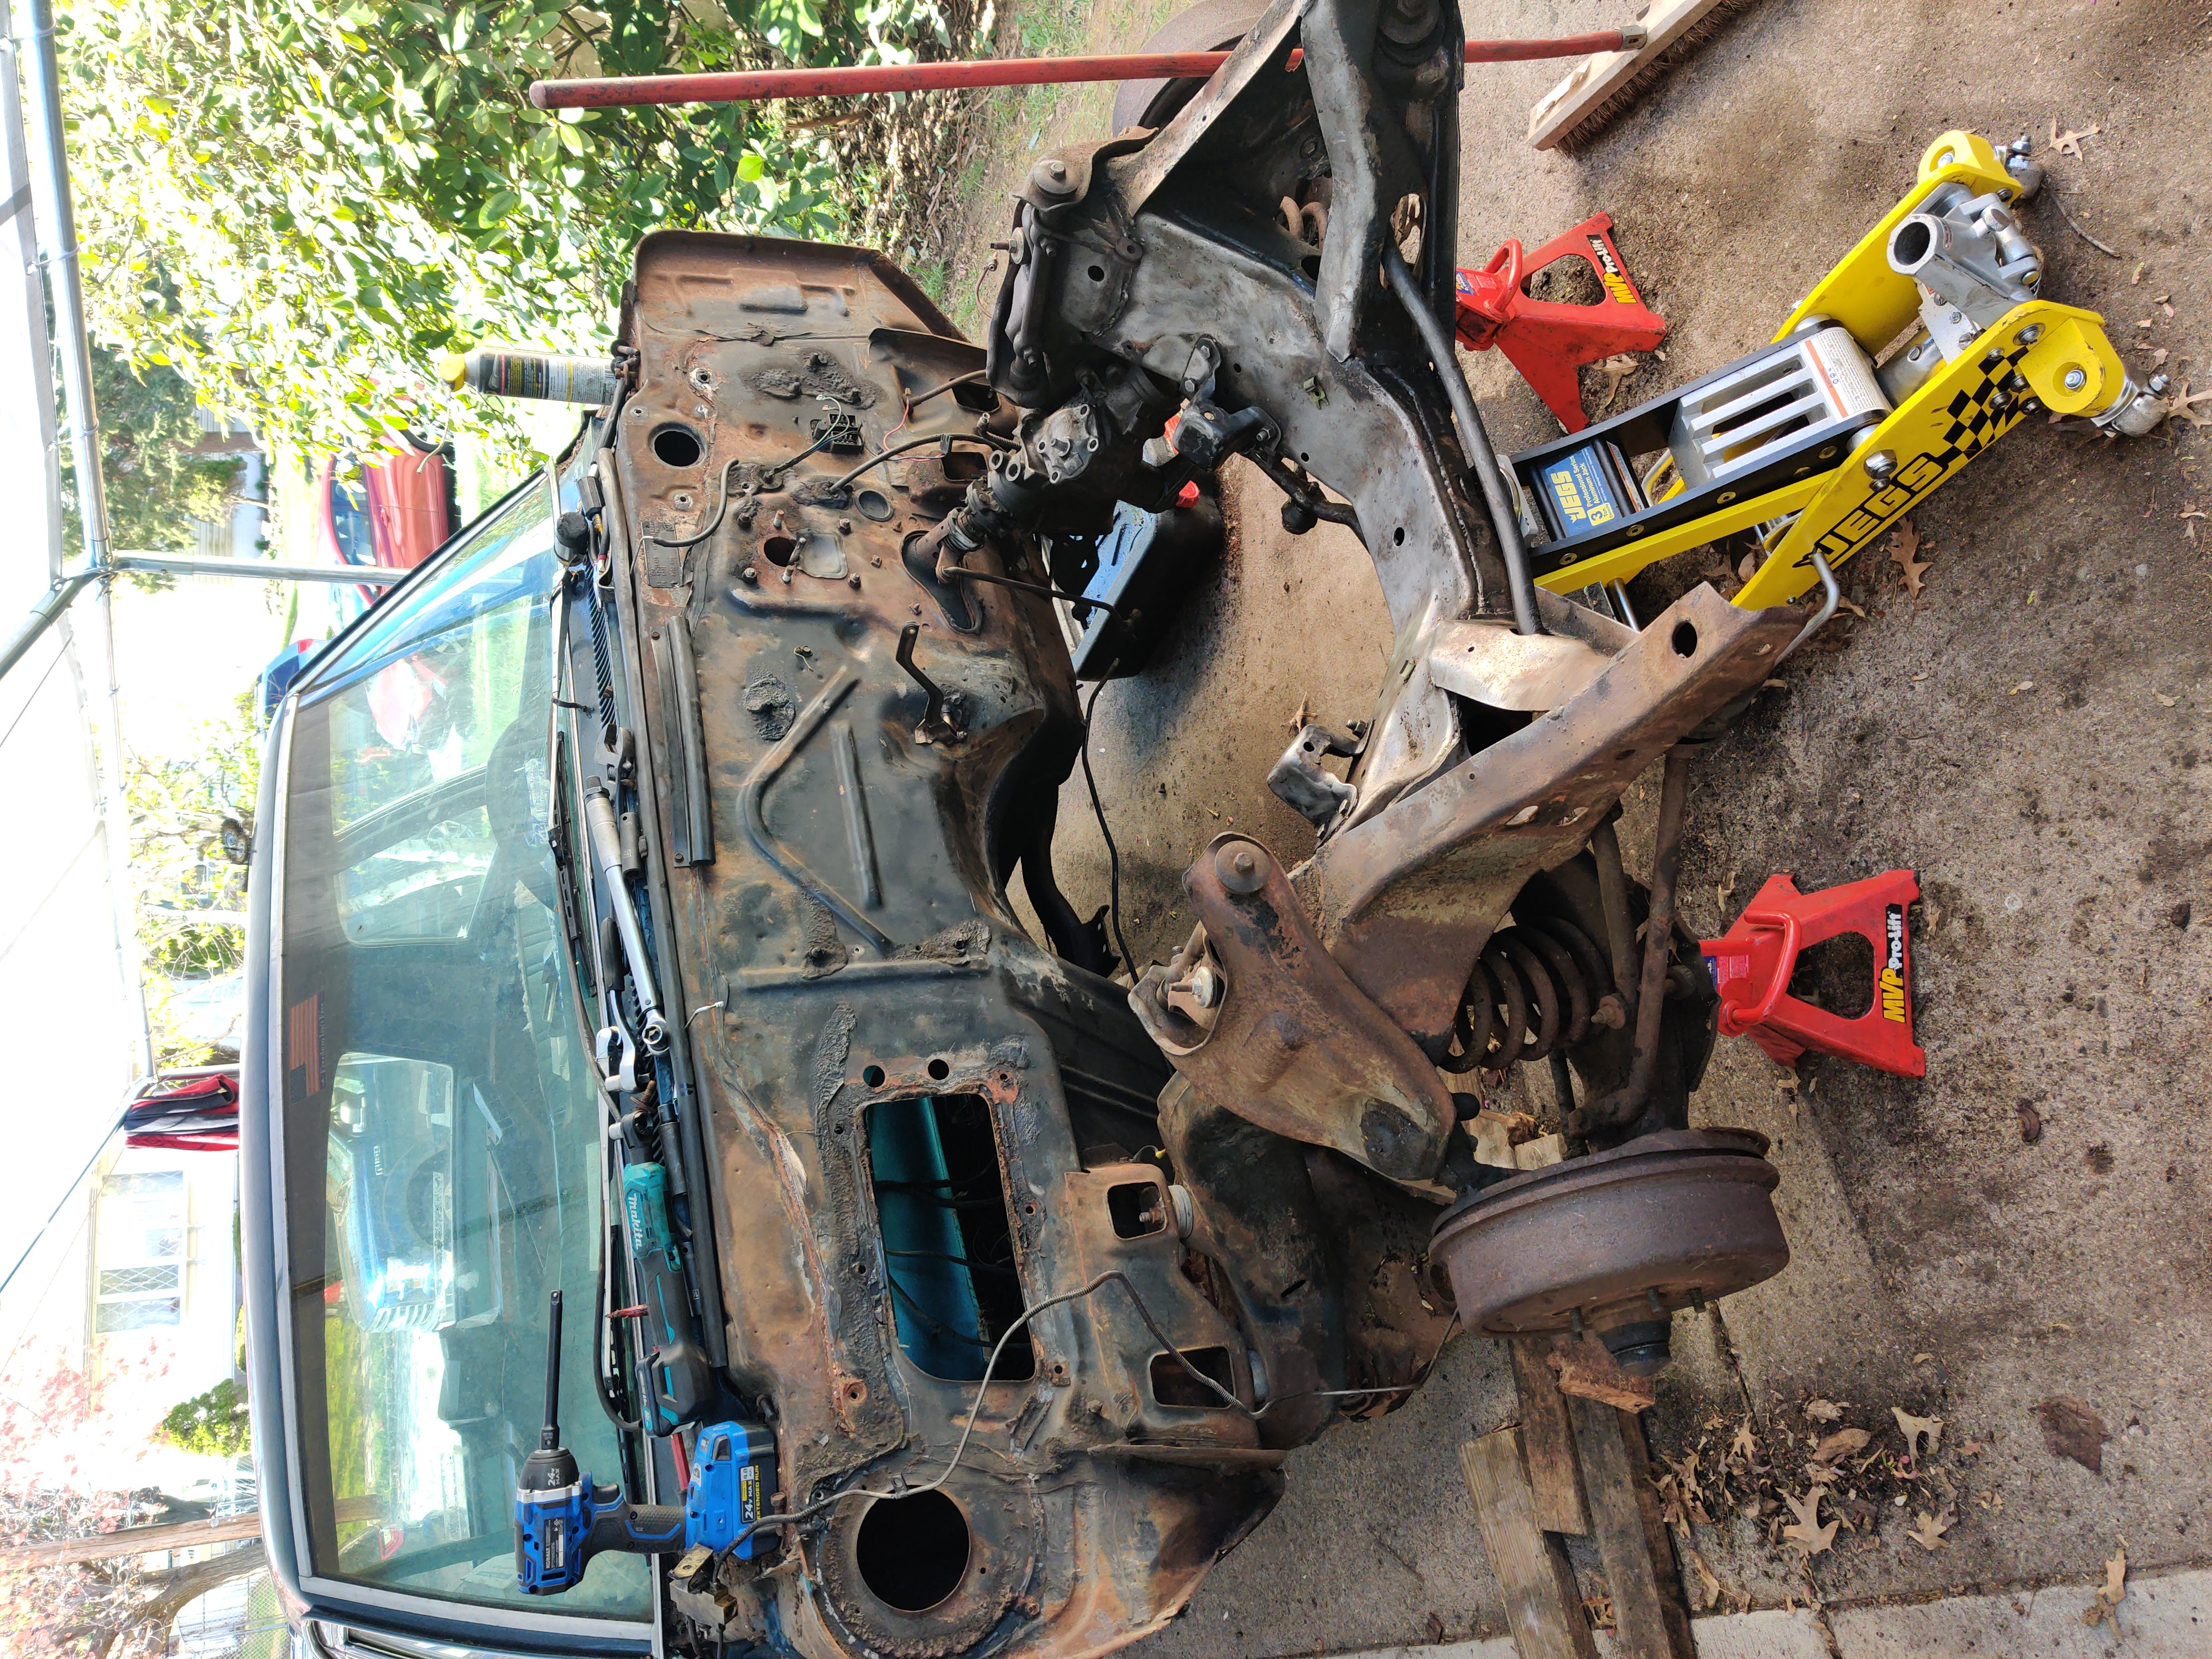
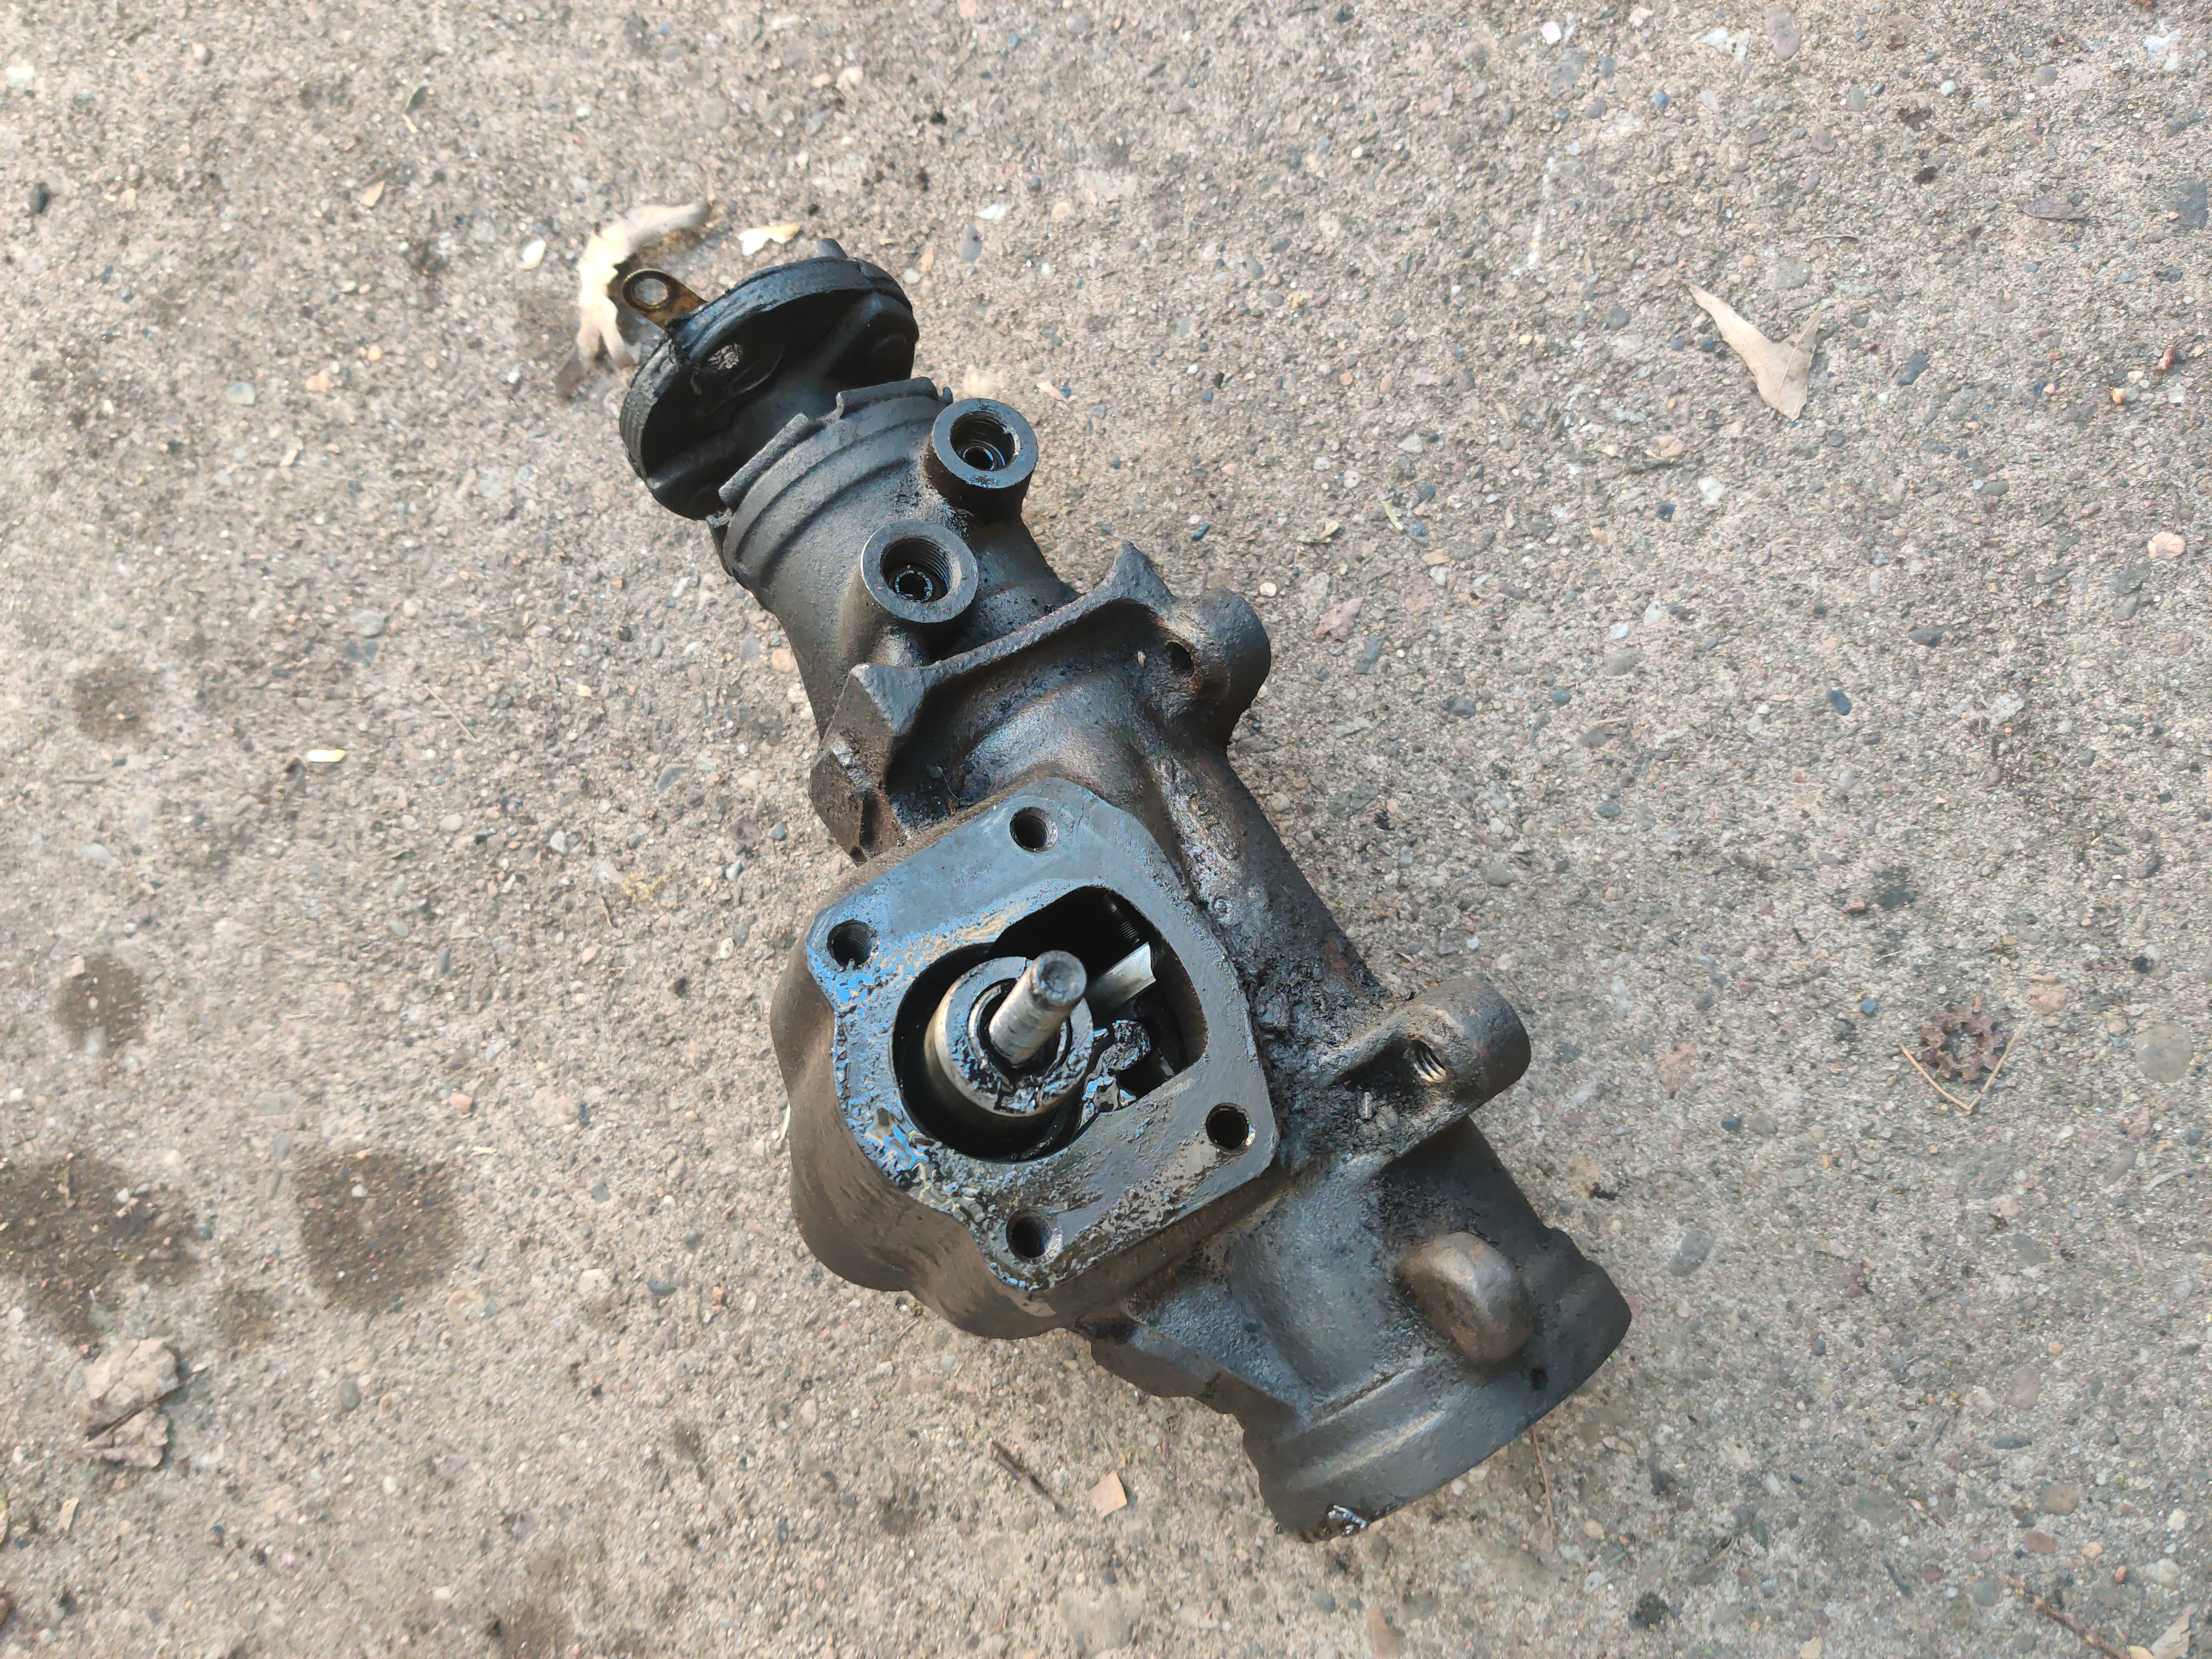
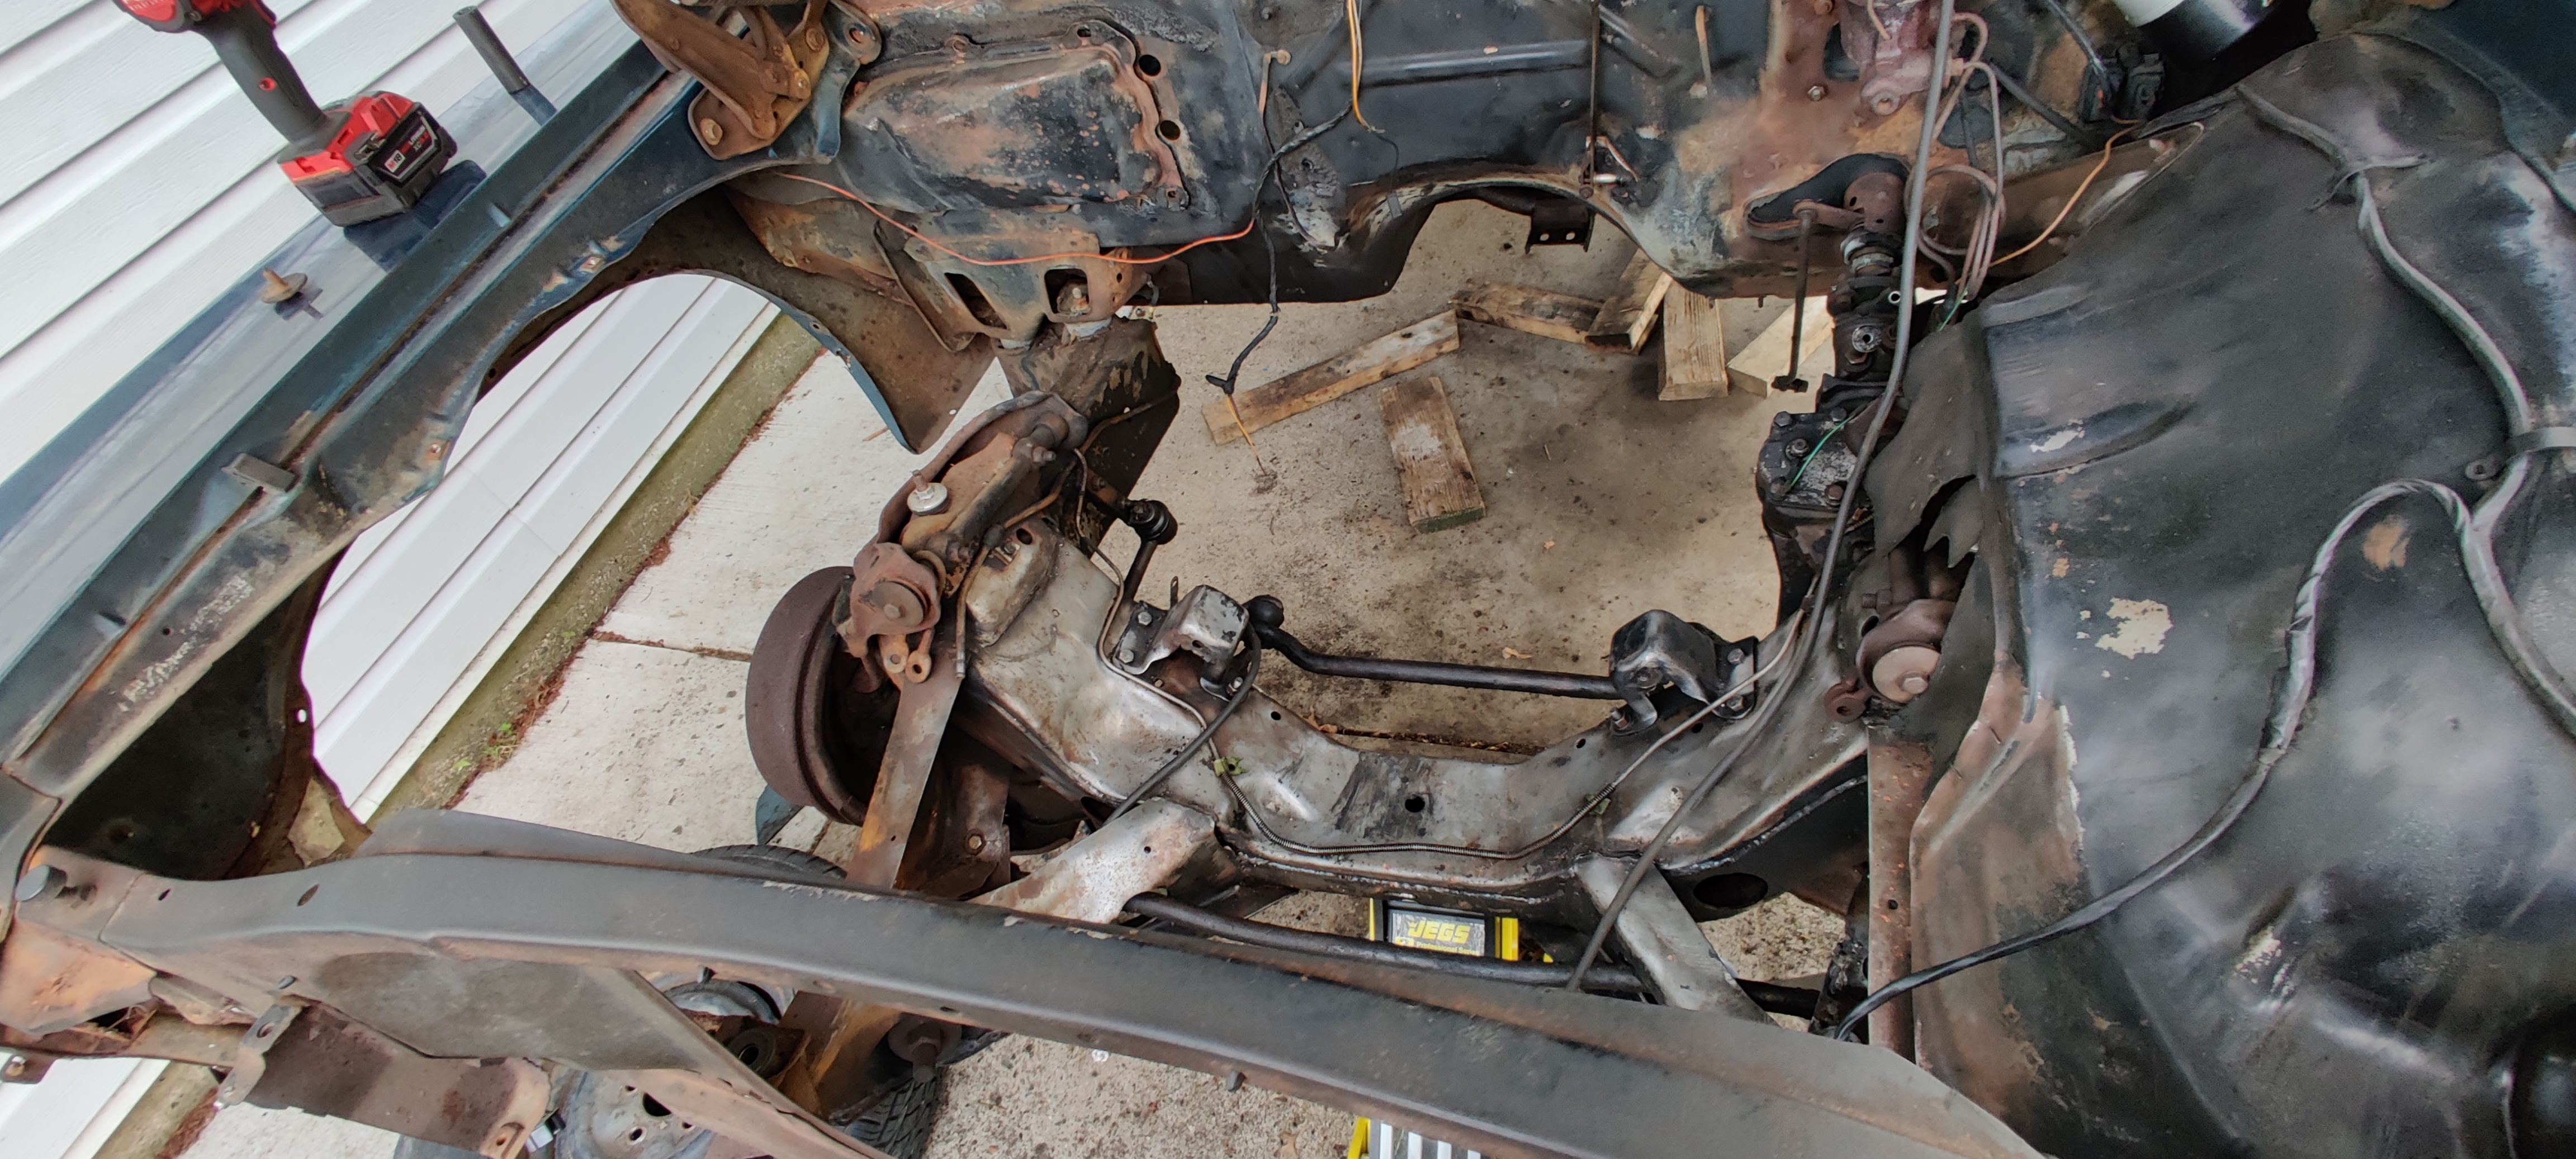
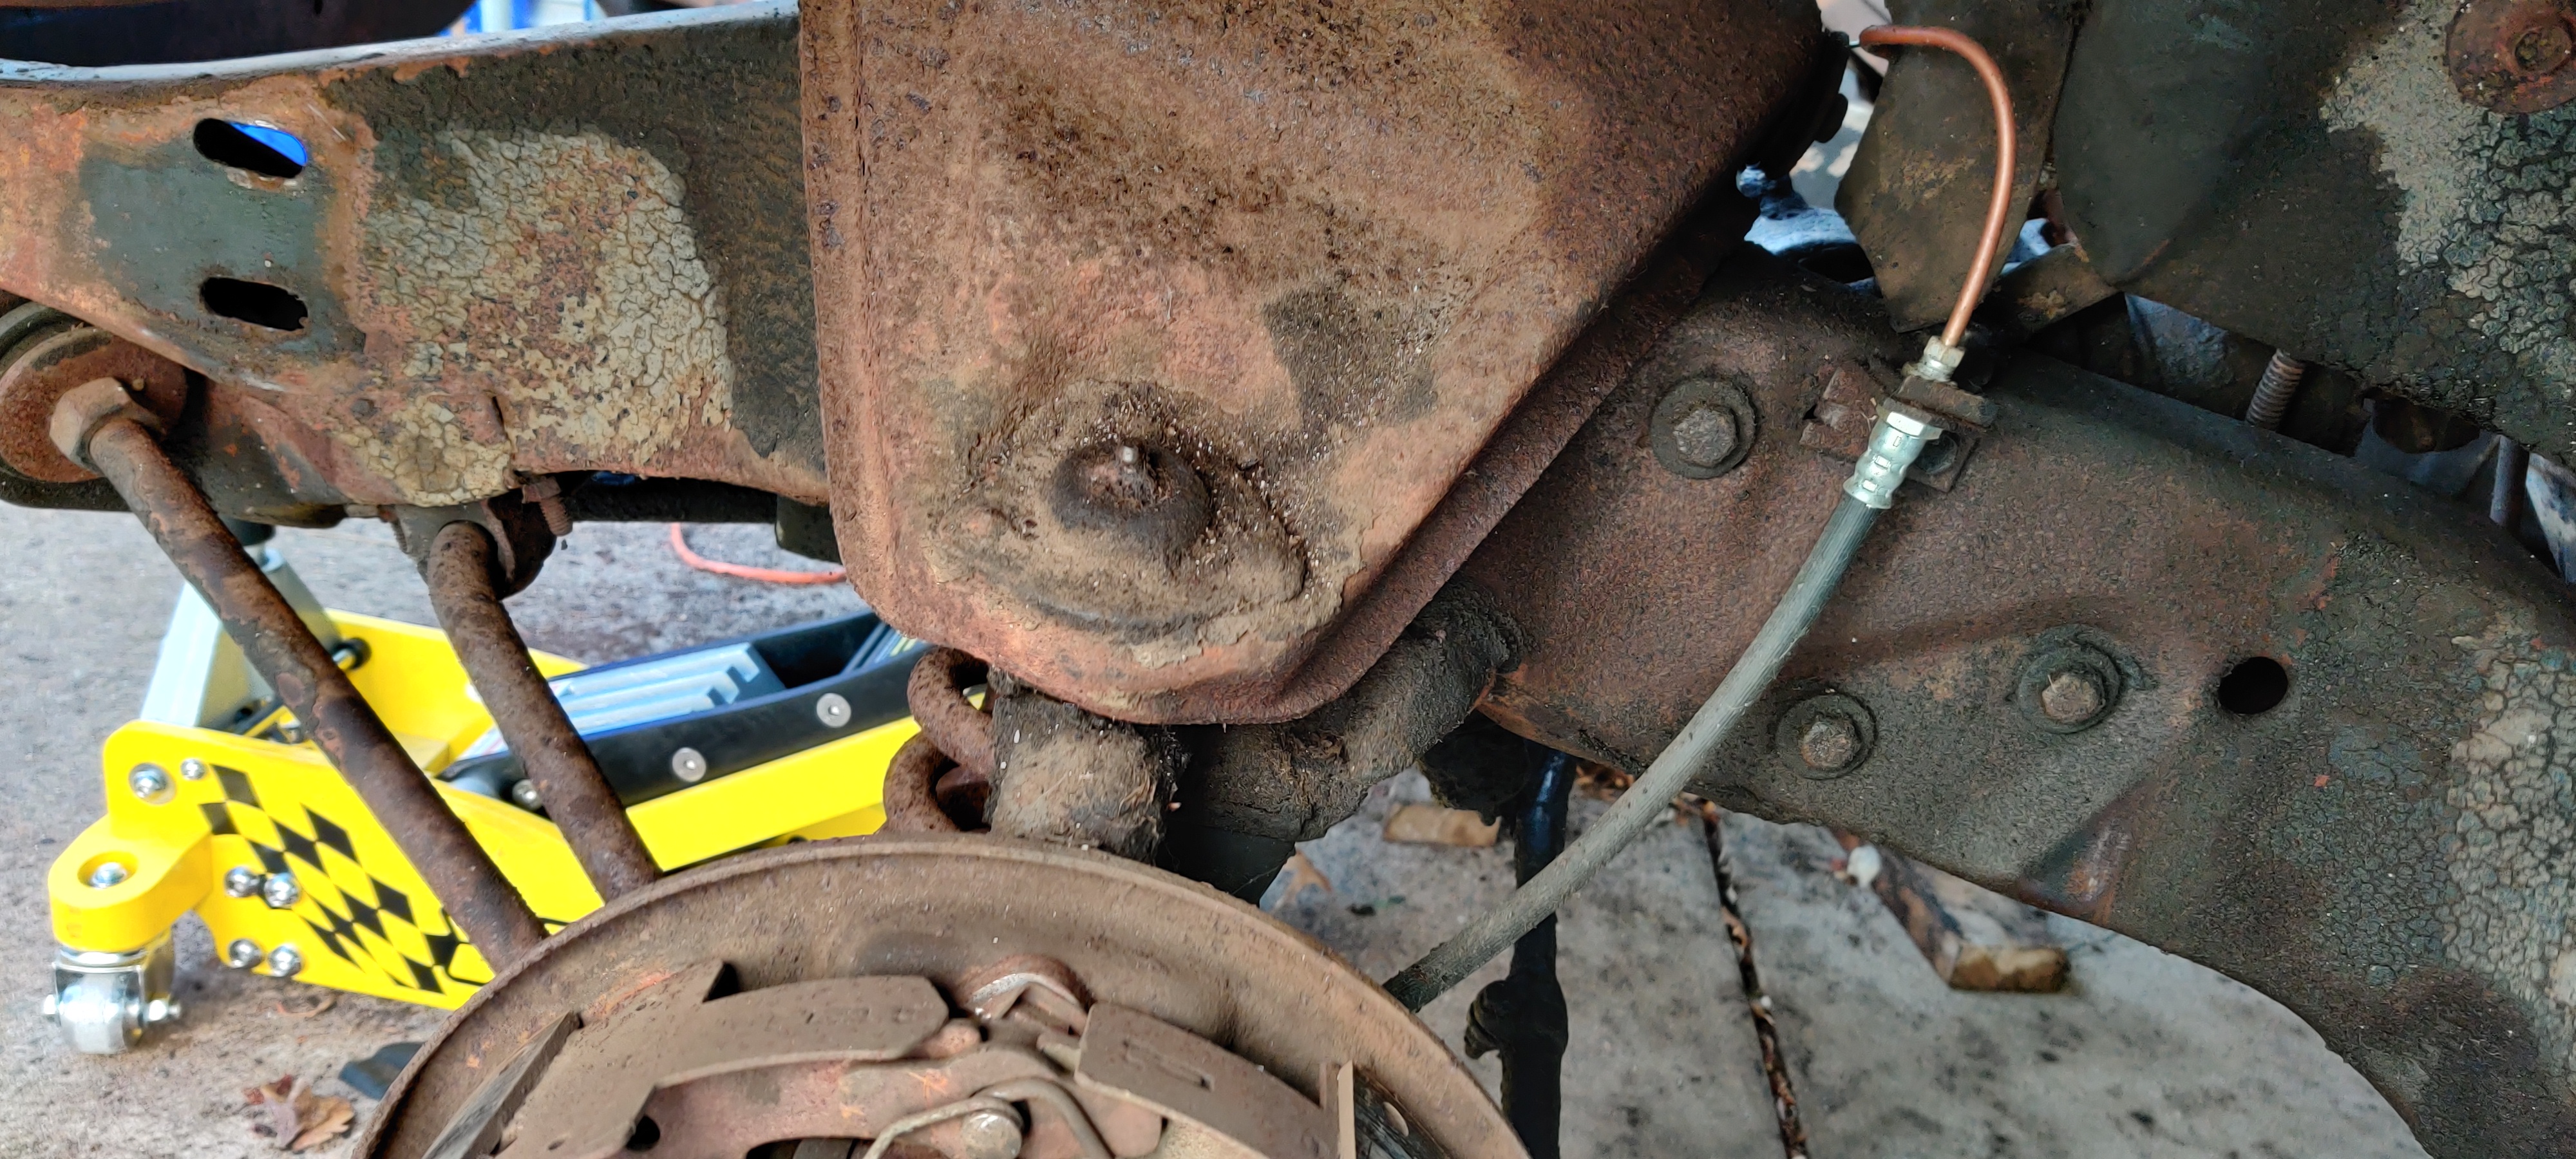
Took 4 hours, but we were able to finally disconnect the powersteering gearbox from the steering column and linkage. The gearbox itself is held on by 3 bolts going through the frame, these were not too difficult to remove. The pitman arm that moves the linkage steering the front wheels is held on by a 32mm bolt and then pressed onto a flanged shaft coming from the gearbox. Ended up having to use a grappler to pull the pitman arm off of the gearbox. We were pretty tired after that. Next we'll have to figure out how to disconnect the pitman arm from the linkages. They're held in by a bolt and cotter pin through the bolt and nut.
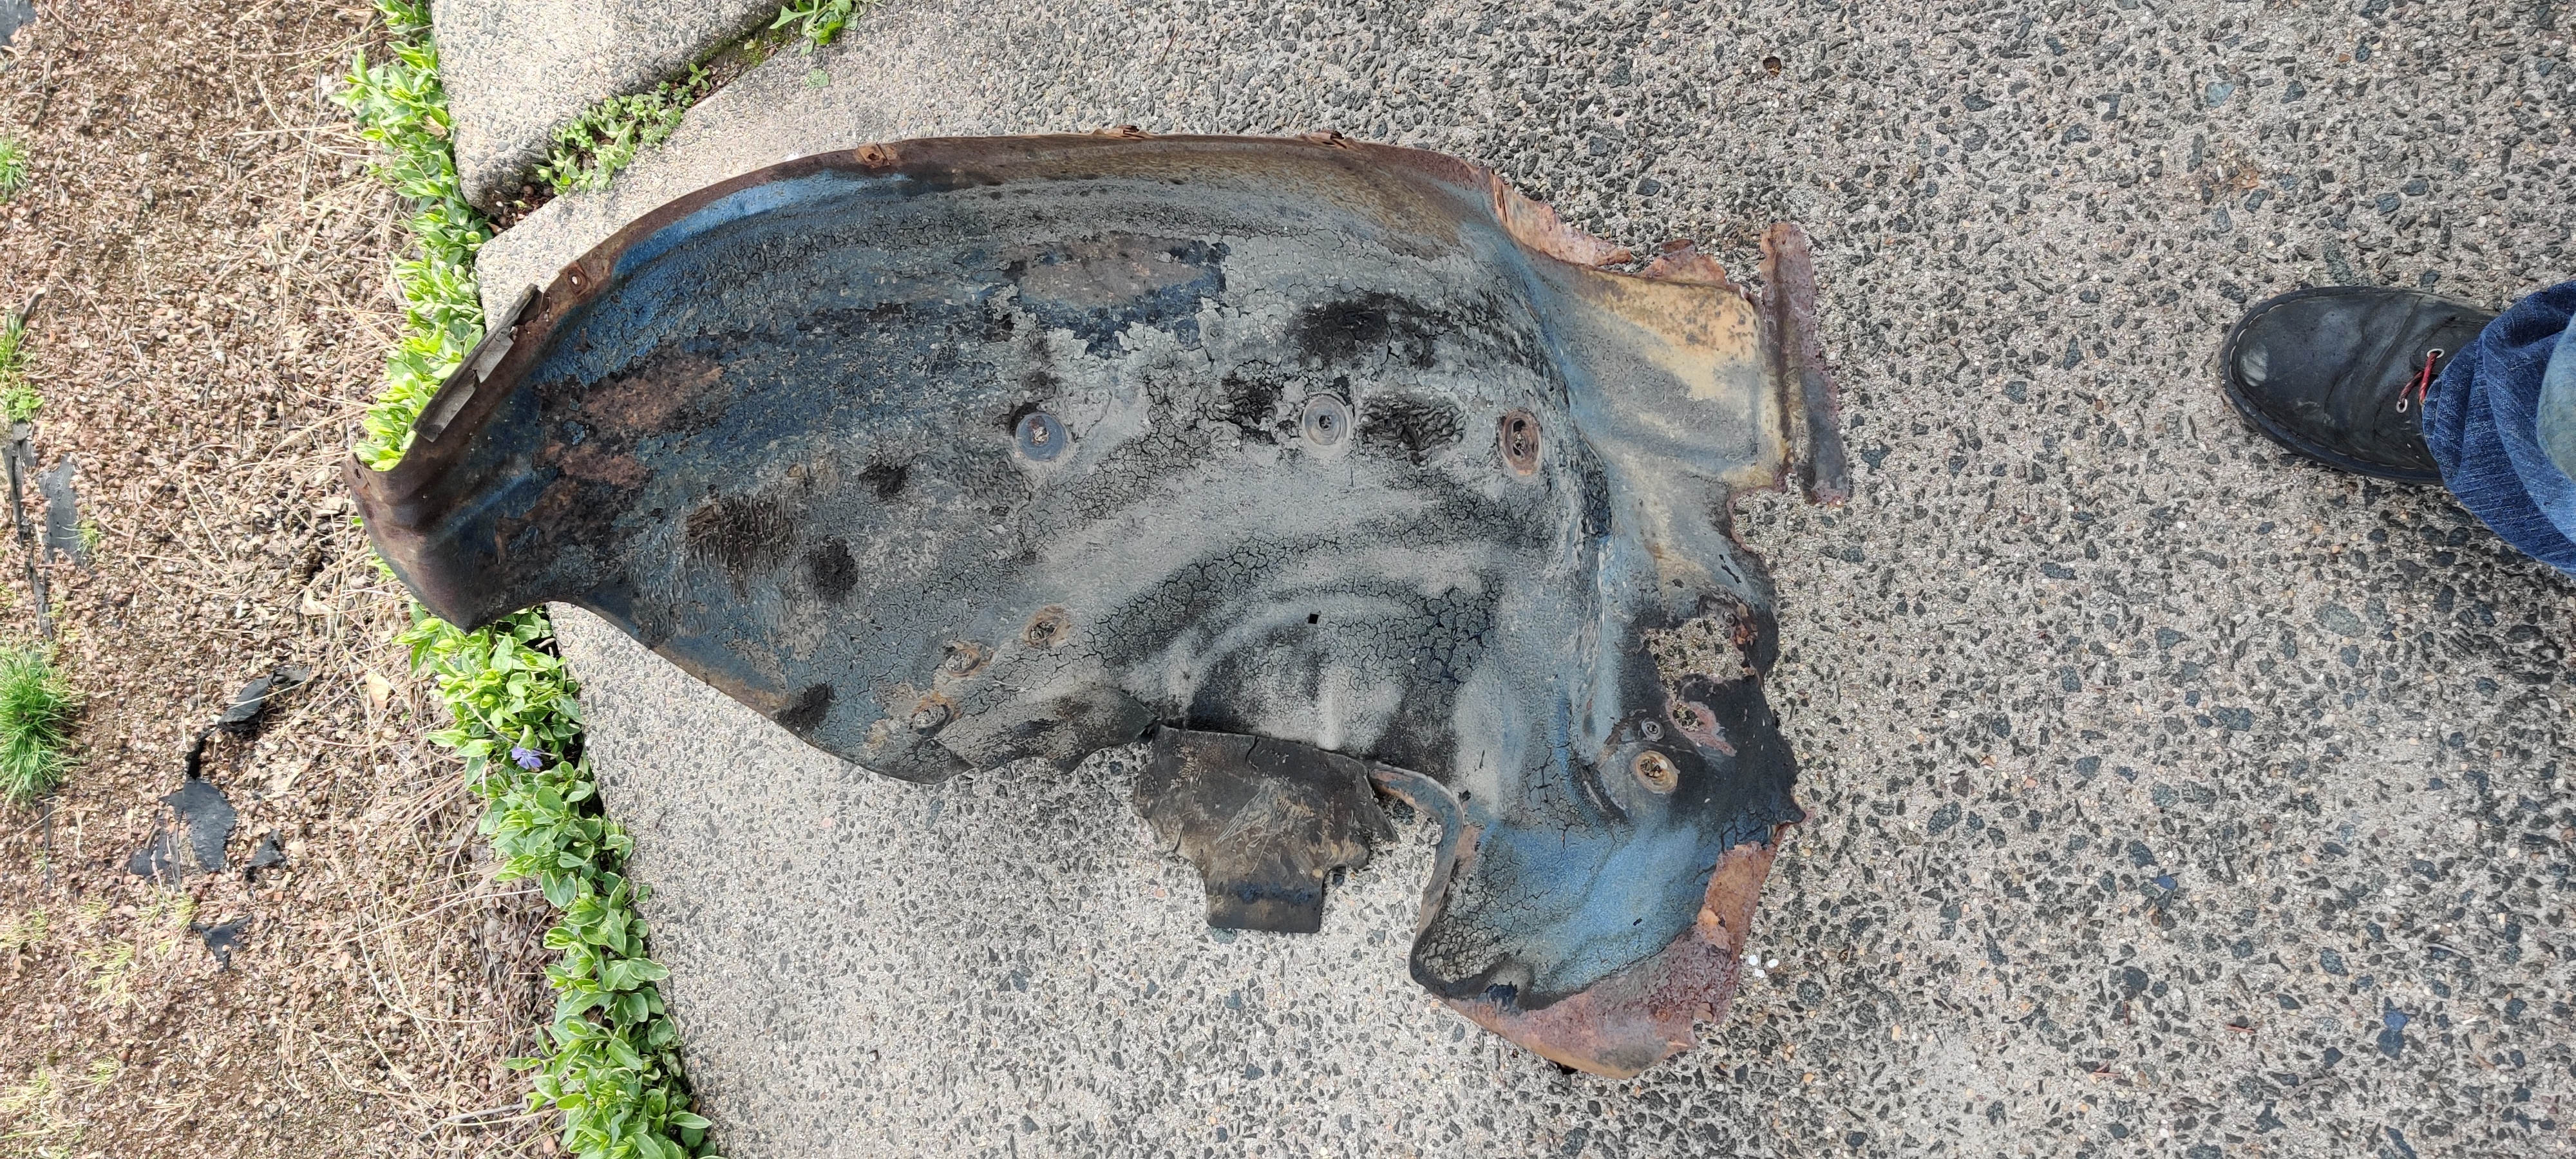
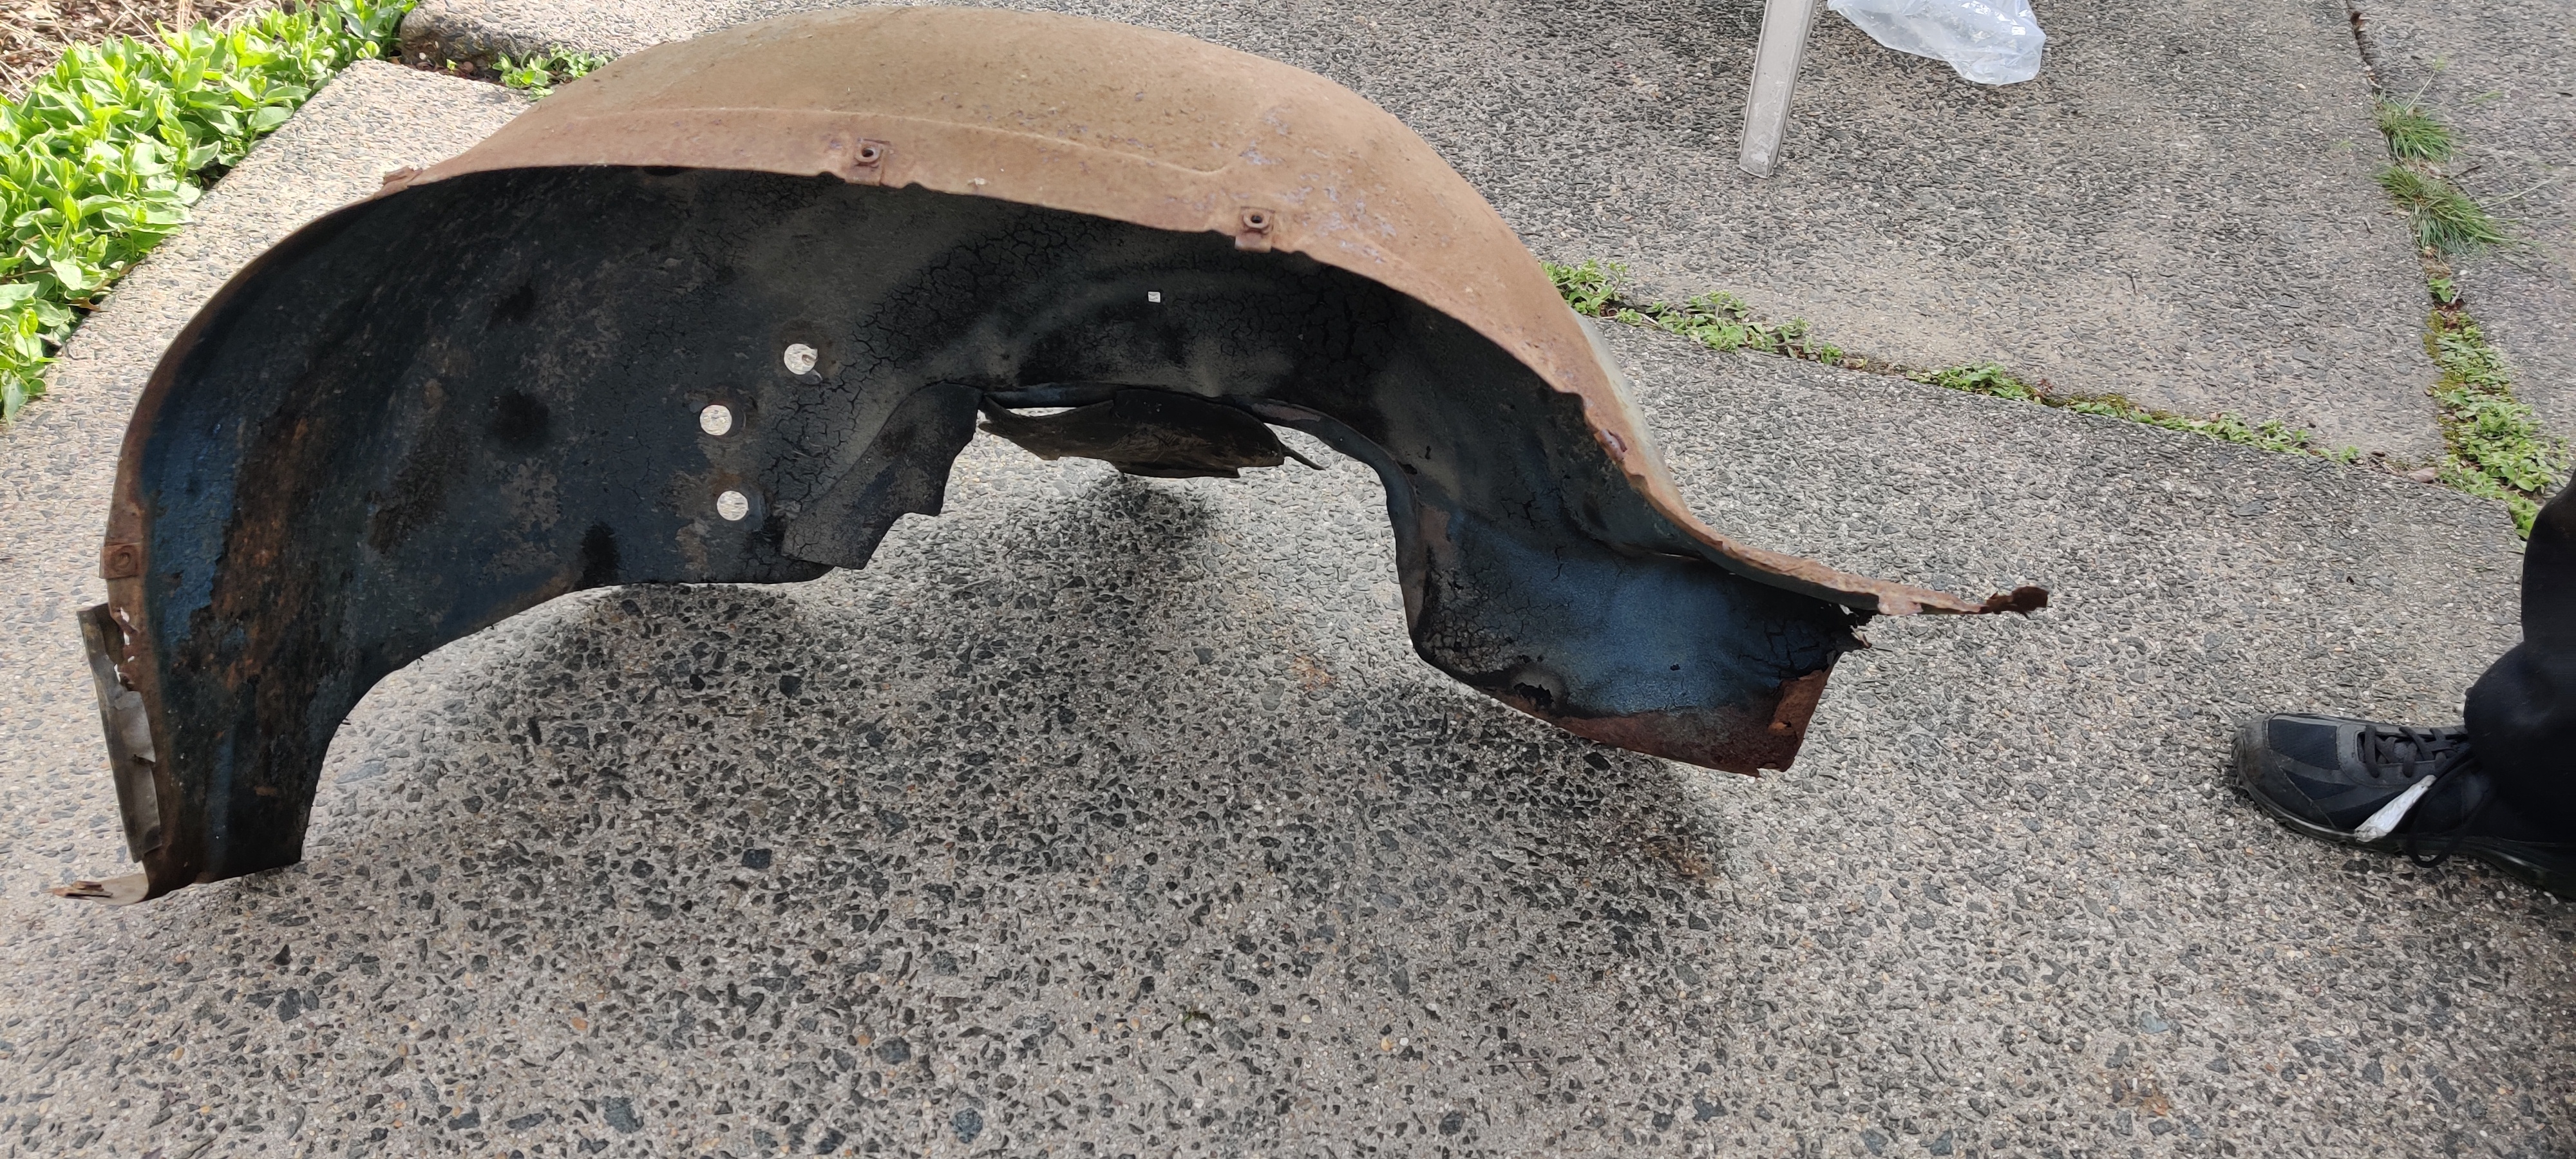
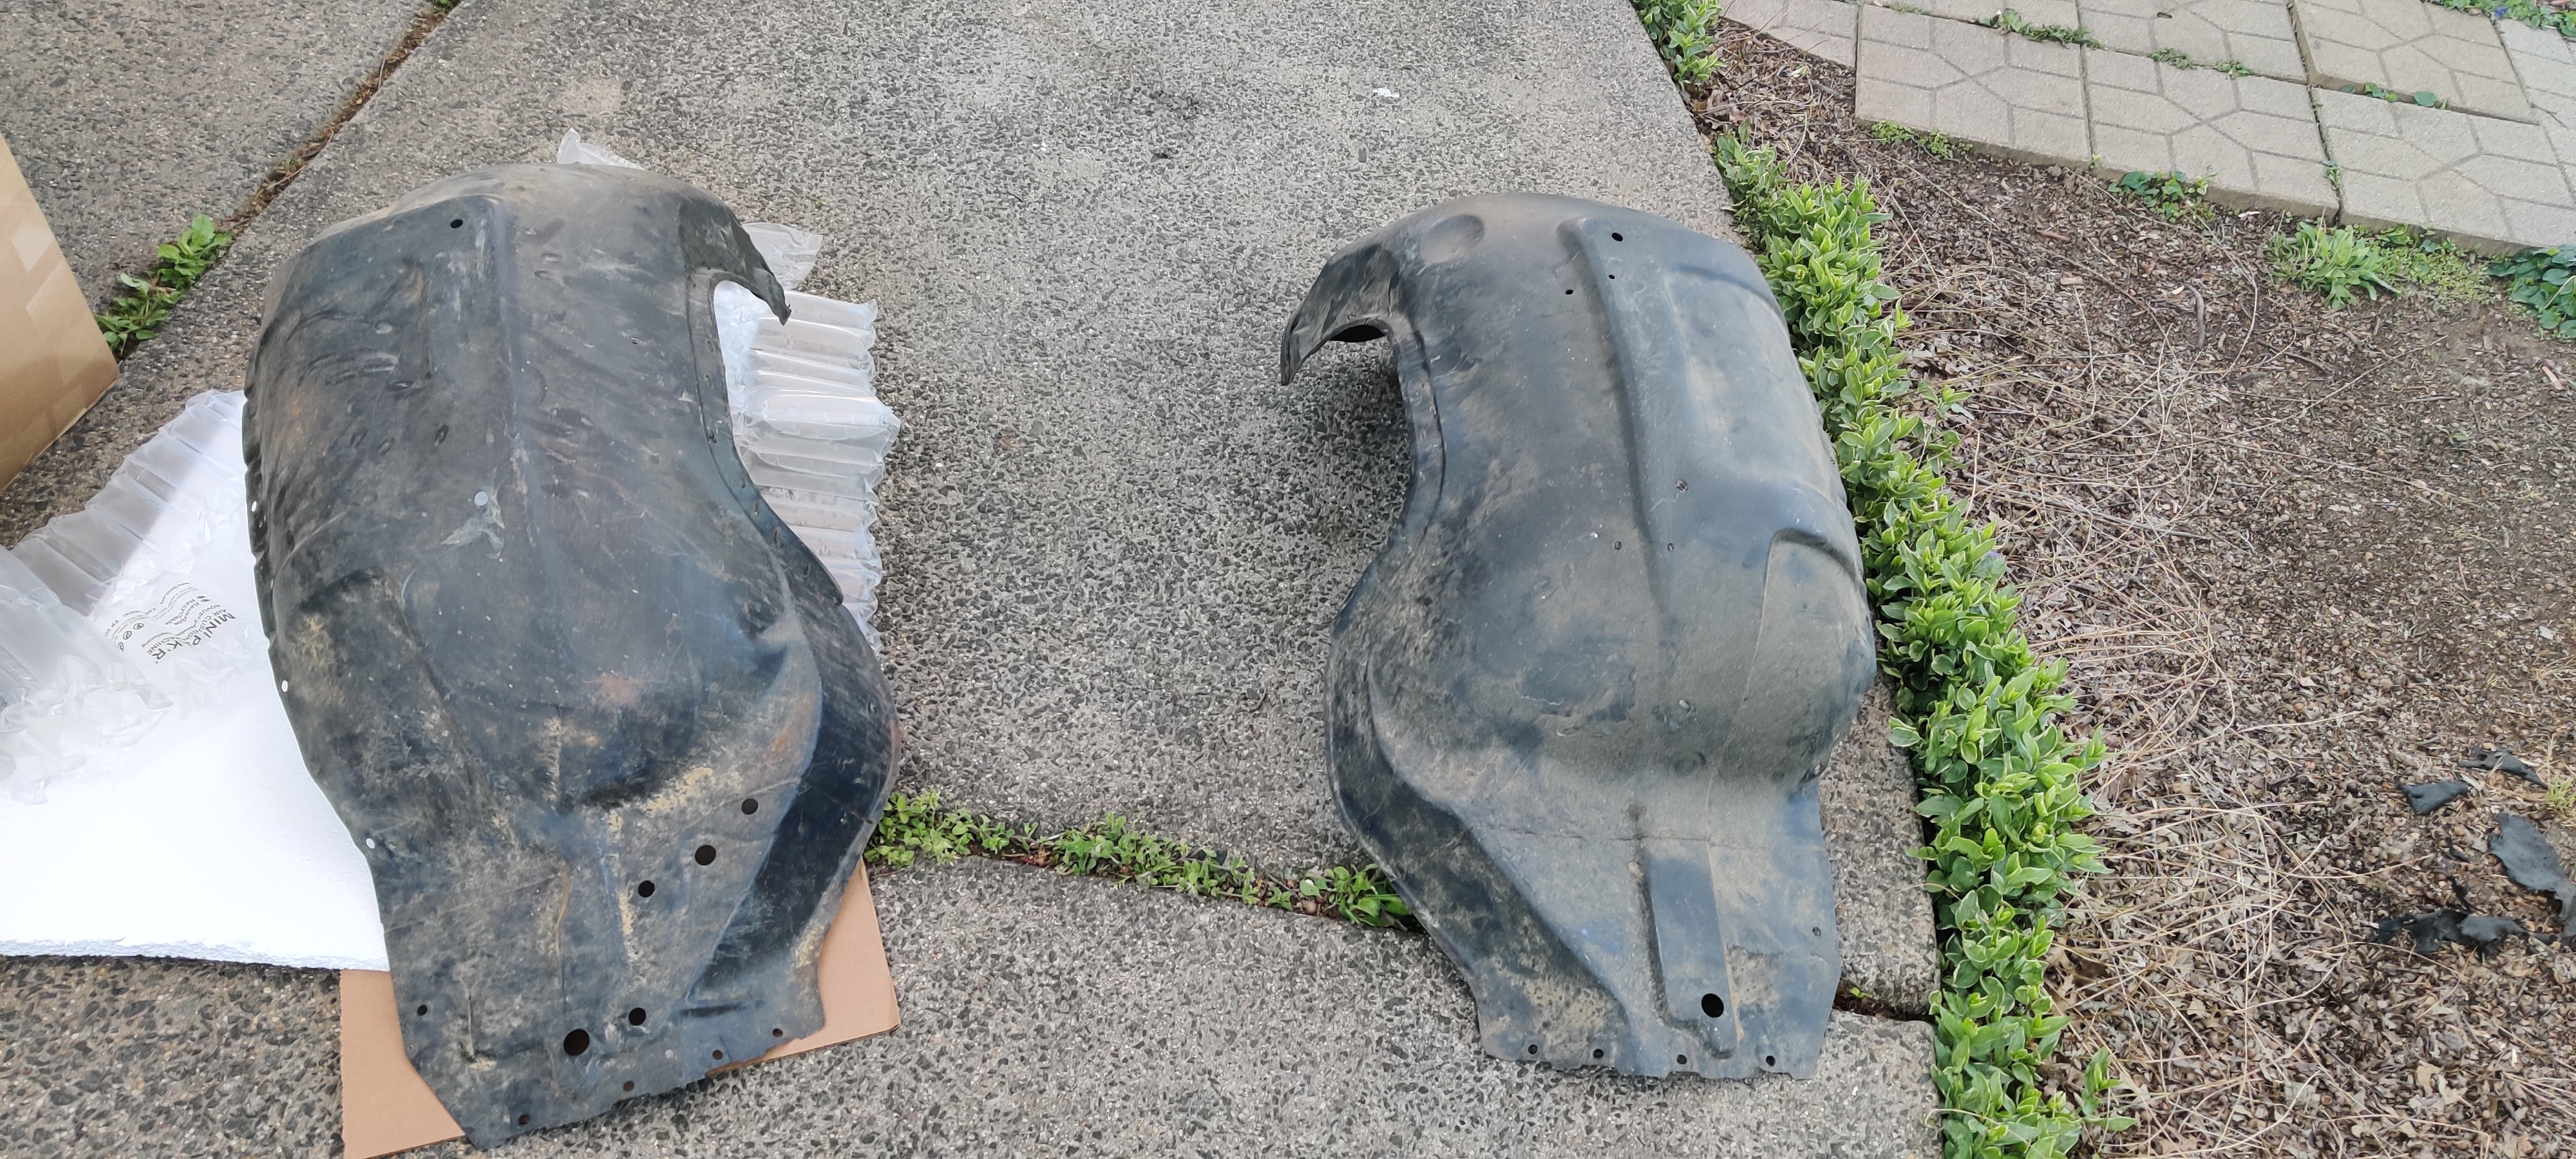
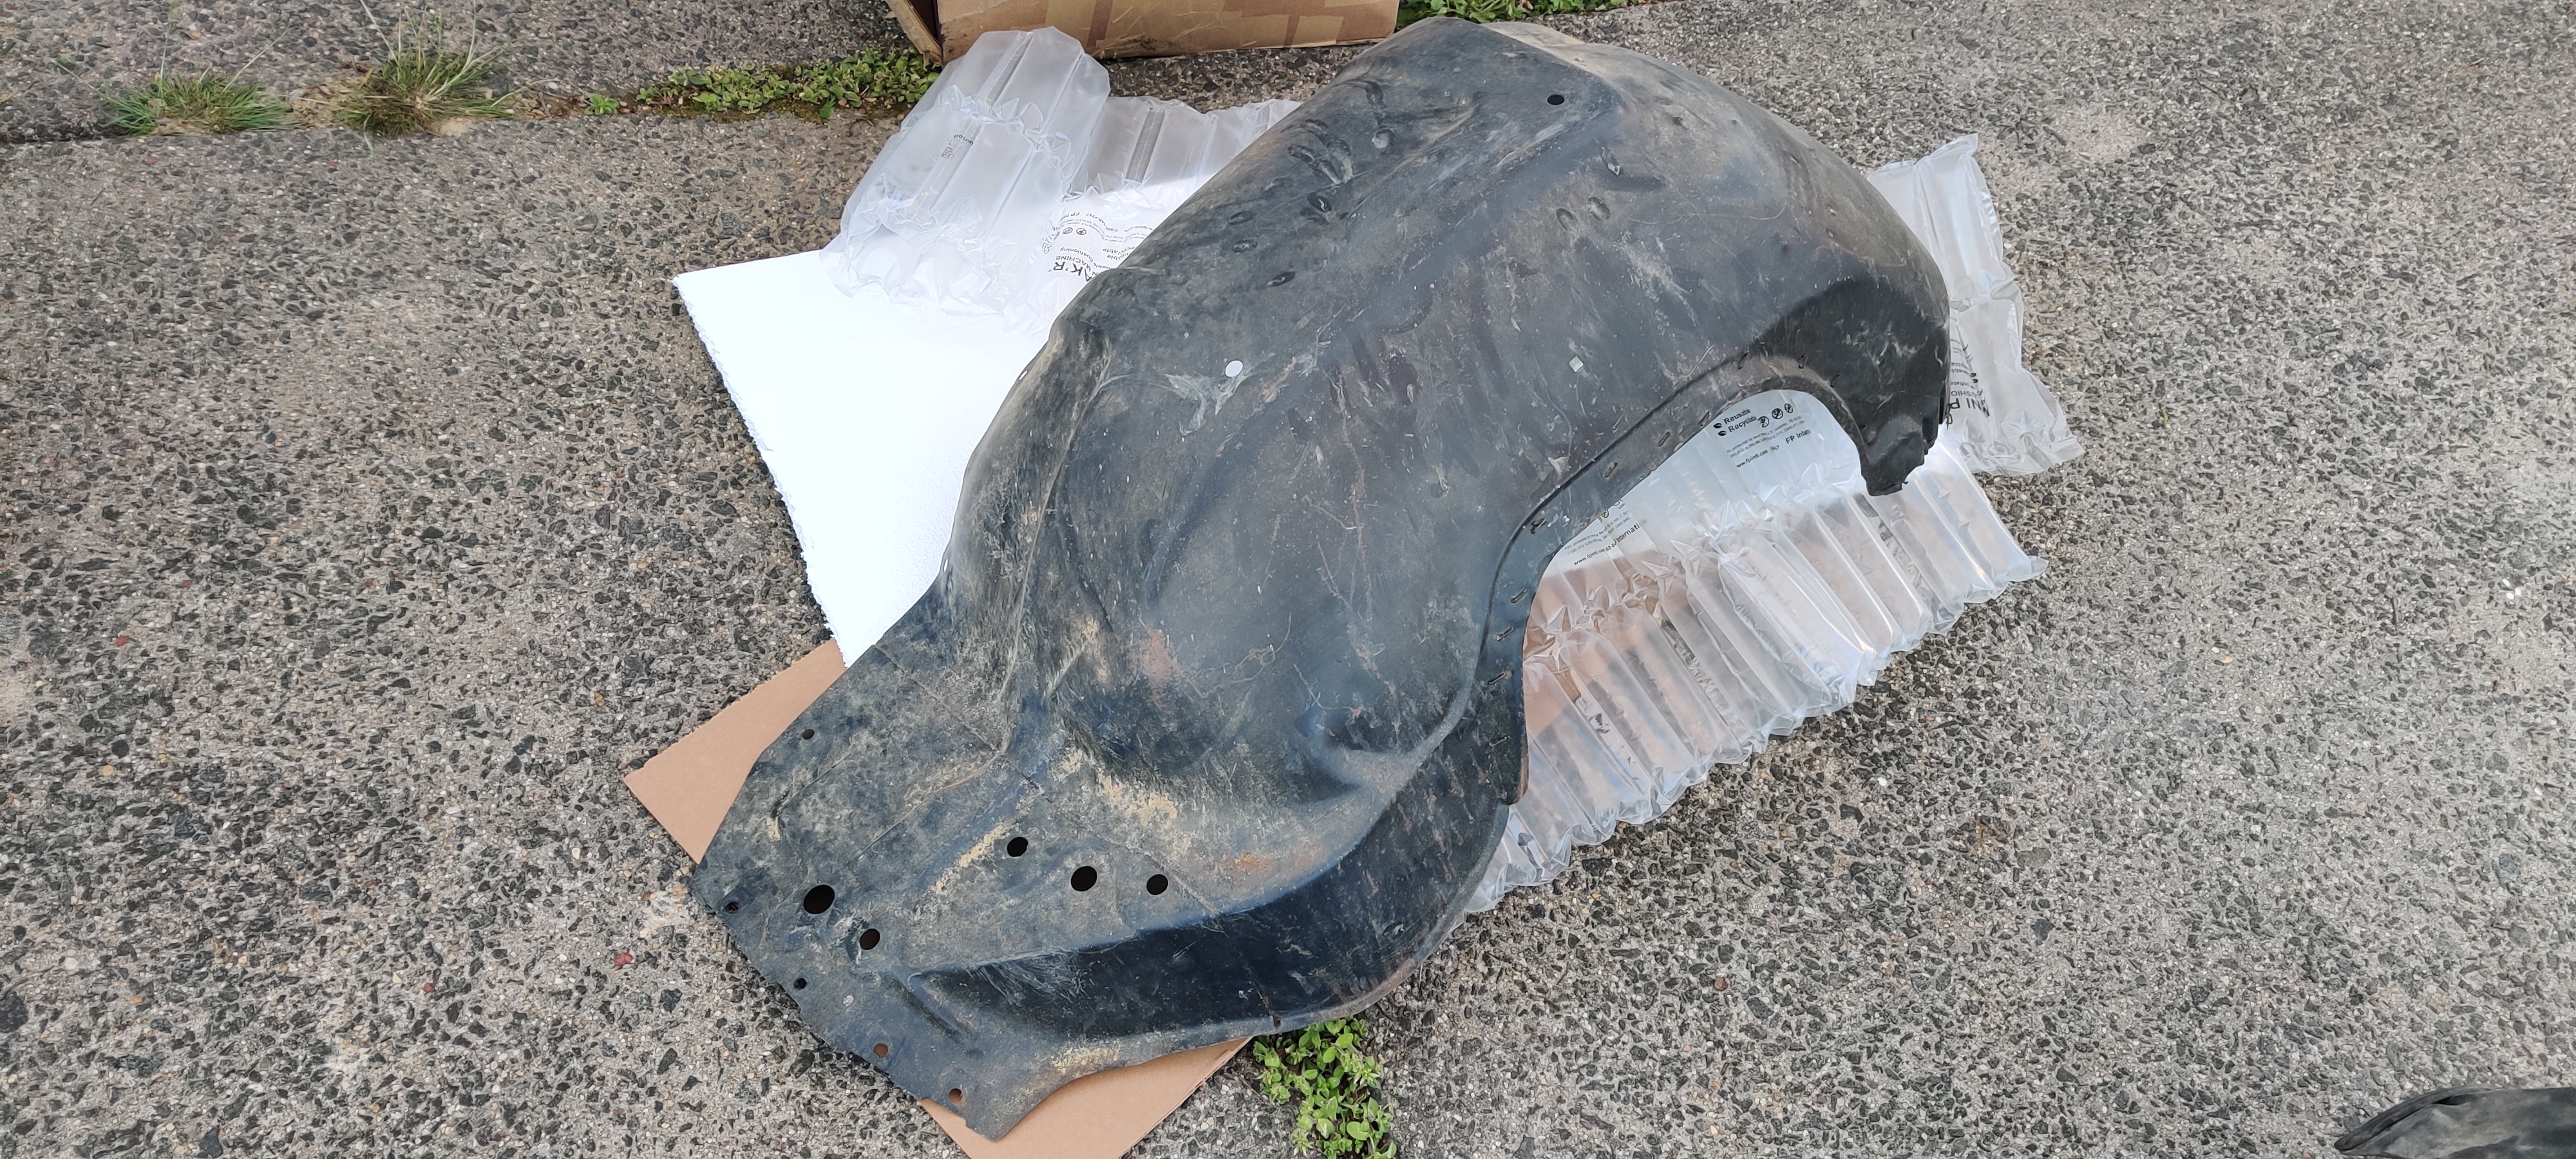
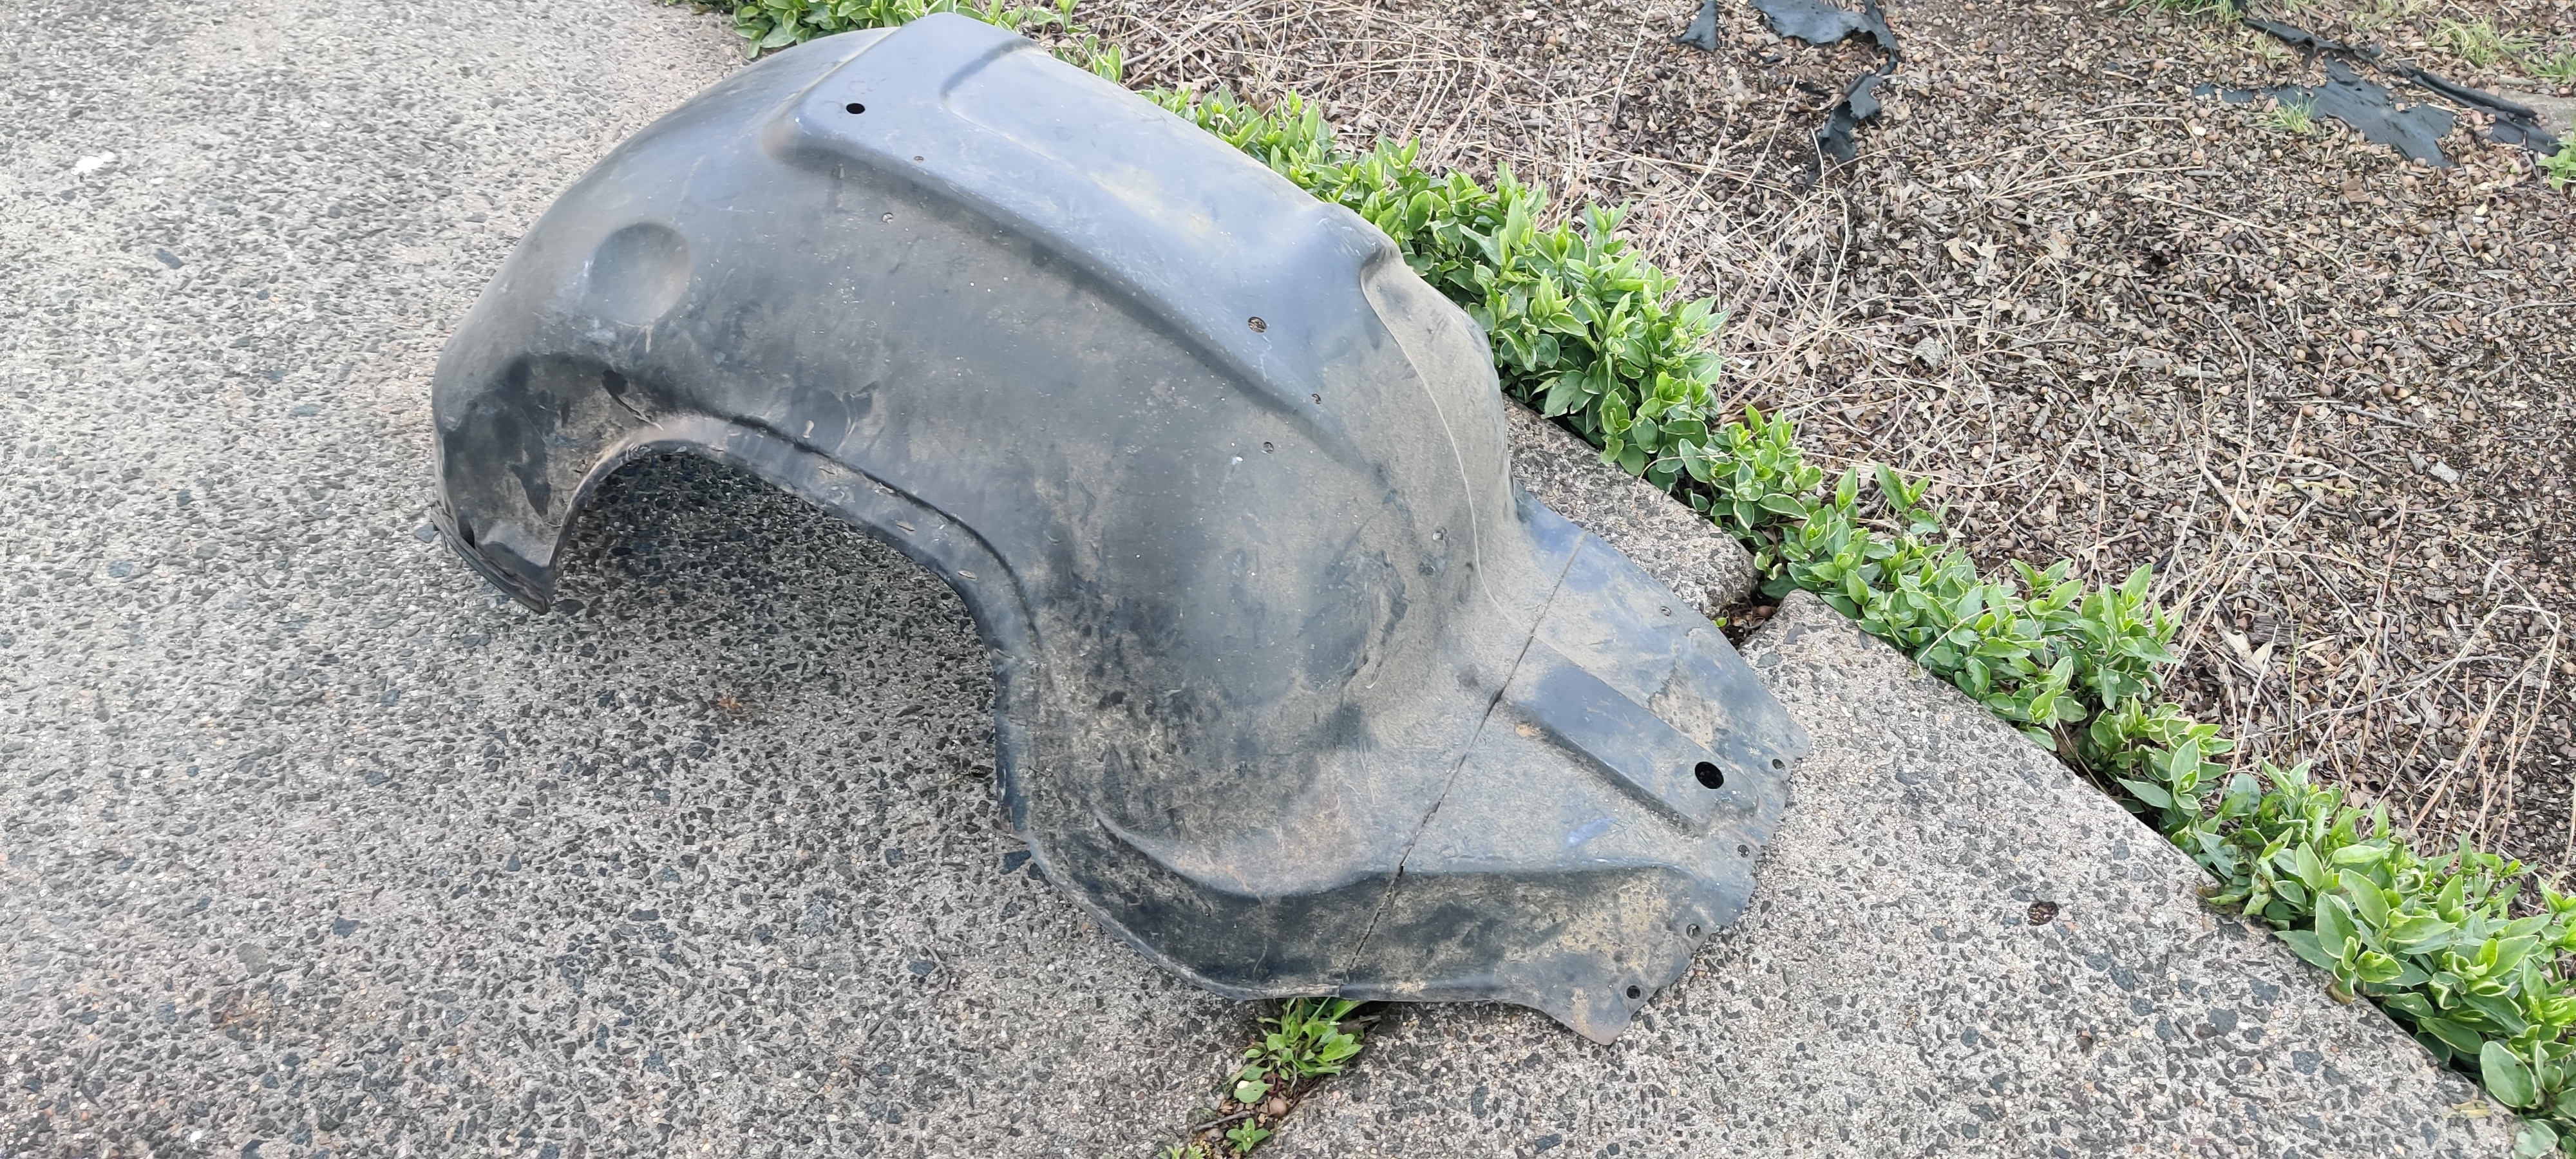
So those wheel wells I got off the internet? yeah they don't fit right... trying to figure out if I can modify them or something, annoying.
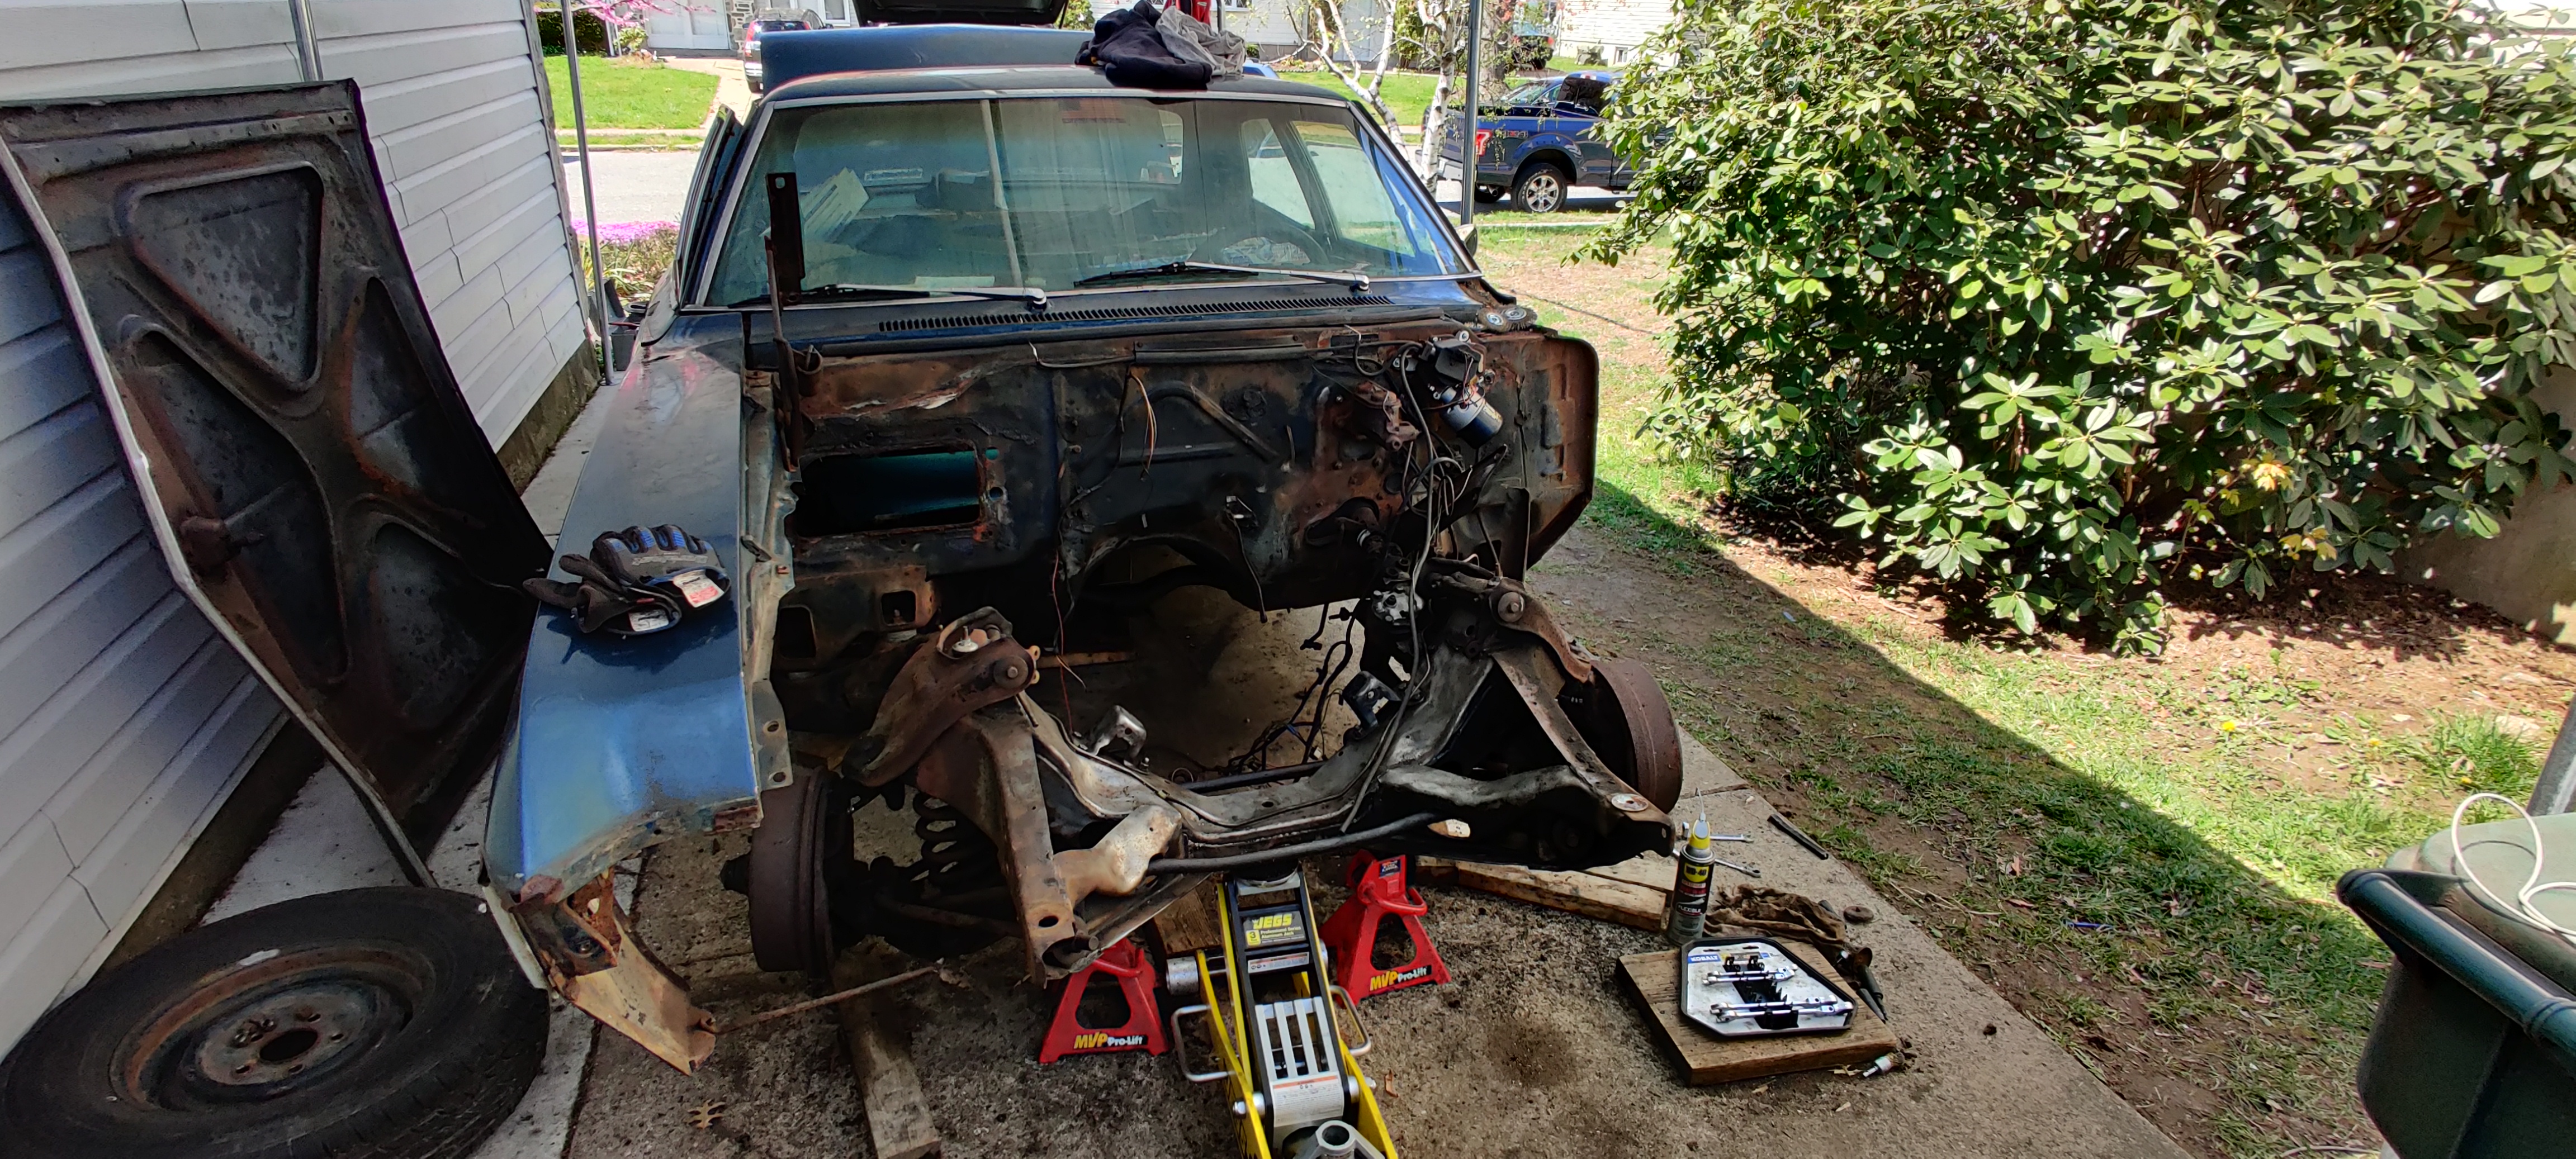
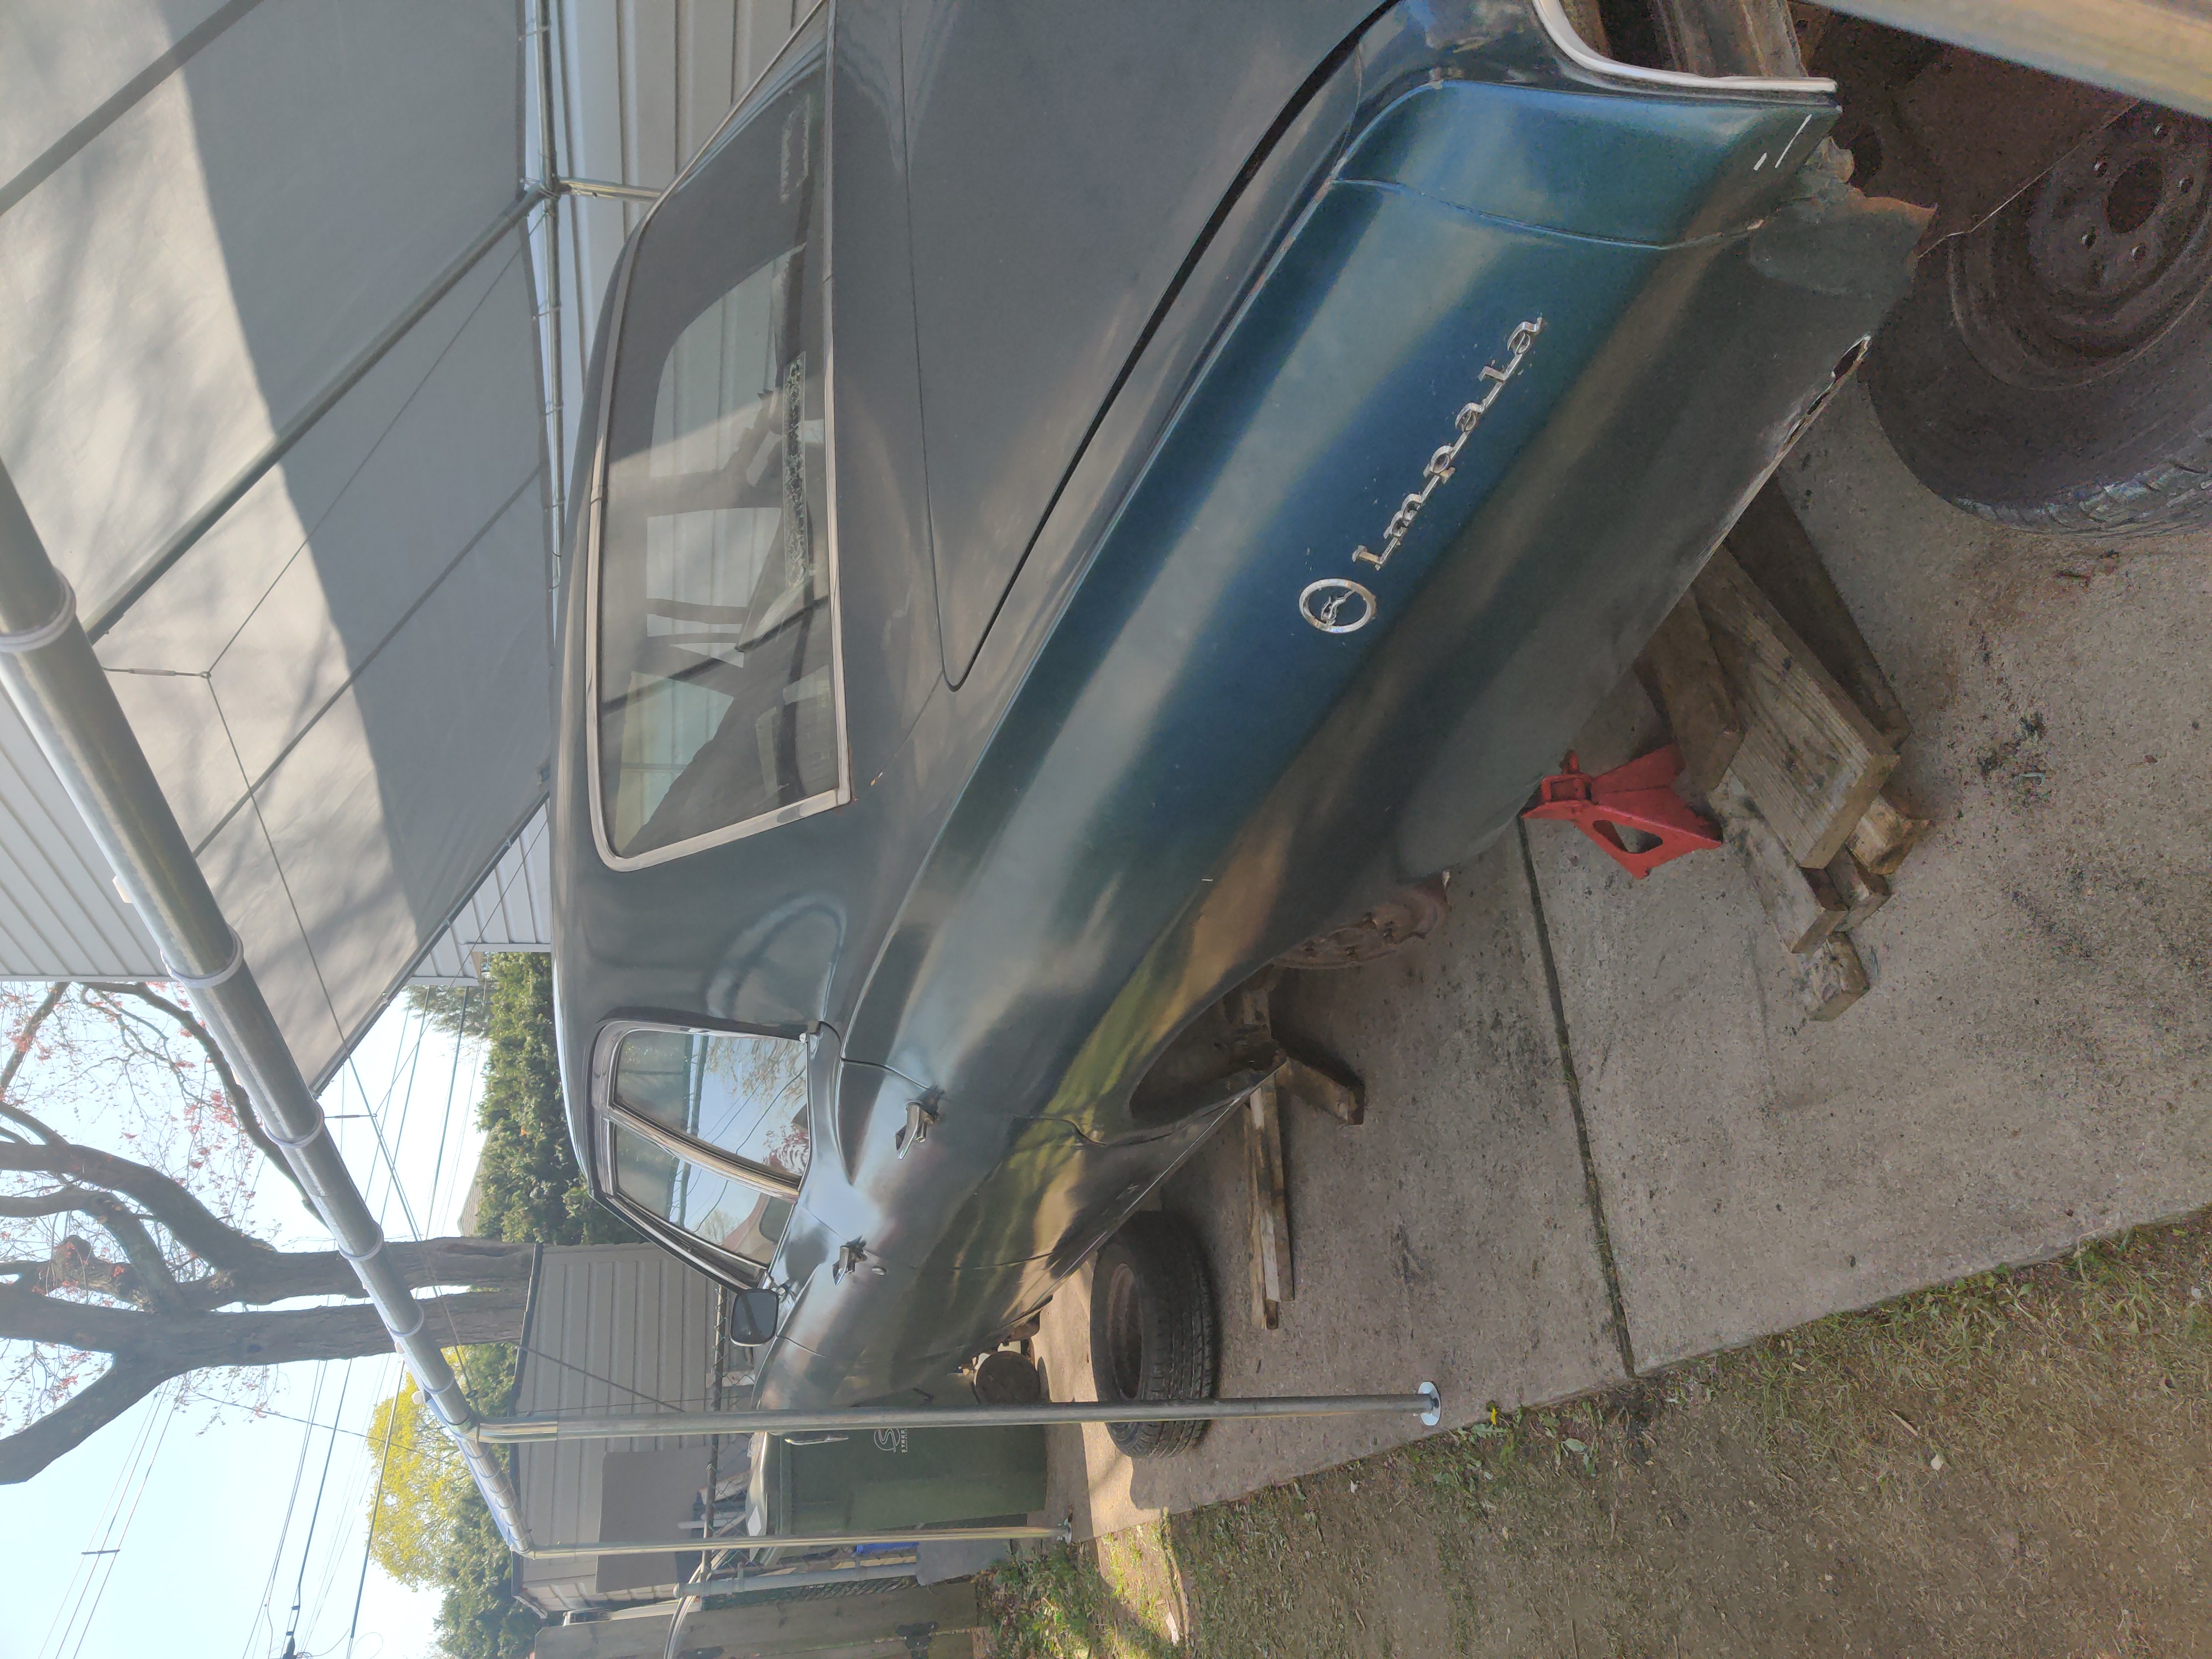
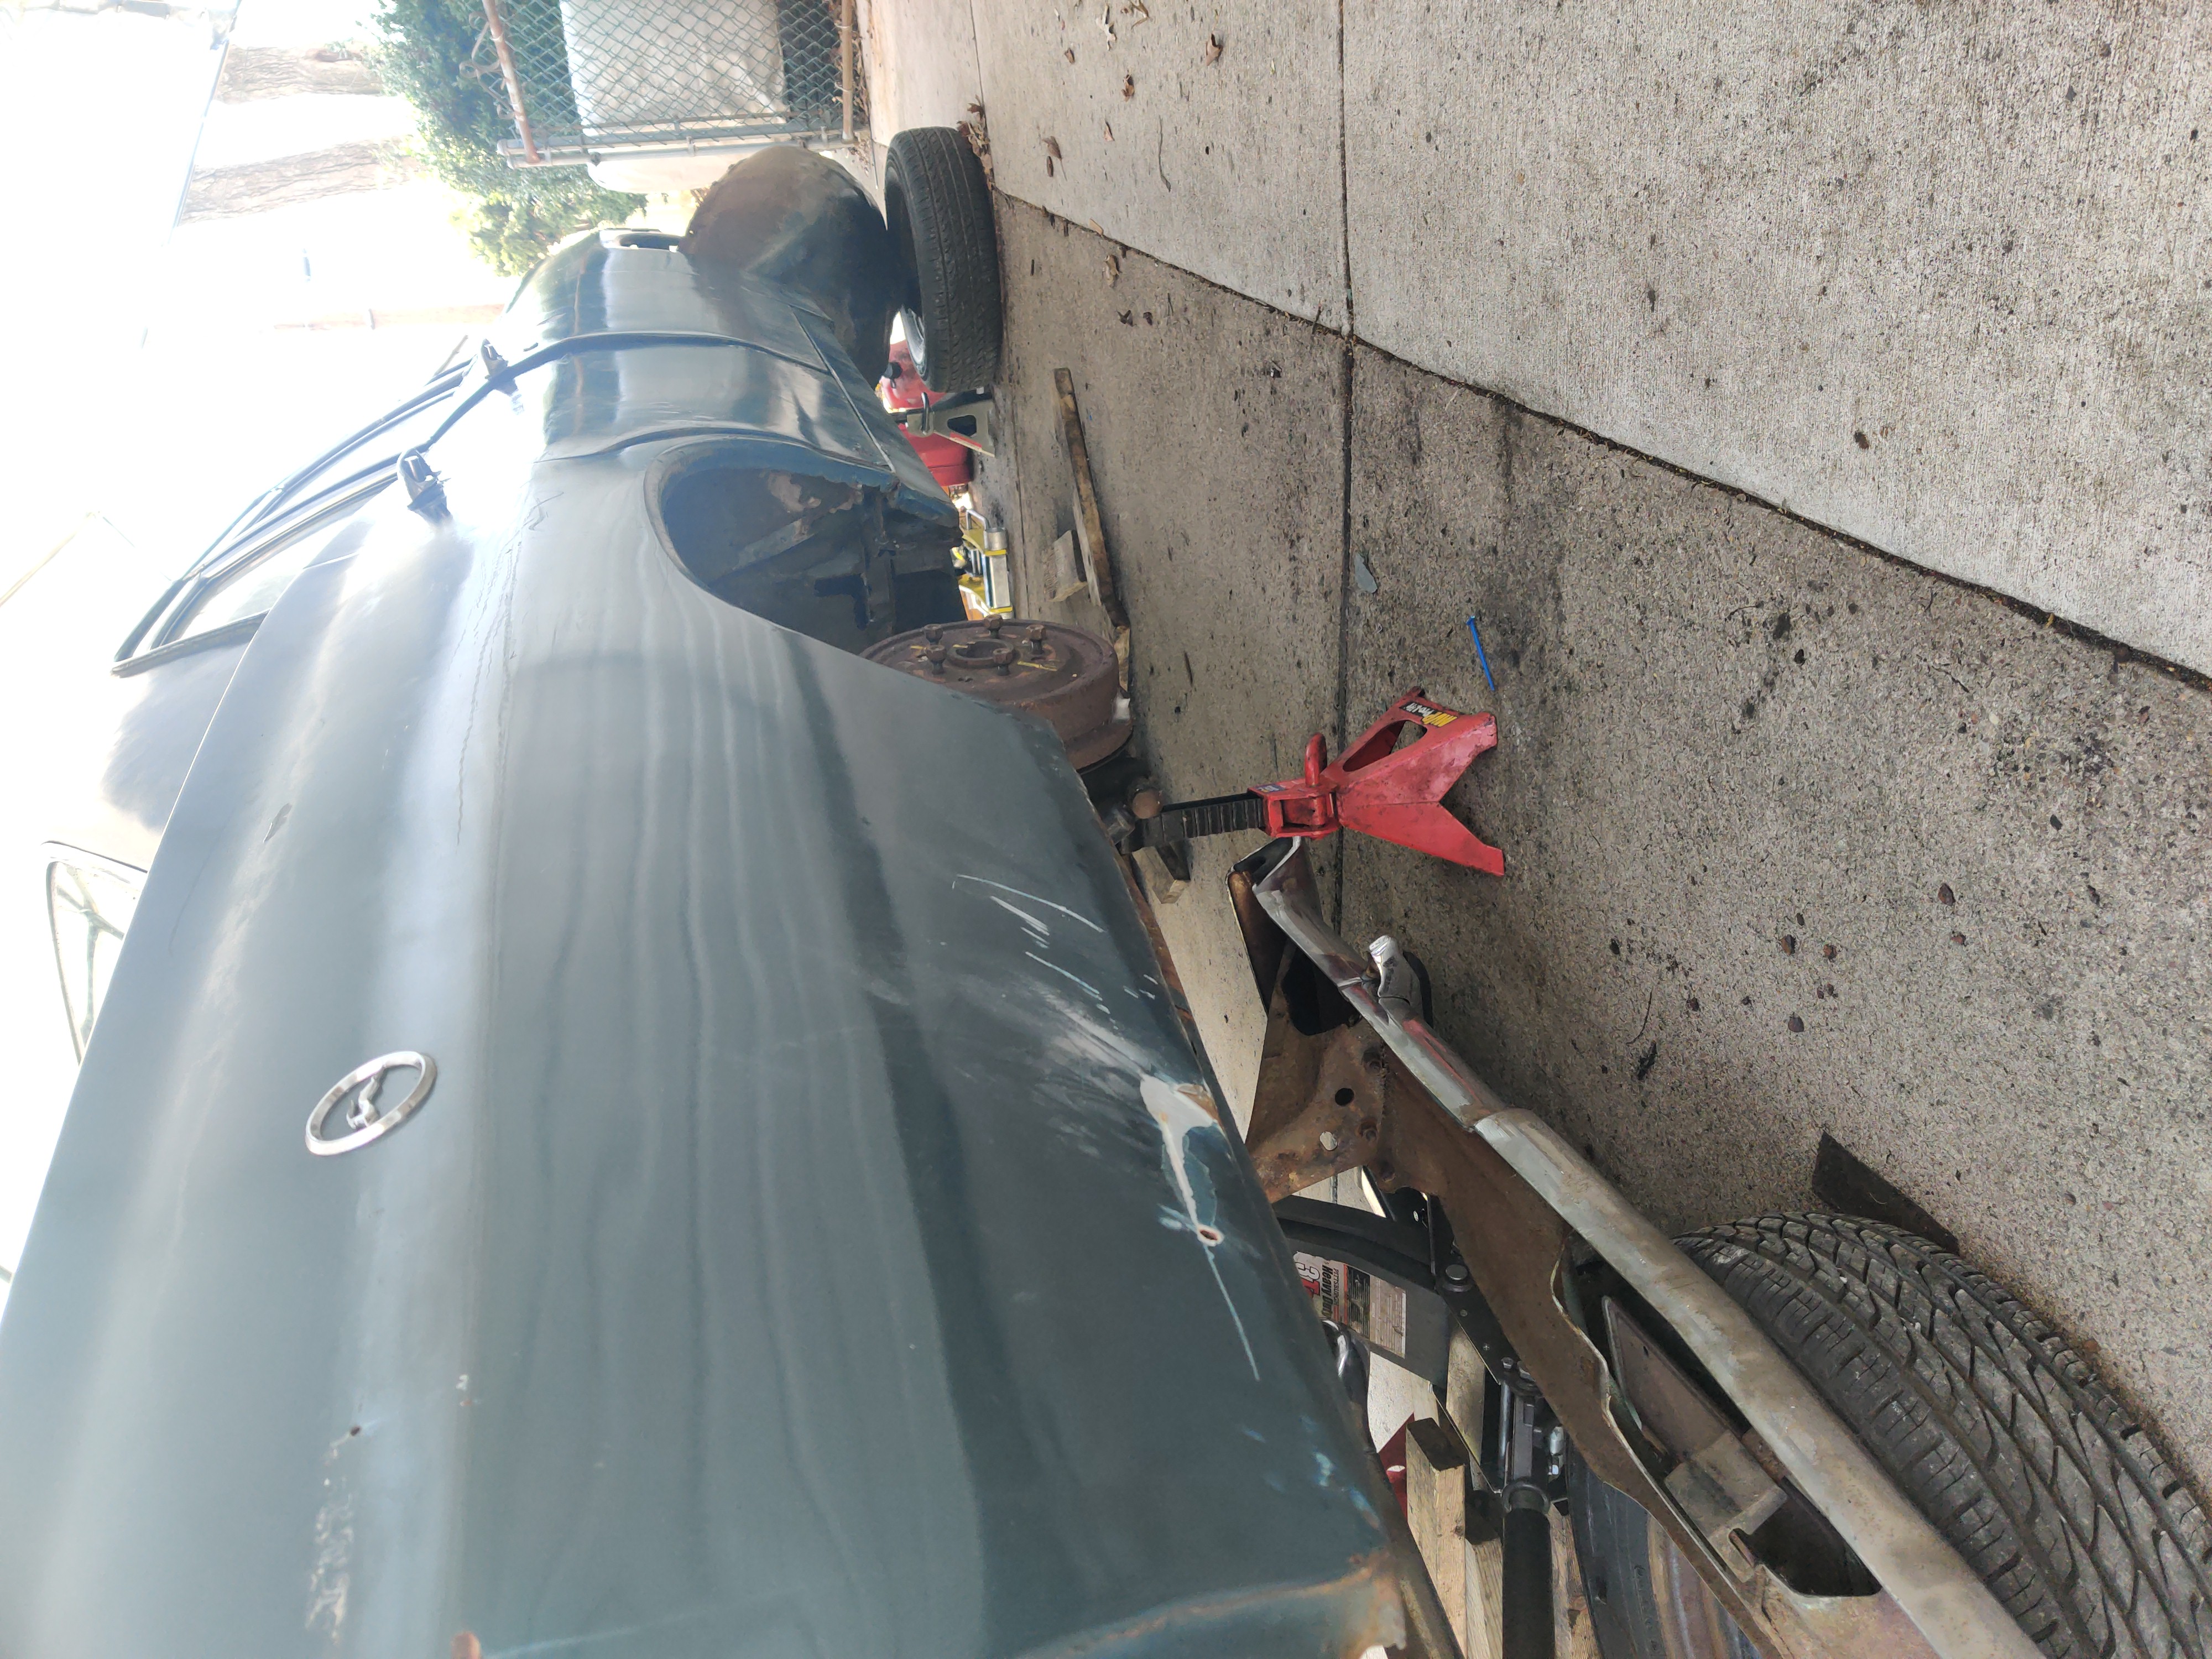
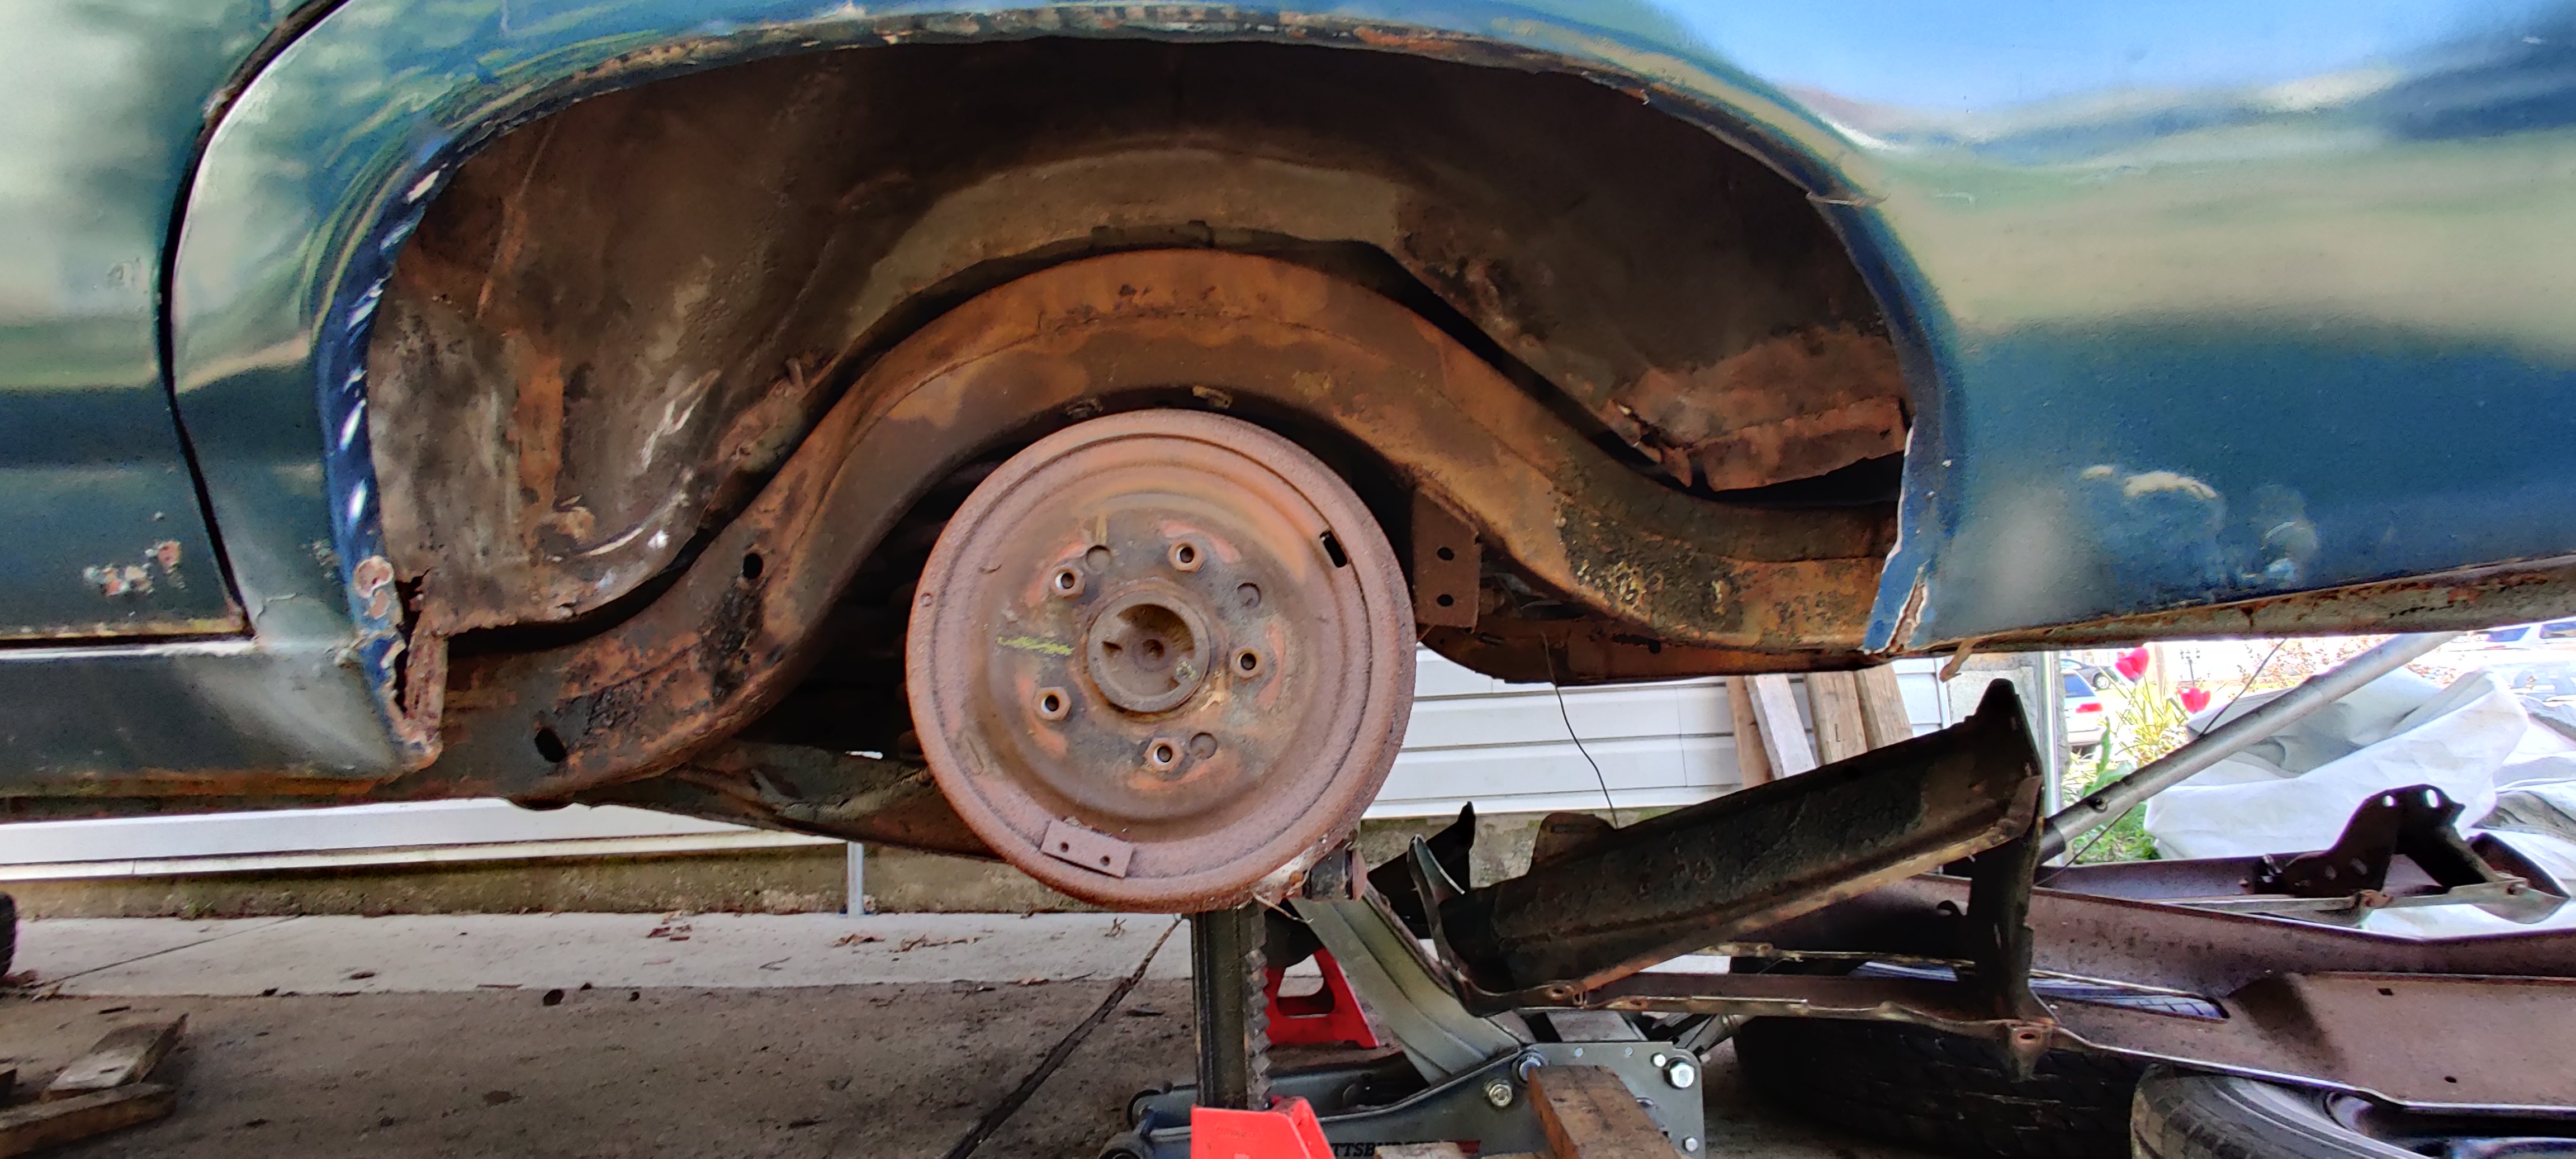
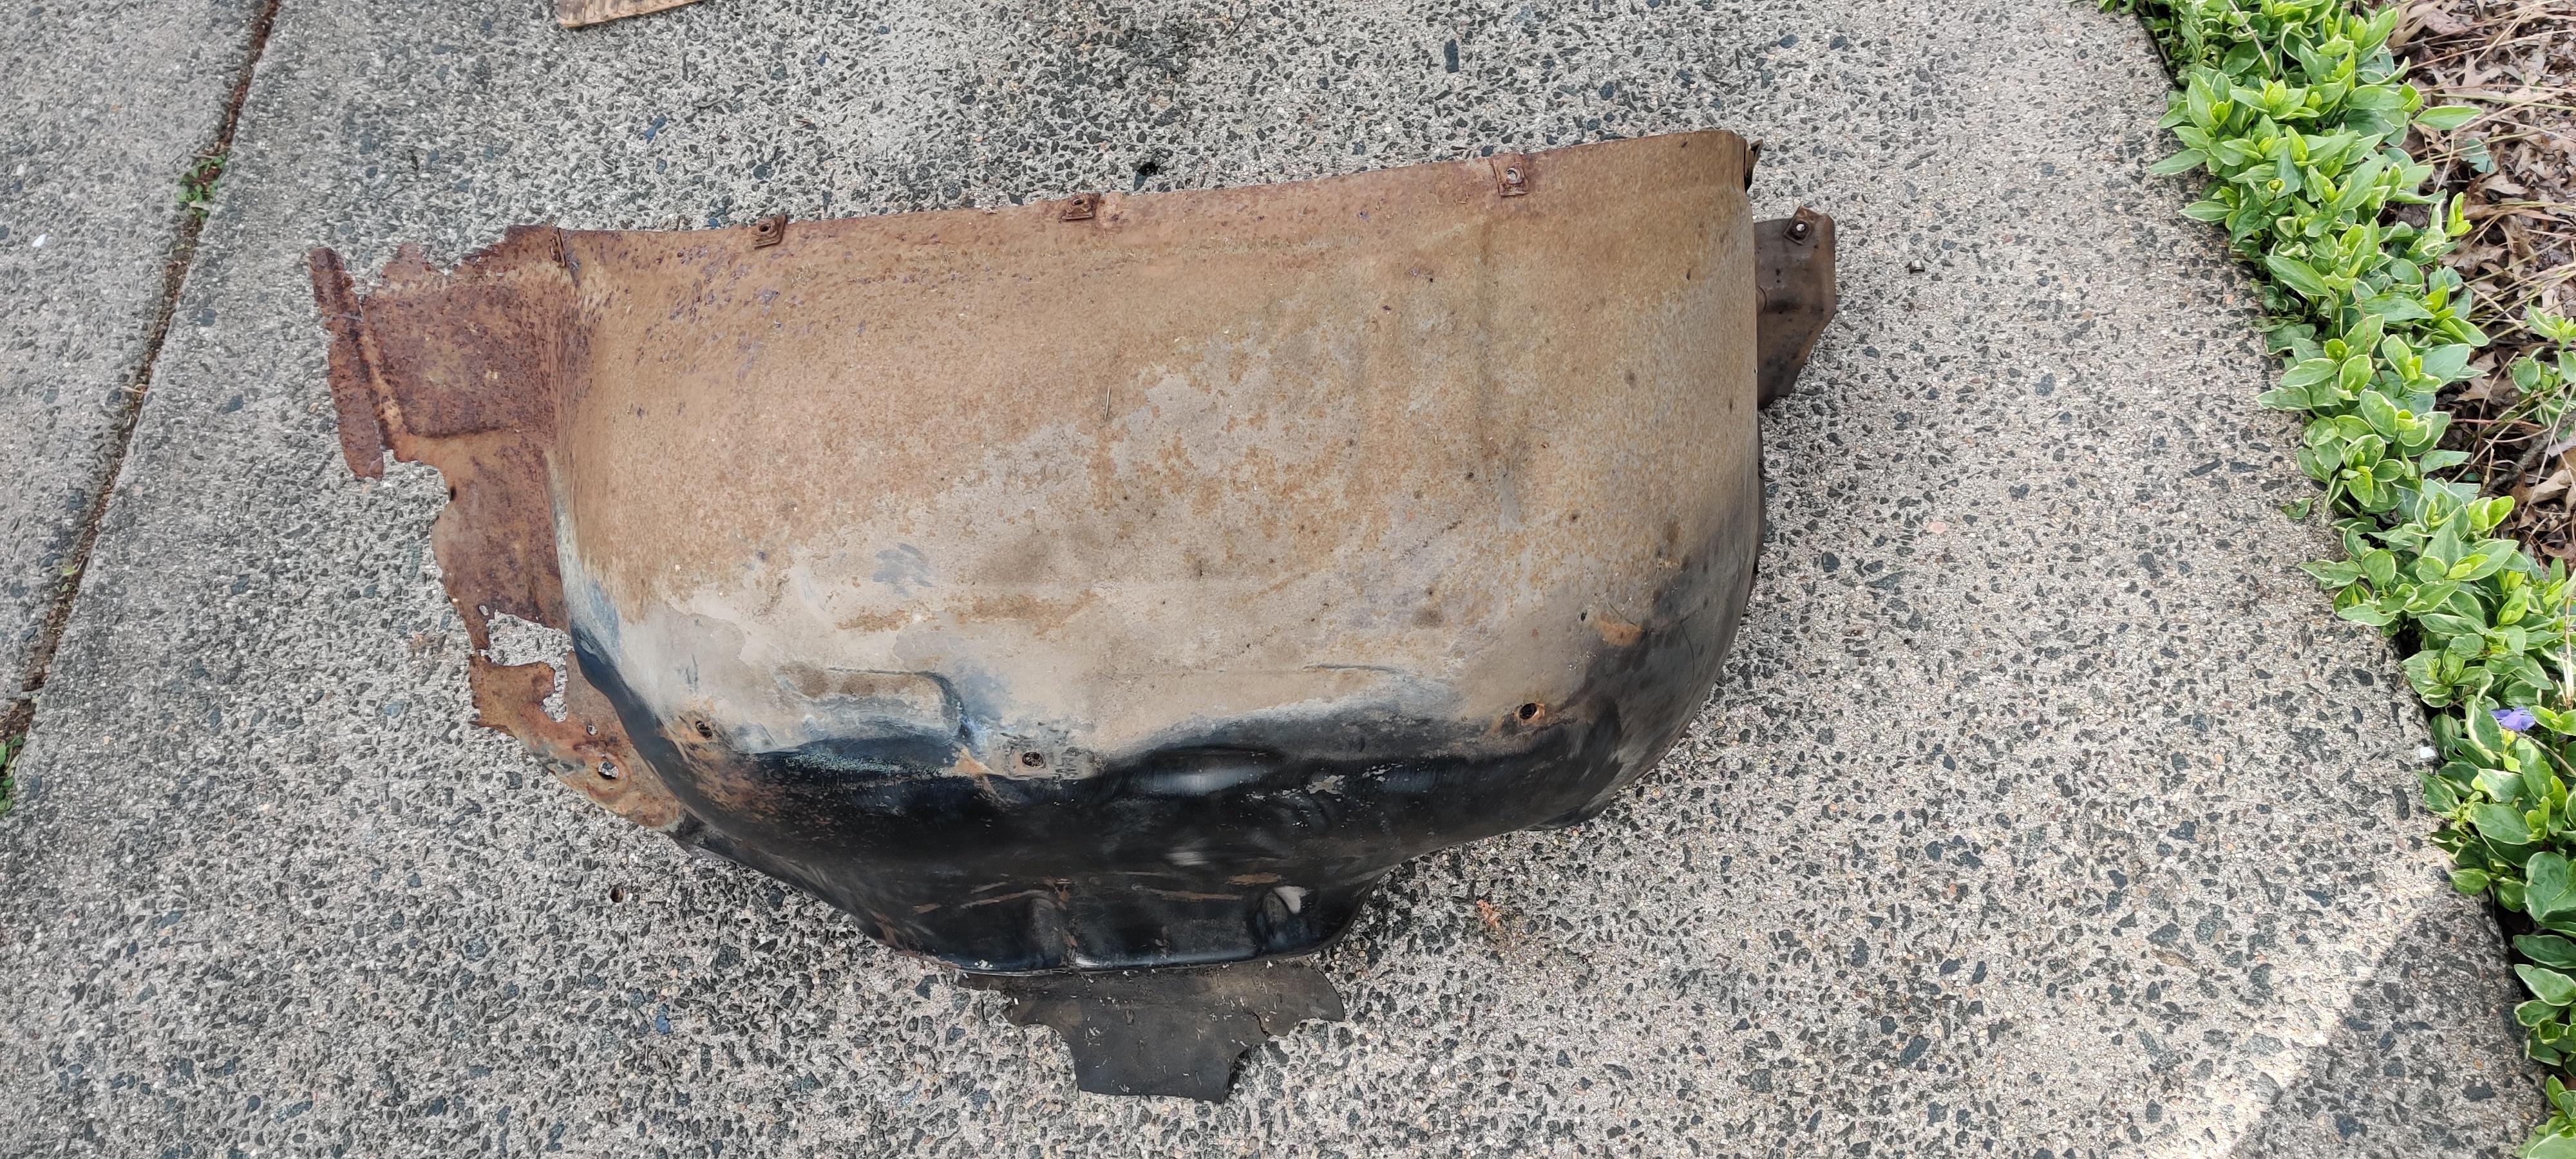
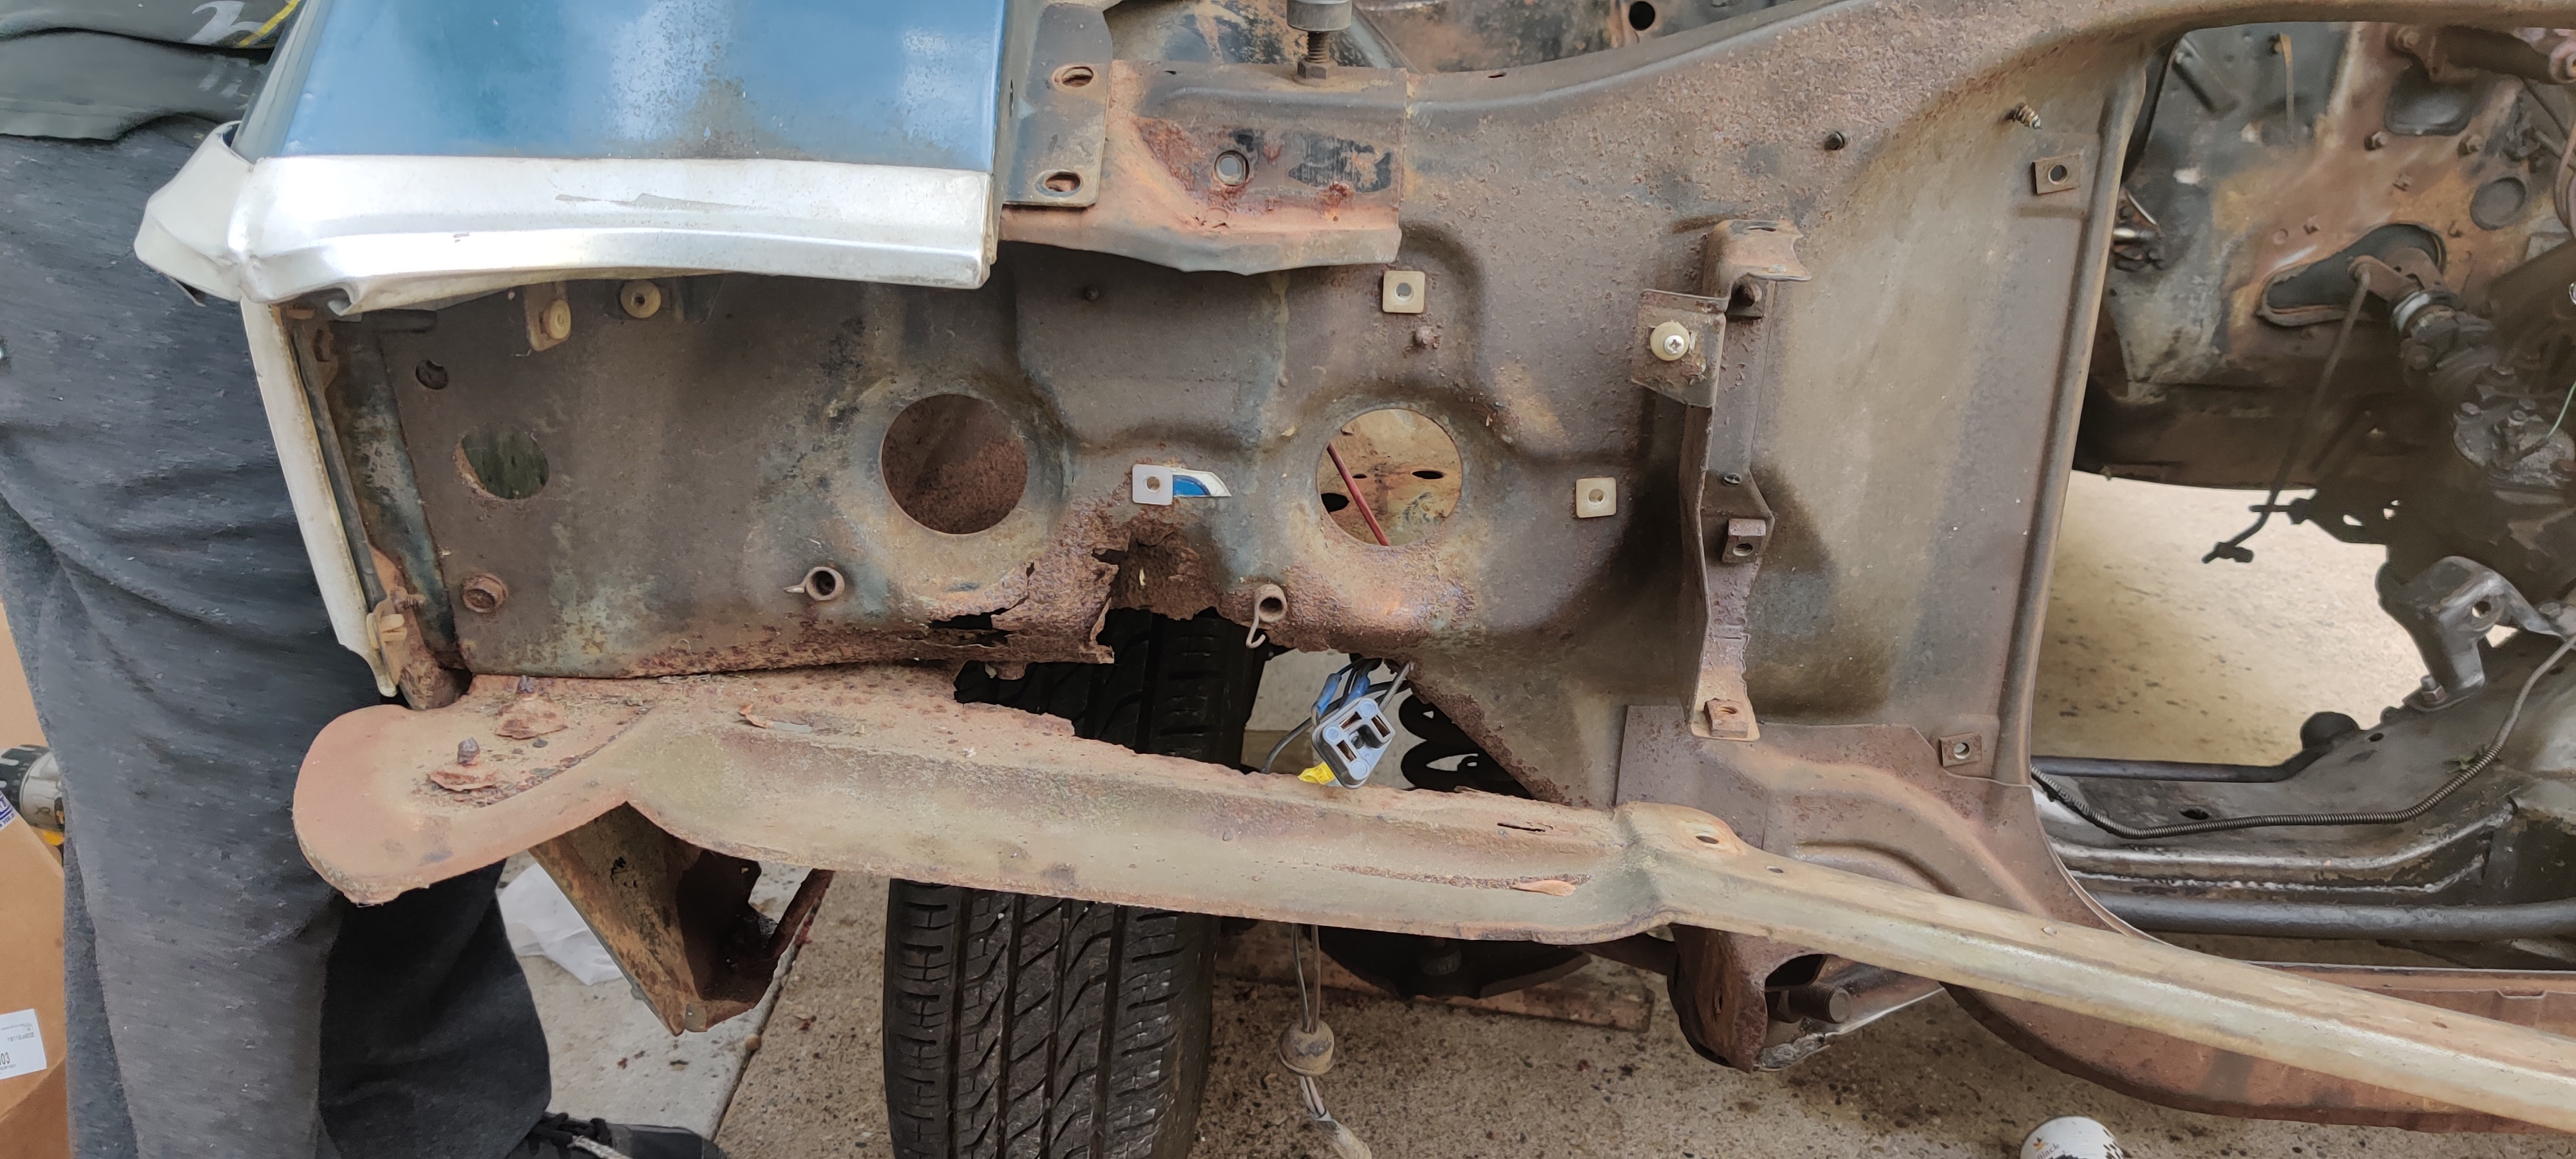
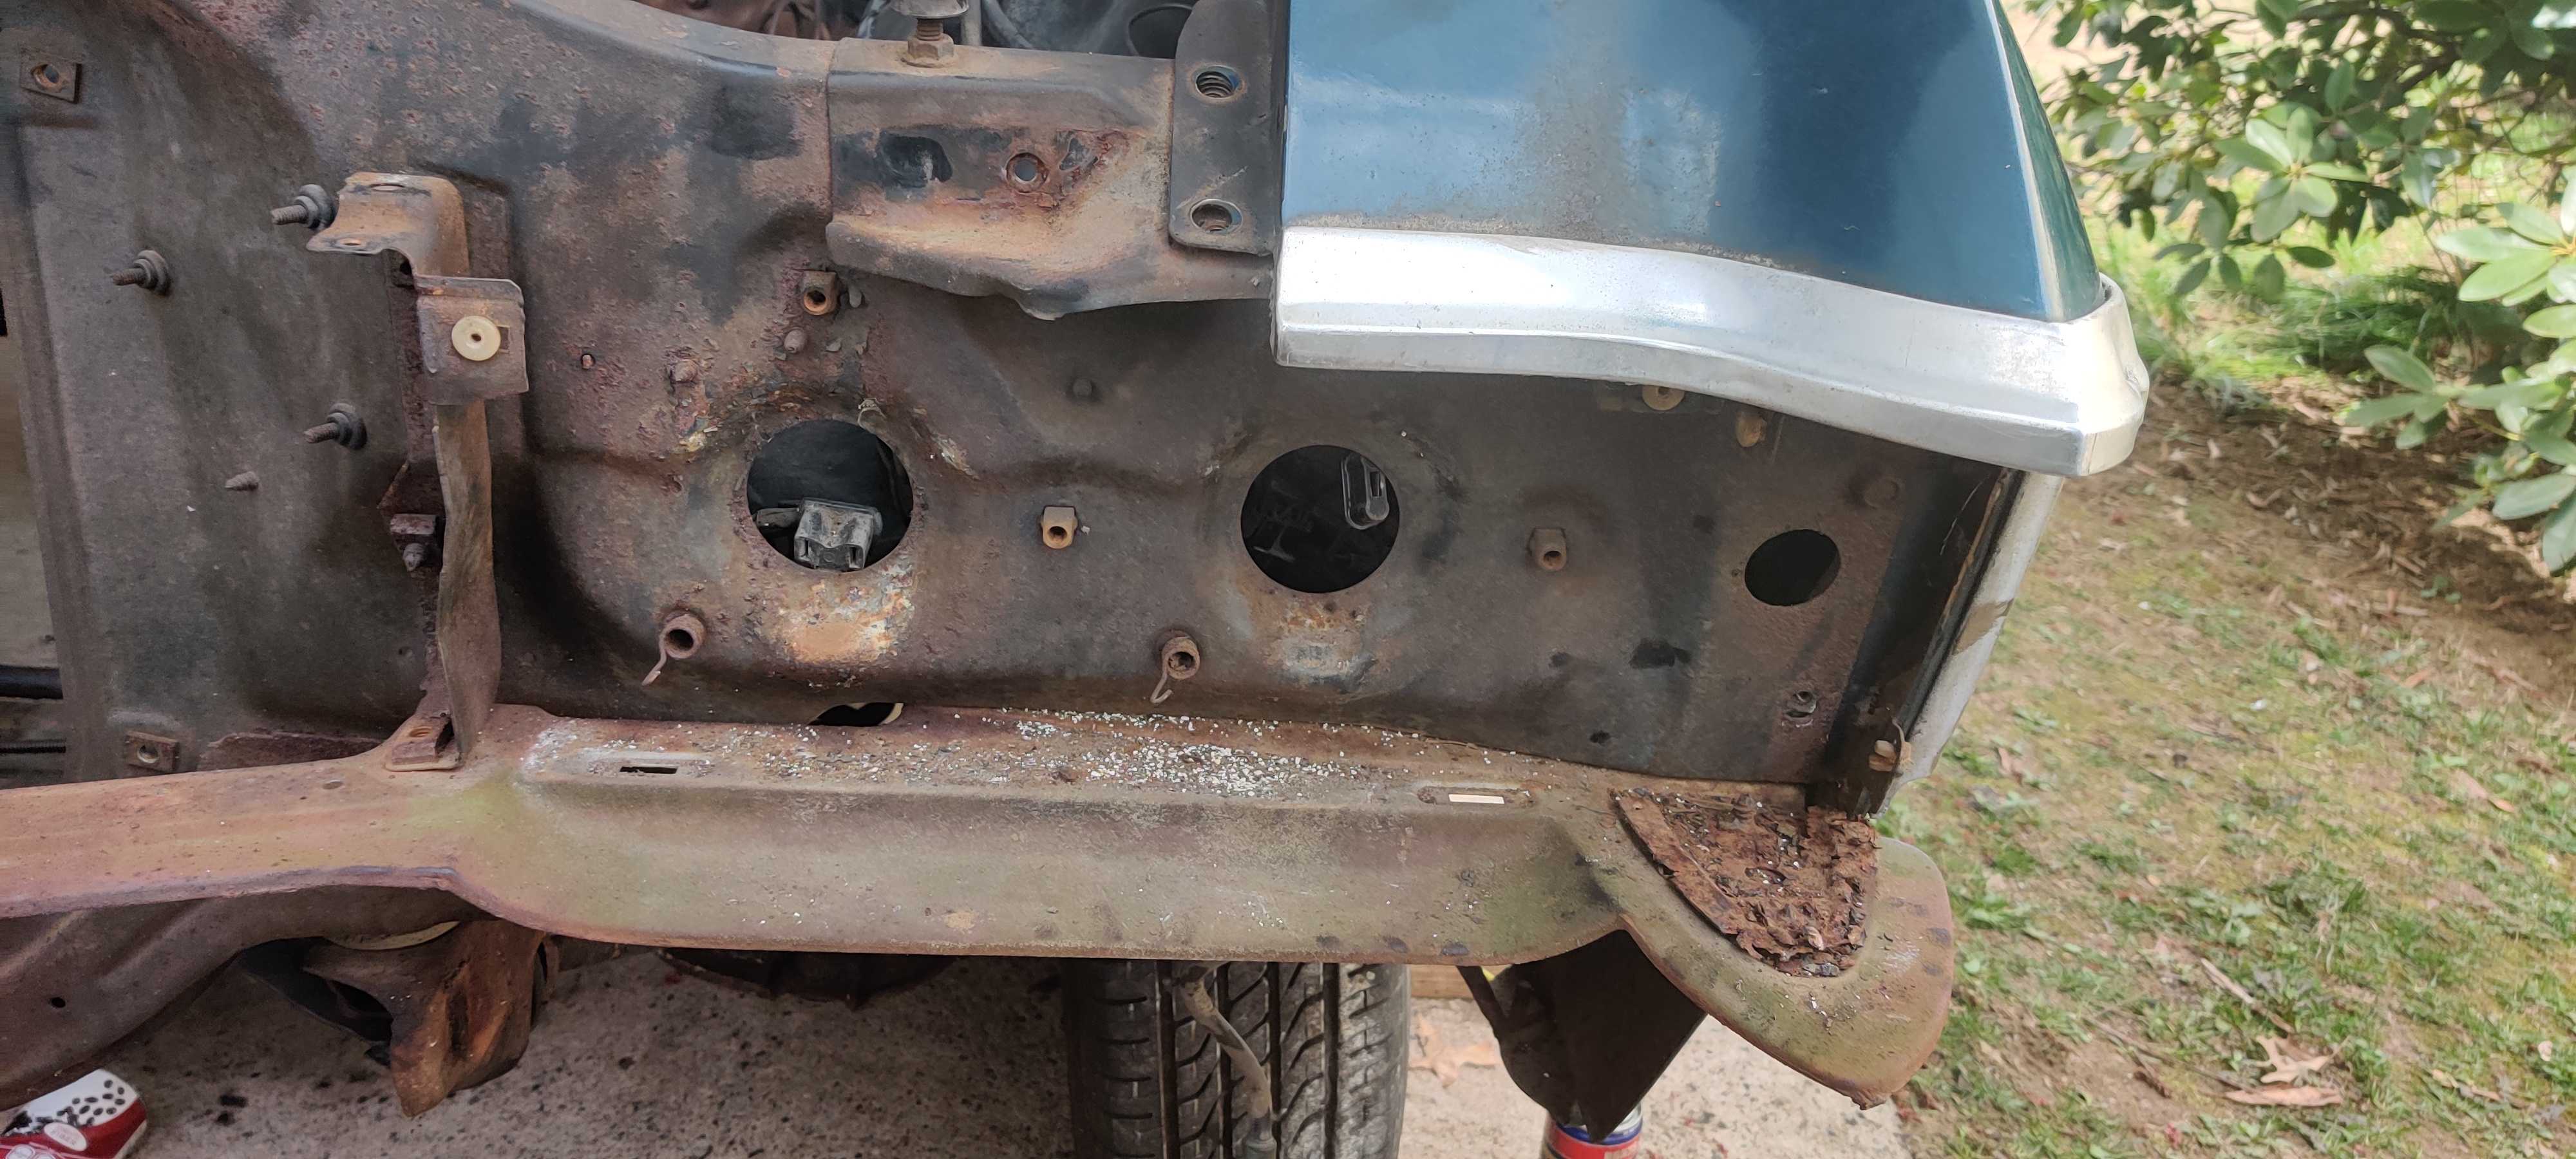
Anyway, we took the left front fender off and found more rust damage (are we even surprised anymore?) on the fender. I'm weighing my options on whether to replace the fenders or ship them out to get fixed.
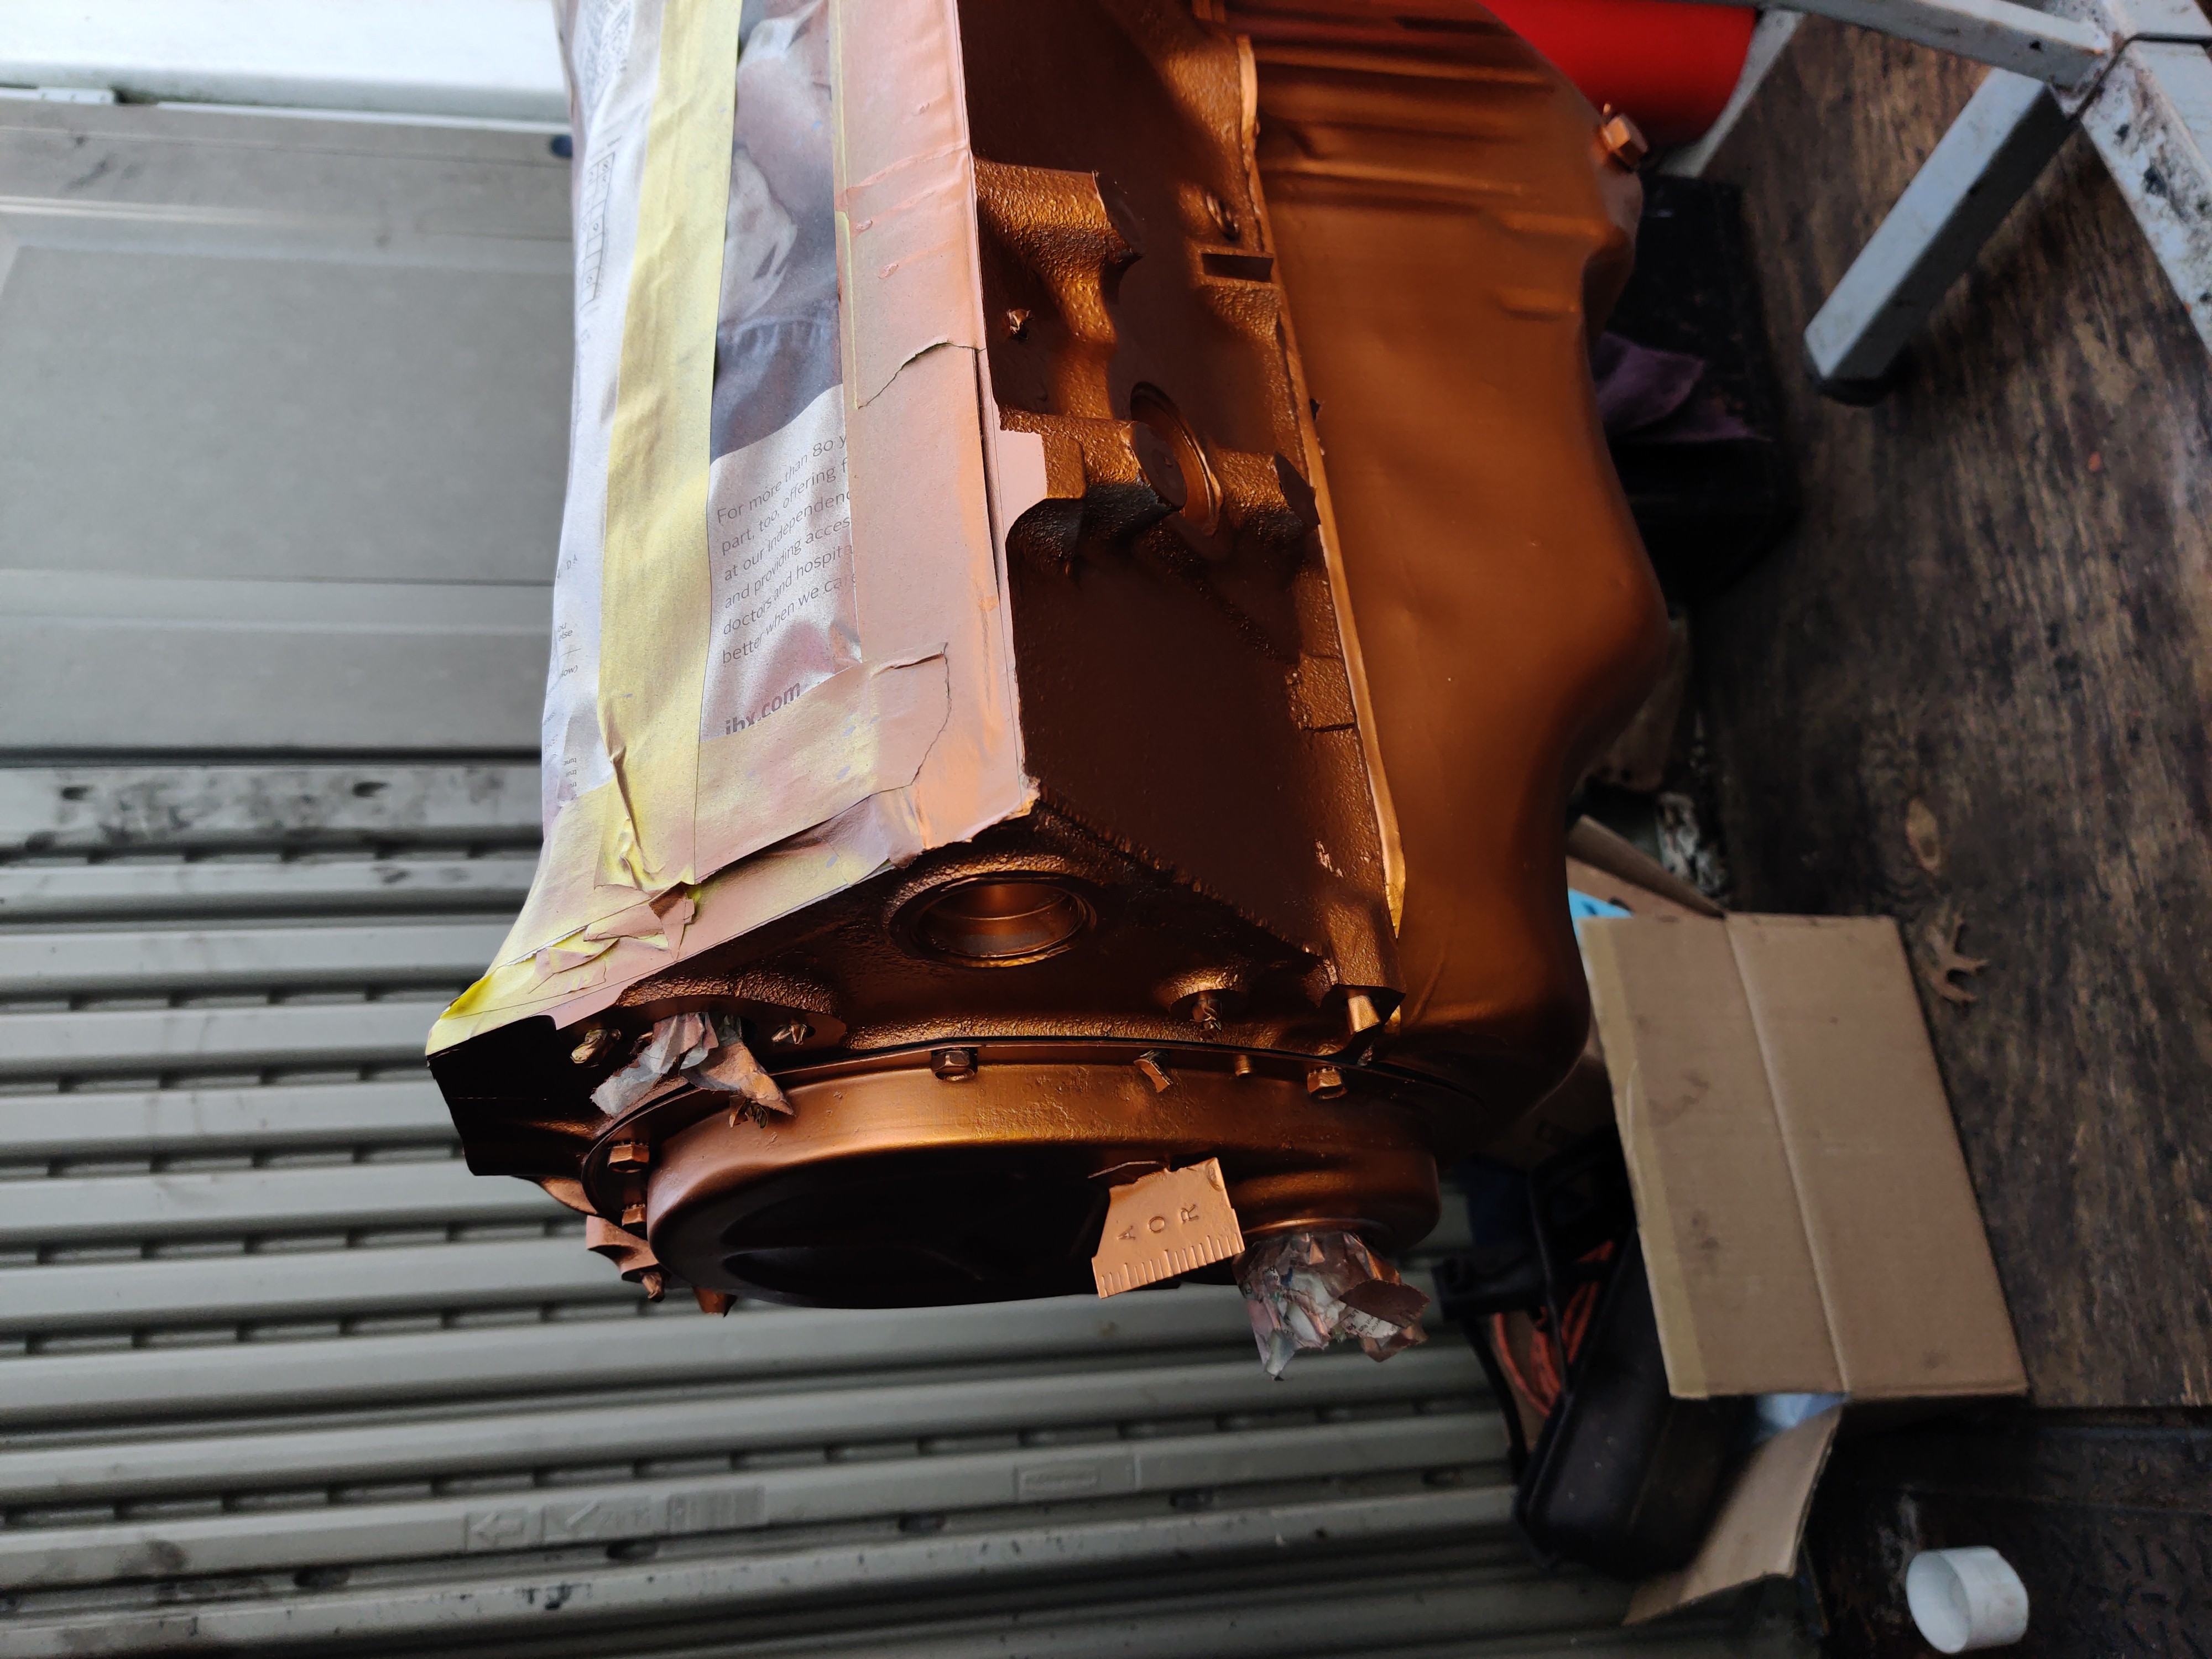
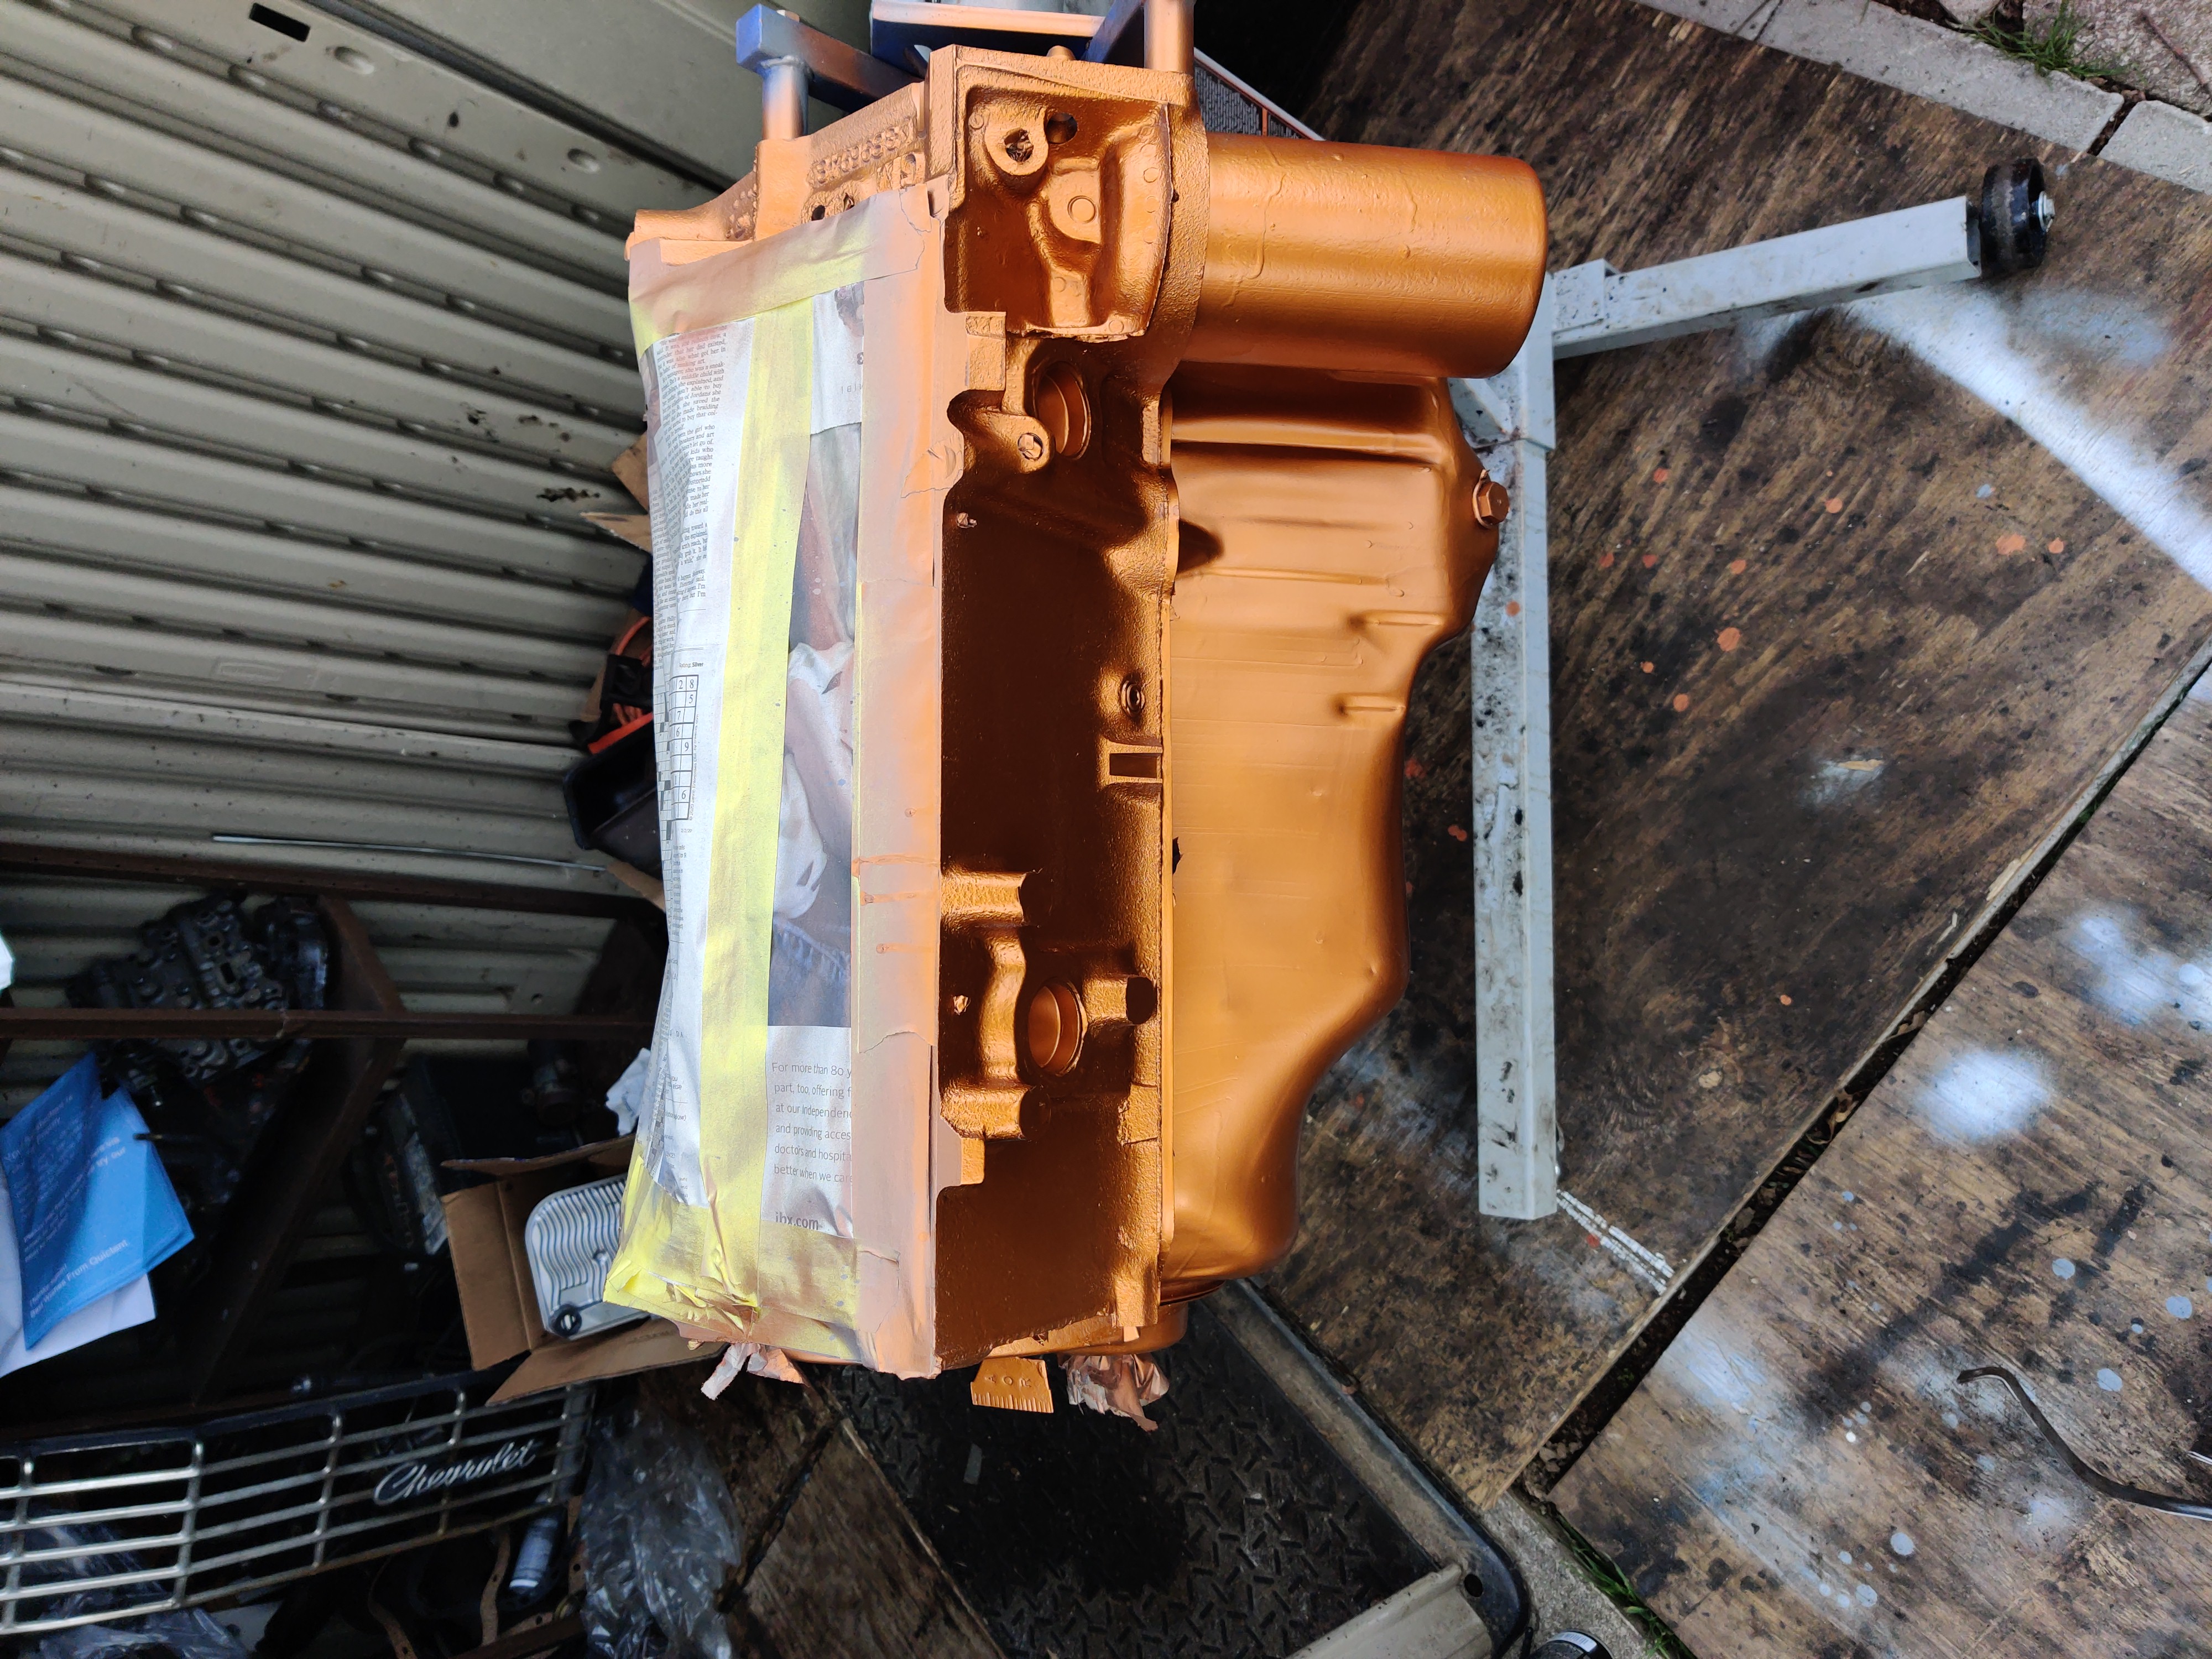
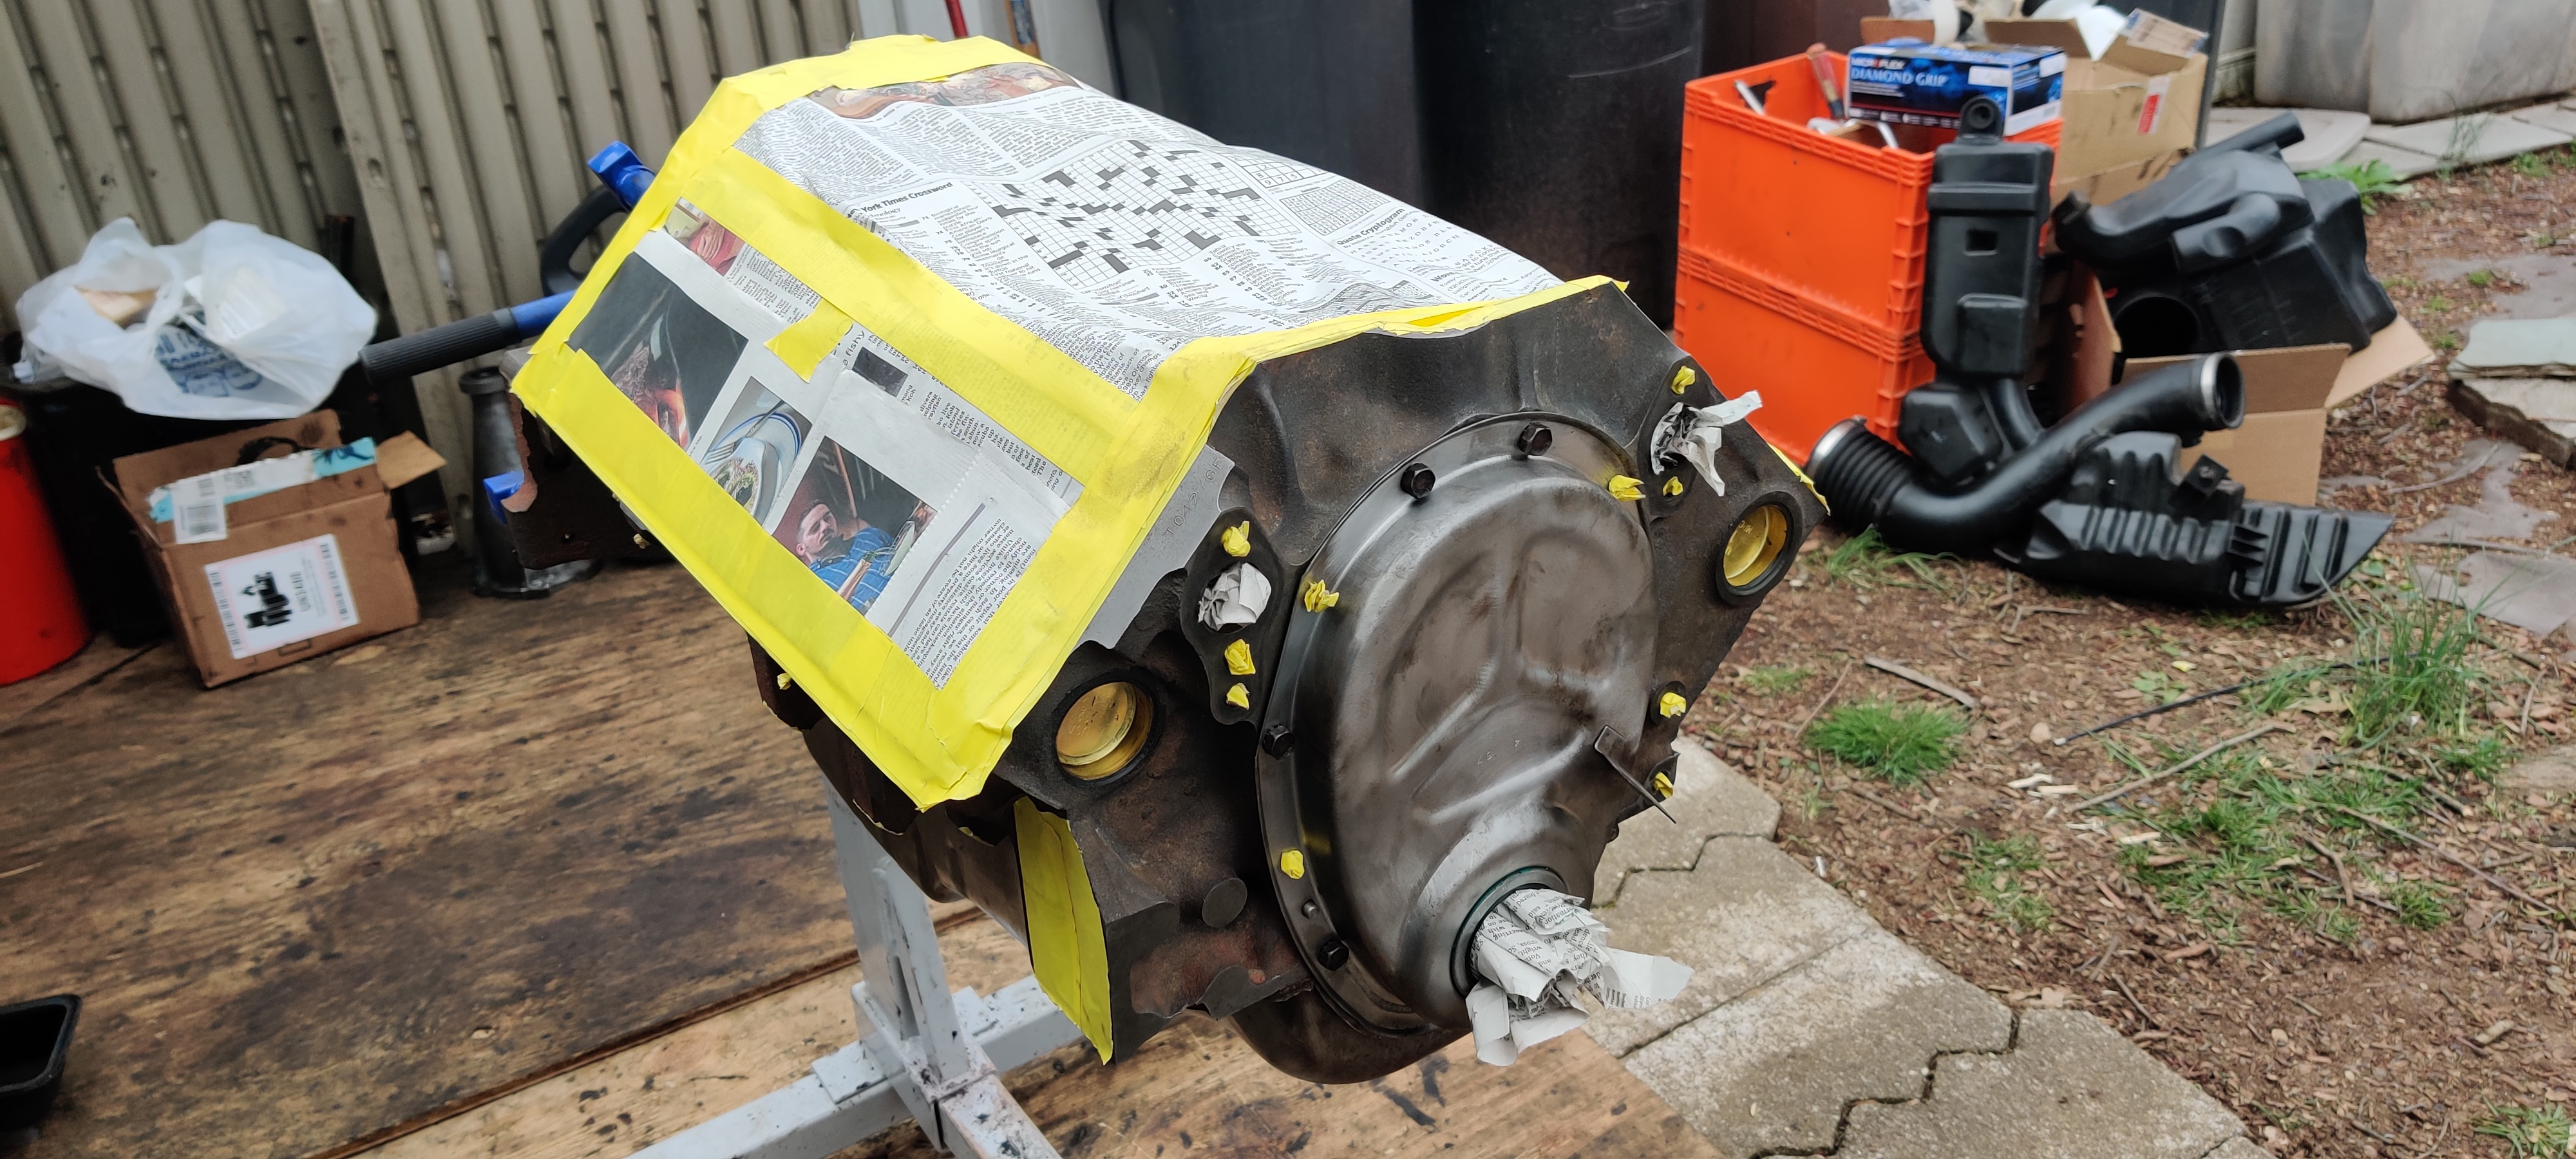
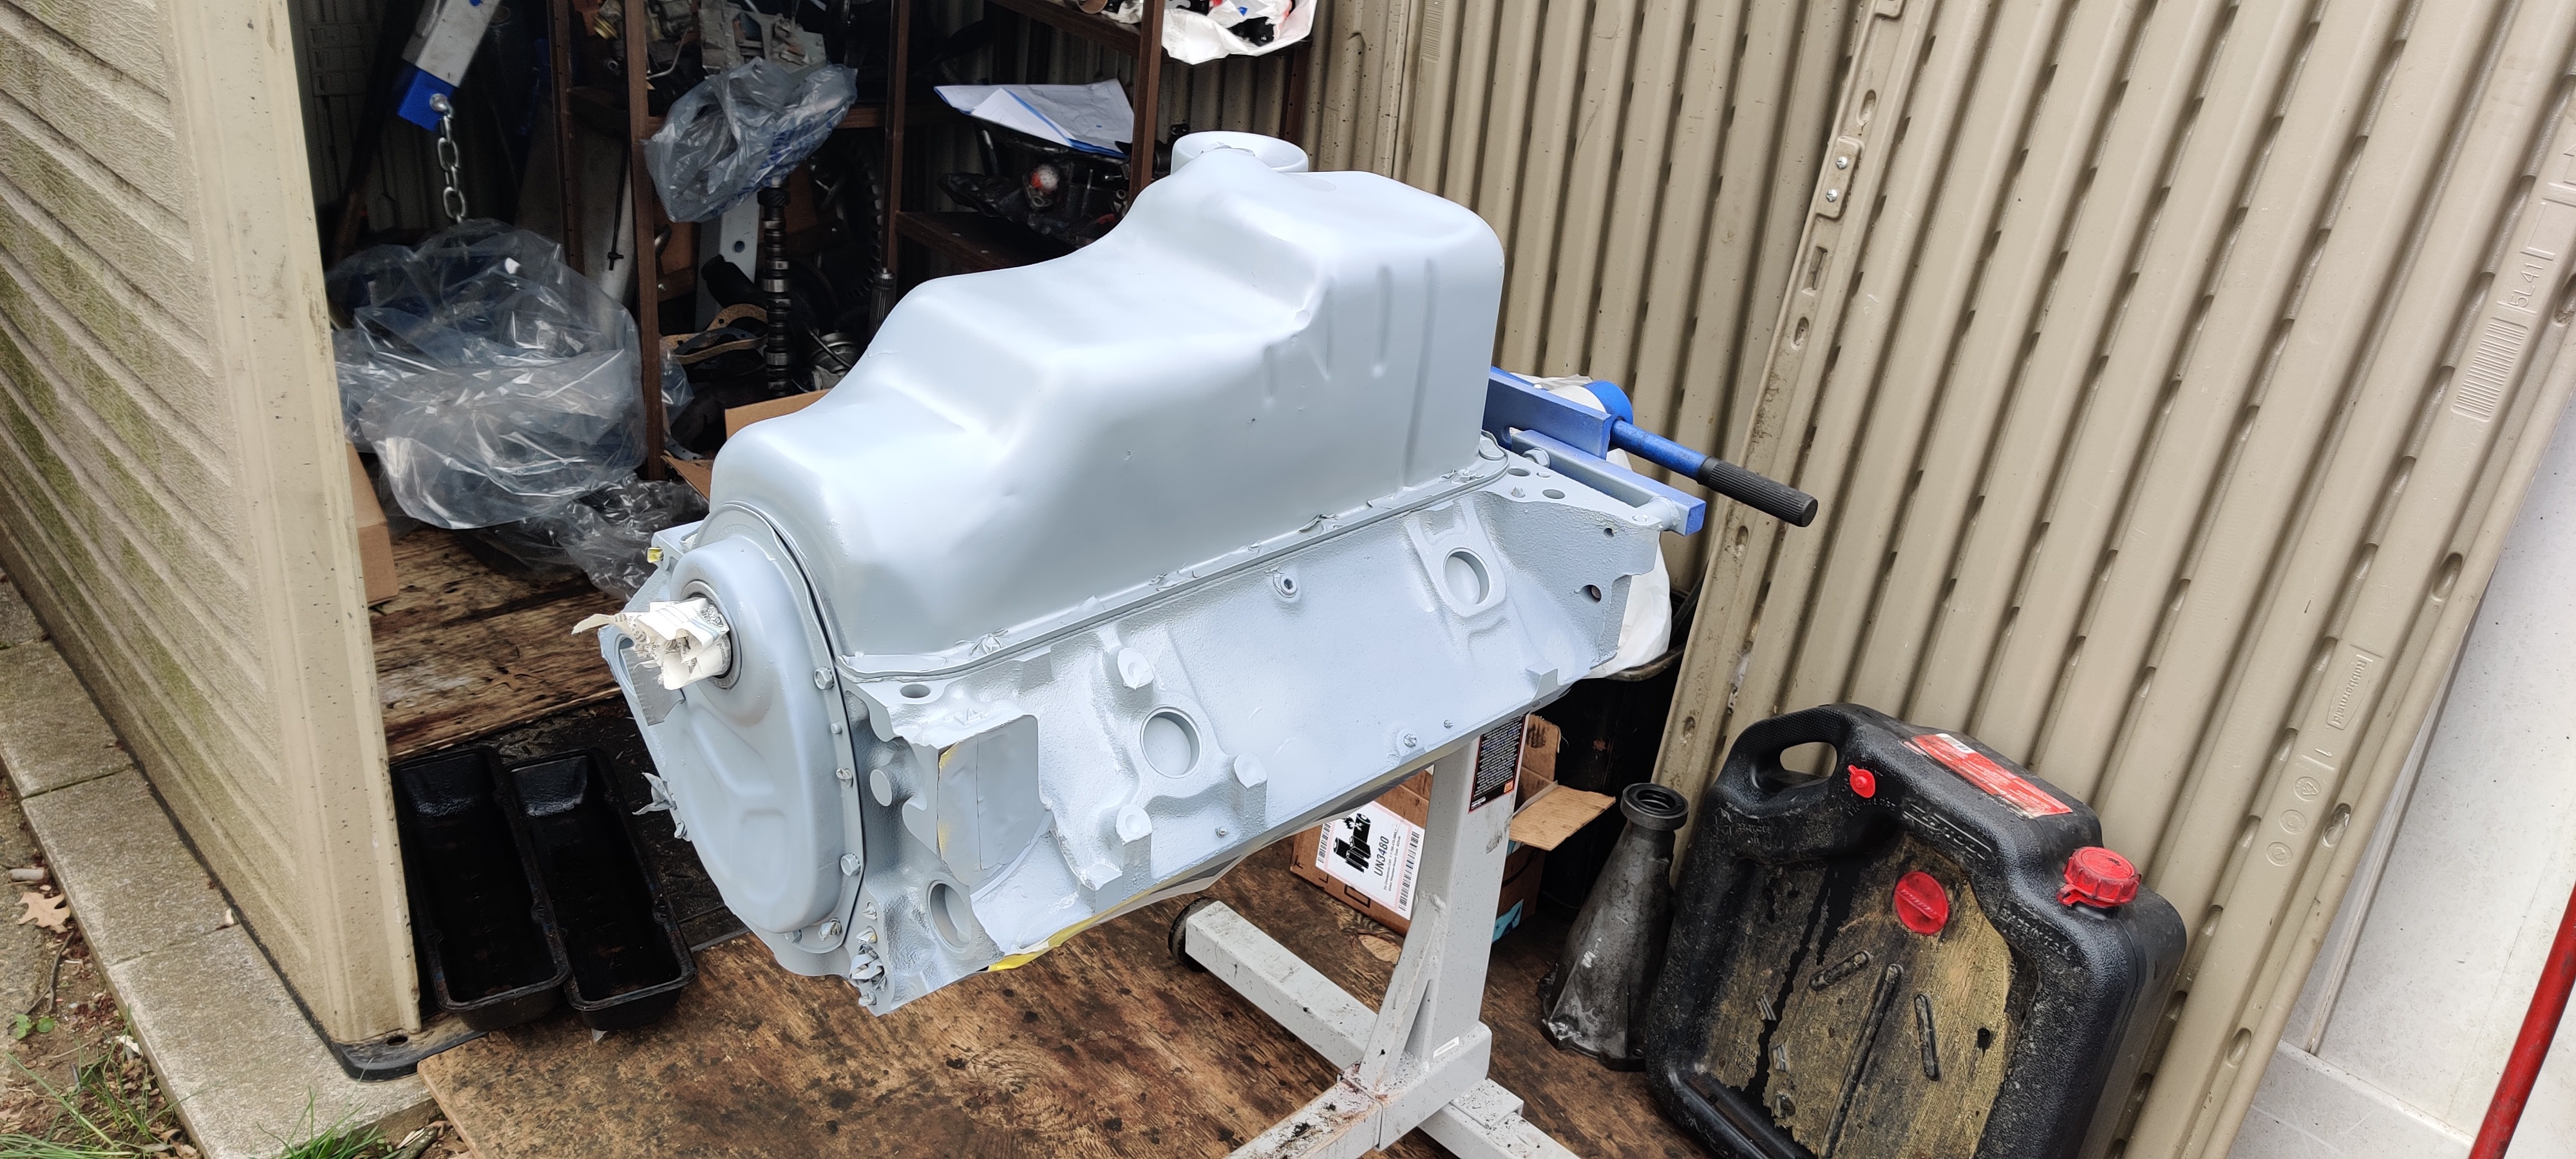
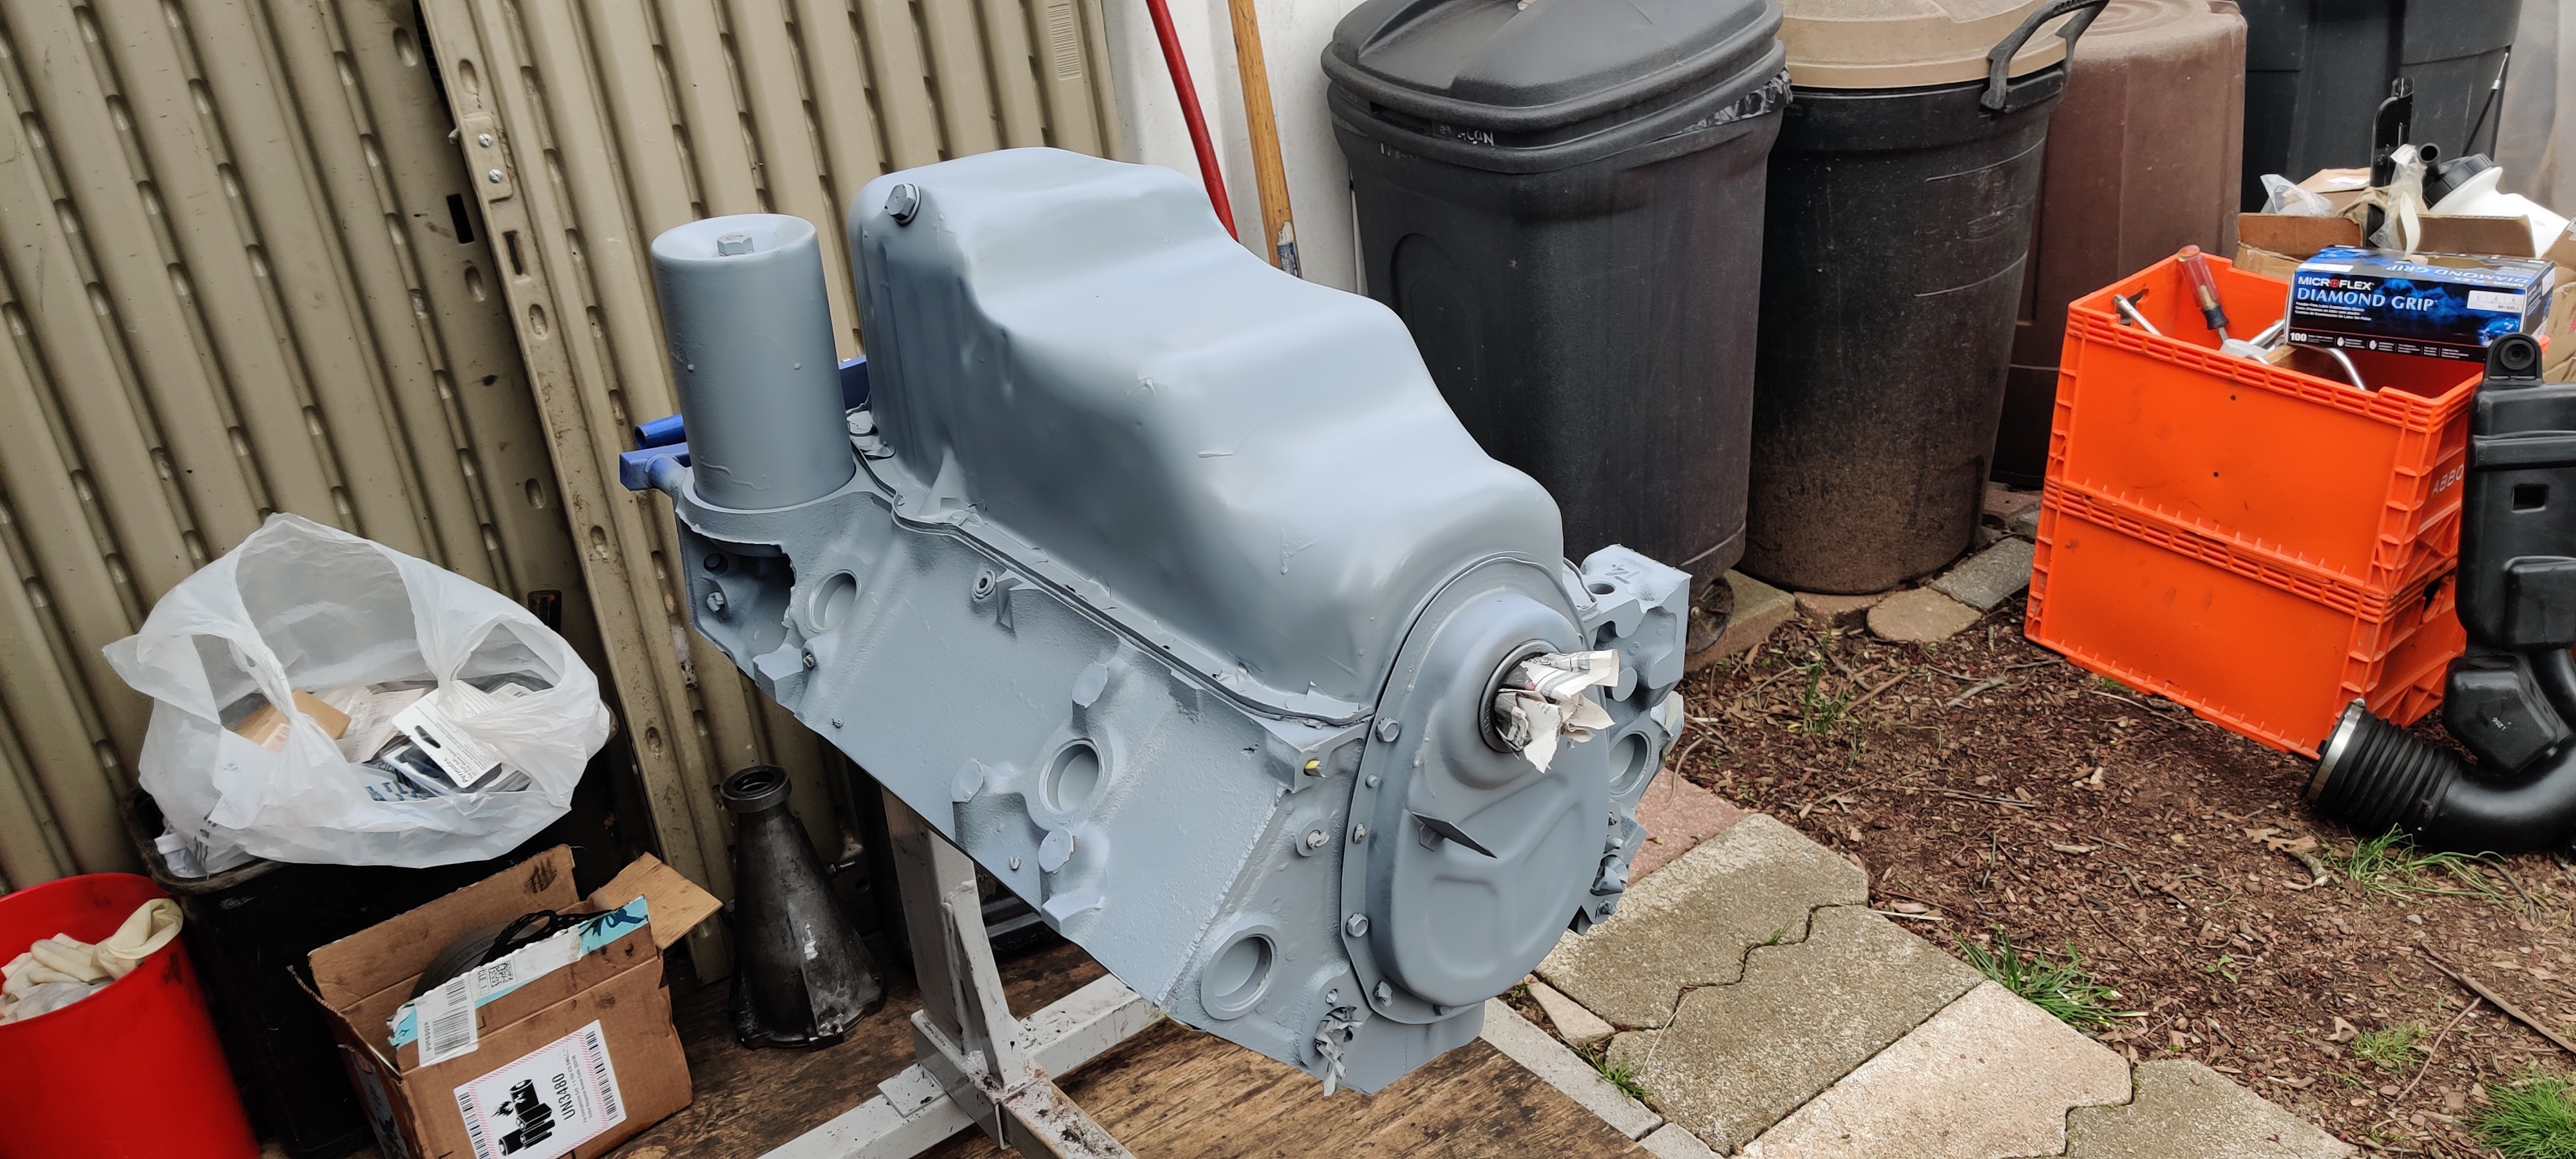
We also painted the engine block. Got two layers of the metallic orange. Looks really good. One more coat will go on next weekend.
We also took the cover off the differential, and to our actual surprise, it's in great shape. Finally something on the car that isn't worn, broken, or rusted out. The fluid stank pretty bad though.
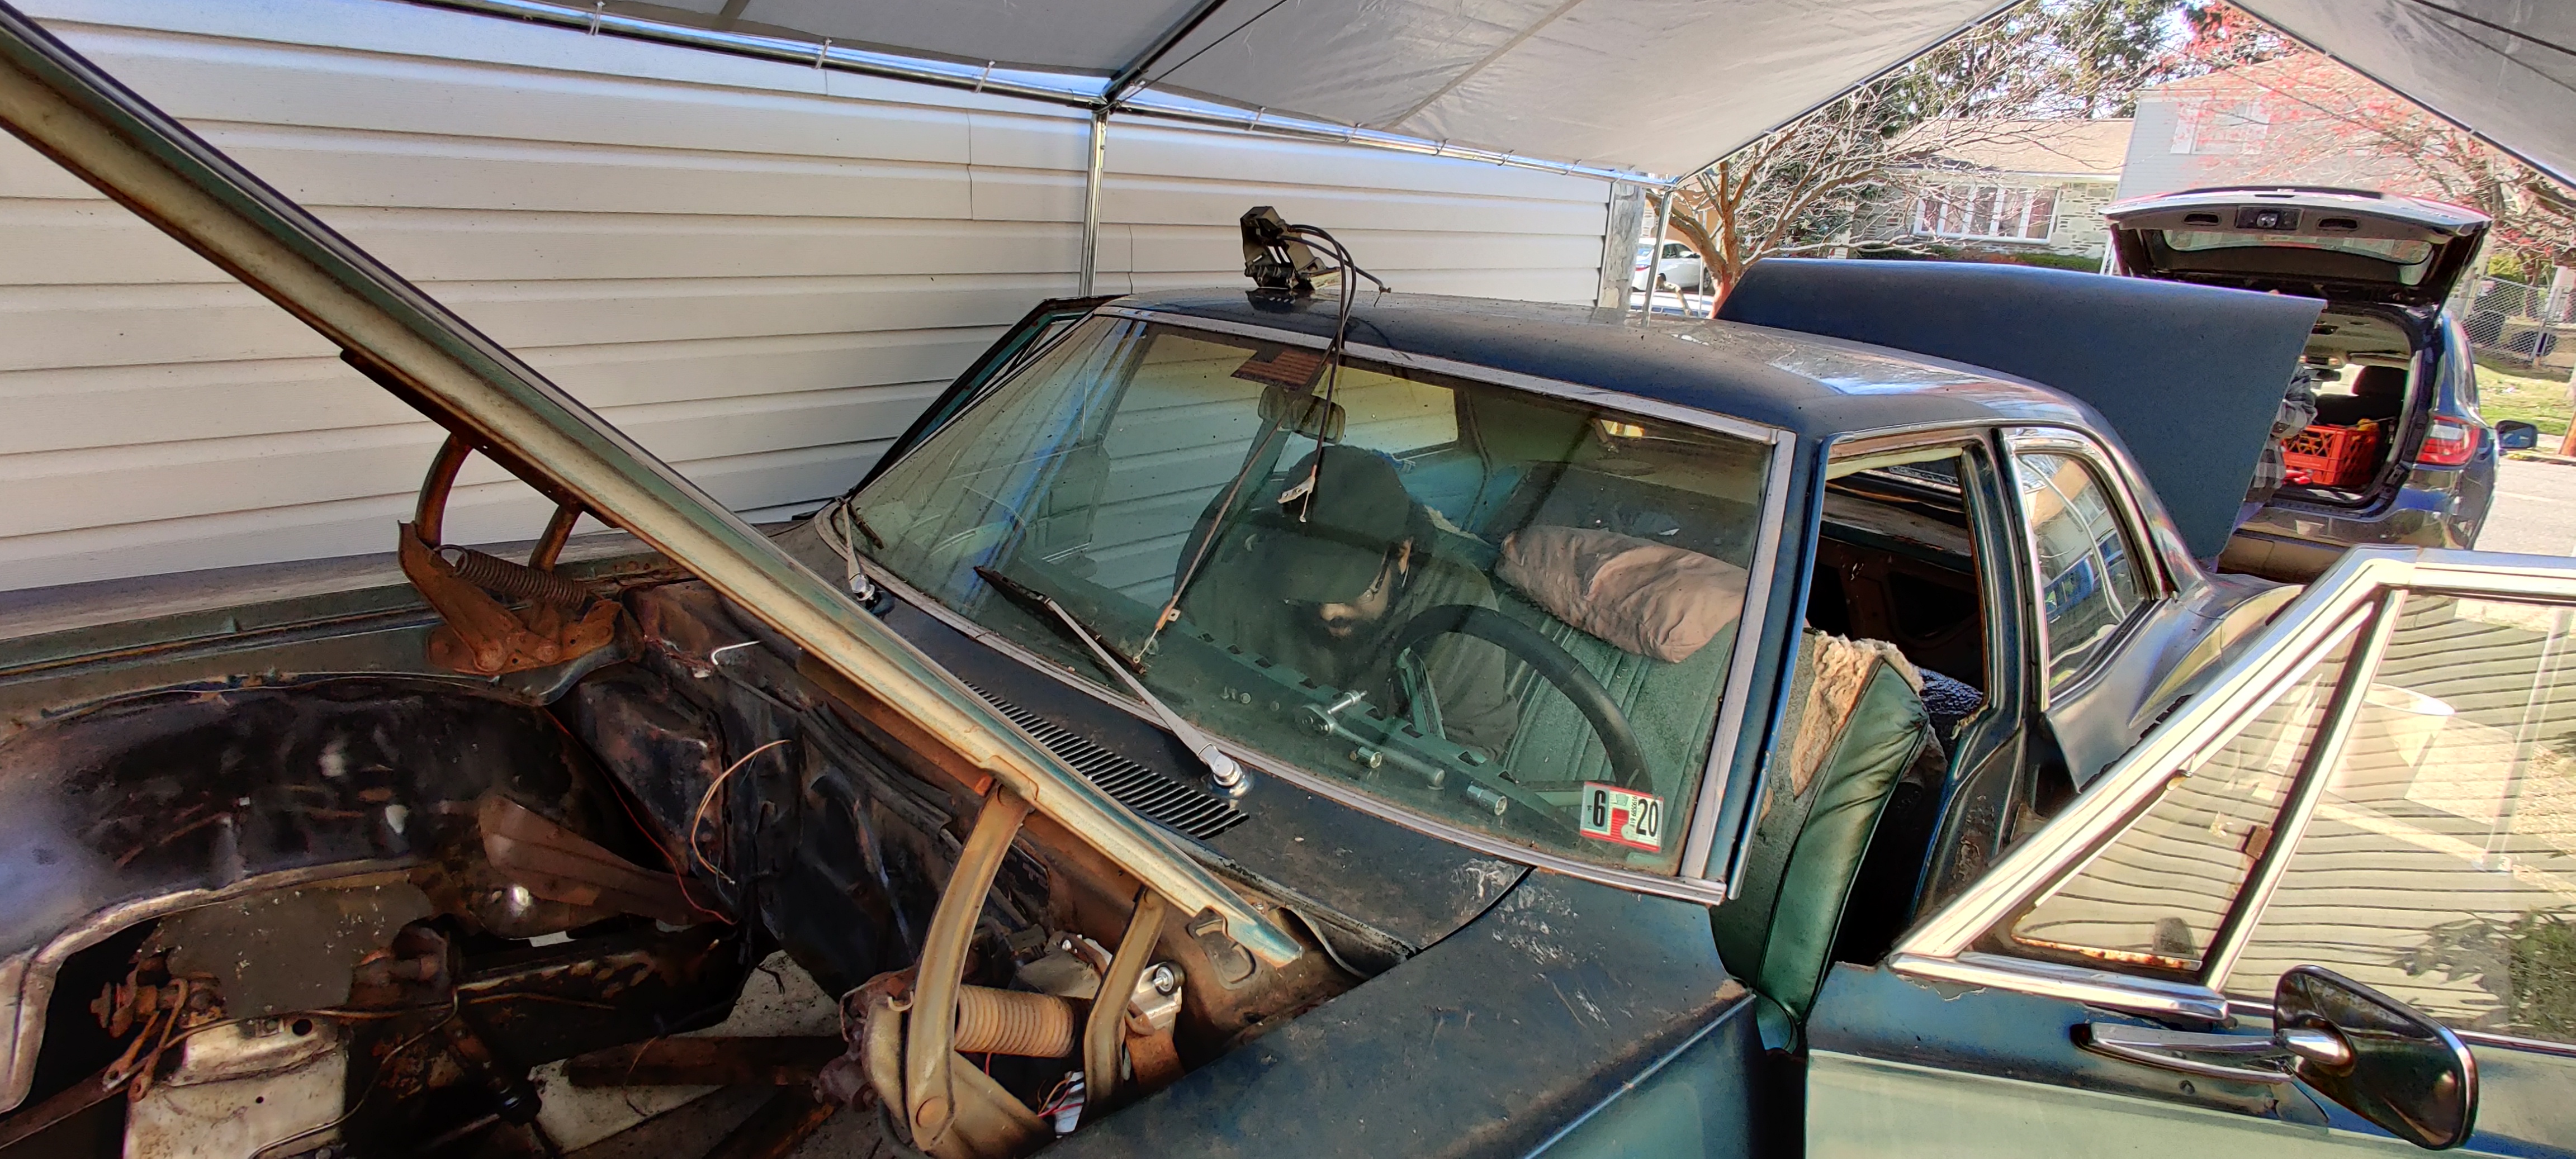
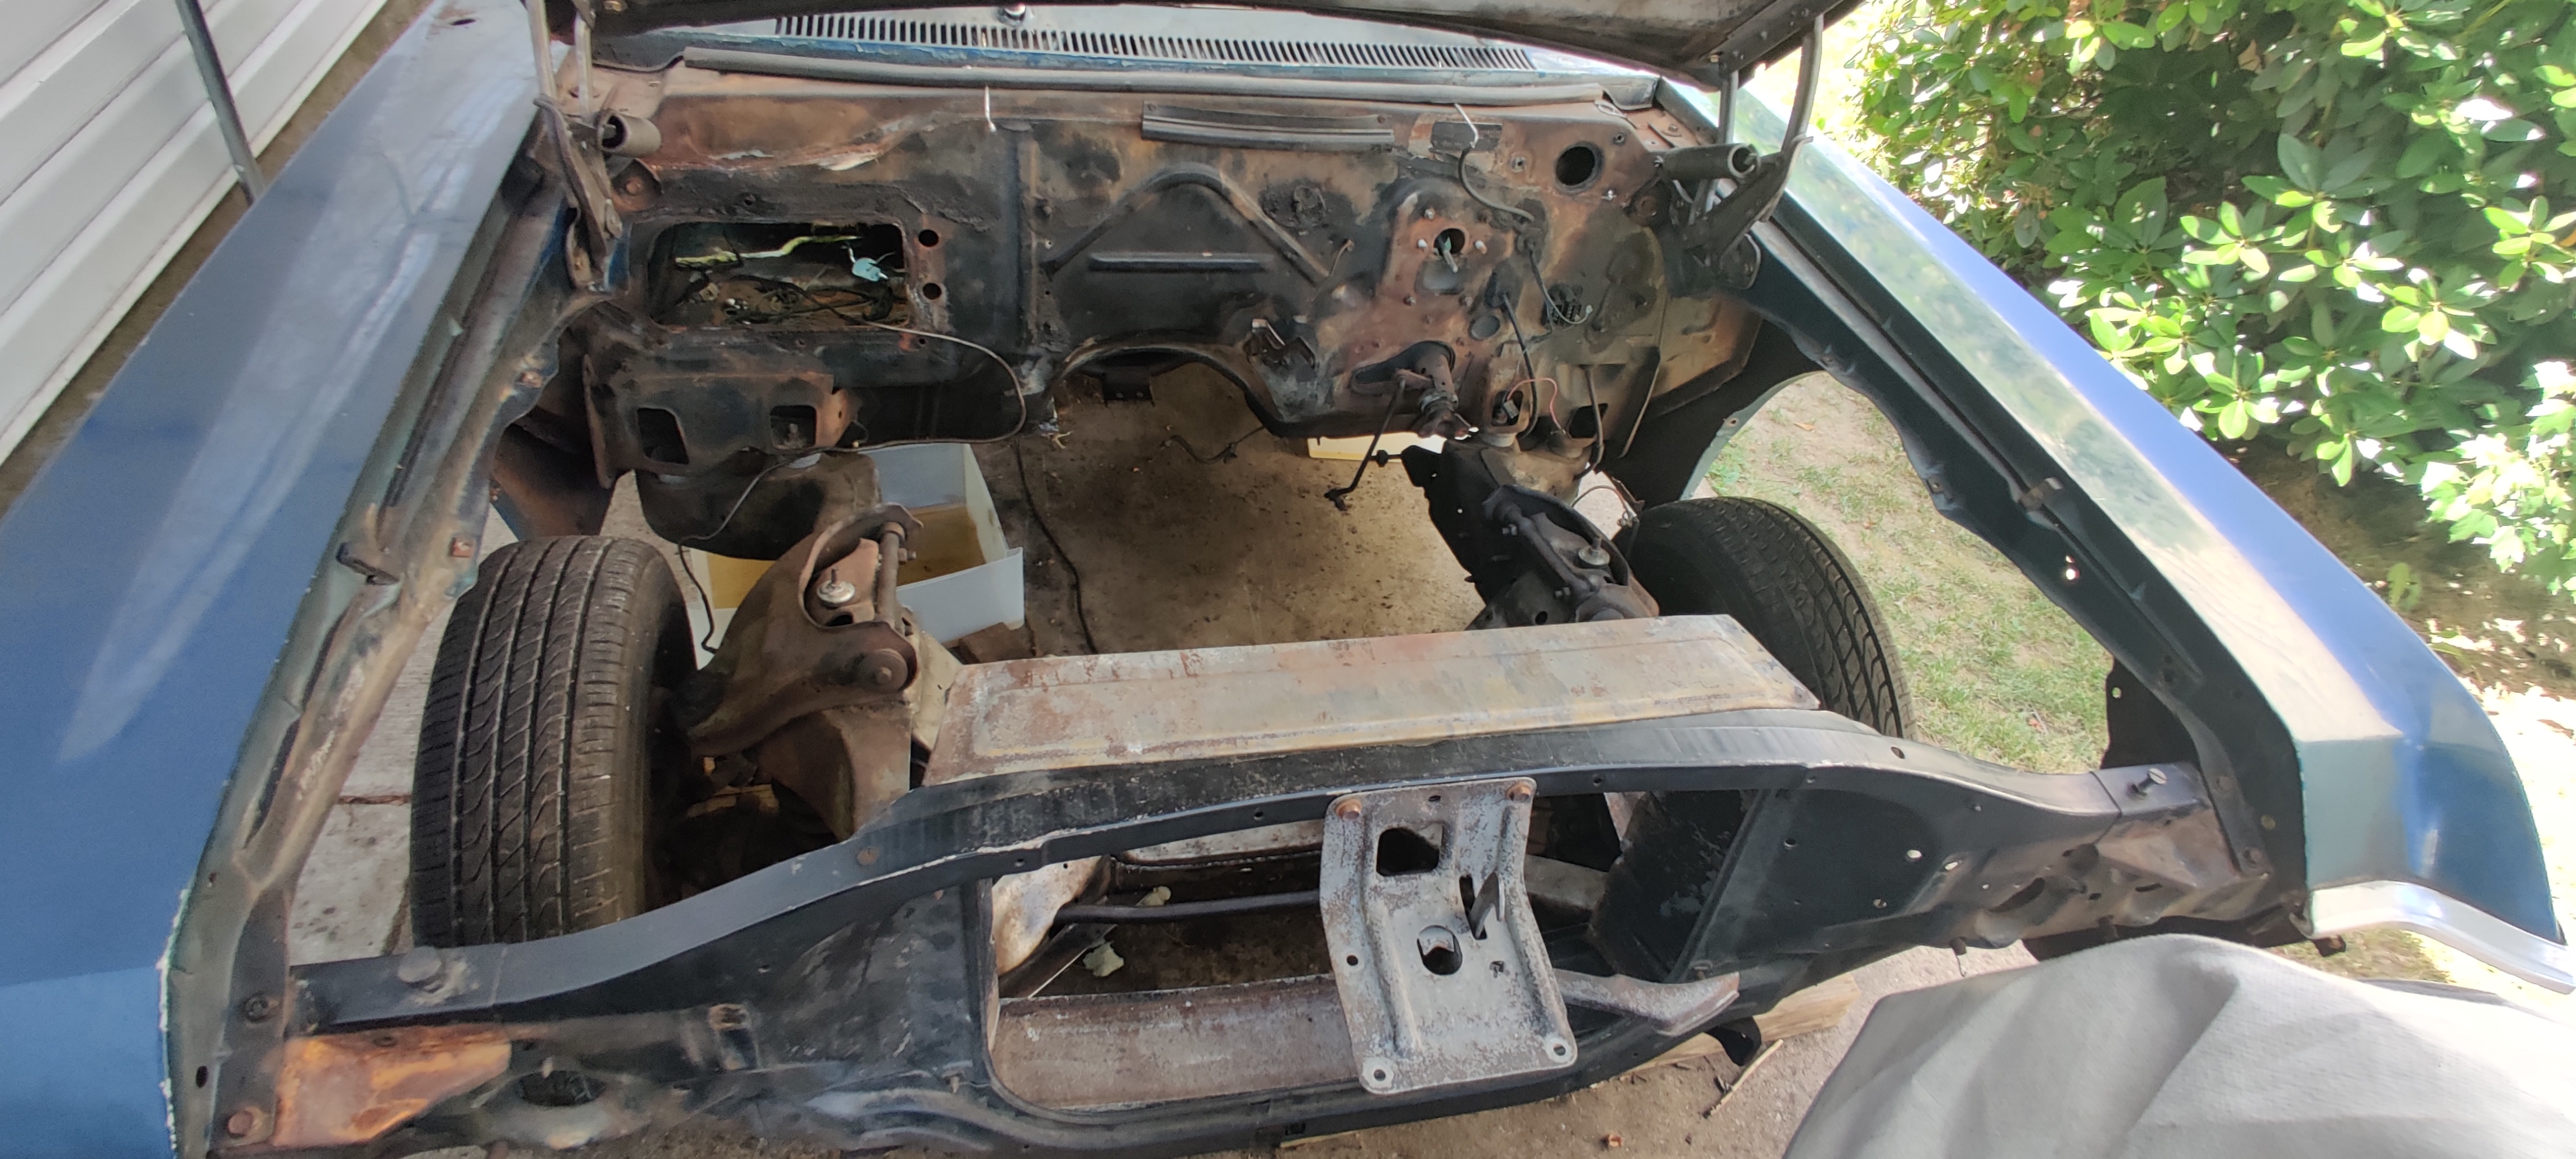
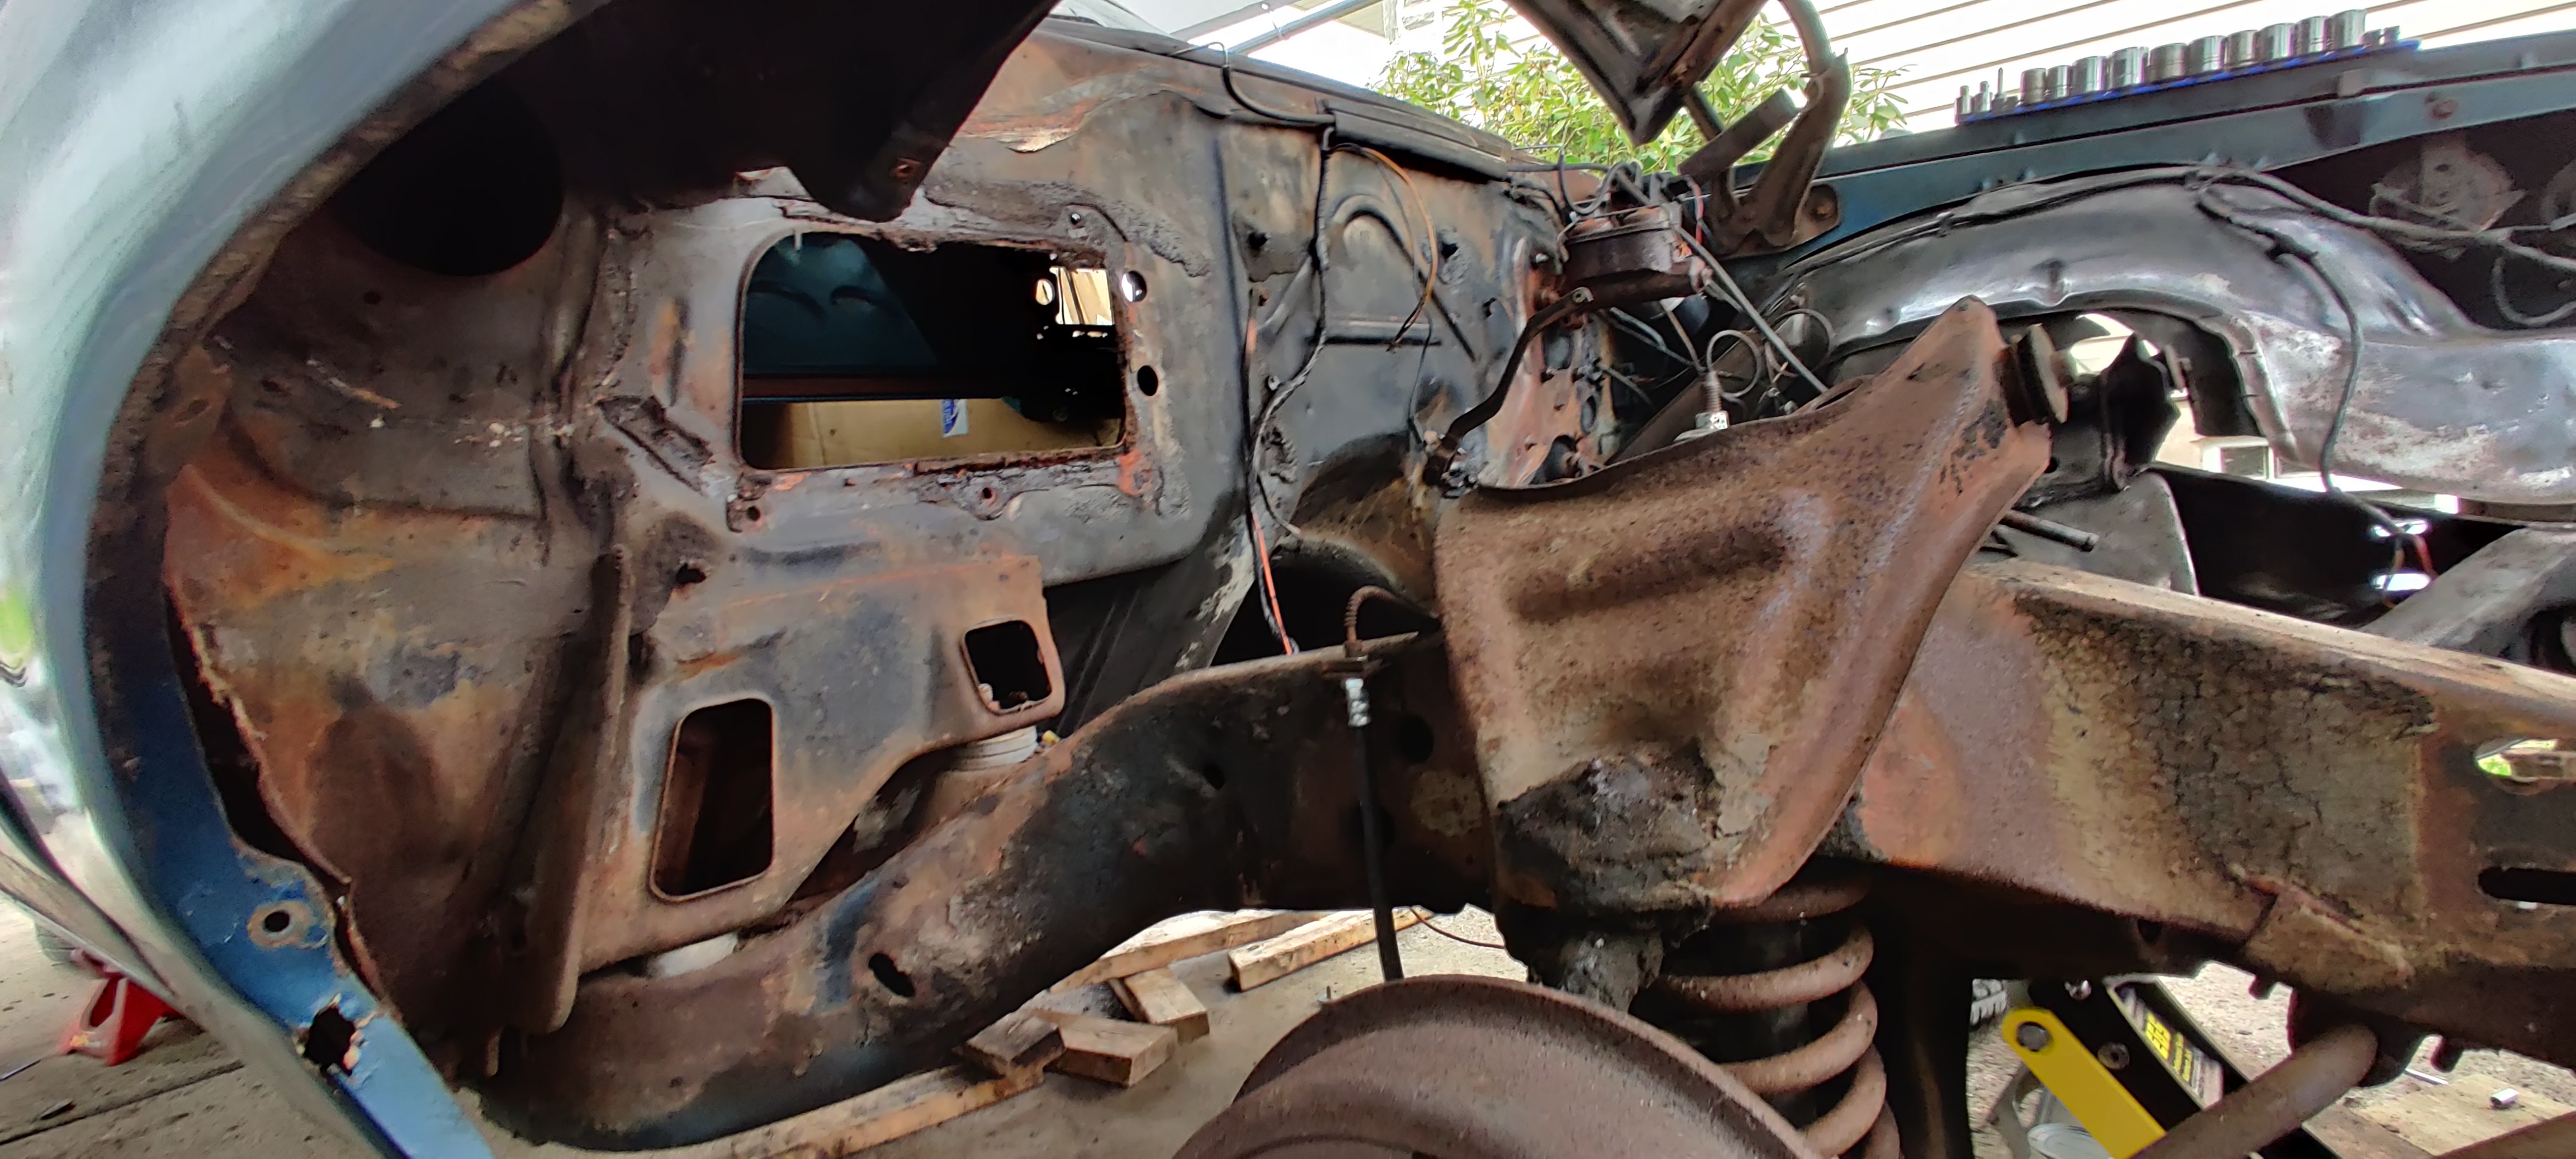
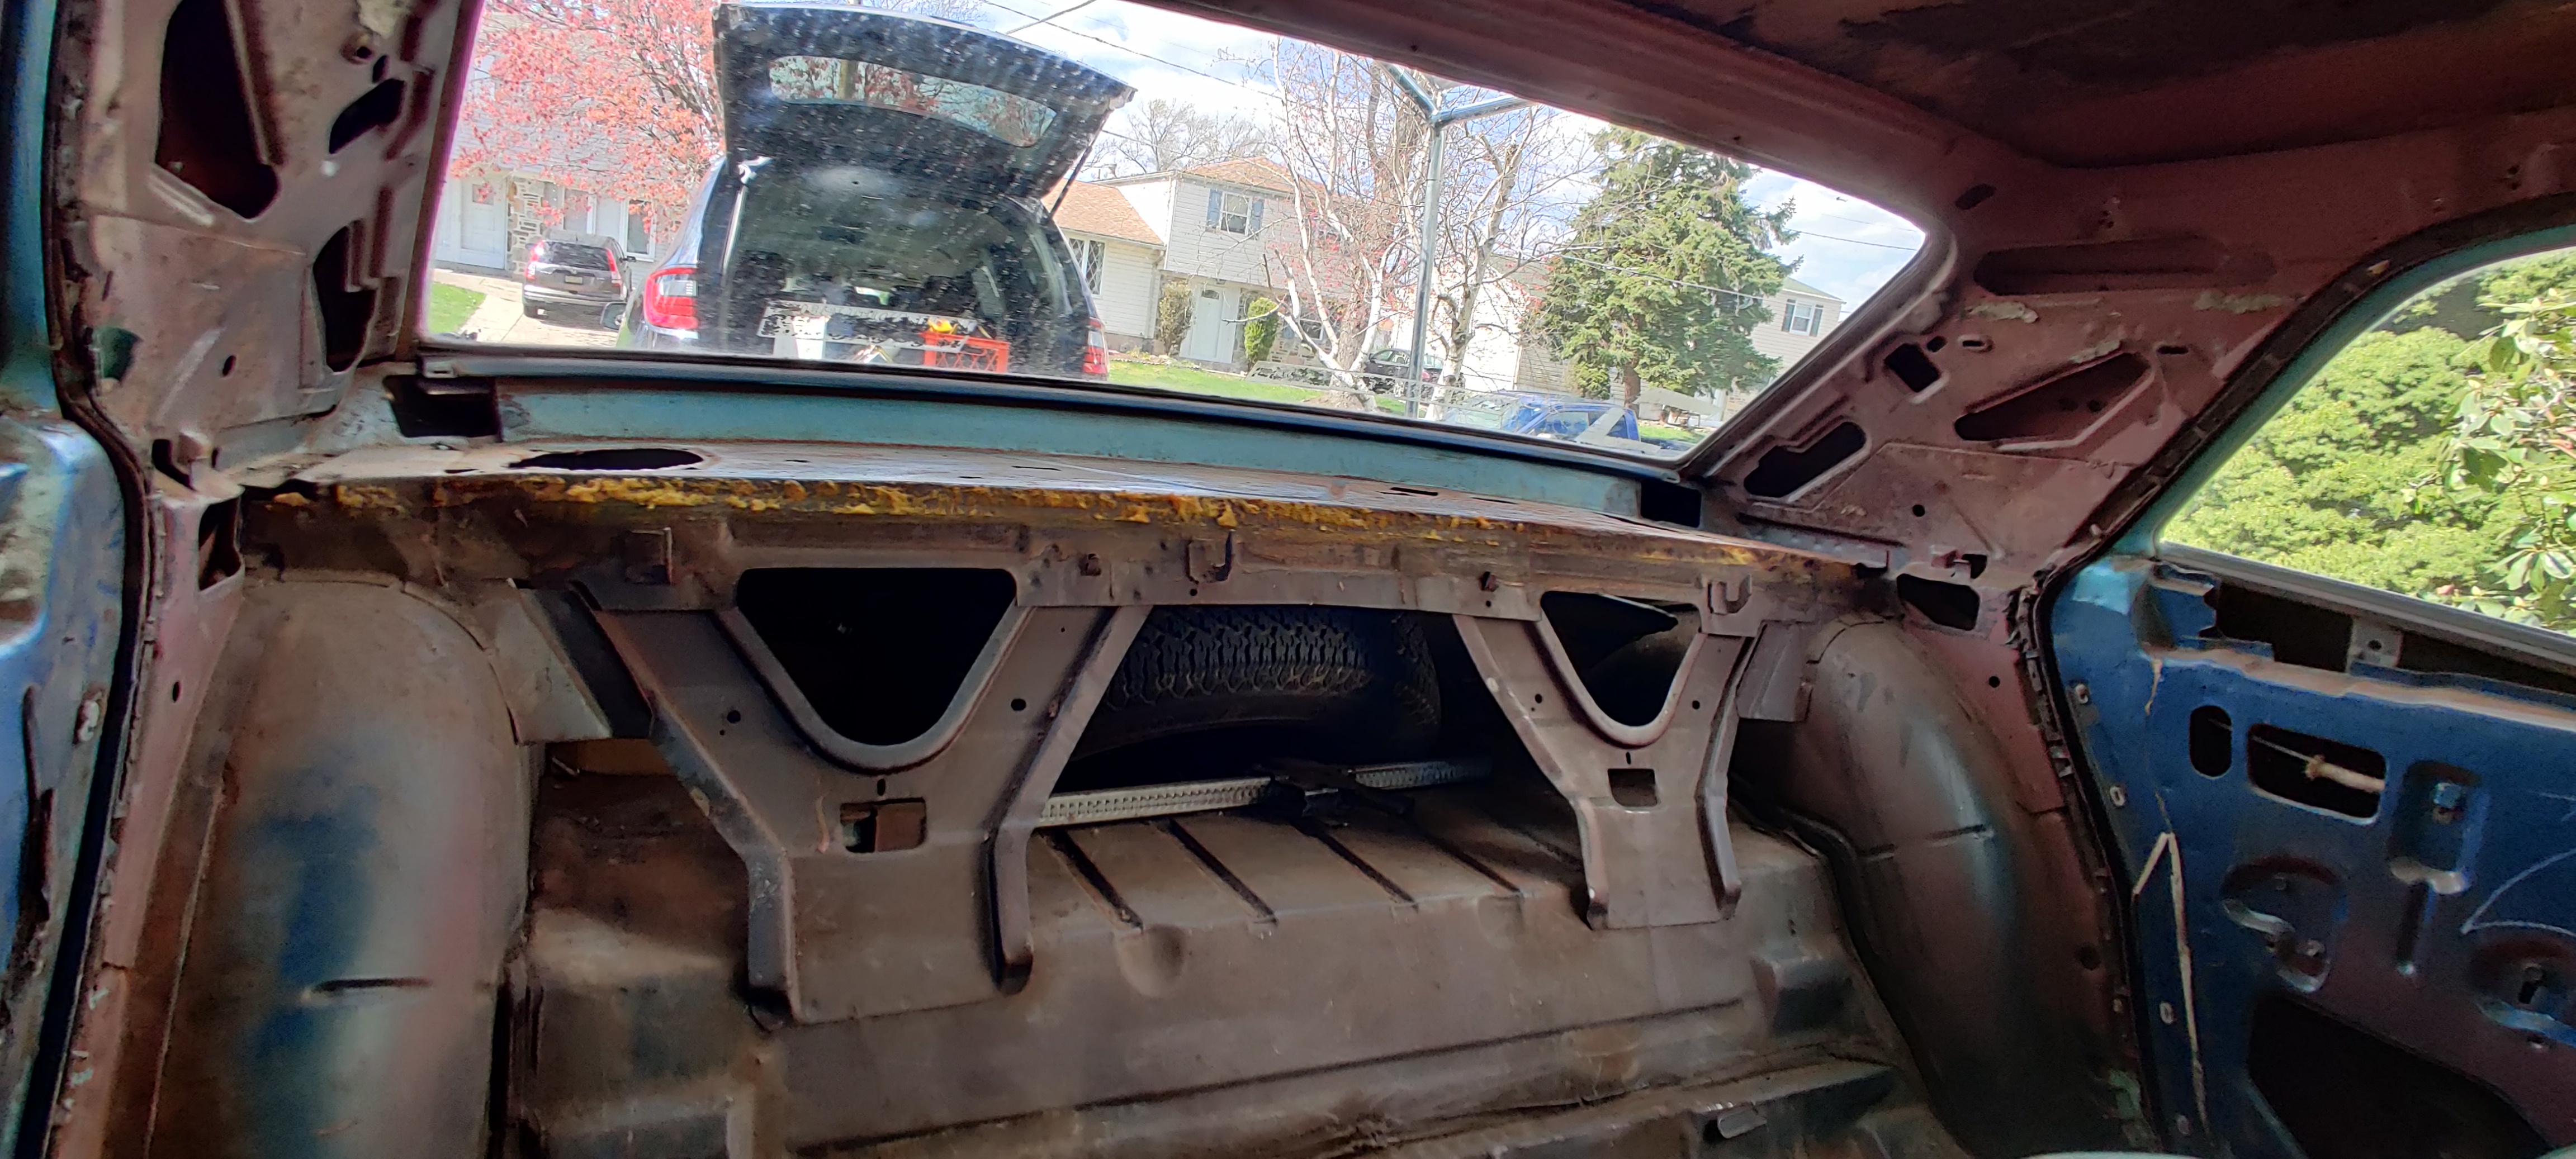
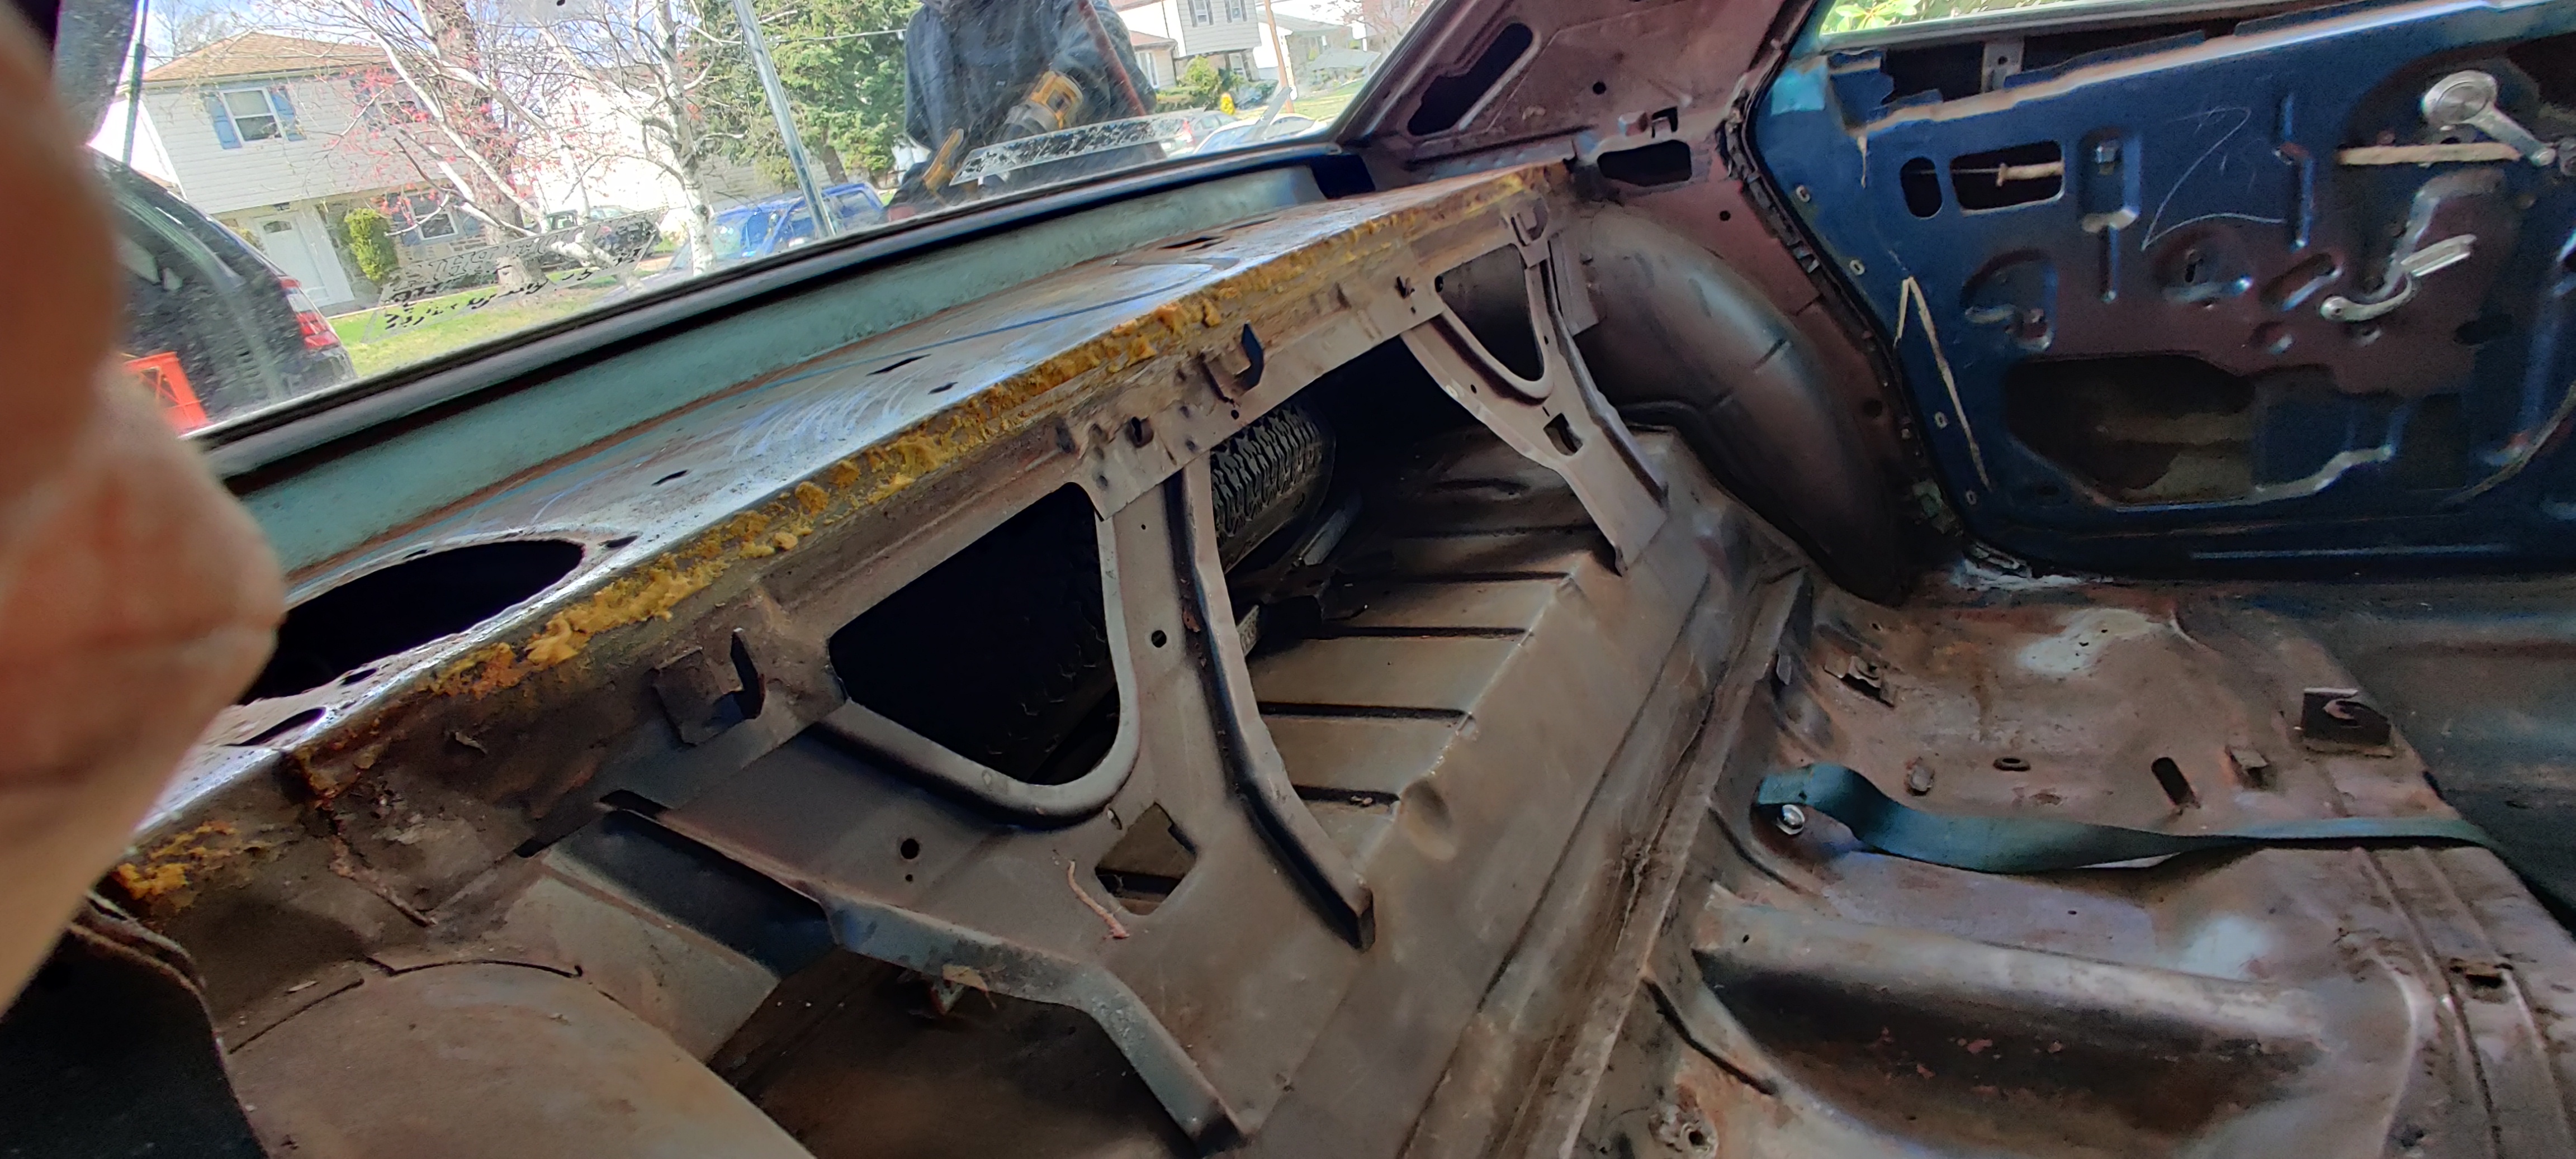
We then focused our attention to getting all the components off the firewall so we can get it sand-blasted. Got the master brake cylinder off and the windshield wiper motor/pump off as well. Was trying to disconnect the steering column, but it is pretty filthy and will not come apart. We gave up, the car won that round. We'll try again next weekend.
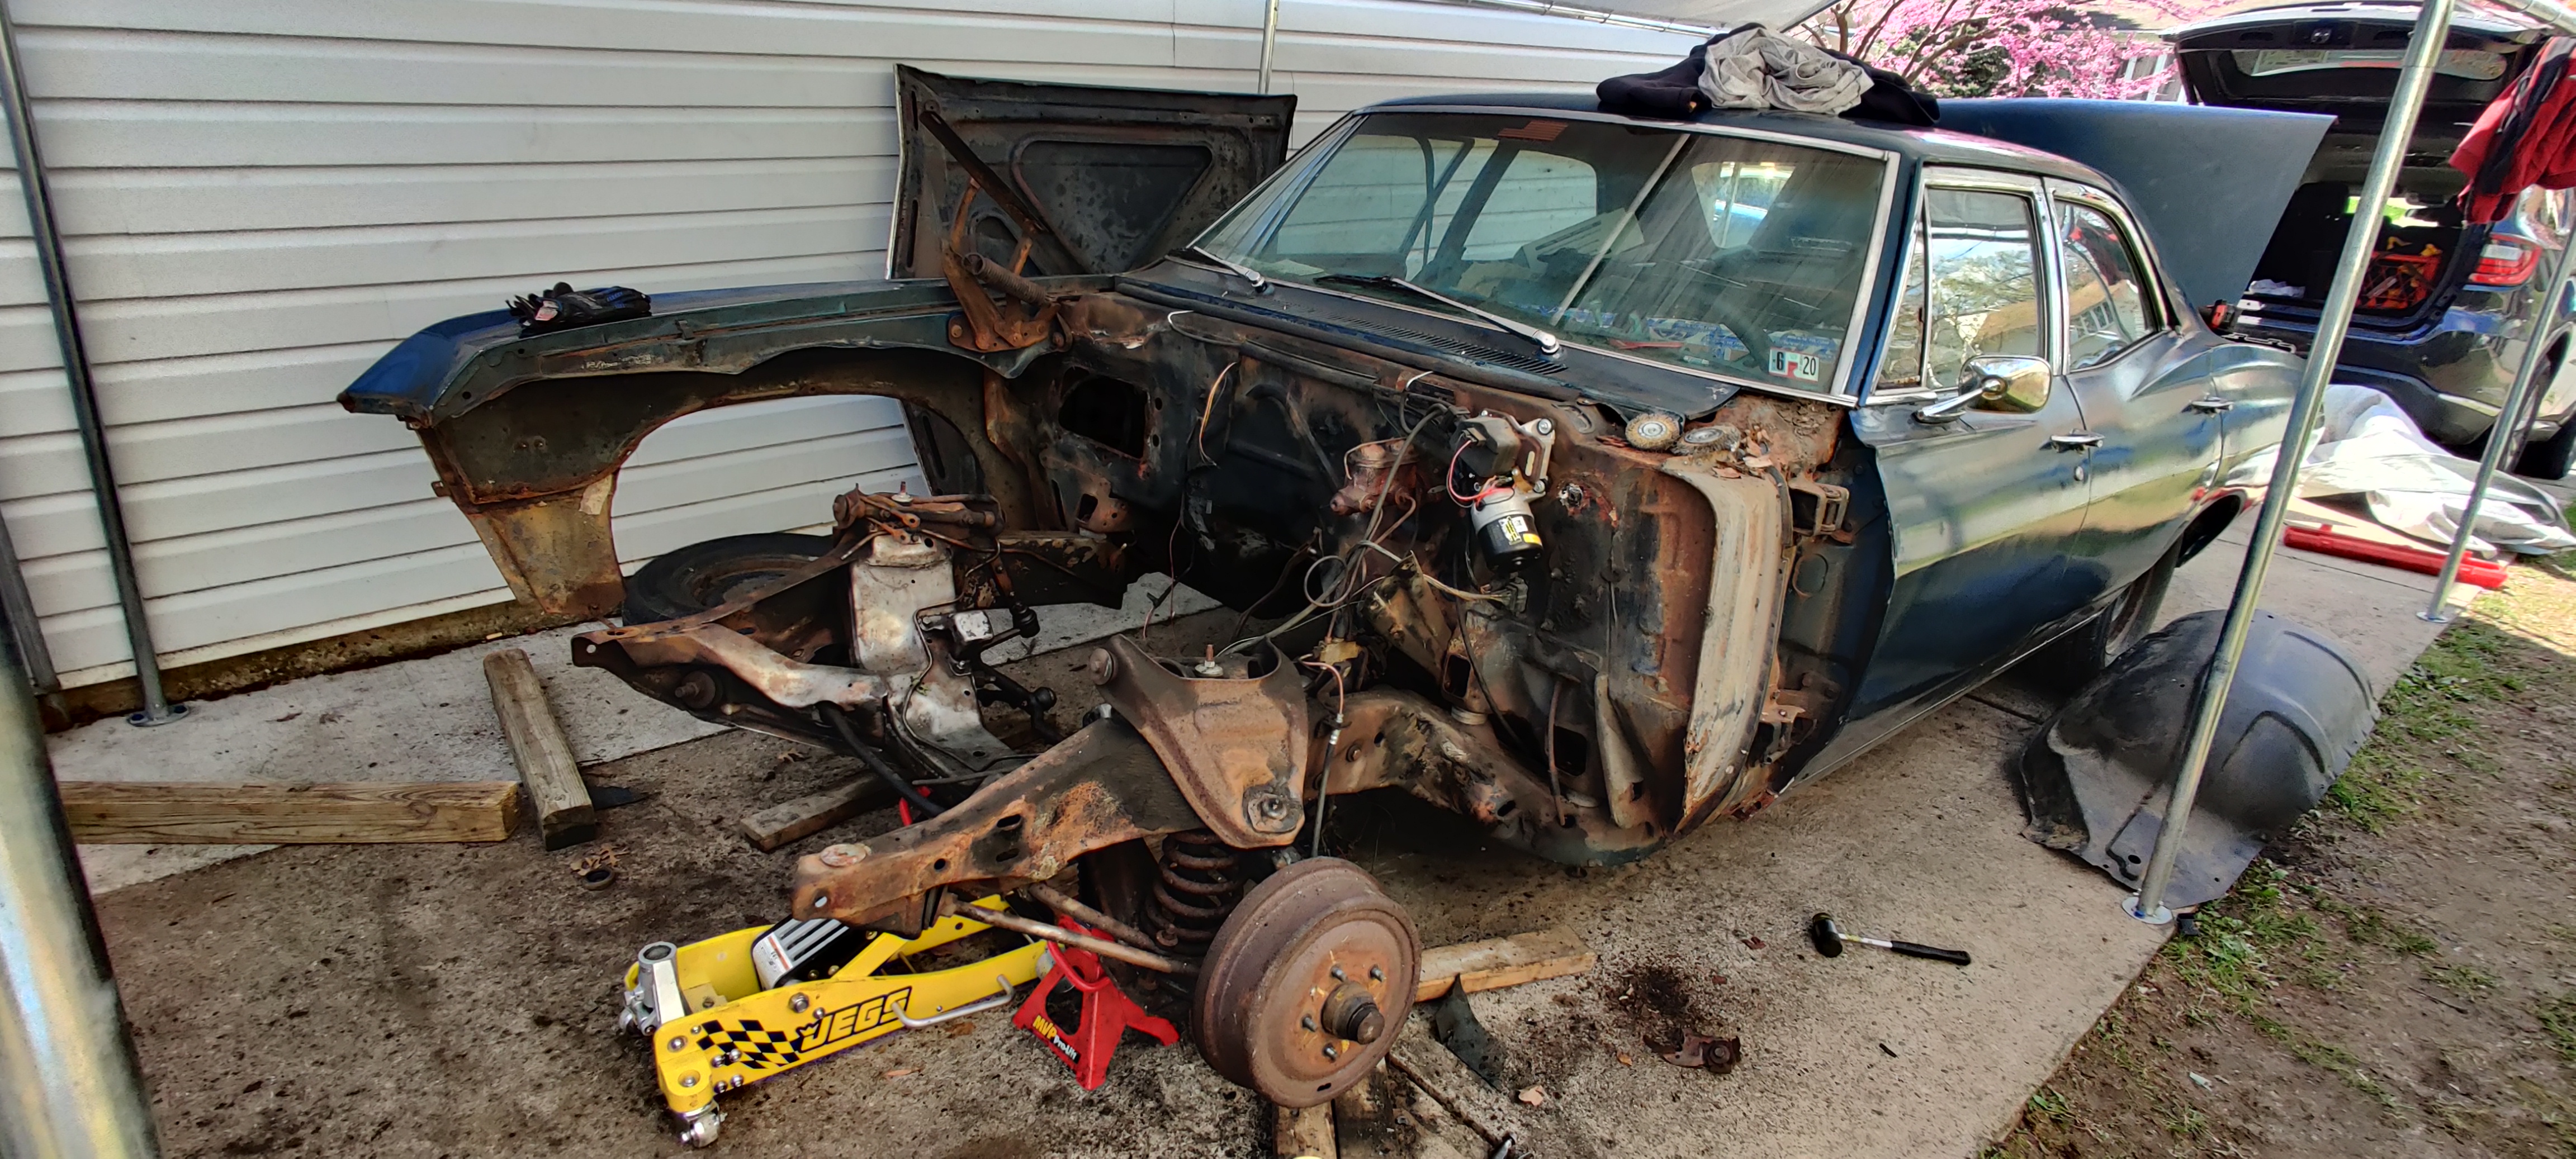
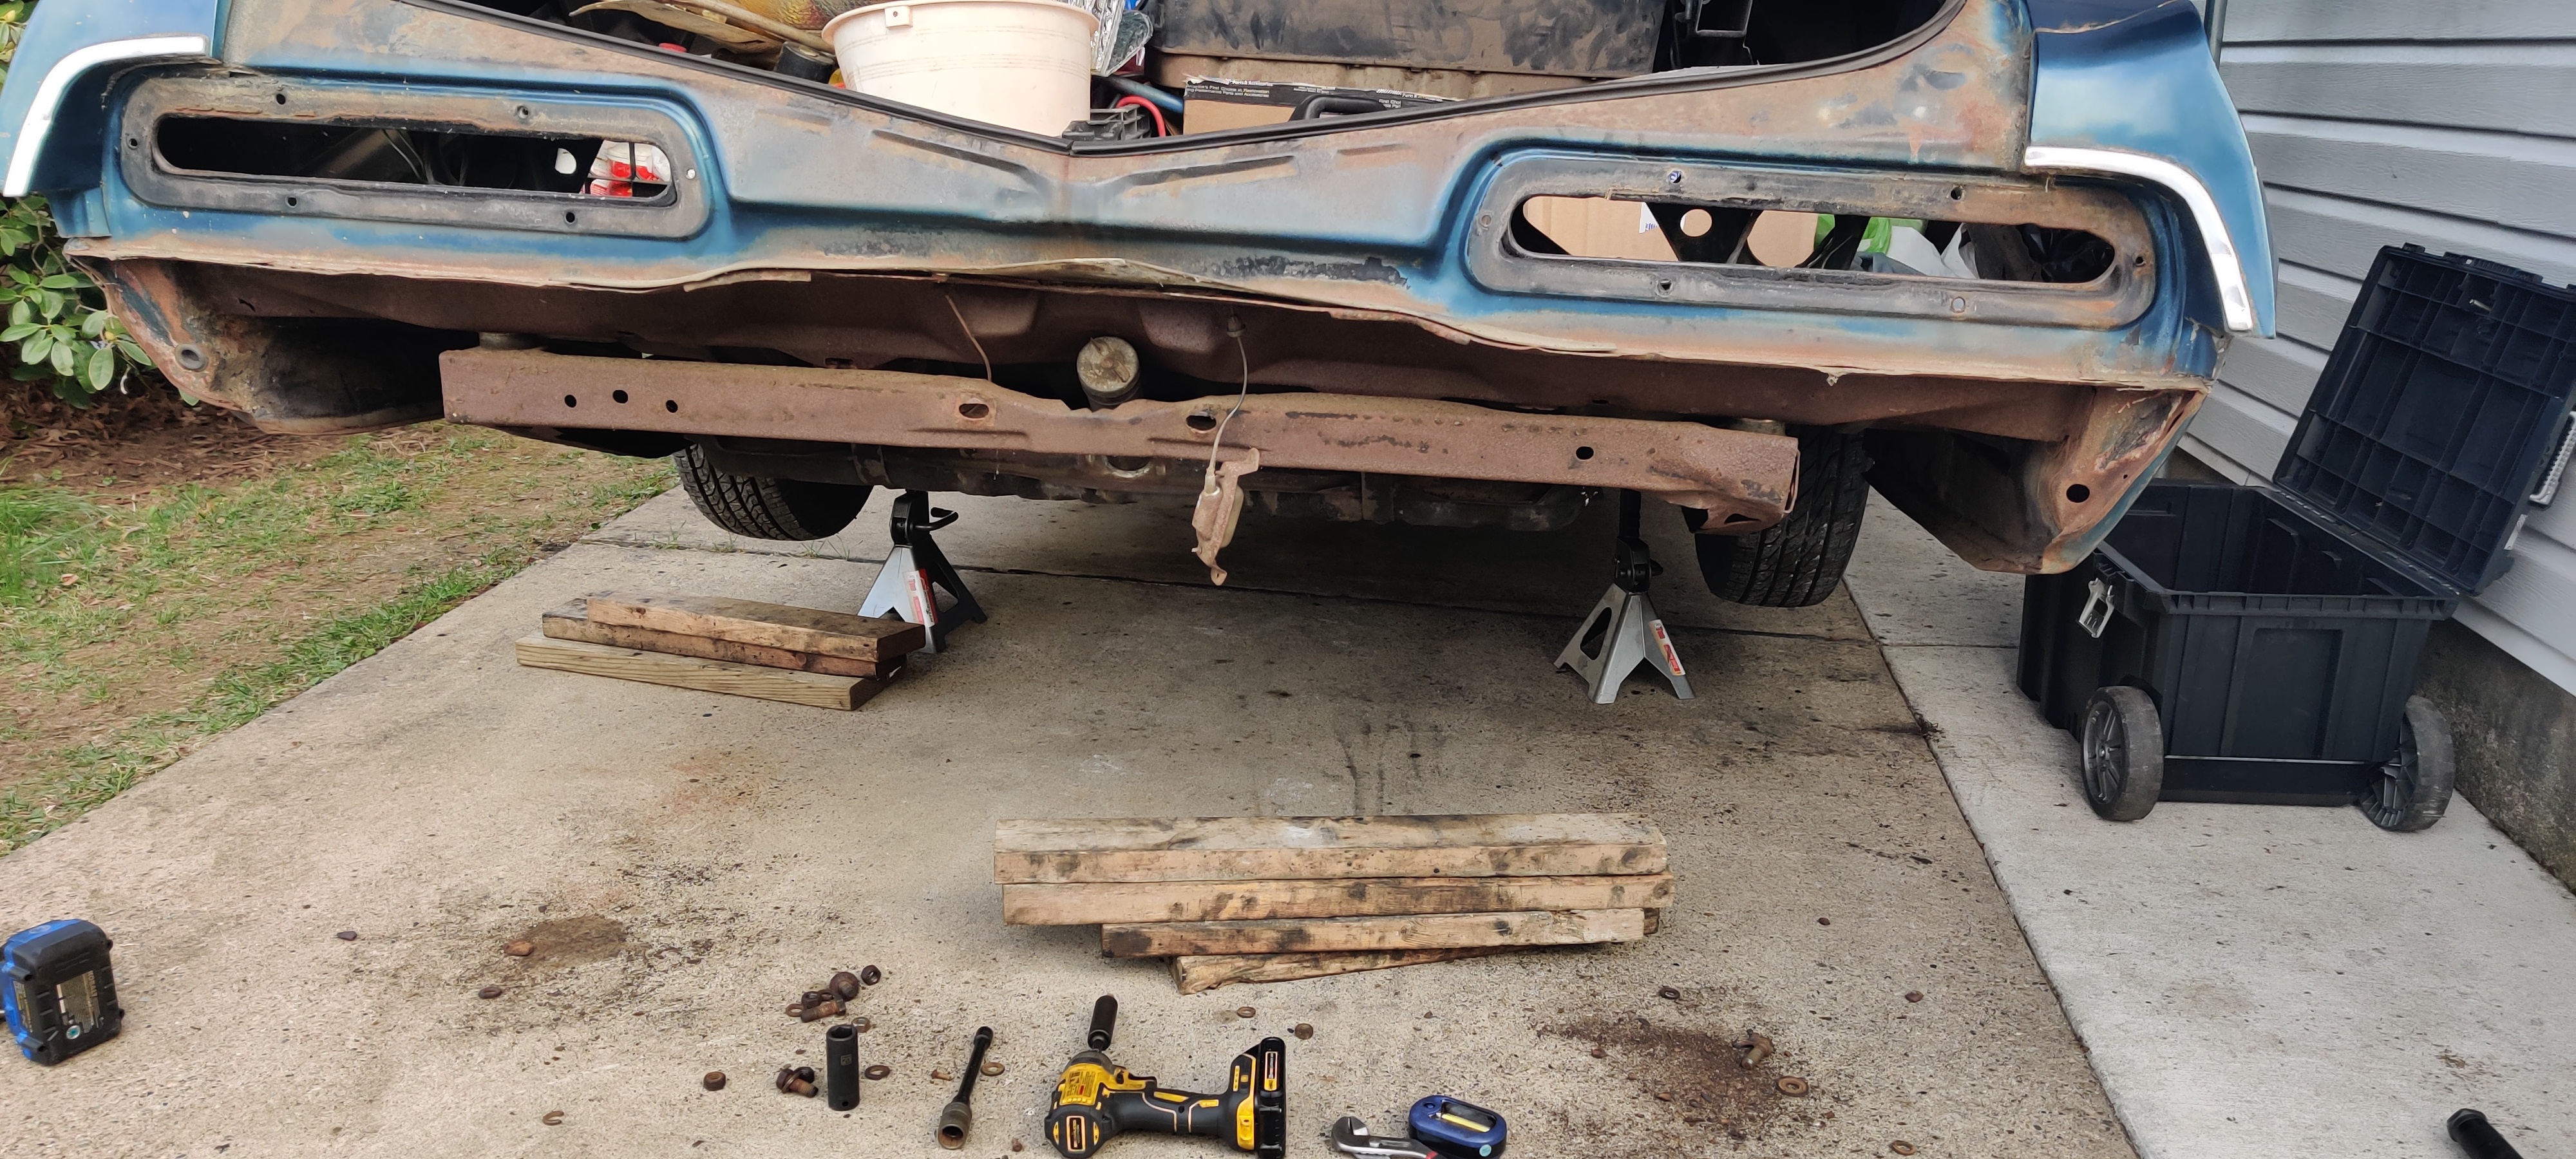
On Saturday, we jacked the impala high up and emoved the fuel tank. After cleaning all the surface rust on both sides, we then coated it with a few layers of universal primer. After that, we did more visual inspection and grinding of the frame and body. No big surprises as we knew a lot of the body was rotted out but the frame is in good shape. Lastly, we removed the front right wheel well as it was severely rotted out, made connections with another Impala owner and got new wells shipped to us. Will mock them up next week to make sure they fit.
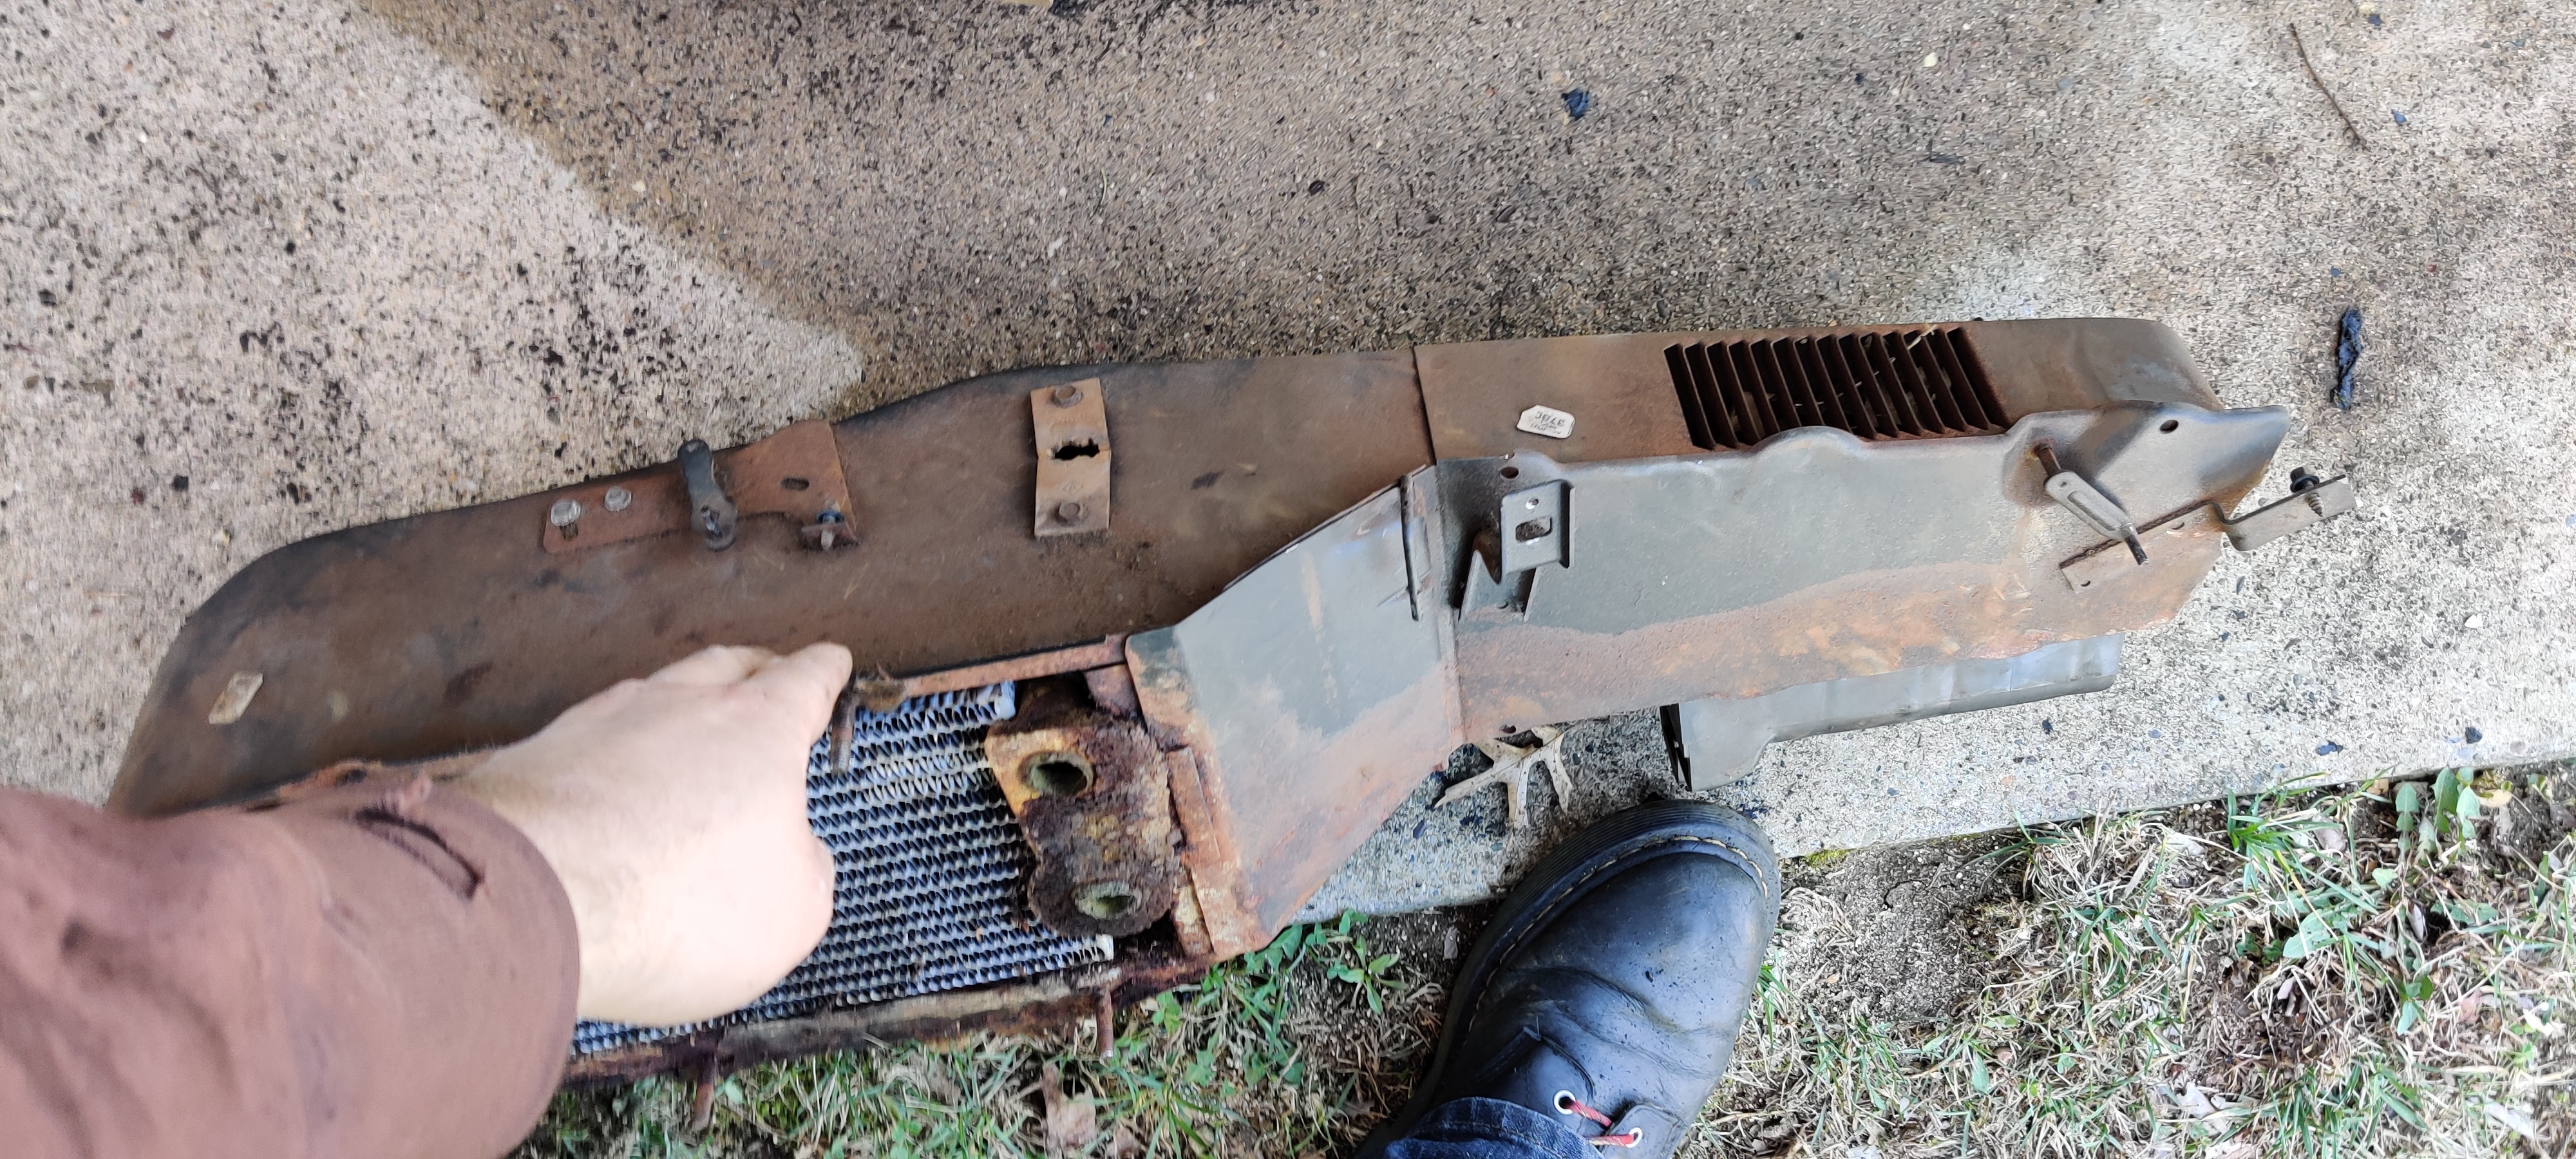
On Sunday, we put the last coat of universal primer on the fuel tank and removed the front radiator core support frame. Currently in the process of finding a new or good condition core support. After some consideration, we've decided that we're scrapping the old front fender panels and replacing them, as both sides have a lot of rust damage and botched bondo repairs. After that, we focused on the rear quarter panels and wheel wells and found that both quarter panels were installed differently. The left side was tack welded on and filled with bondo. While the right one was properly welded in visible spots and tacked and painted on other spots. Less bondo on this side. Will have to do some rust patching as there is no full replacement quarter panel availble.
Next weekend we'll mock up both wheel wells and possibly paint the engine block if weather permits.


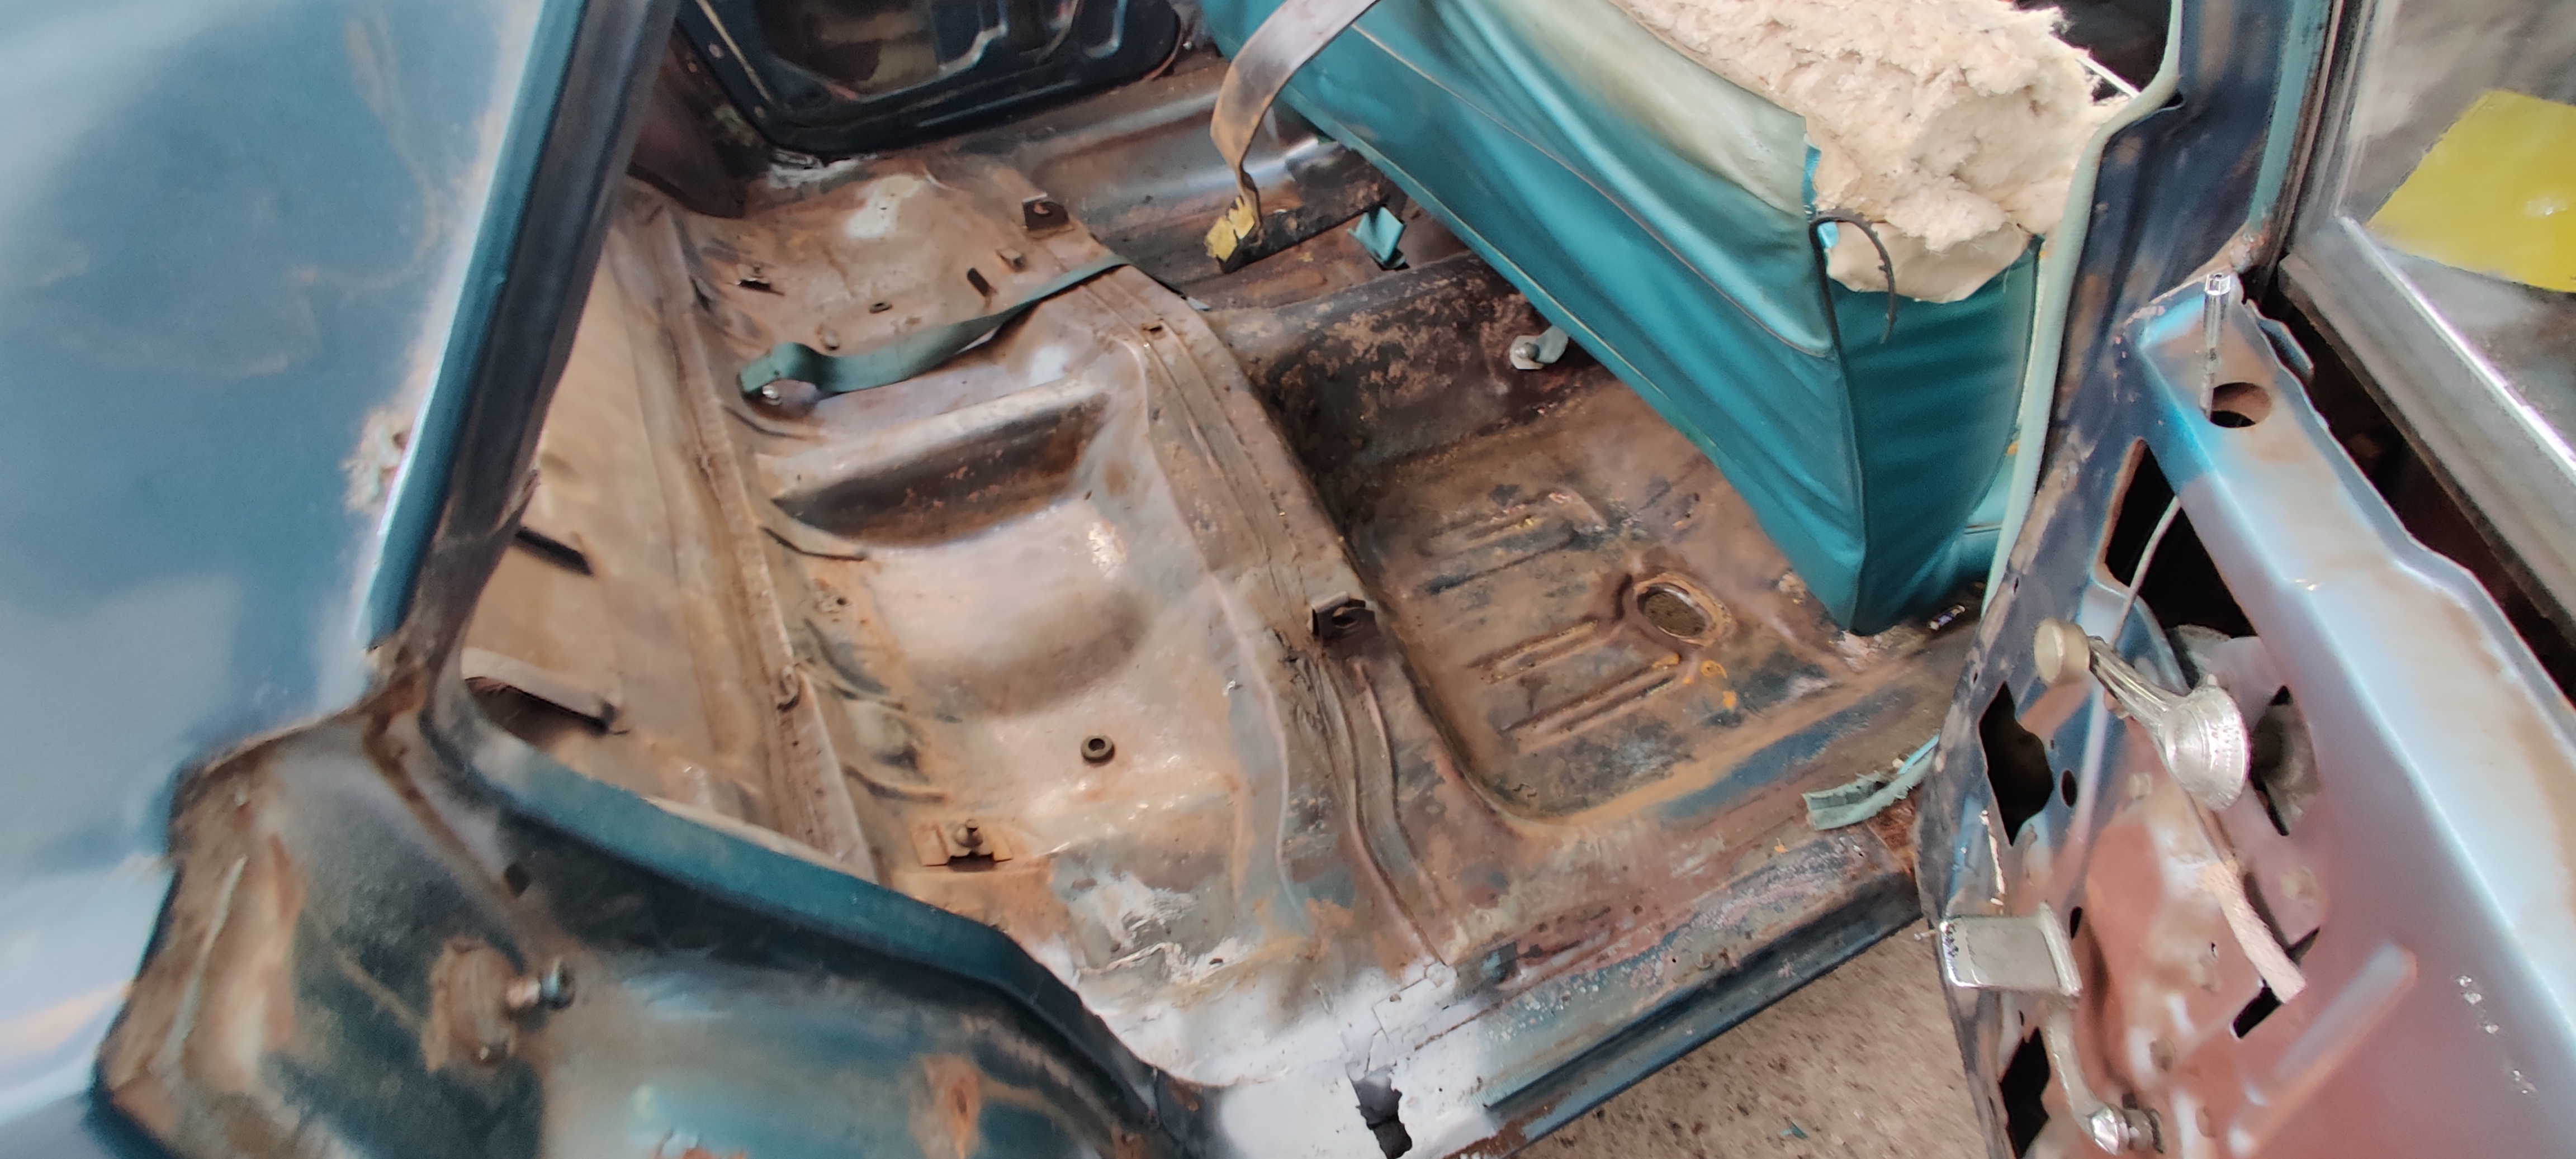
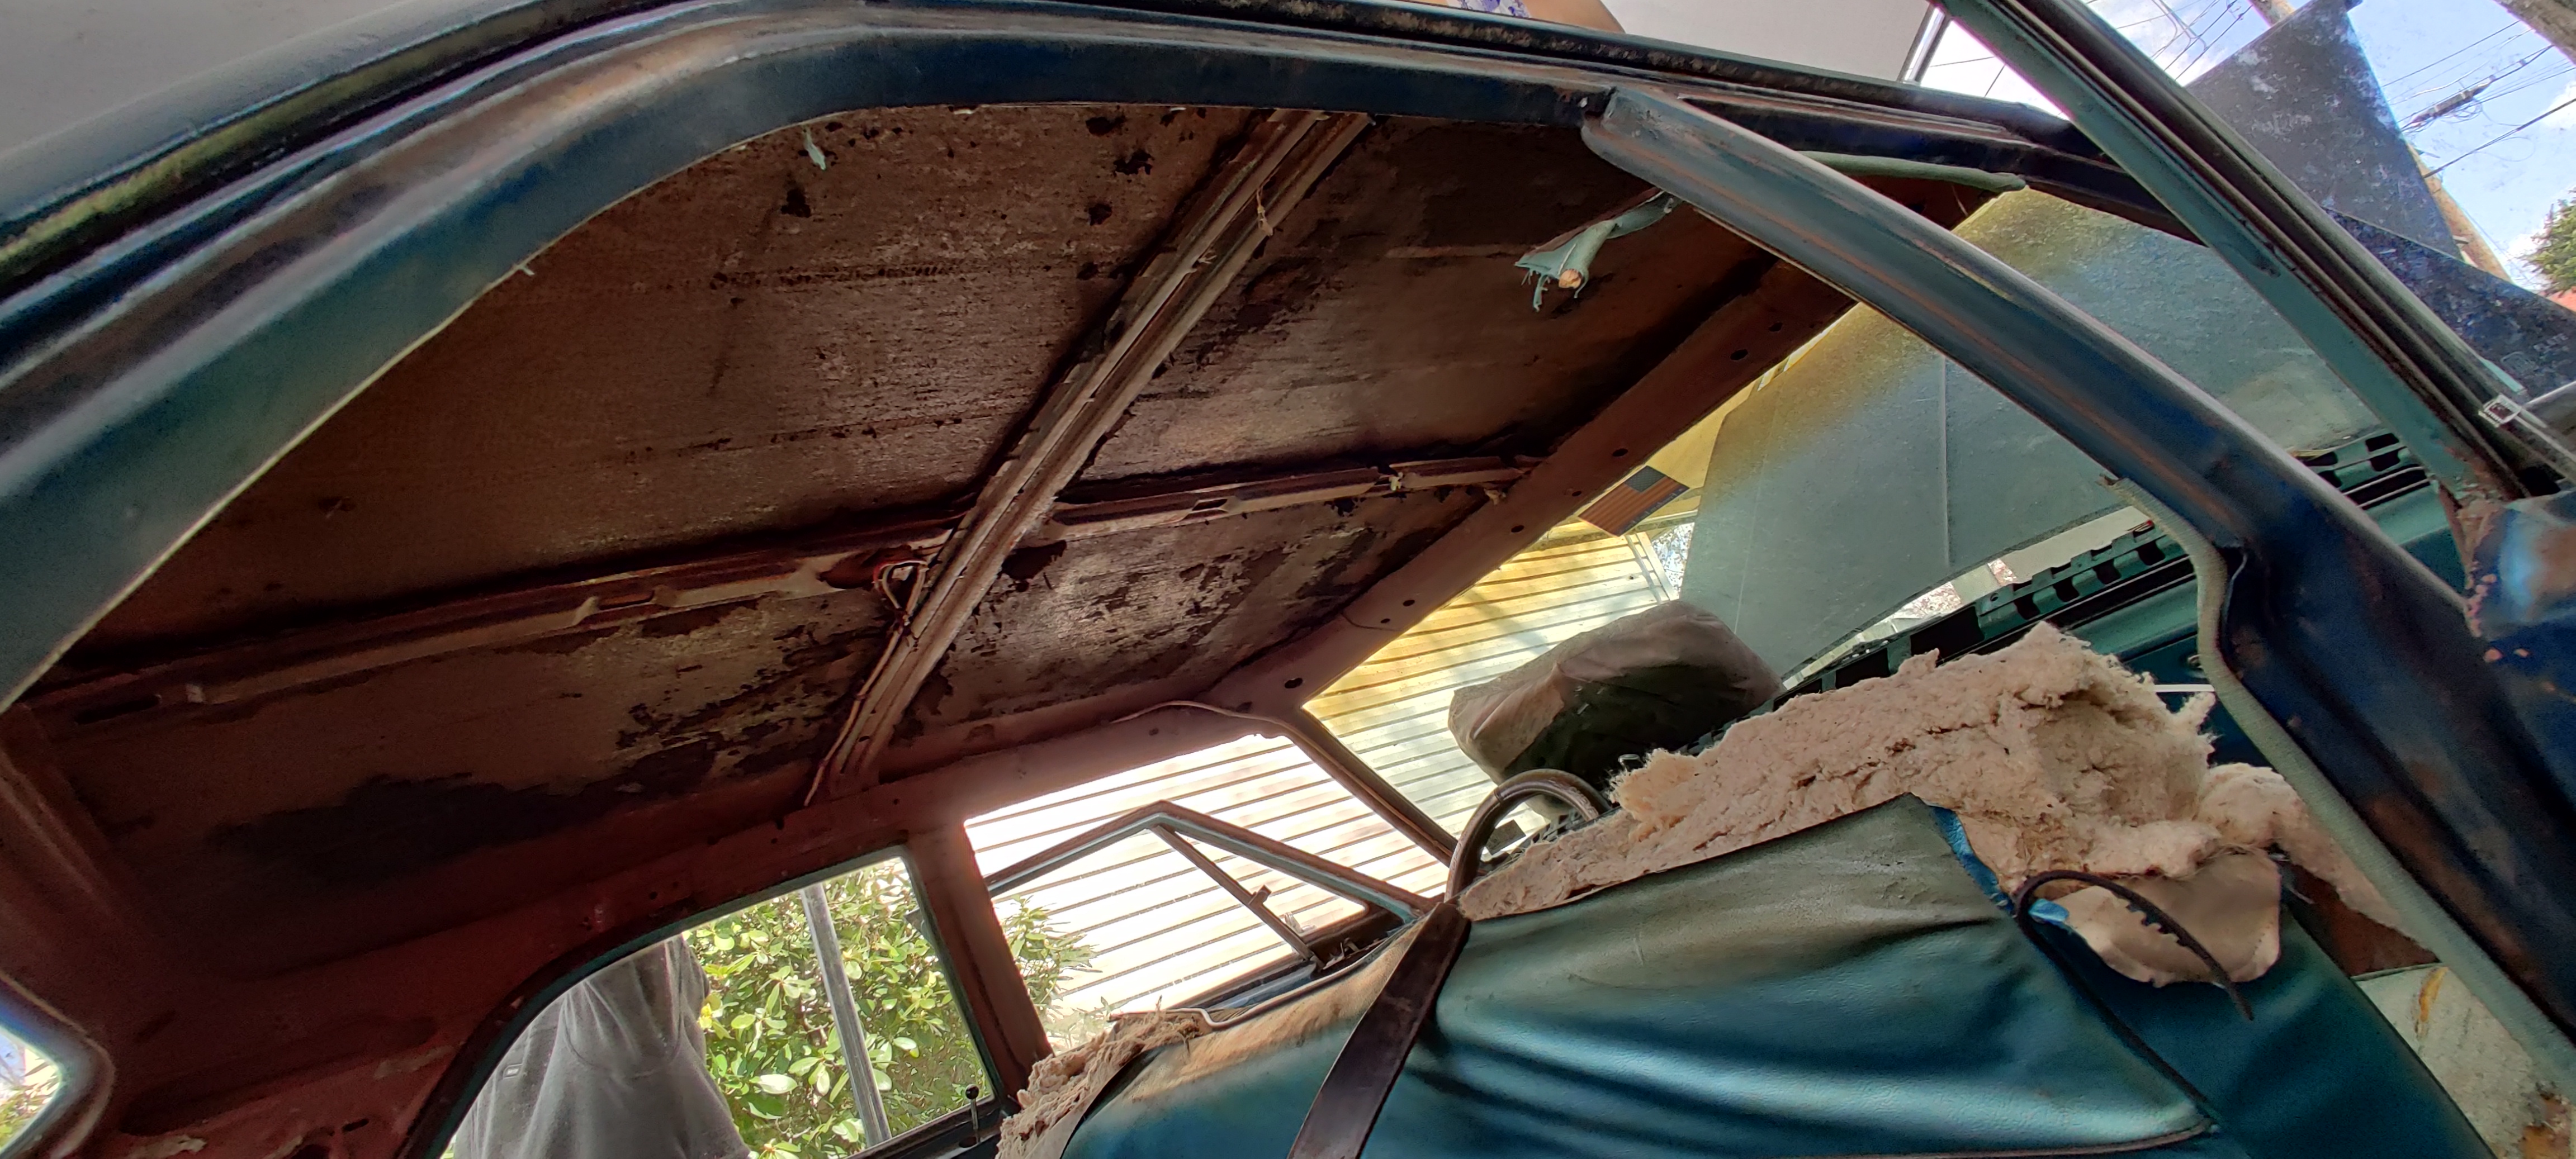
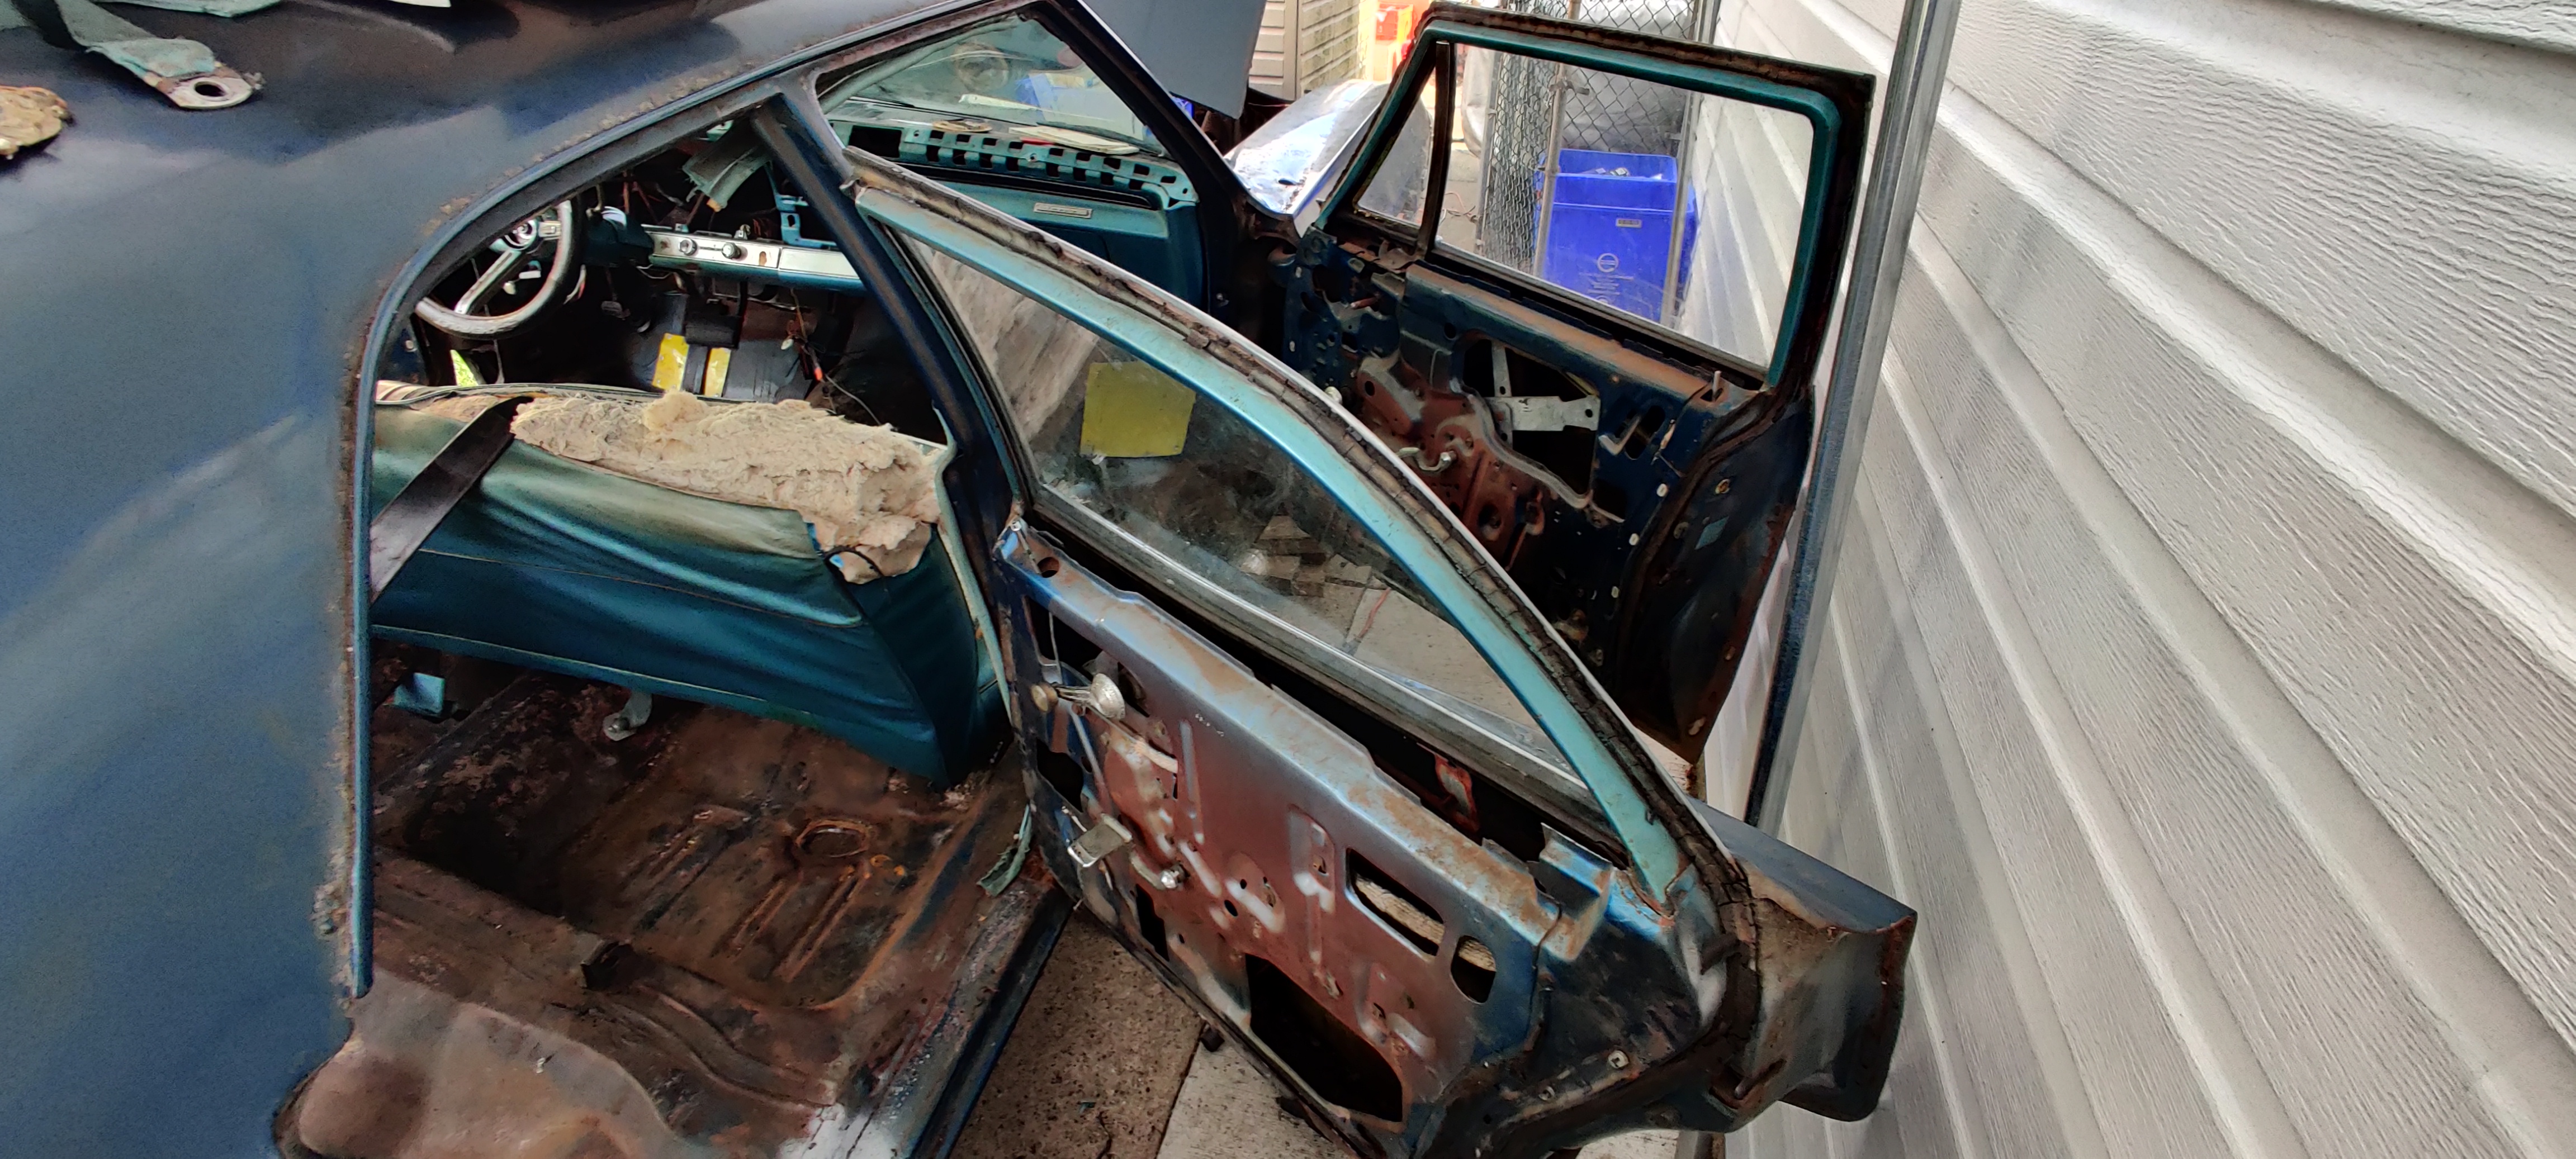
On Saturday, we finished gutting the interior, took the ceiling fabric off and found a lot of trashed insulation and some surface rust on the inside. We had to use ice scrapers to get some of it off. Not really sure what this stuff was made out of, suspecting it might have been asbestos, good thing we had bandanas on, just in case. Removed all the interior door panels and found some more rotted metal on the rear right door. This entire right side is annoying with it's rust problems.
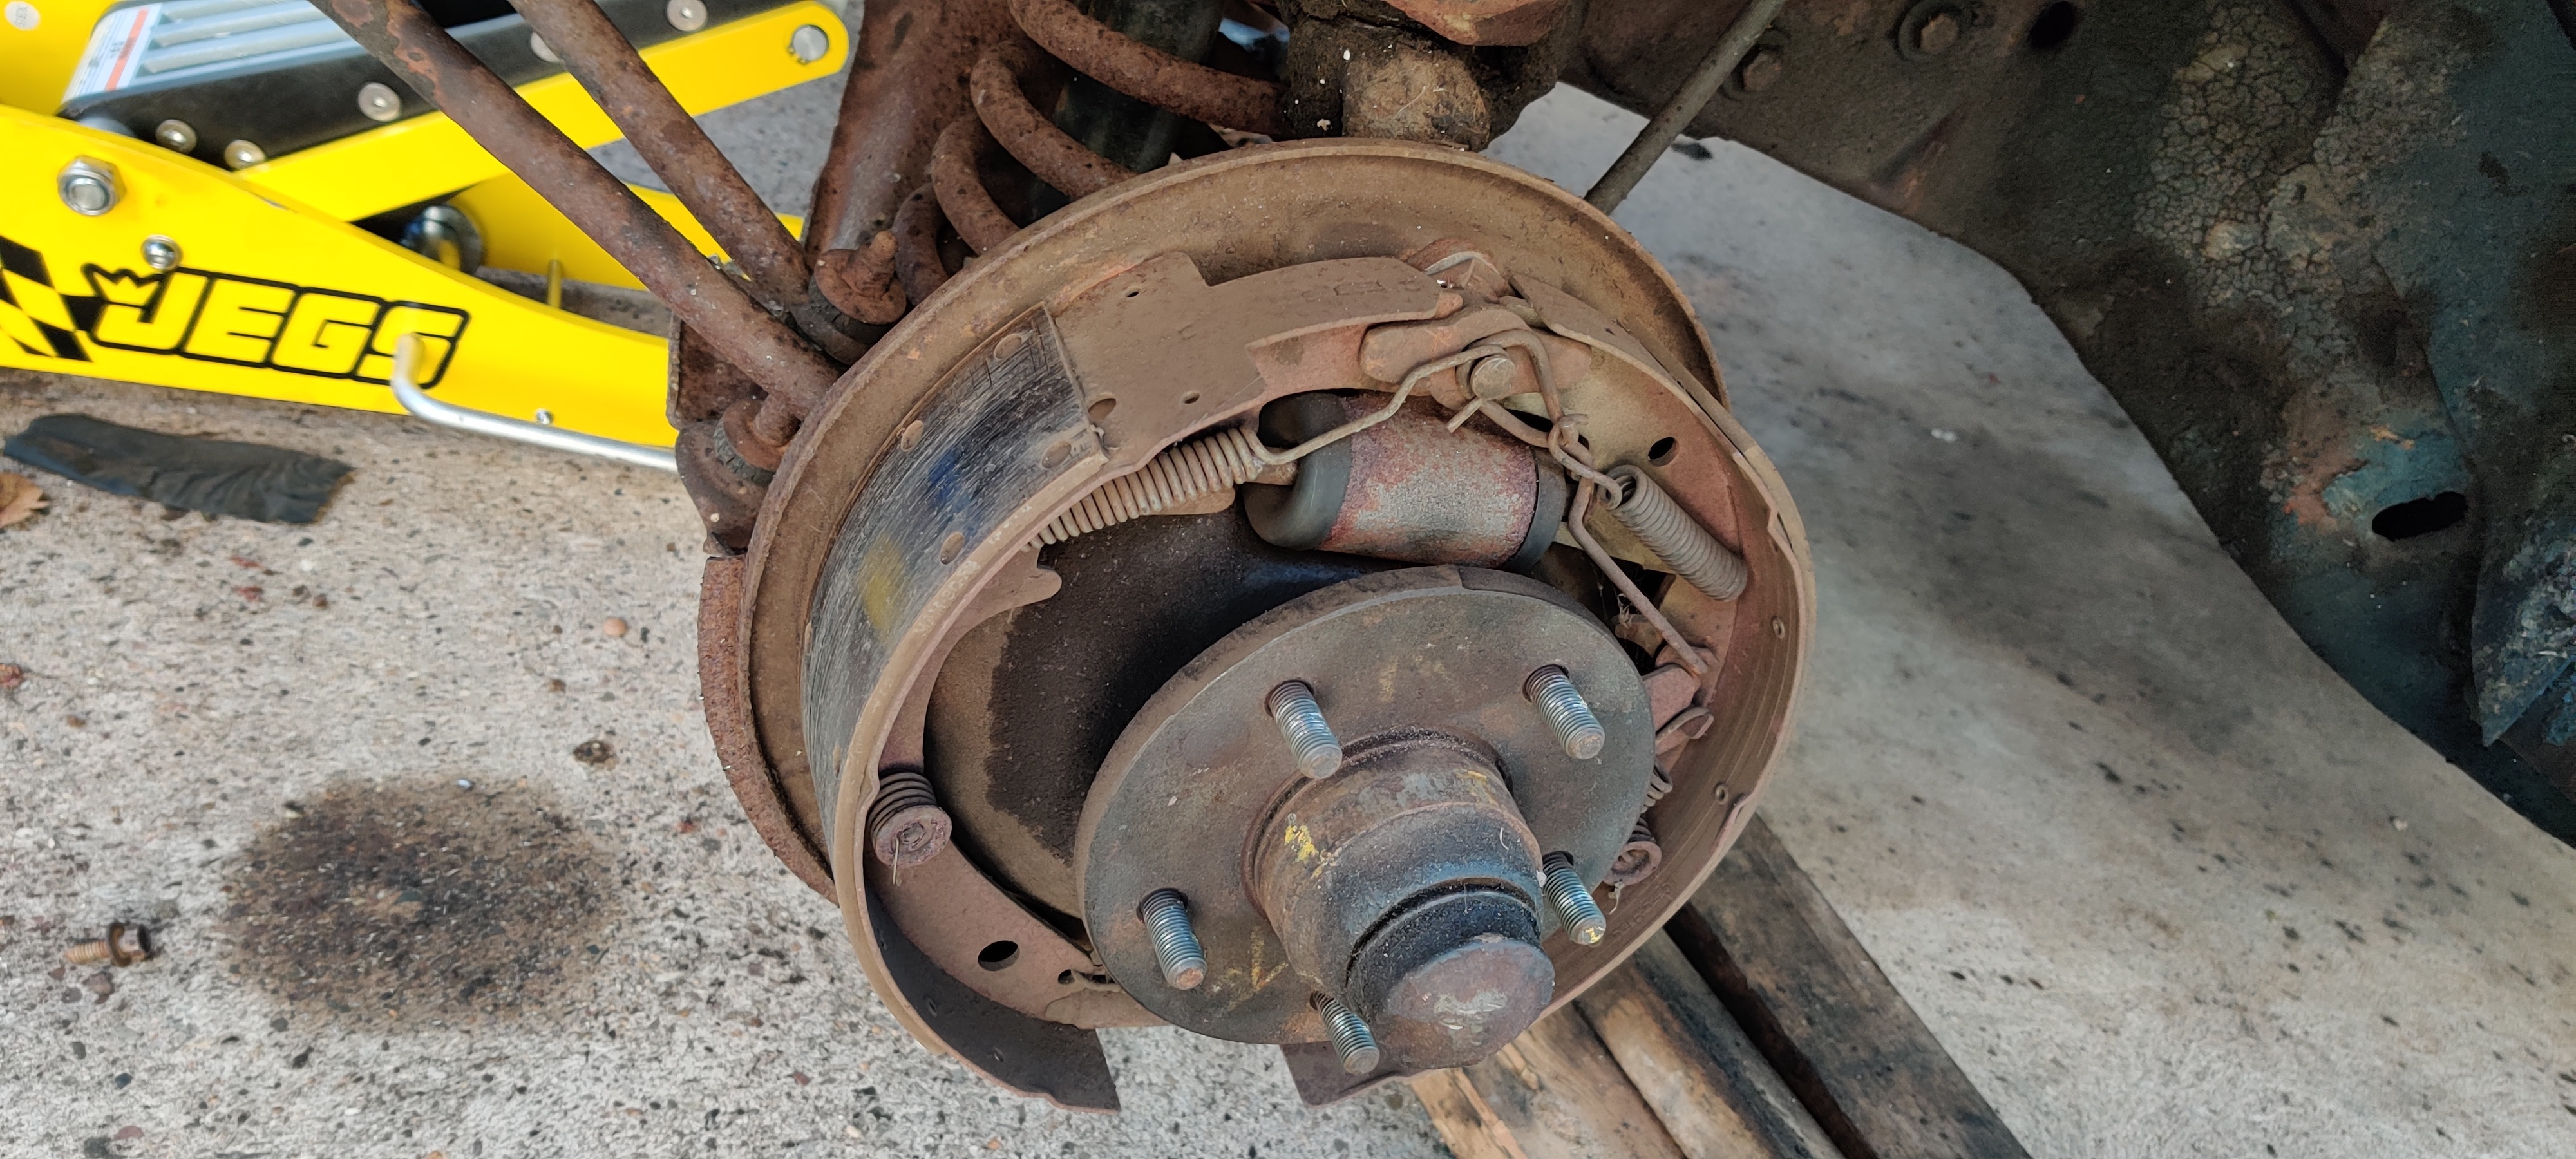
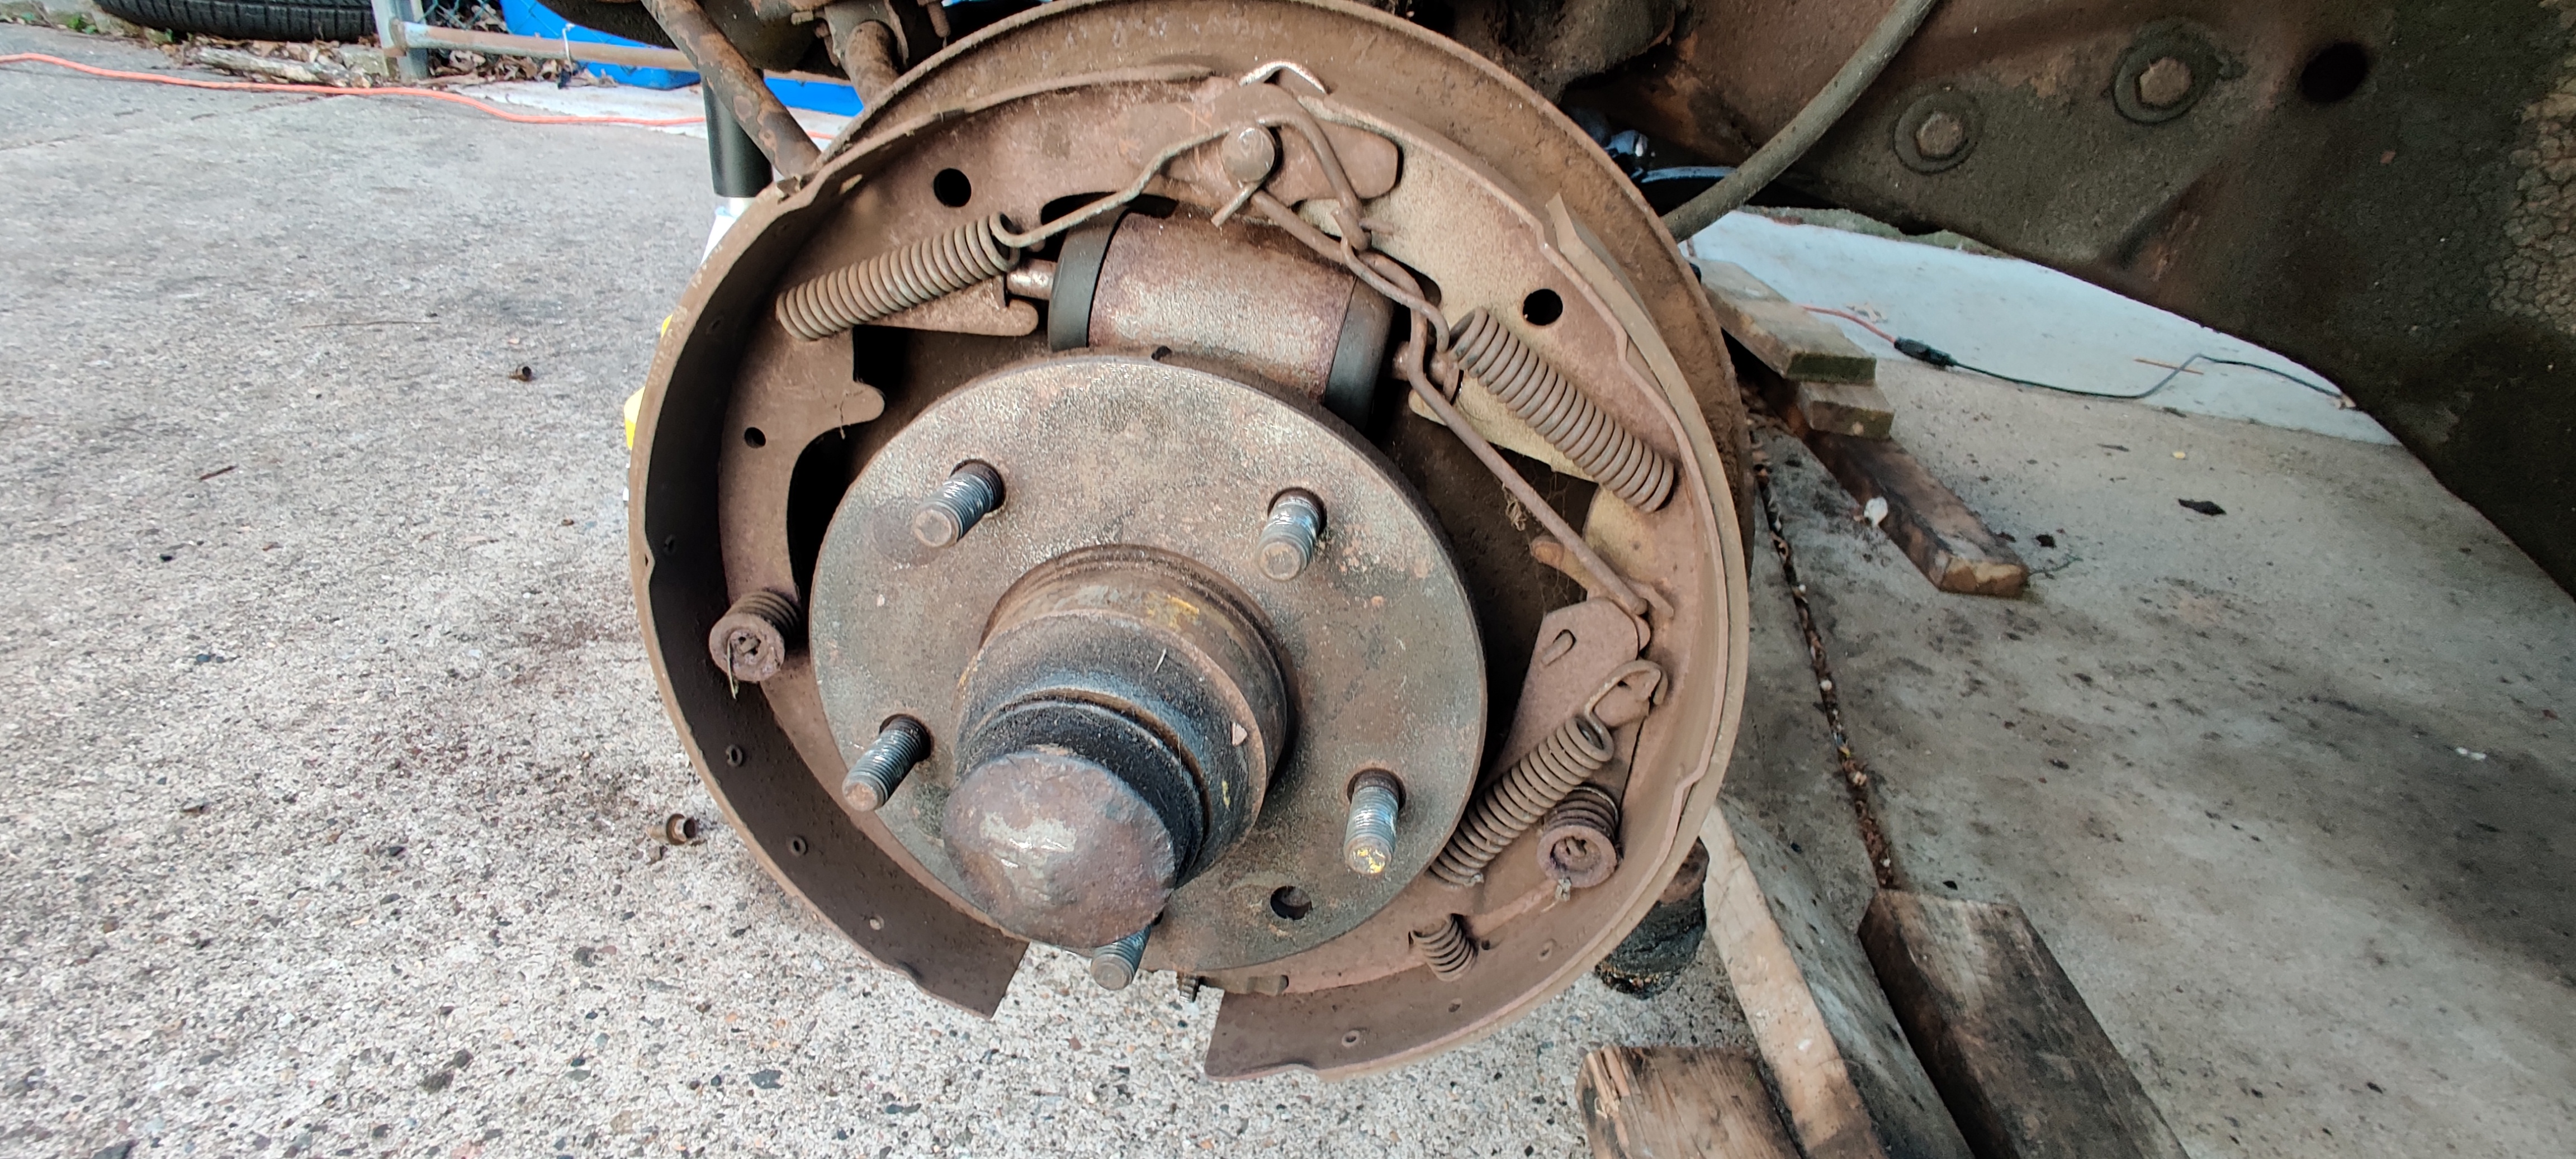
Also discussed what needs to be replaced in the engine bay. We've decided that we'll need to replace the front right wheel well due to it being rotted out. We also inspected the drum brakes on all 4 wheels. Found out the pads are pretty much shot on the front wheels. The plan is to convert the drum brakes in the front to caliper and replace the drum brakes in the back with new drums, as I cannot find a caliper kit for the rear.
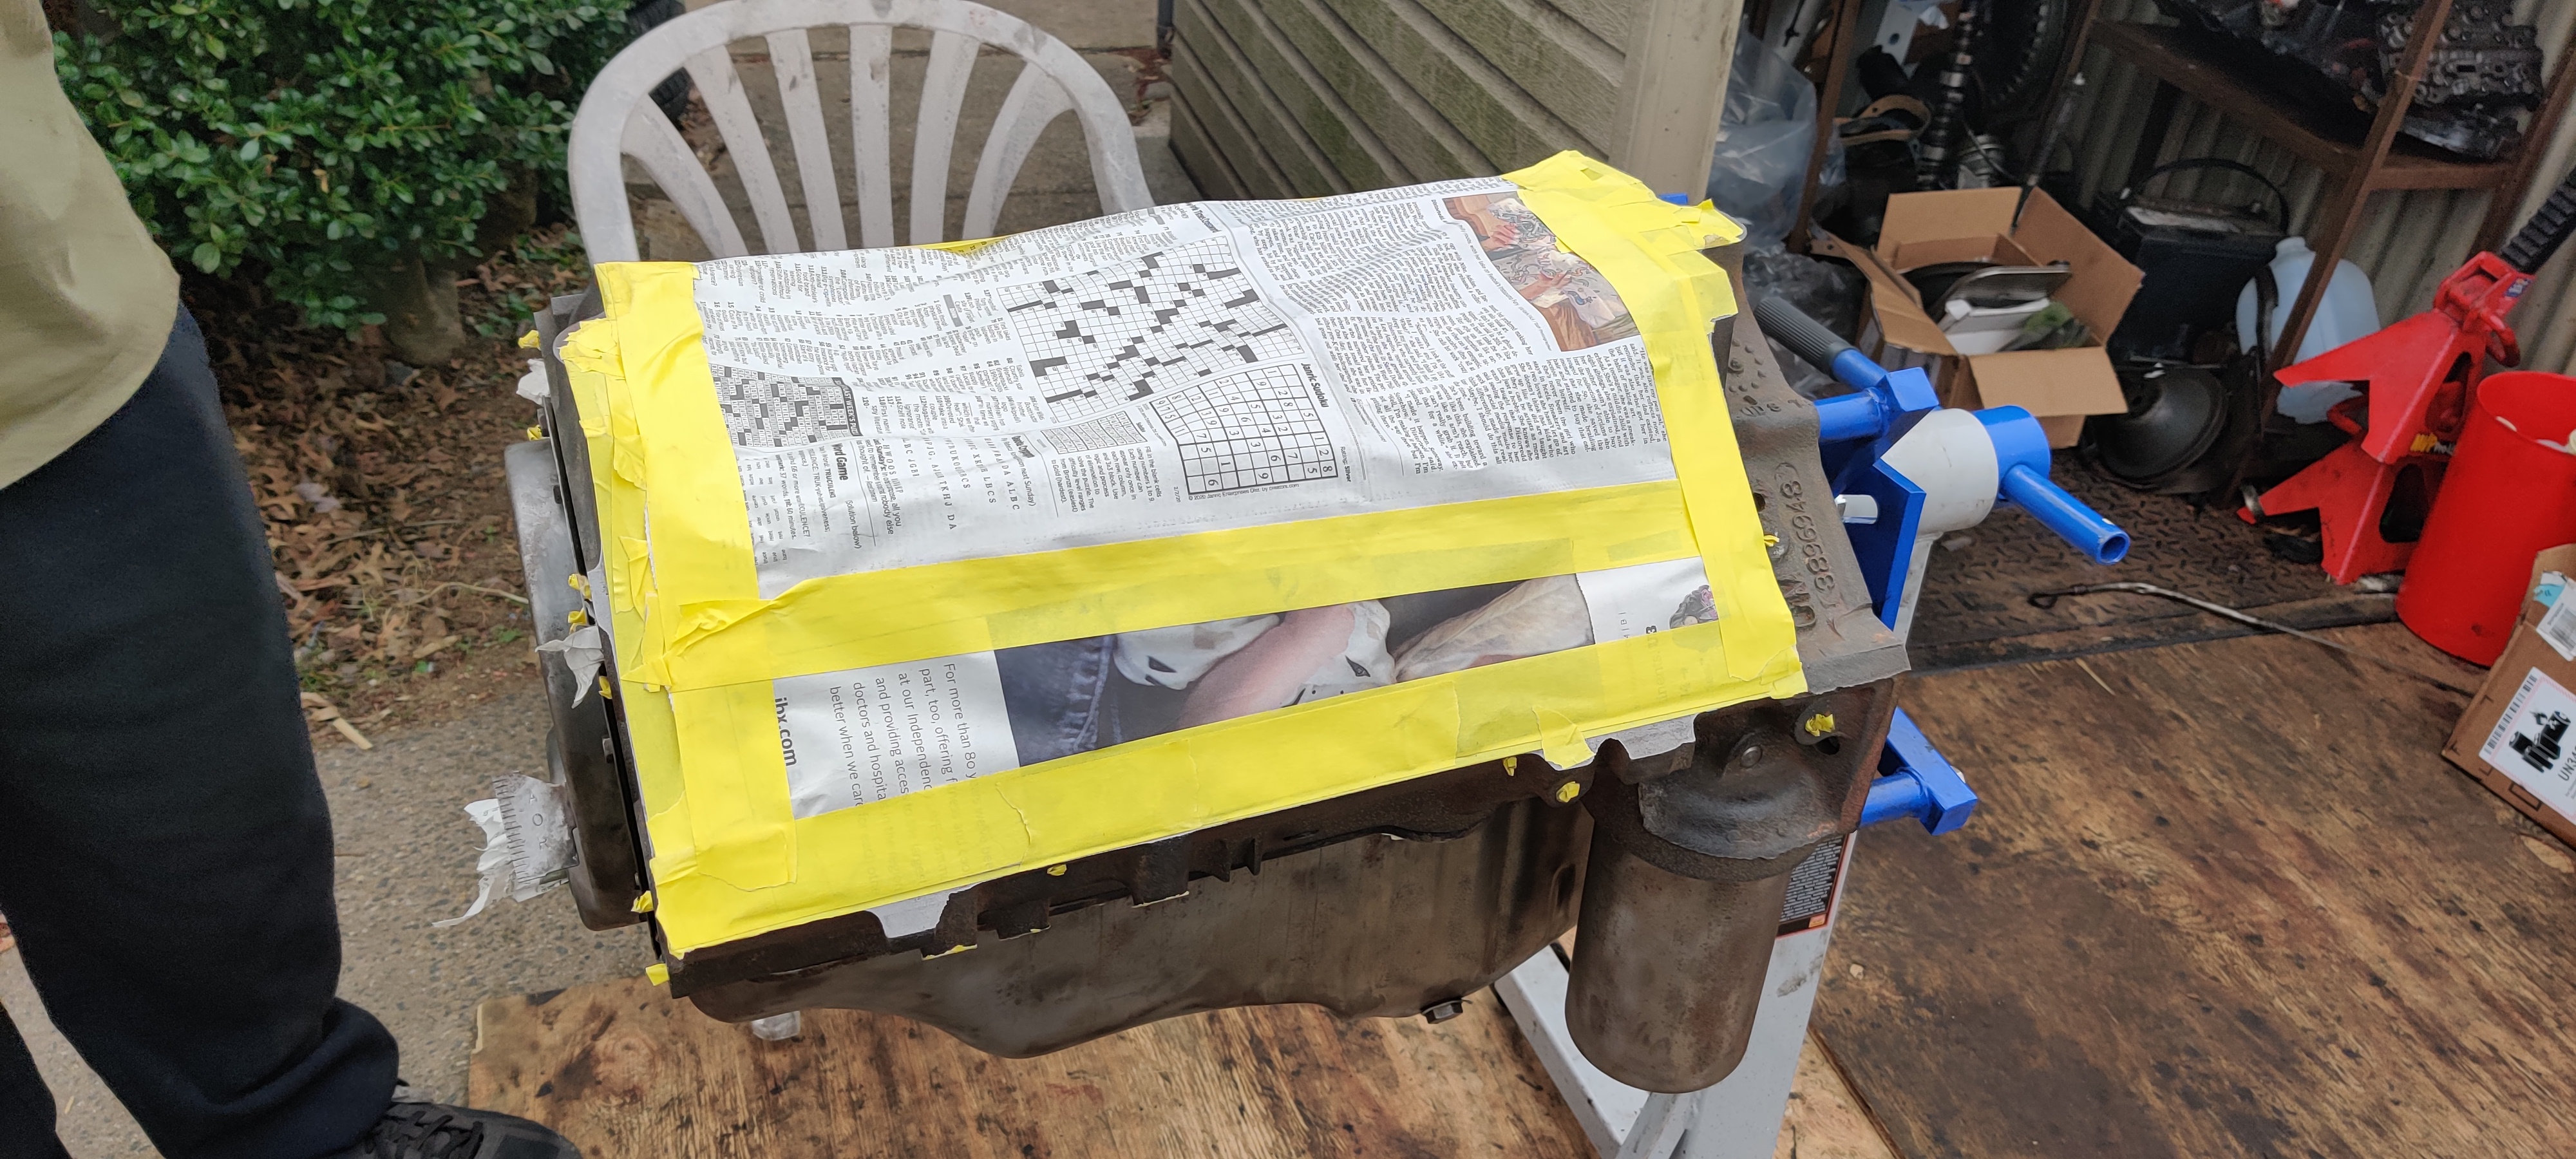
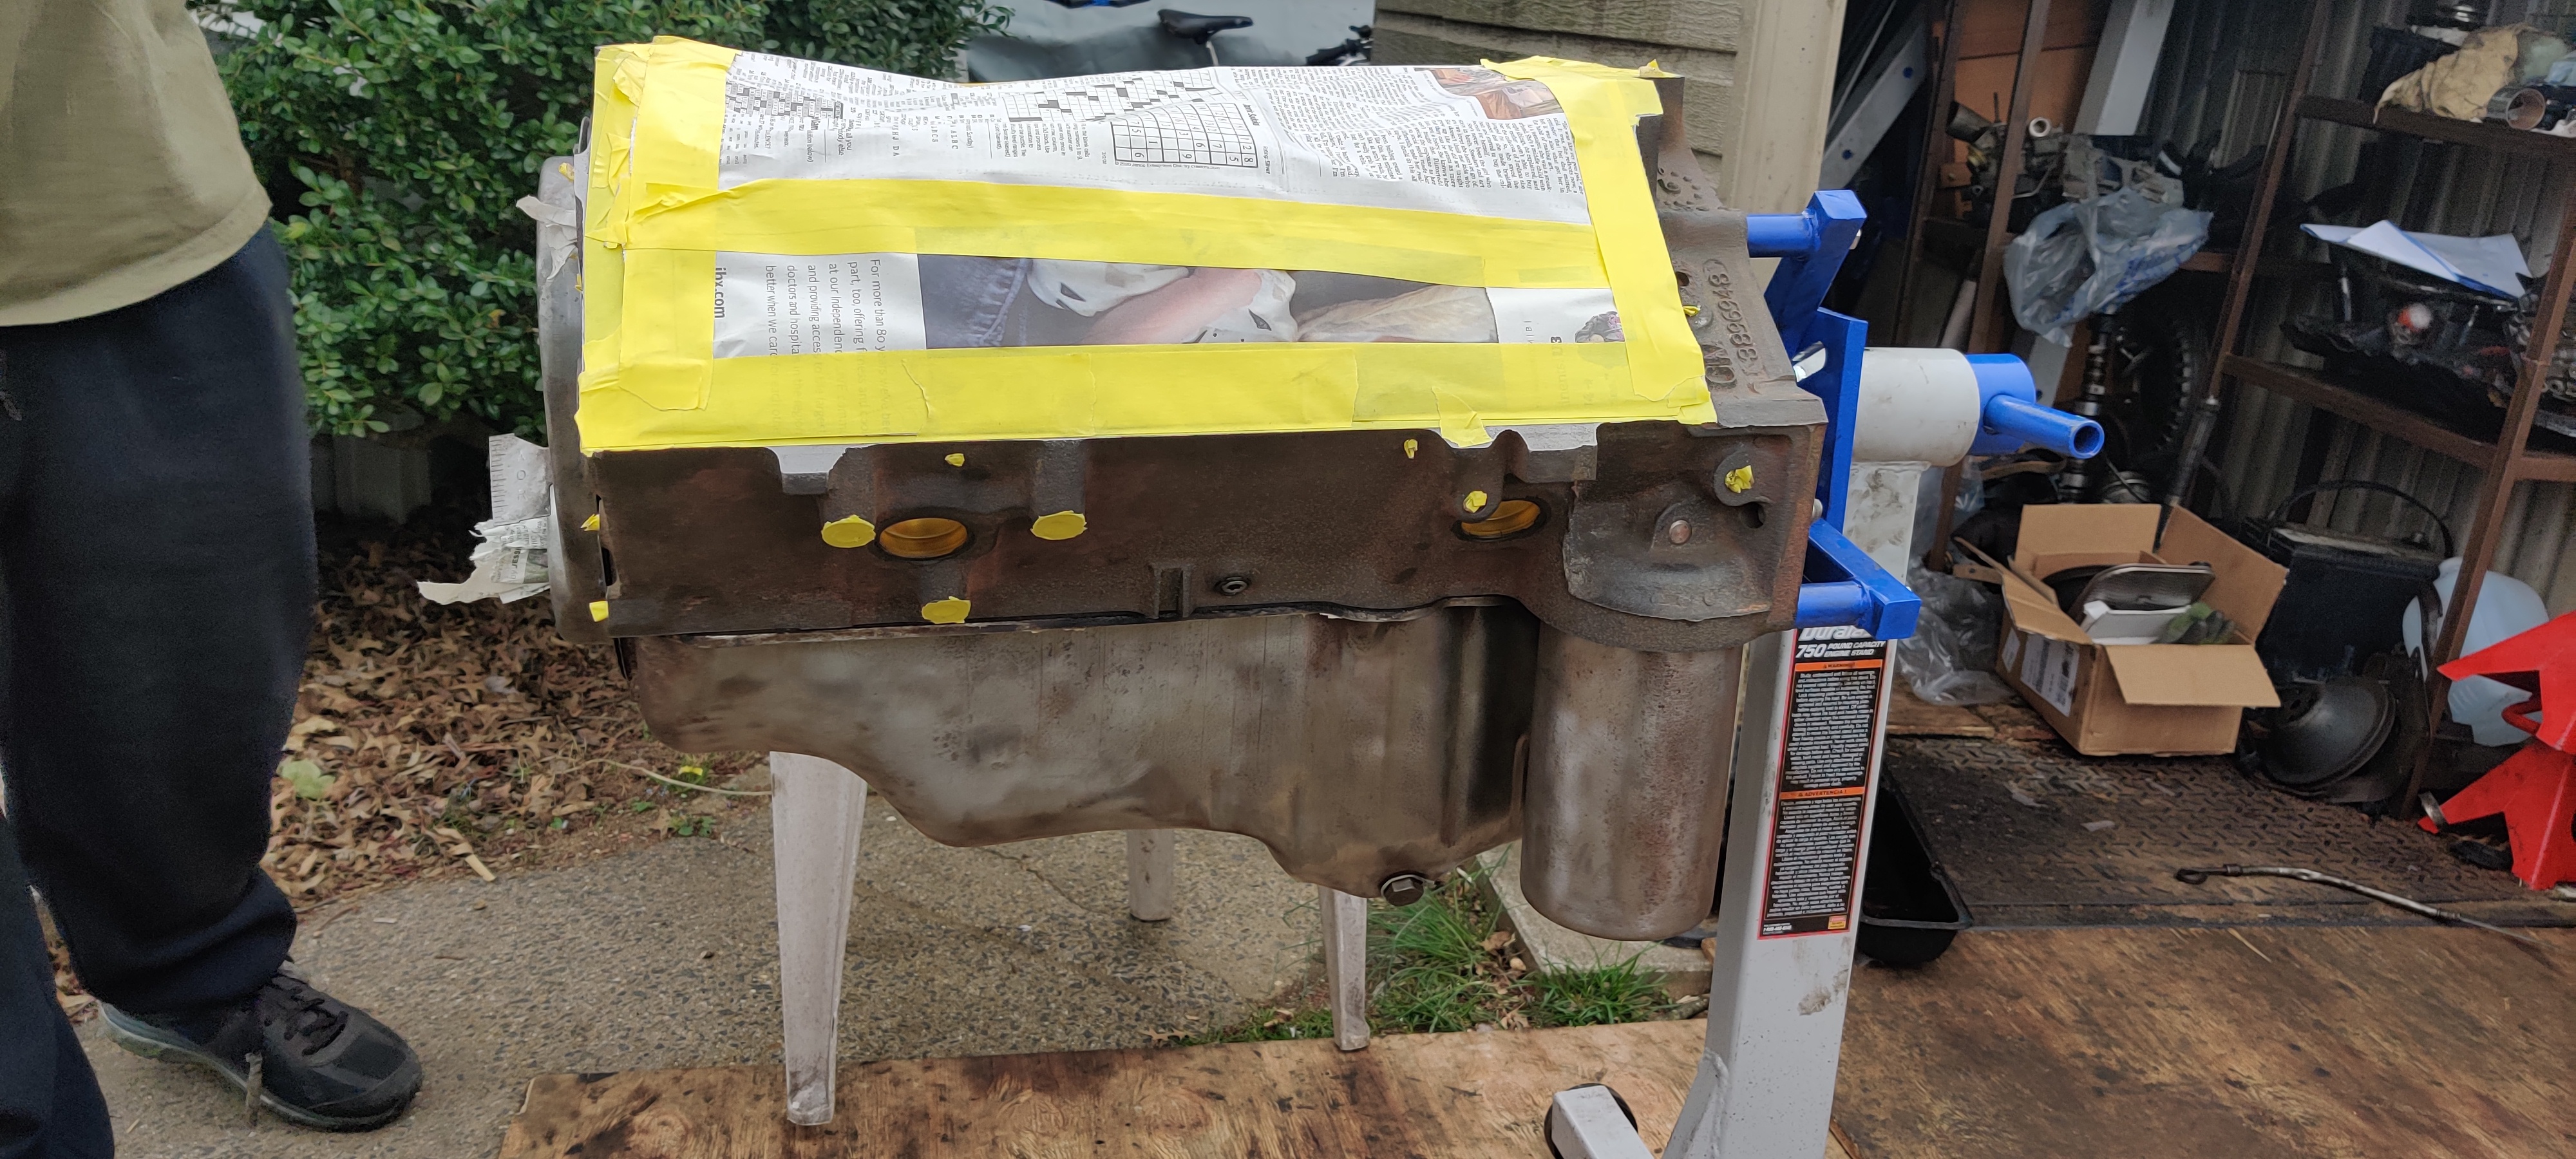
On Sunday we focused on priming the engine. Covered up all non-paint surfaces, like the cylinder heads and intake area. Plugged all holes as well. We also cleaned and grinded the oil pan, oil filter housing, and timing chain cover. These only had dirt, grease, and surface rust, so they're going to be reused. We then bolted them on and gave the entire engine two coats of high temperature engine enamel primer. We were going to apply a third coat as directed by the instructions on the can, but it started raining a little bit and we had to rush to get the engine back into the shed.
Next weekend we plan to grind the surface off the underside of the frame and inspect the suspension components closer, as the ball joints look pretty tired.
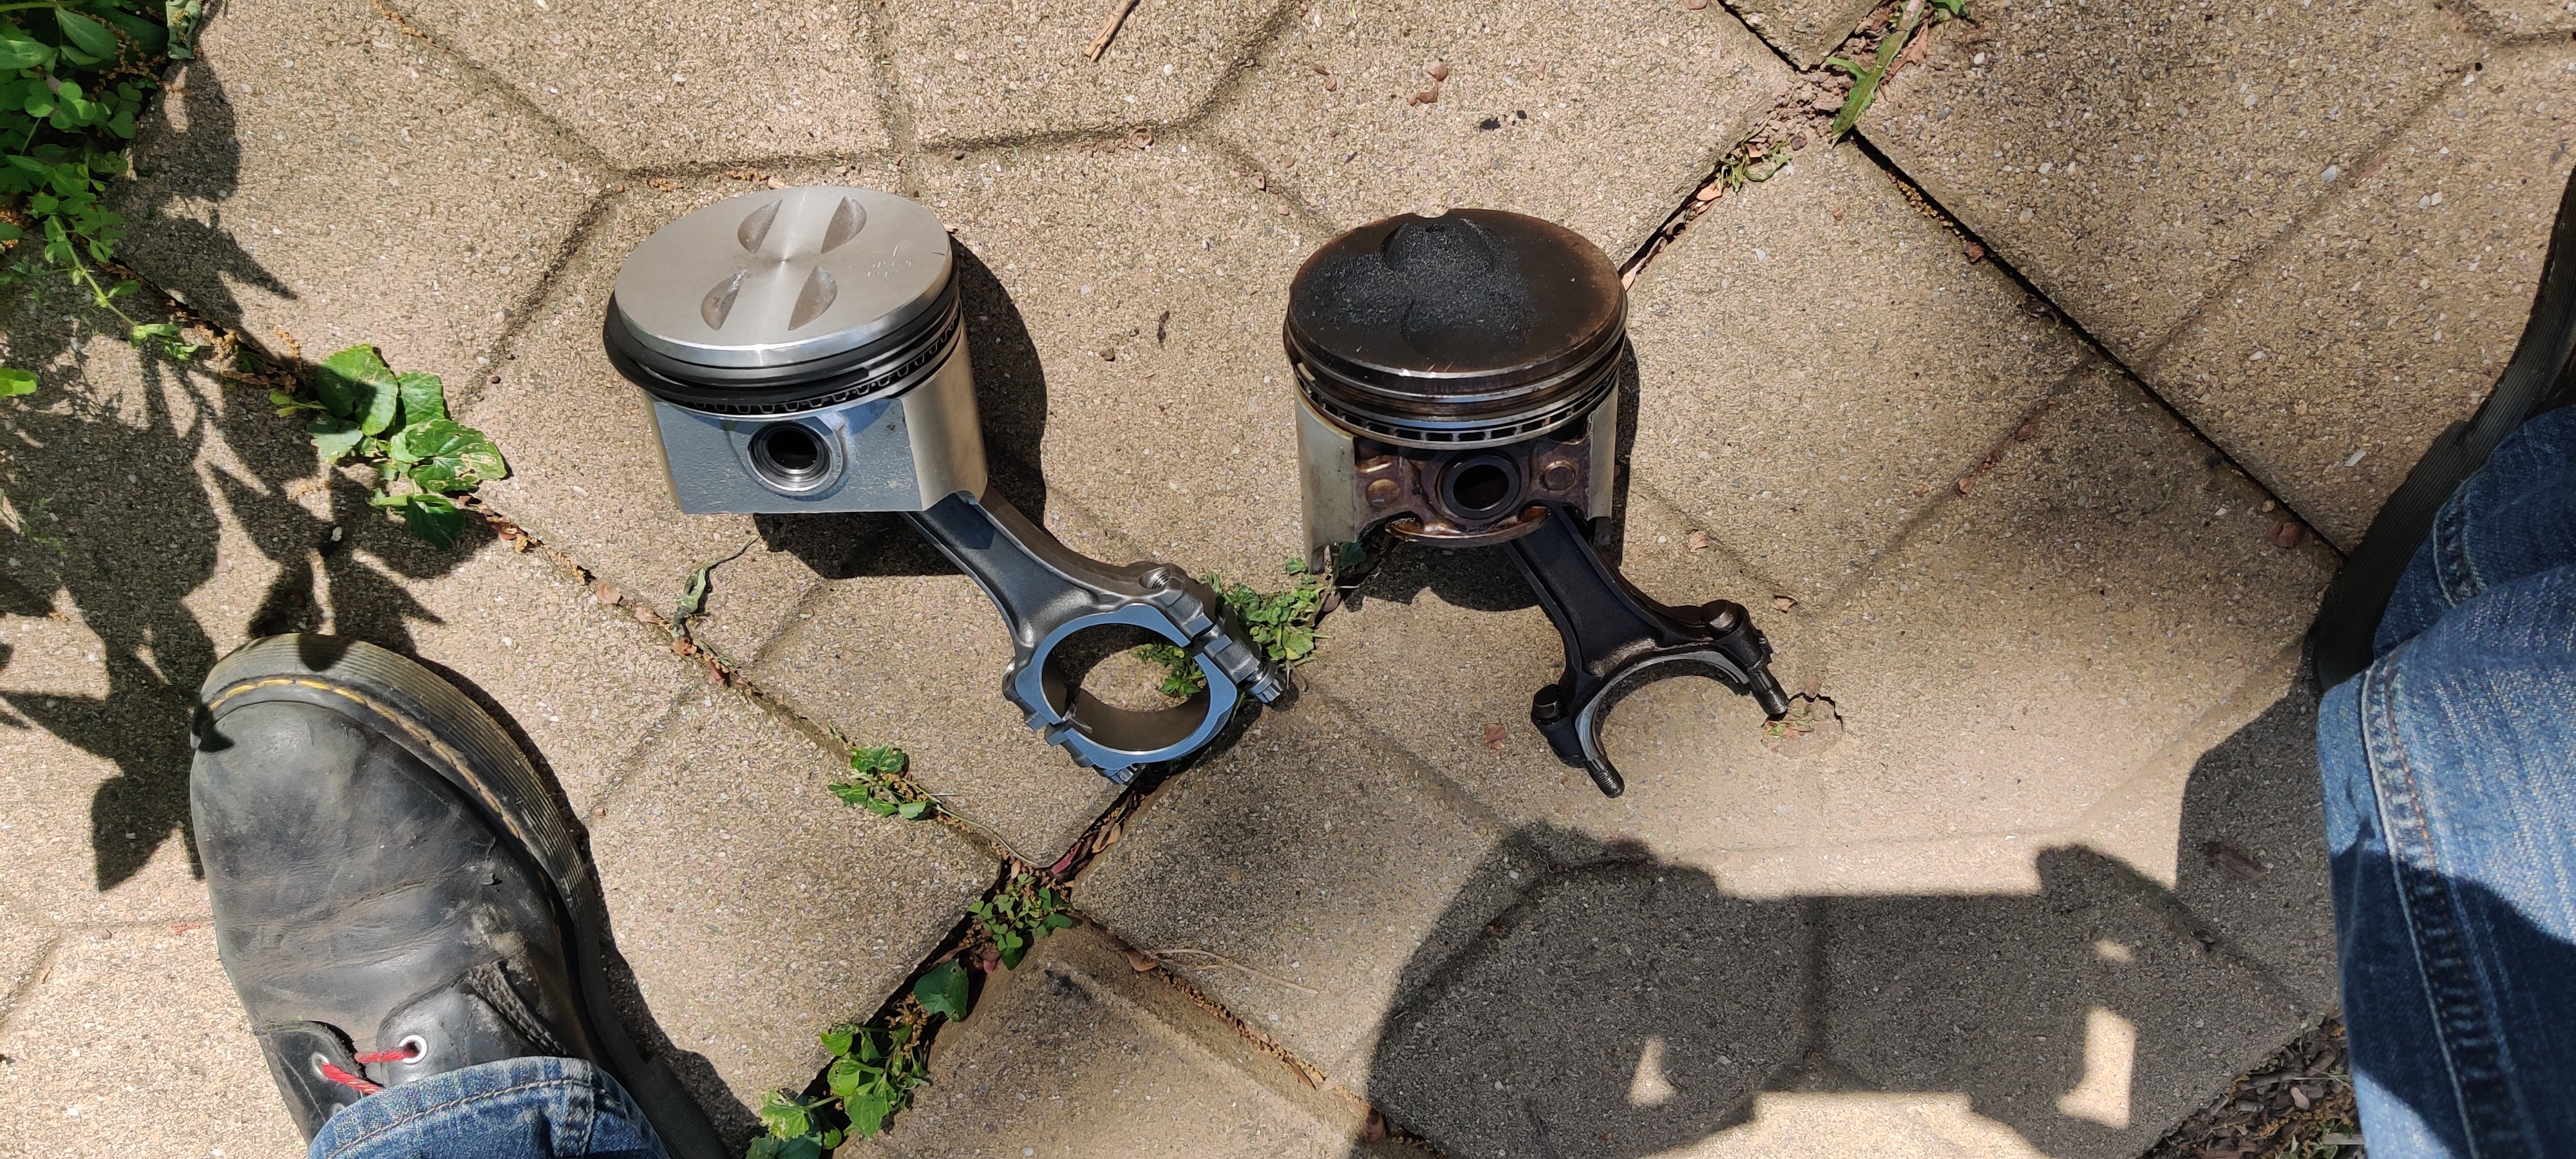
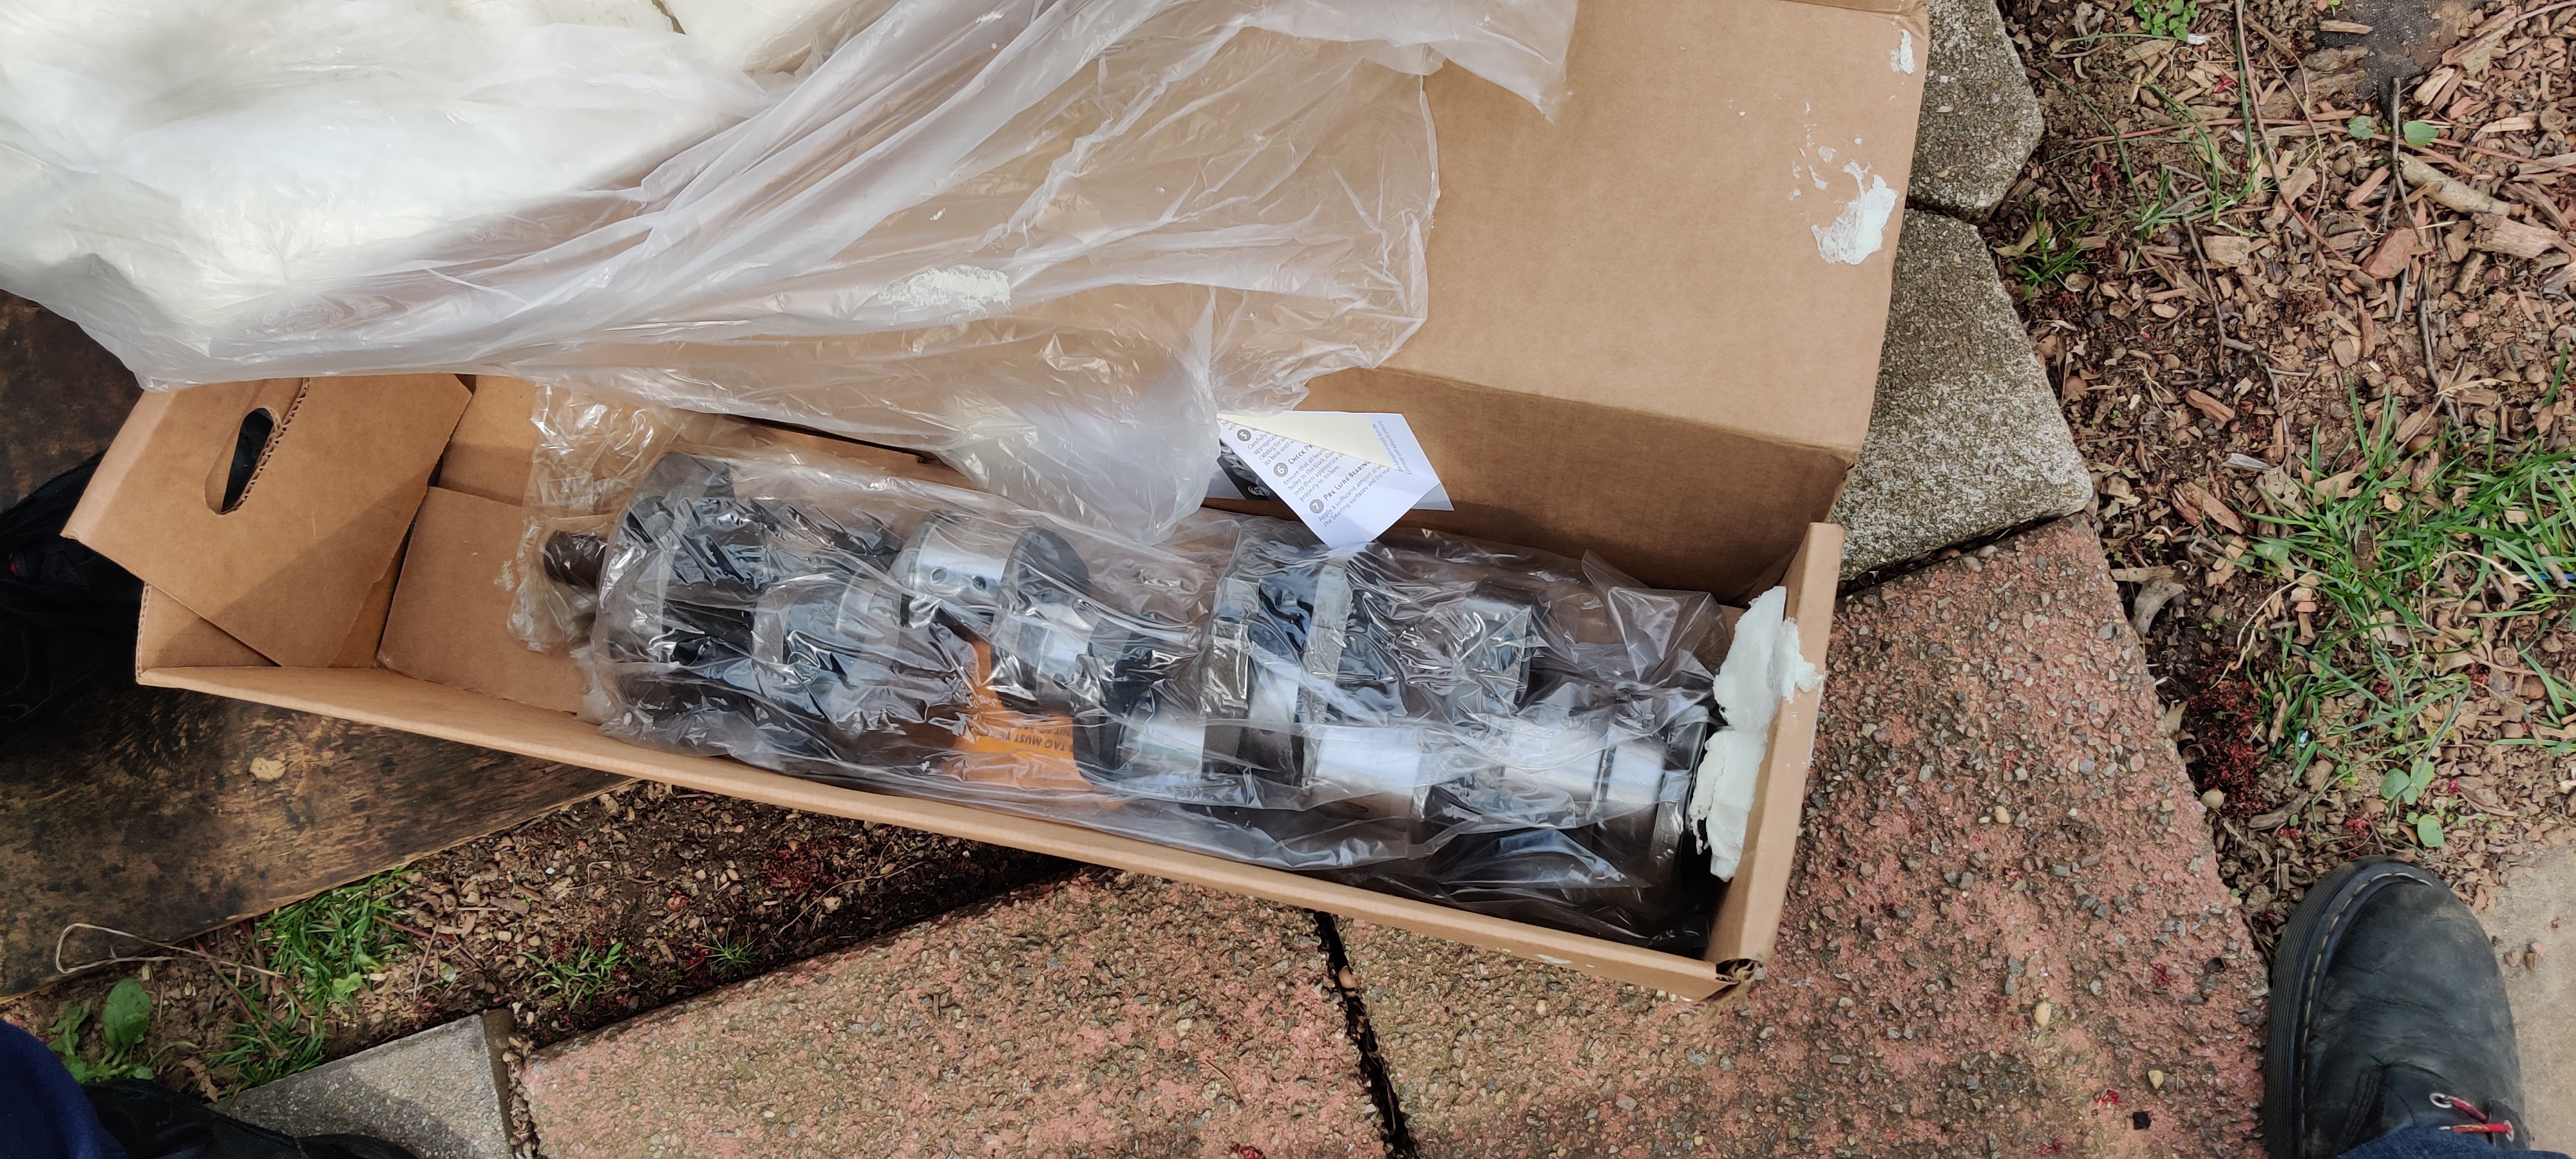
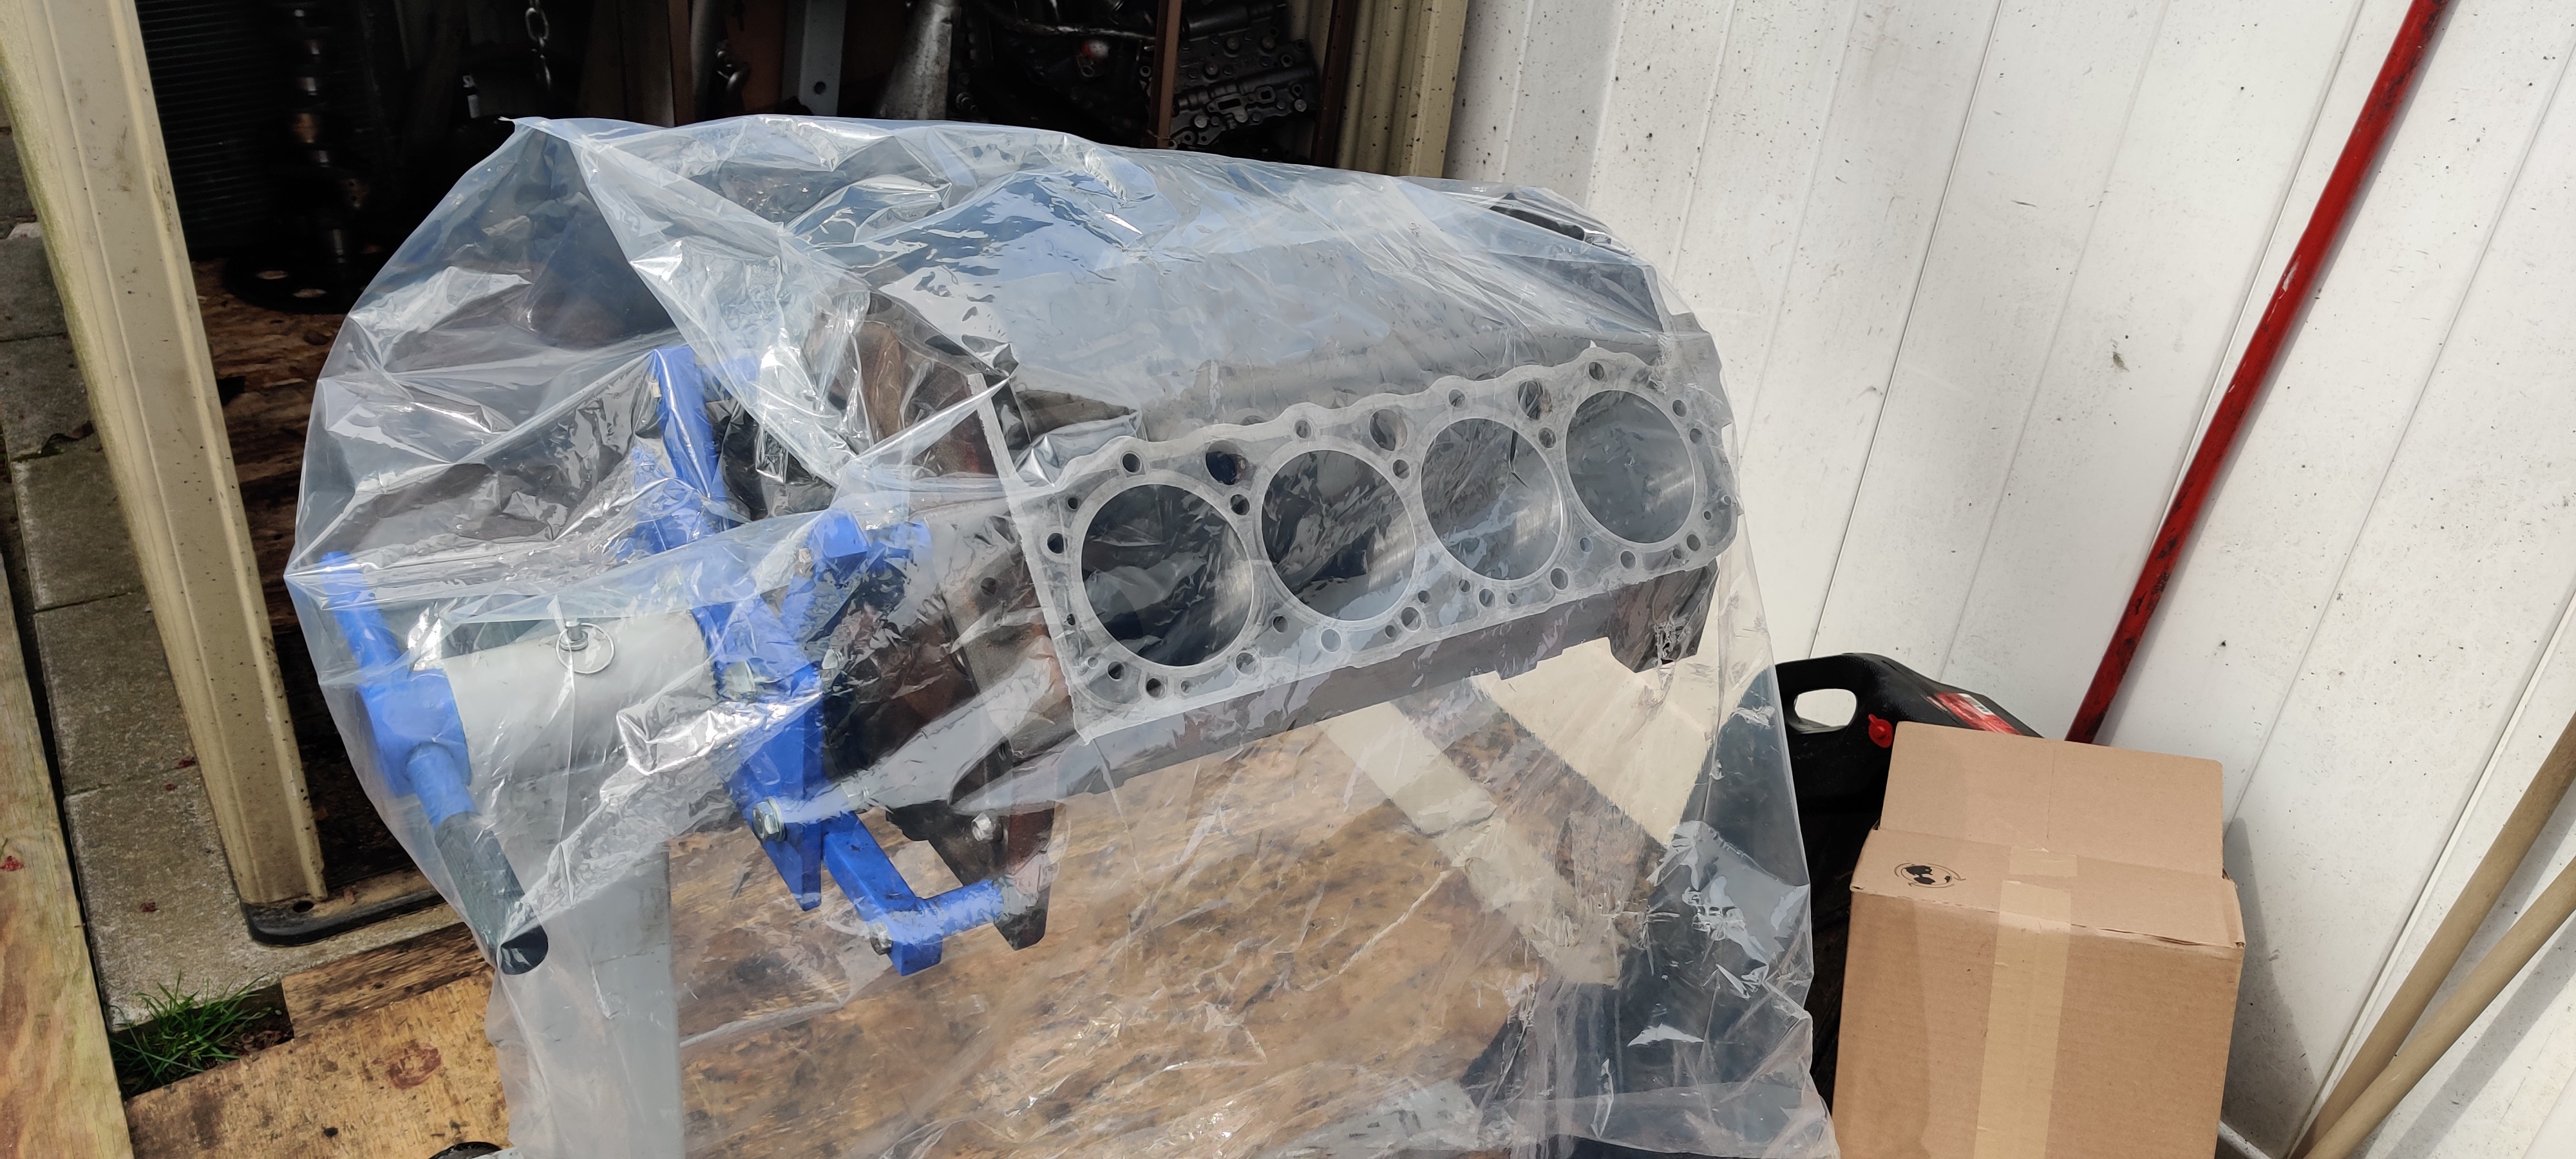
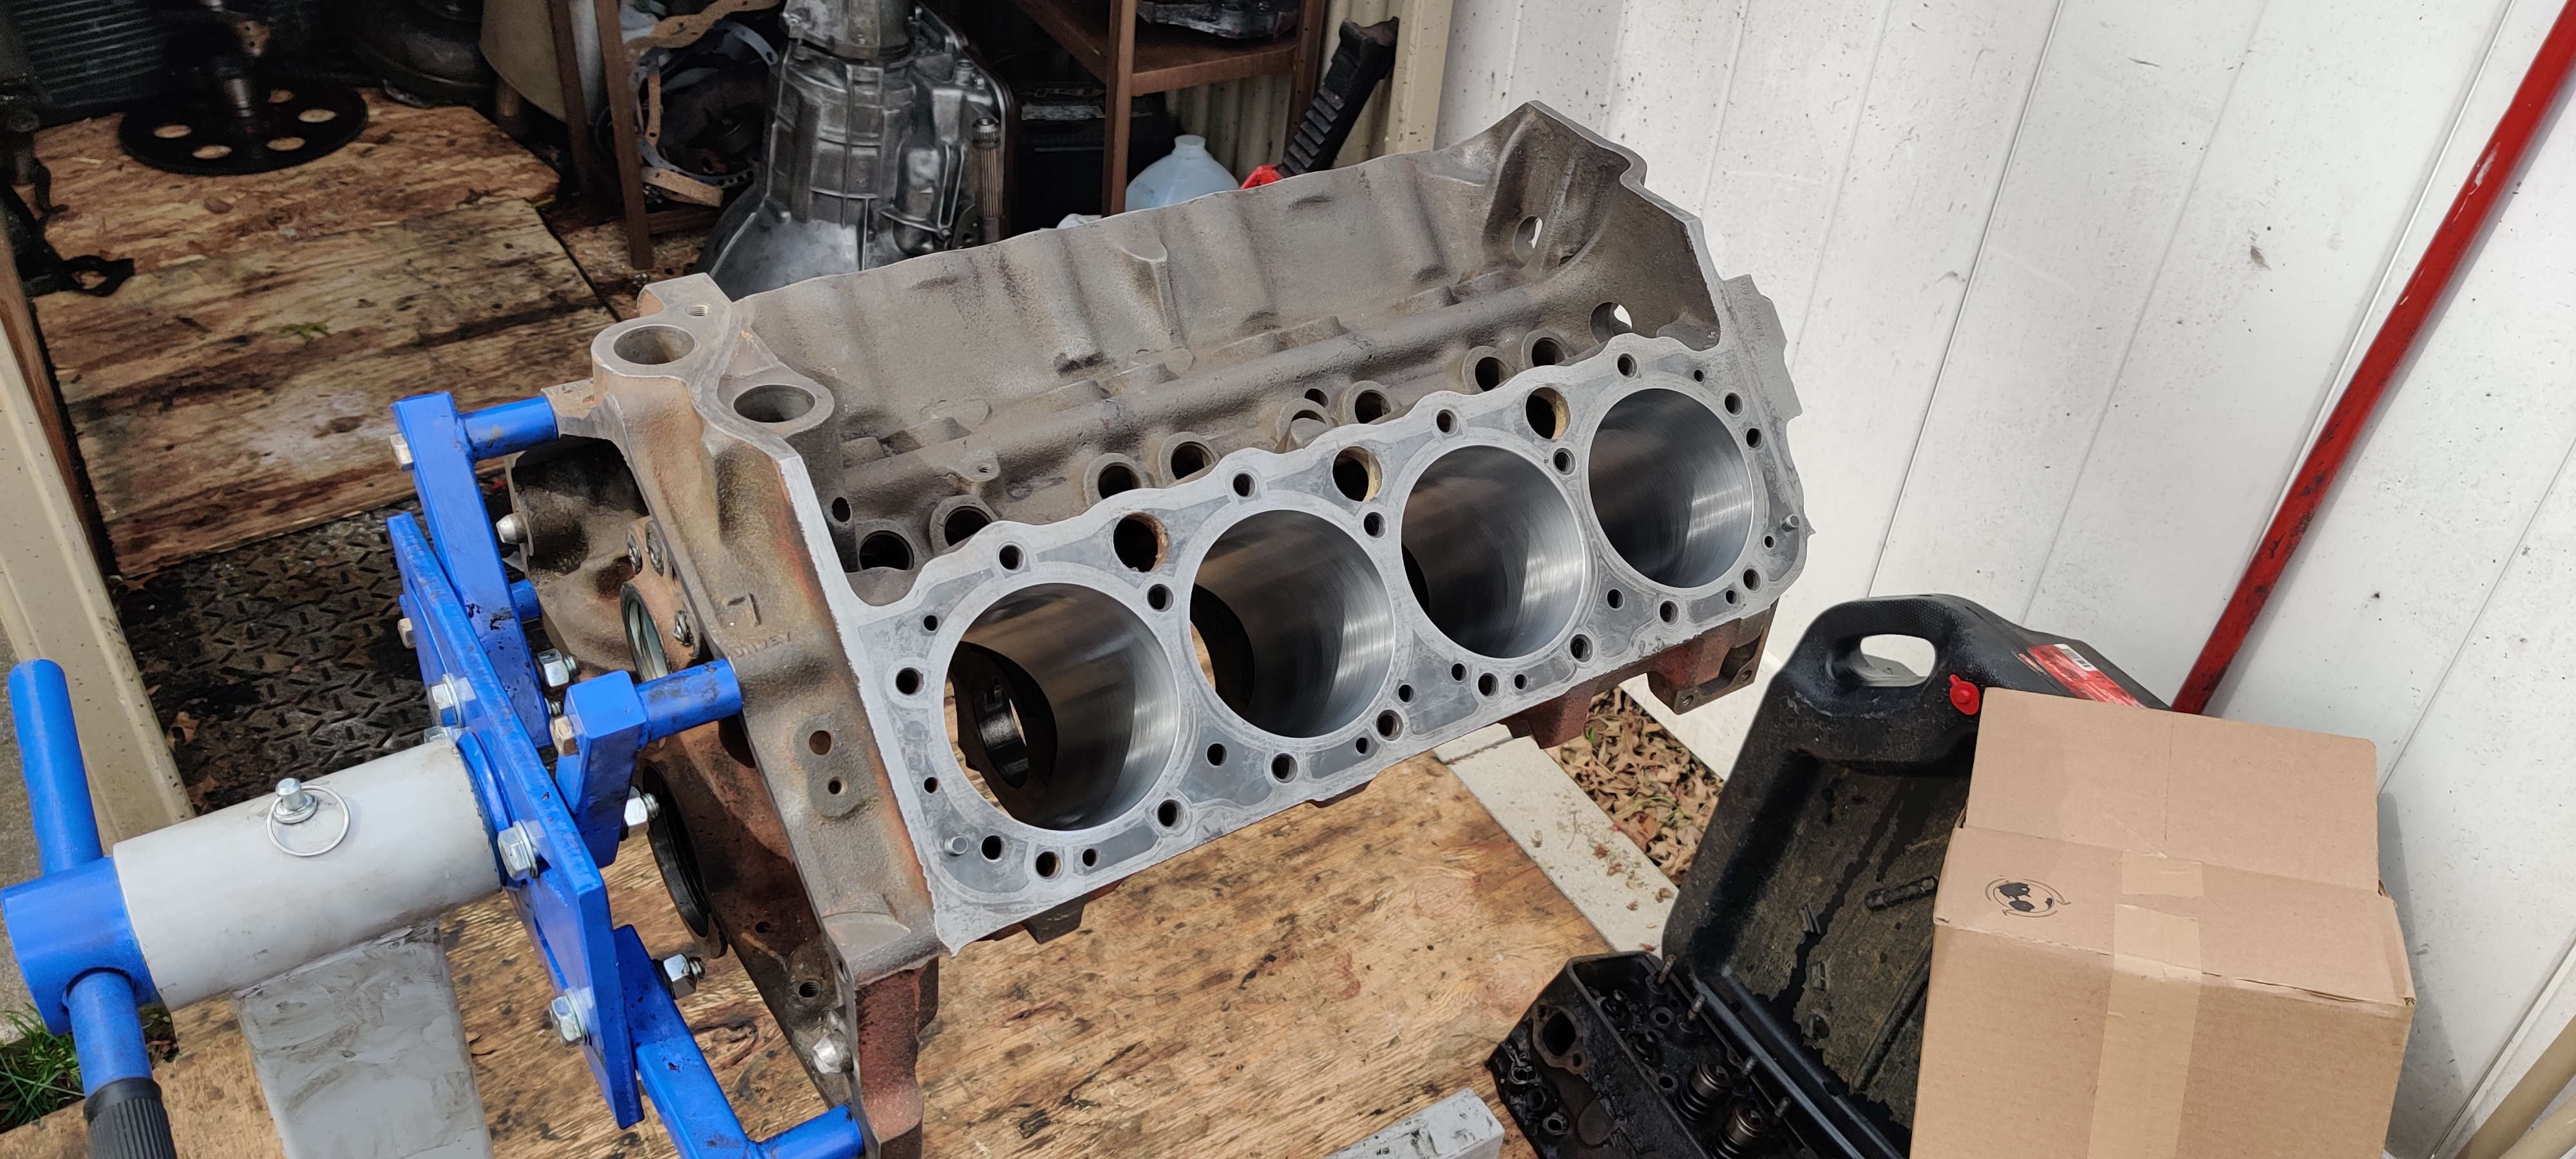
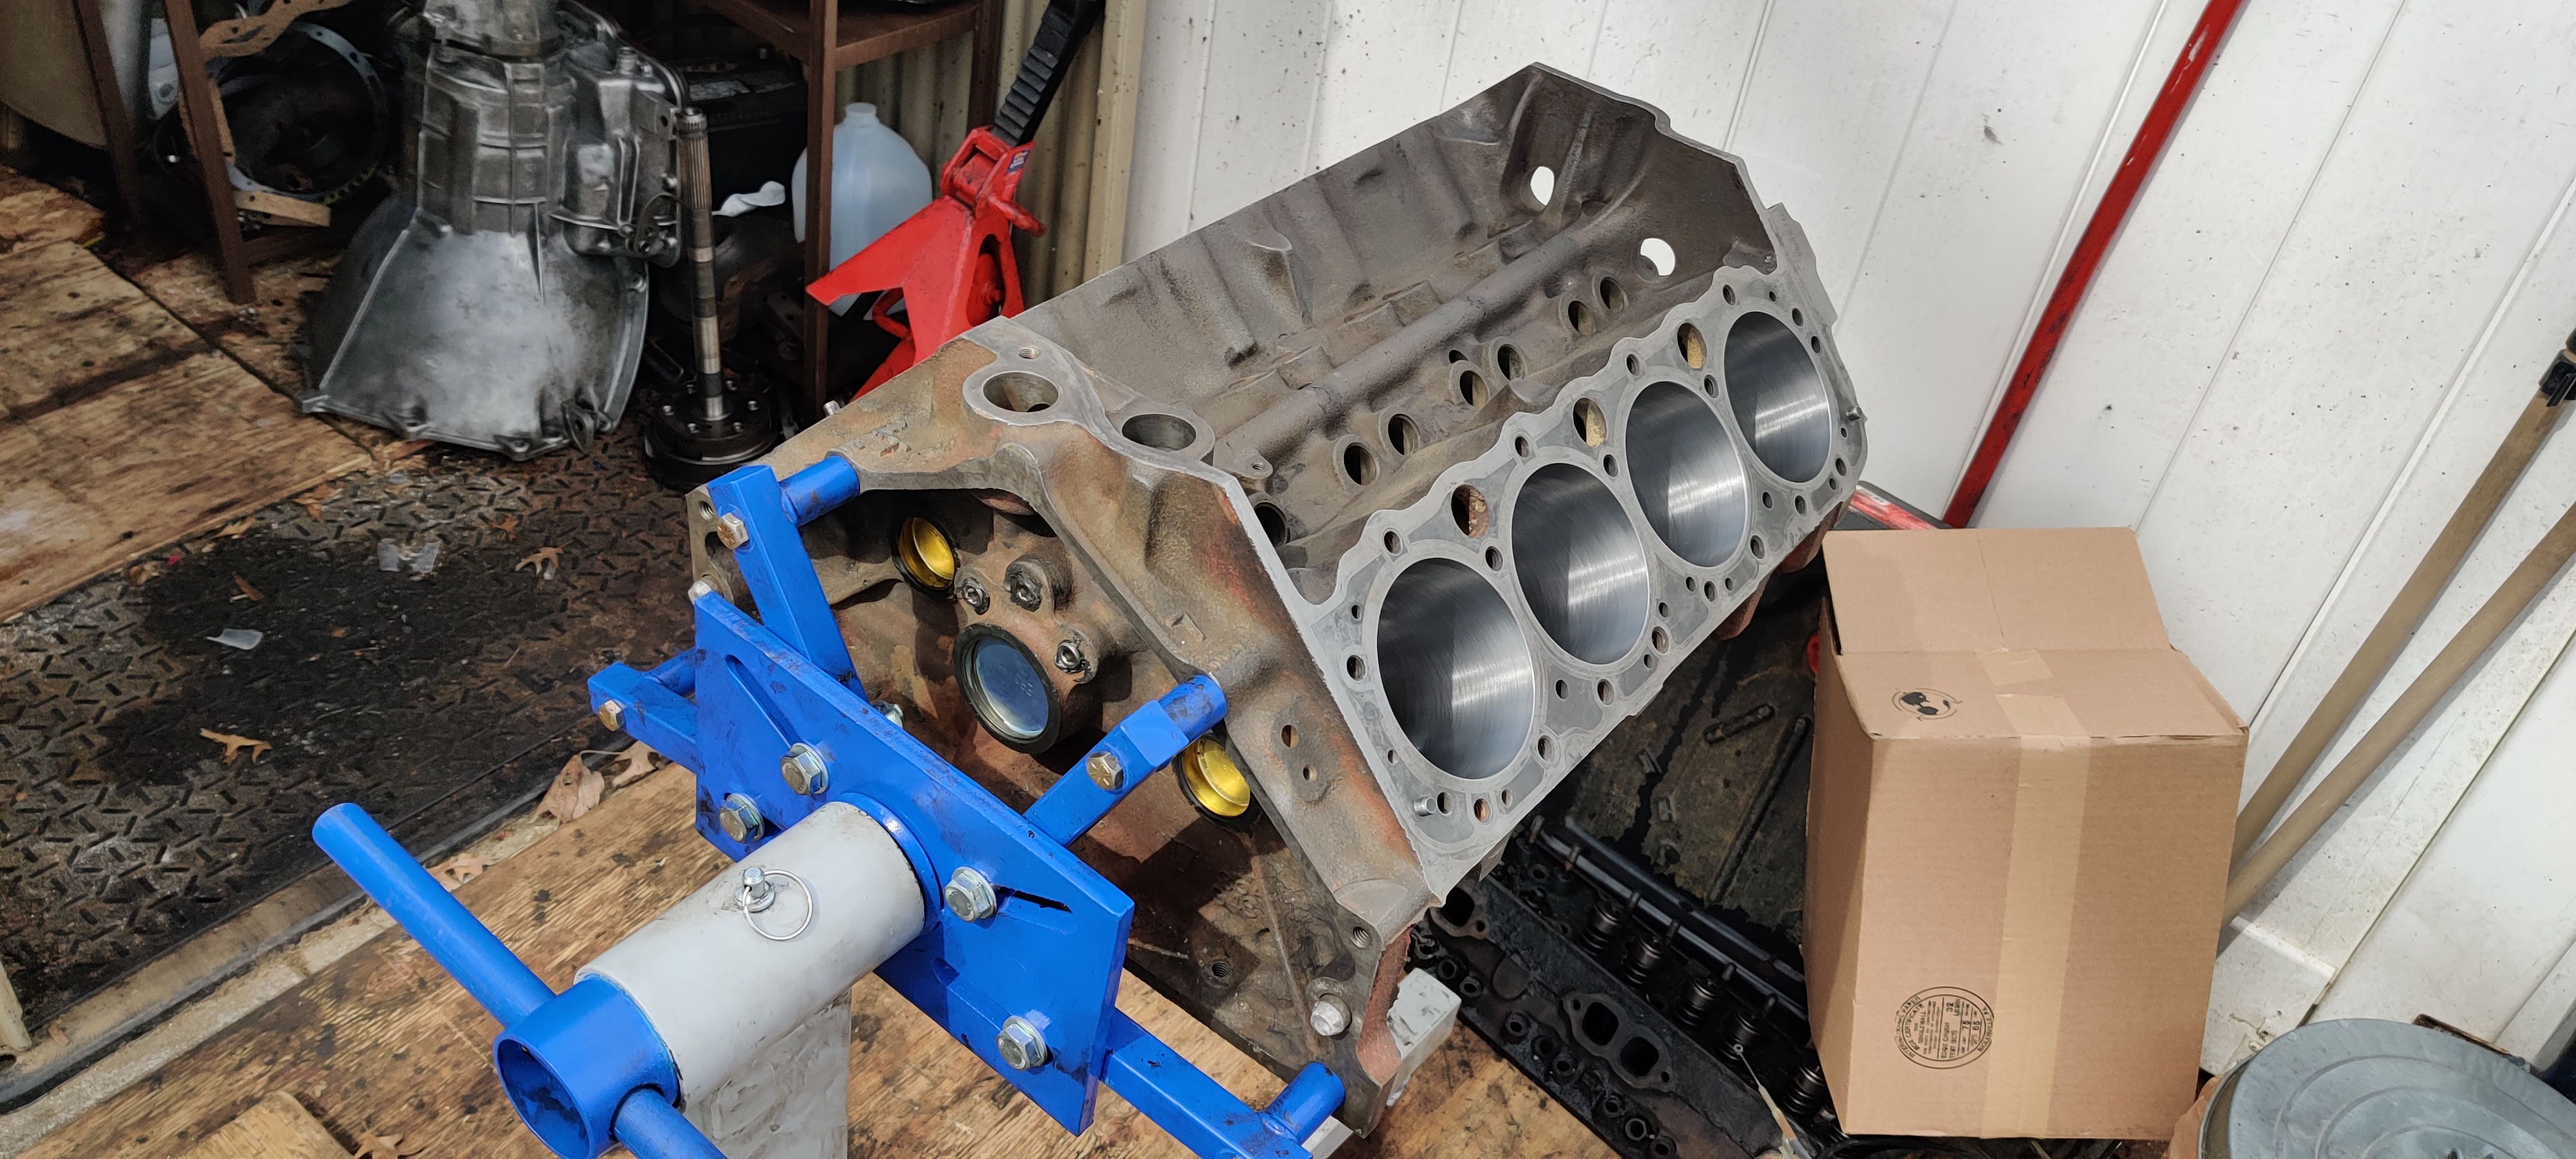
Picked up the engine, Engine Tech Pistons, Eagle Connecting rods, and crankshaft today. Everything is honed and the crankshaft is balanced. Engine block is super clean now and will be getting primed this weekend. Really impressed with Philadelphia Racing Engines.
Stay tuned for updated after this weekend, will be reassembling the engine and doing some more body prep.
On Saturday 4th we rebuilt the transmission. Replaced the friction plates and installed the new, correct length planetary gear. New ratio is 1.69:1 compared to the old one which was 1.82:1. We had some difficulty reassembling the entire thing as some of the new parts did not mesh well with the old parts. Eventually we got most of it together, tho we're having an issue with a butterfly spring that holds the transmission "parking brake". Can't figure out how it goes back together. Will revisit that later on. Also need to order the correct oil pan gasket.
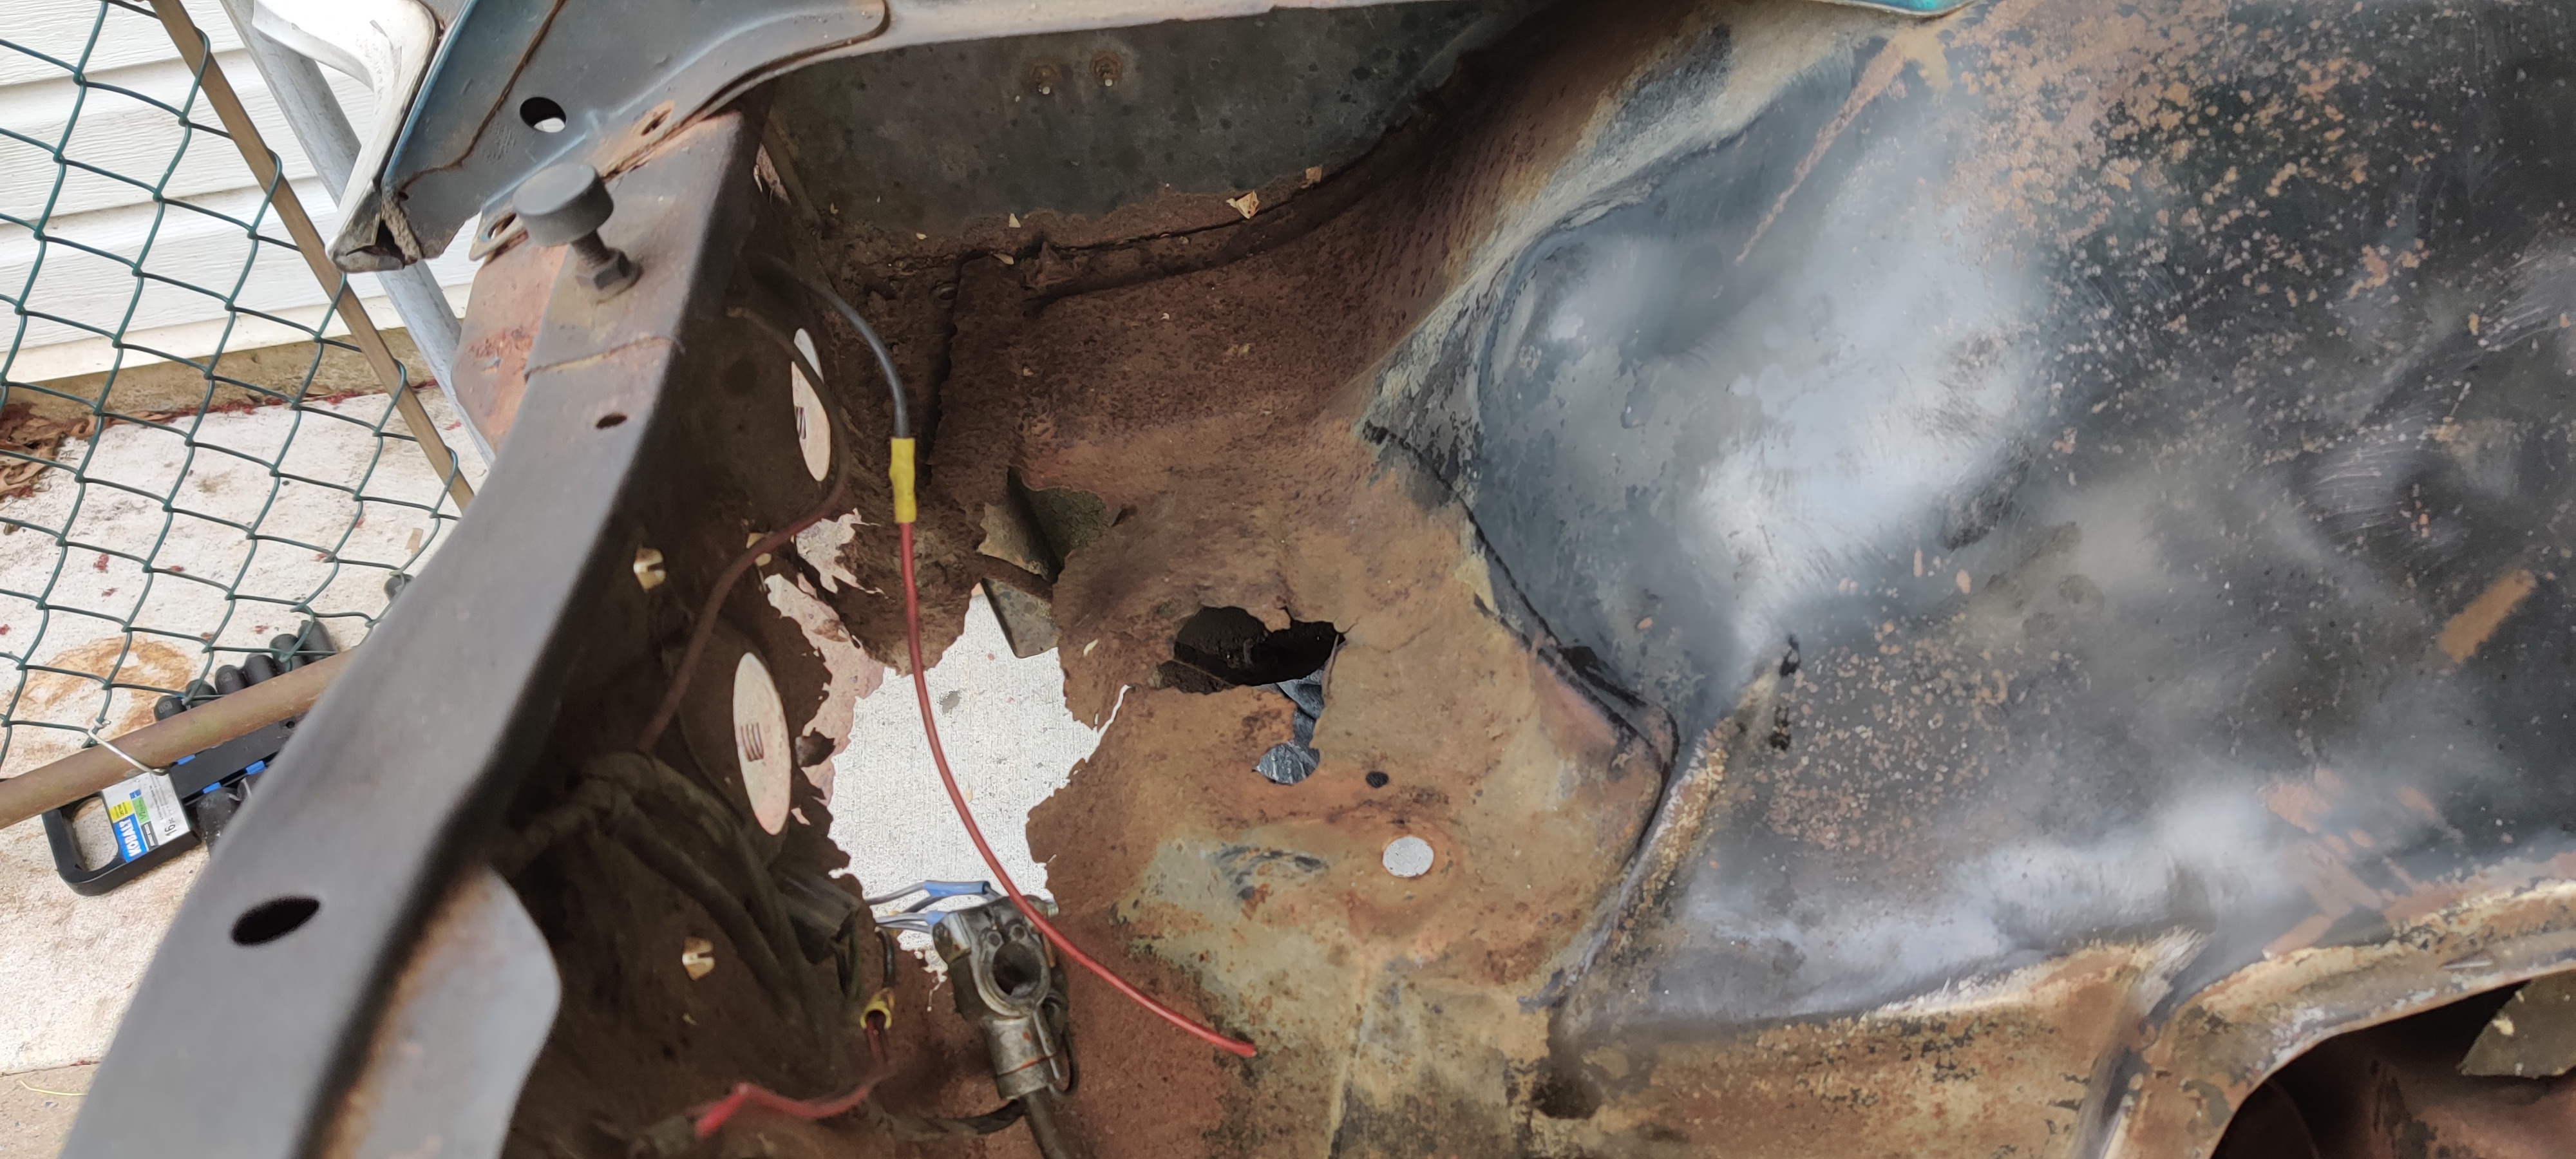
On Sunday 5th, we took the headlights, tail lights, front and rear bumpers off to prepare for sand blasting. Didn't have too many issues removing the front end components, although it revealed more rust damage. It appears on the front right passenger side, a previous battery may have corroded the metal, as there's a lot of rust damage to the wheel well. It's like the entire right side of the car was laying in water for 20 years. When we started on the rear bumper, we found some damage from when the car was rear-ended in the 80s. The bumper part of the frame was giving us a lot of difficulty accessing one bolt as it was pretty bent. Took over an hour to remove it, but we successfully pulled it off, literally.
Next step is the last of the interior stripping, inspecting the wheel wells, and finding a shop to sand blast the body.


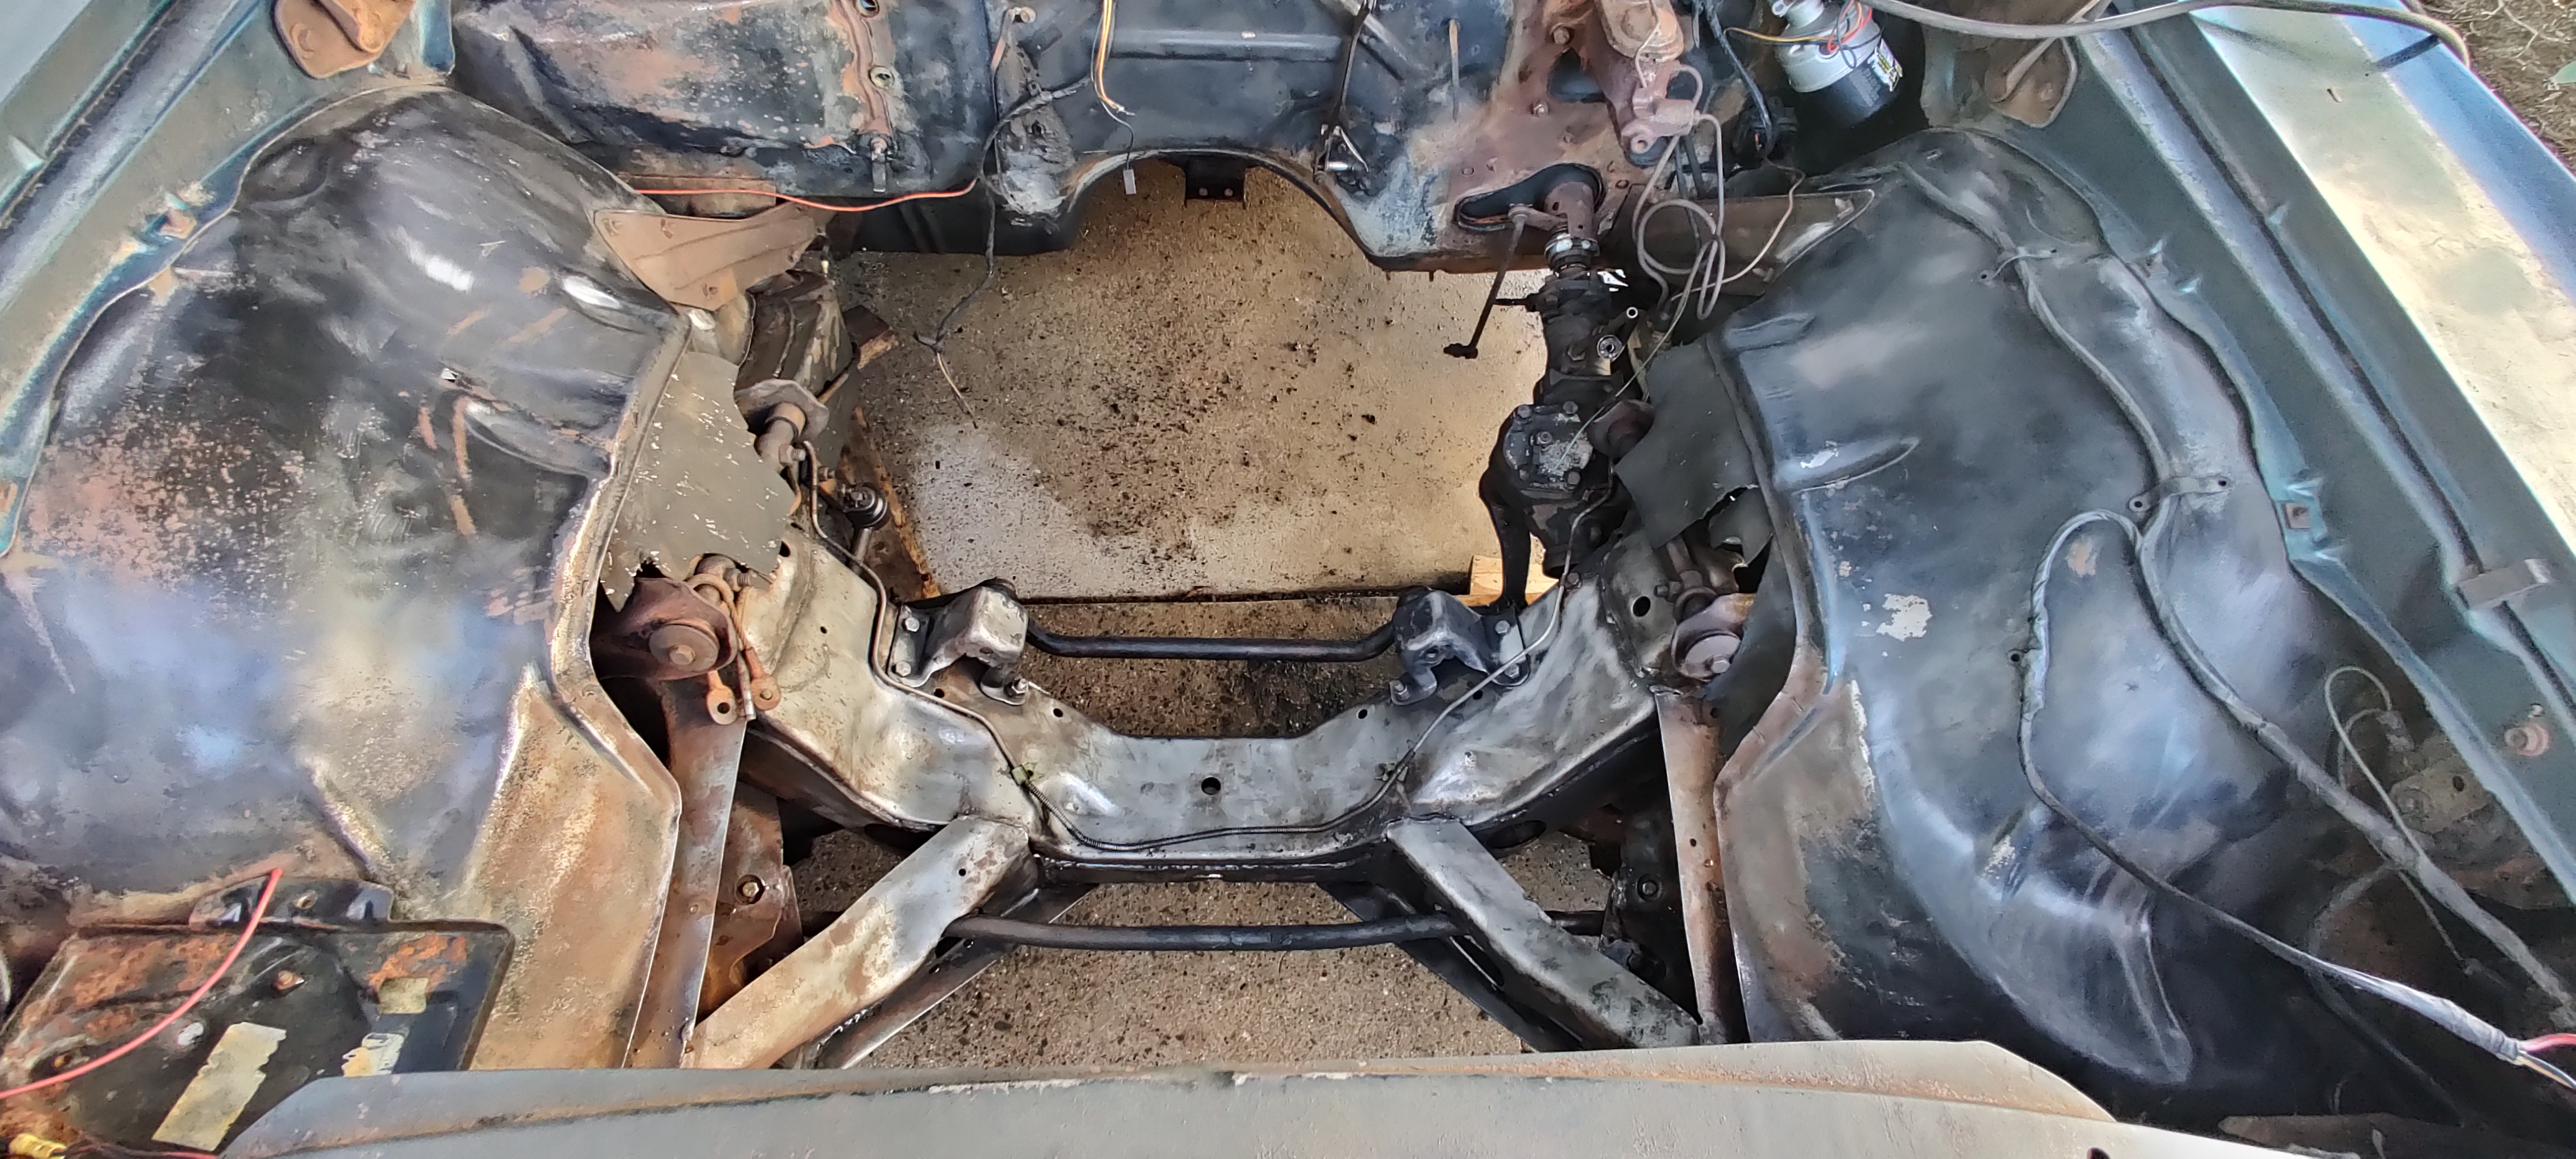
Today we power washed the engine bay. Got the cross member that supports the engine nice and cleaned up all shiny! Could eat off of it... maybe. Also used the wire brush drill bit and got a lot of oil and surface rust off of the metal in the engine bay. Then used a leaf blower to dry up all the metal so we don't create more rust and work for ourselves later.
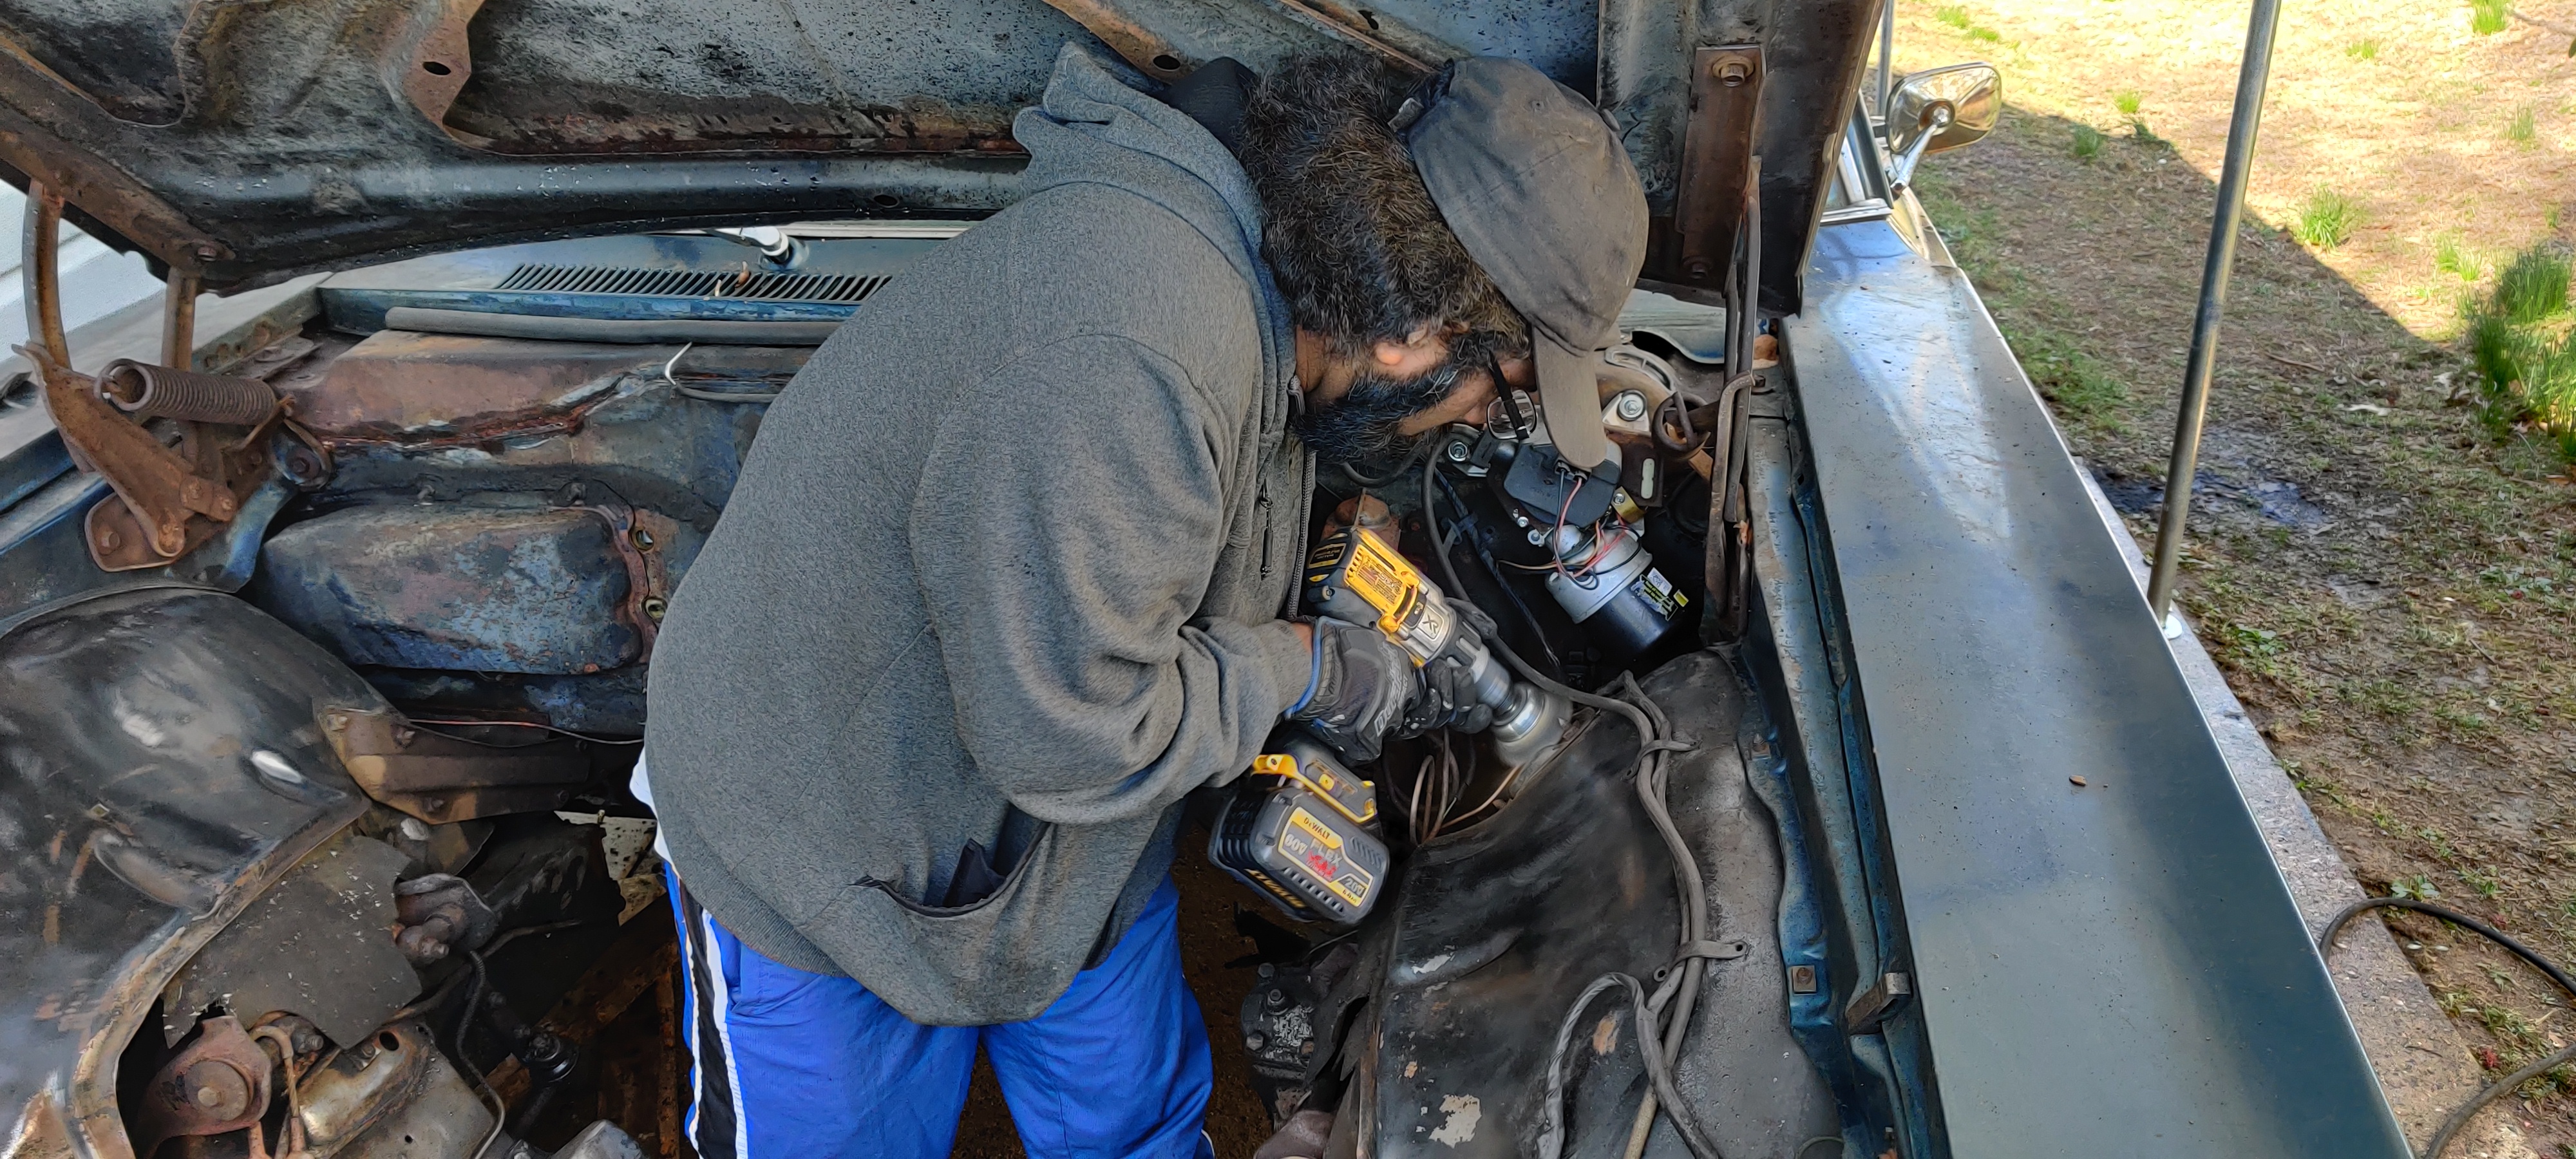
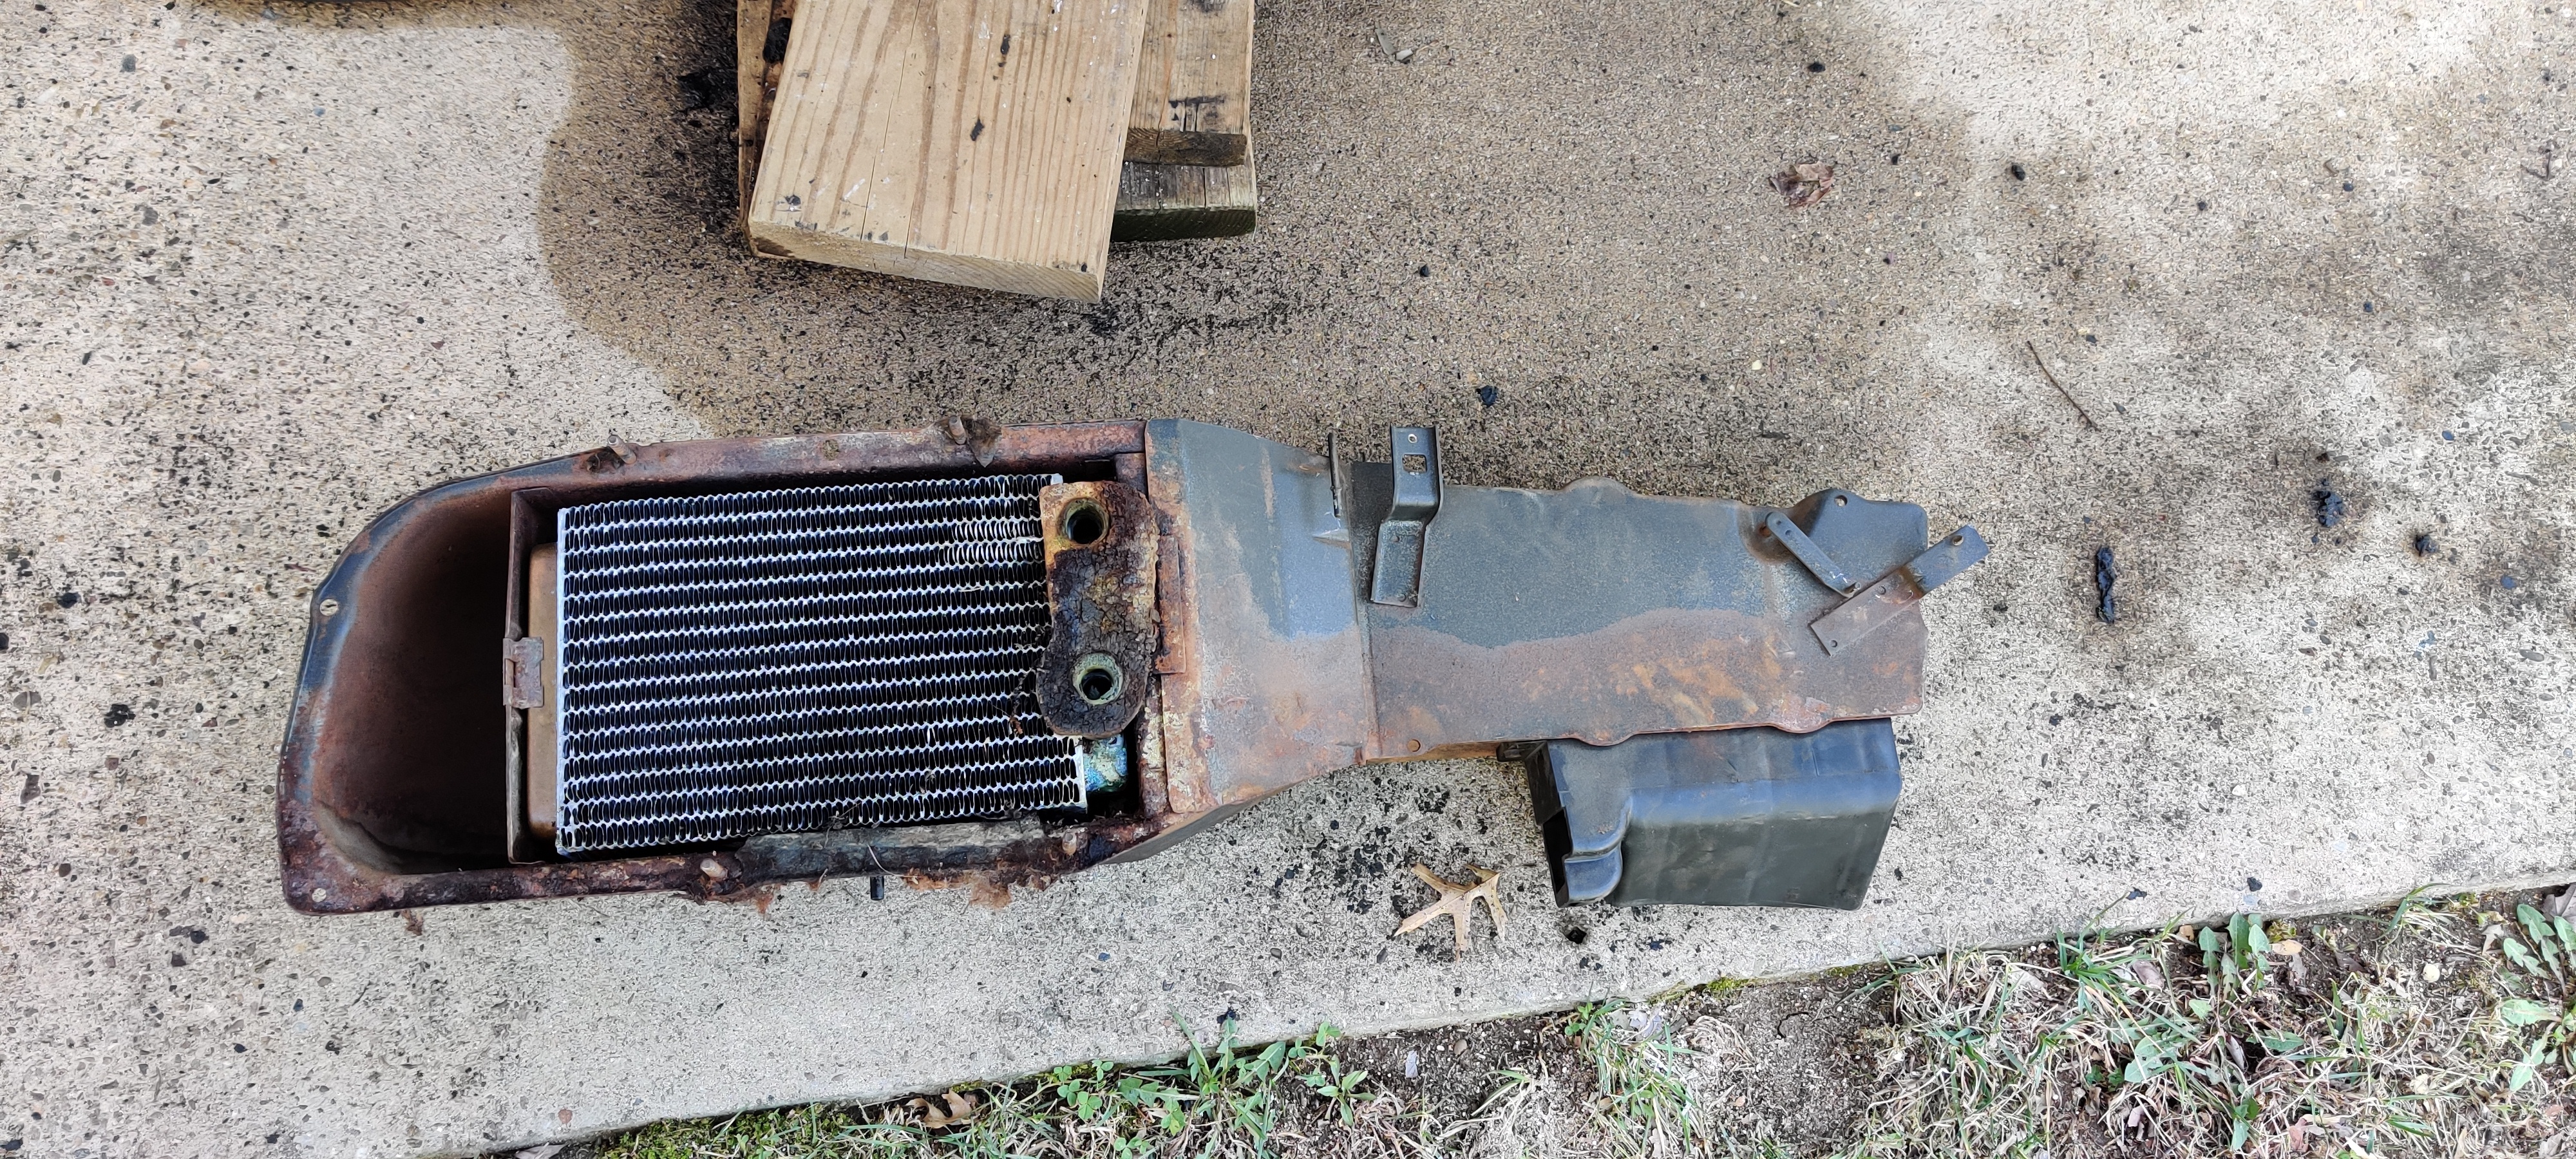
After that, we started stripping the dash some more, took out the instrument cluster and the heater coil which provided factory heat via the vacuum line. We're replacing the actual coil, but will be using the original housing. Going to have to clean and sand the dickens out of it.
Soon we will be getting the entire body sand blasted. Looking into a couple local companies that can provide this service.
Next weekend we hope to reassemble the transmission